106

Finding Vivian Maier

Saturday, March 5, 2016

source


Well, hello! I'm back from my unplanned blog hiatus! I don't have any elaborate excuses to provide to explain my absence, other than the fact that life got busy and something had to give, at least for a while. Anyhoo, I'm hoping to get back to a more regular schedule of posting: sharing random things I like, some of my work for Vitamini, and craft projects as I come up with them. Getting back to my bloggy roots, yo.

Speaking of random things I like - I just watched the documentary Finding Vivian Maier last night and loved it! College kid and amateur historian John Maloof buys a box of photographic negatives at an auction and discovers hundreds of beautifully shot photos of urban life in the 50's and 60's. With nothing more than a name and a Chicago suburb address, he dives into research to figure out who this mysterious photographer was. A really intriguing story - I recommend it! Find it on Netflix. Check out more of her work and learn about upcoming exhibitions on the Vivian Maier website.

source
source

38

DIY Easy Fabric Art

Wednesday, July 29, 2015

DIY Easy Fabric Art by Vitamini Handmade 
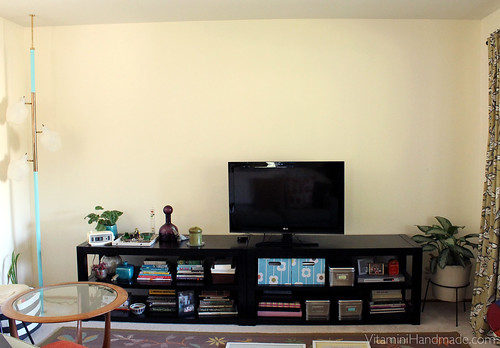
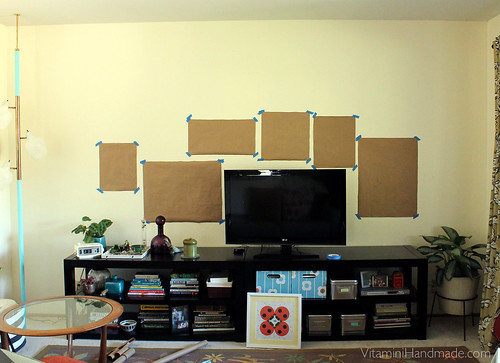
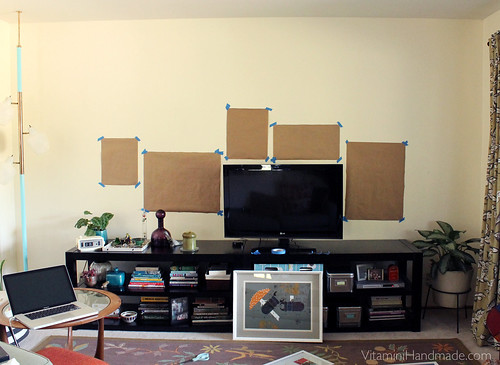
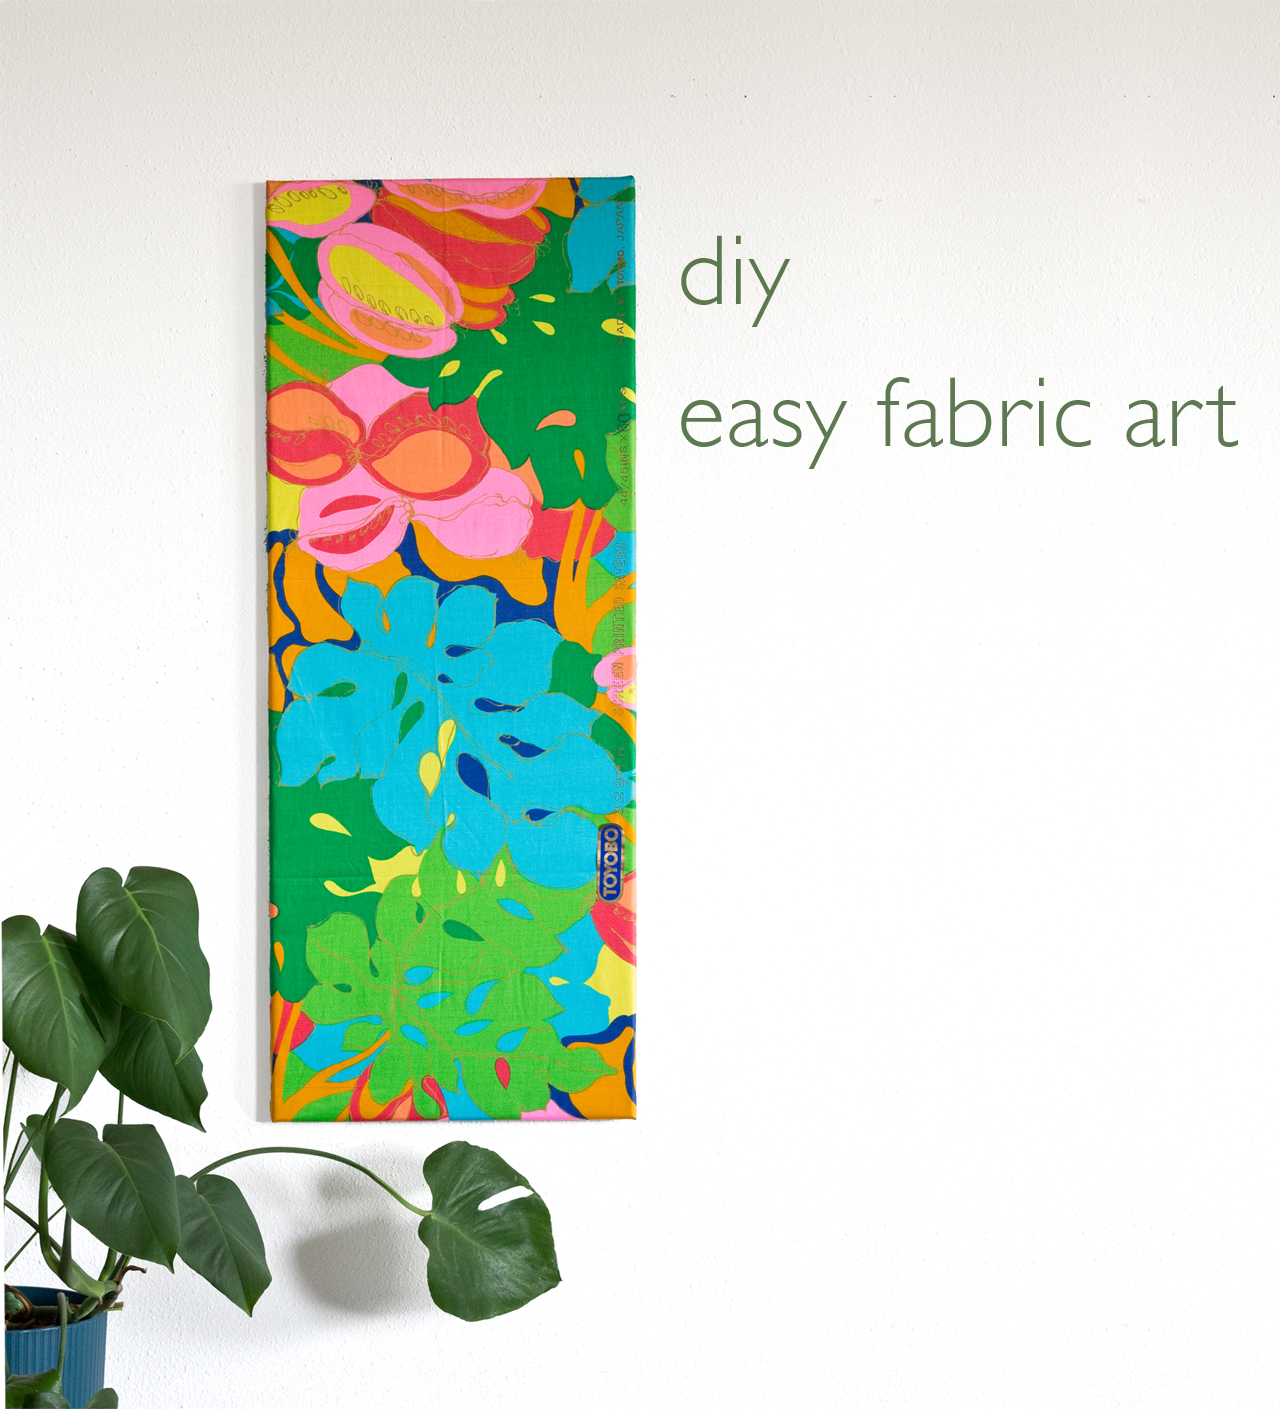
There's nothing better than a large piece of art in a room, but unfortunately, buying big framed art can get pretty expensive. I found a bunch of great vintage Japanese fabrics at a Buddhist Temple rummage sale last summer for a steal - something like $1 for the whole bundle. The prints were so great but the dimensions of the pieces were odd; long and skinny and not quite large enough to sew much with. I noticed this bright tropical print in my fabric stack the other day and realized it would look great on the wall! I have a trick for hanging up fabric panels on the wall that looks super professional but is actually so easy to DIY and inexpensive, too (the whole thing cost less than $10). I can't wait to share!

I love using wood canvas stretcher bars for this project because not only are they inexpensive but  you can also buy them in the exact dimensions that you are looking for. That said, this project could also be done with a picture frame.

Here's what you'll need:

DIY Easy Fabric Art by Vitamini Handmade
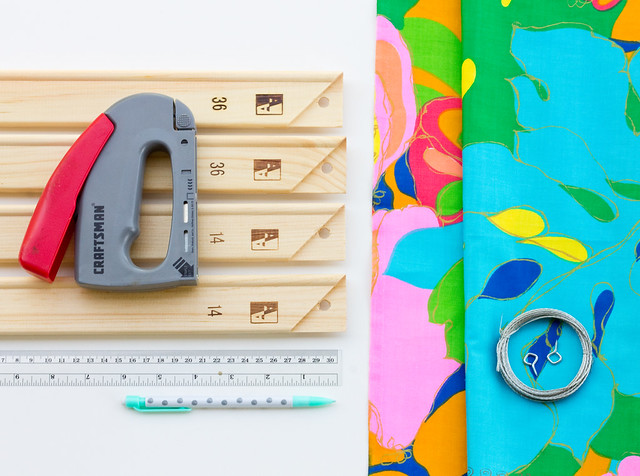
  • Fabric panel. Large scale prints work better than smaller ones
  • Canvas stretcher bars, 2 for the width and 2 for the height, both about 4" shorter in width and length than your fabric panel. These 4 stretcher bars cost me about $8 total (cool, right?!)
  • Staple gun with staples. I love this Craftsman staple gun. So easy to use.
  • Picture wire and "i" screws
  • Ruler and pencil

DIY Easy Fabric Art by Vitamini Handmade
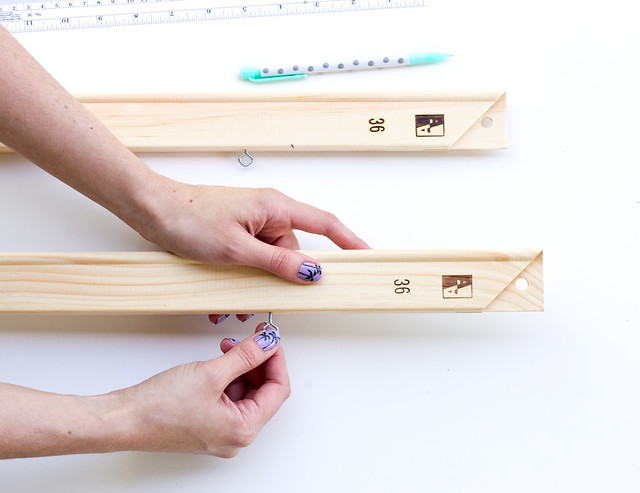
Measure and mark the location for the "i" screws on the vertical pieces. Since mine was tall (14" x 36") I measured 7" down from the top of each side. Twist in the screws.
DIY Easy Fabric Art by Vitamini Handmade
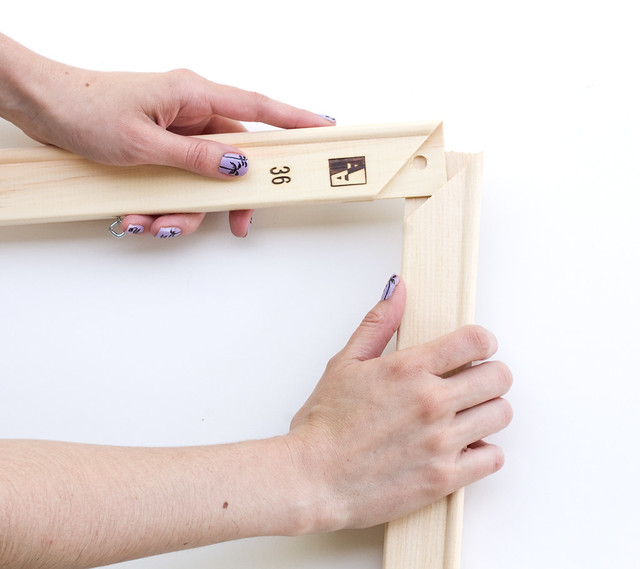
Join the frame pieces. Mine made a pretty sturdy fit, but if yours are loose you can staple over the corners to secure.

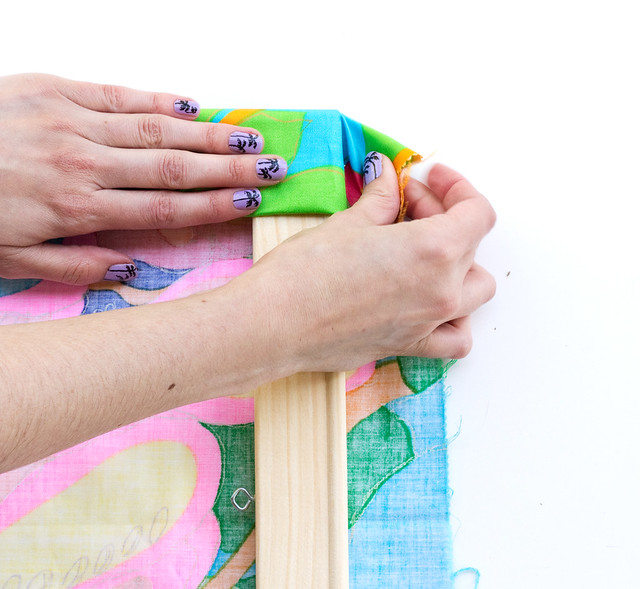
Lay the fabric face down and center the frame over it. Make sure you've oriented the fabric so you know which way is up and the screws are near the top of the panel. Fold the edge of fabric down about half and inch, then fold it over the side of the frame. Staple in the center. Repeat on the opposite side of the frame, pulling the fabric taught before you staple once the center. Repeat on the other two sides. Continue folding over, pulling taut, and stapling on opposite sides, until the fabric is anchored all the way around the frame. DIY Easy Fabric Art by Vitamini Handmade DIY Easy Fabric Art by Vitamini Handmade DIY Easy Fabric Art by Vitamini Handmade
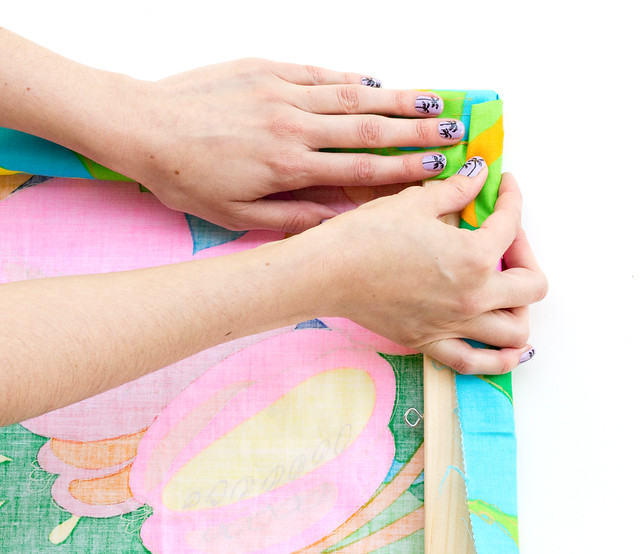
When you get the the corners, fold the fabric like wrapping a present to get a smooth corner and staple.

DIY Easy Fabric Art by Vitamini Handmade
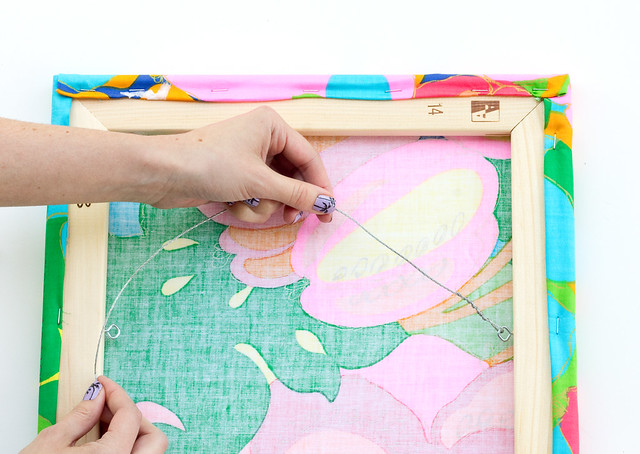
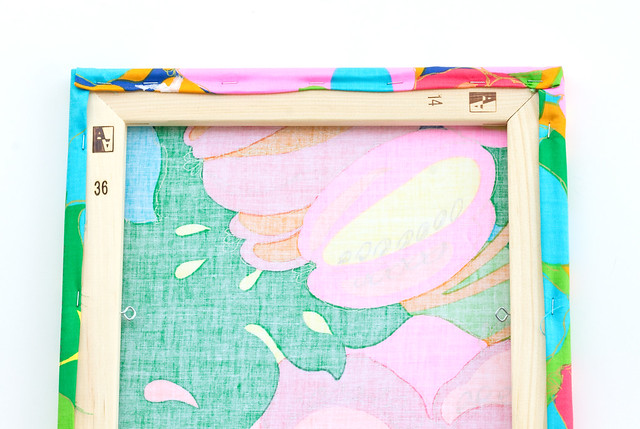
Attach the picture wire to the "i" screws and twist the ends. Done! Hang from a picture hanging hook. Enjoy your big, custom artwork!

DIY Easy Fabric Art by Vitamini Handmade DIY Easy Fabric Art by Vitamini Handmade DIY Easy Fabric Art
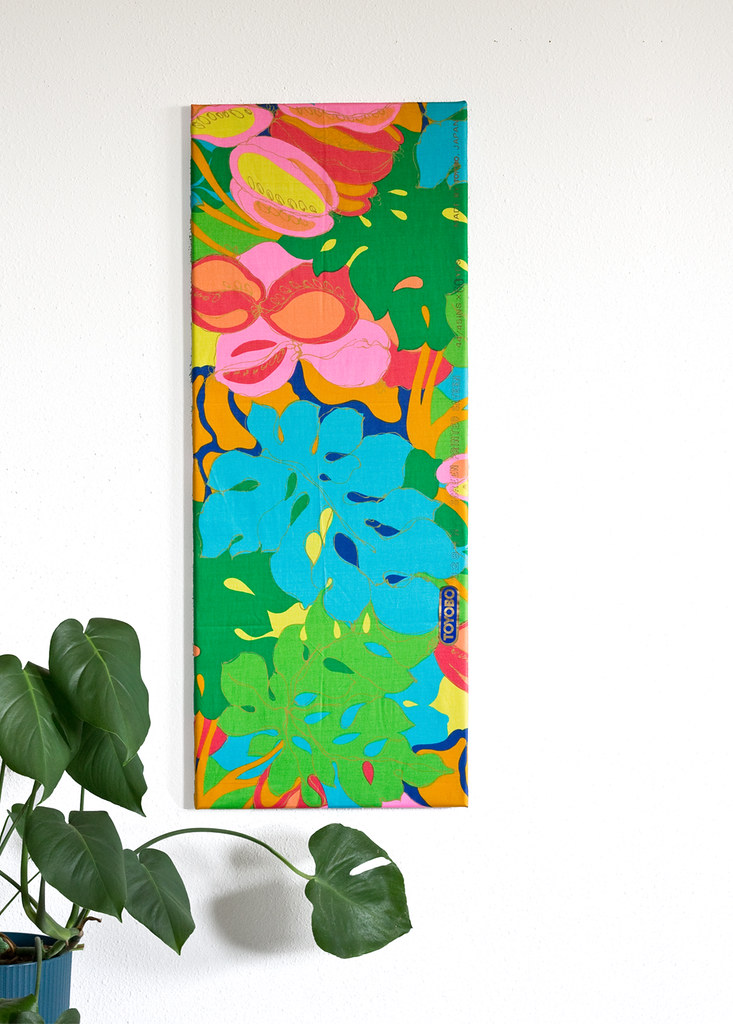
This technique is a great way to make a big, high-impact piece of art for just a few bucks. Look for fabrics from your favorite designers to stretch and make art. I have a large scale Marimekko print that I've had hanging up for years. It still looks great and no one can tell it's not an expensive canvas print.

P.S. Like my palm tree nails? Learn how to do it yourself with my palm tree mani diy!

313

DIY Easy Graphic Art

Tuesday, March 10, 2015

DIY Easy Graphic Art | click through for the full tutorial!

I'm still on a decorating kick, and now that two of my larger projects are completed for the bedroom redesign my mind is wandering back towards art. I started playing around with a few simple materials and whipped up these easy graphic art canvases in practically no time flat. I think you'll like this project for a few reasons: first because it's actually fun to do, second because the supplies are super inexpensive (seriously. like, a couple bucks per canvas), and third because the finished product just looks cool!

Here's what you'll need:

DIY Easy Graphic Art | click through for the full tutorial!
  • Reynolds Freezer Paper. You can find it in the grocery store
  • Paints. I used screen printing inks because I already had them, but acrylic craft paints would work, too
  • Paper plate or piece of cardboard
  • Stenciling brush
  • Burlap canvases. I got a 3 pack at Michael's for something like ridiculous like $4. Flat canvases work better than wood framed ones
  • Craft knife 
  • Cutting mat
  • Iron
  • Ruler 
  • Pencil
Sketch out some ideas for the layout. Simple shapes made with straight lines are the easiest, and it's best to apply the light colors first and the dark colors last, so keep that in mind when planning the layout.

Draw the shapes onto the paper side of the freezer paper and cut out with the craft knife. Place the stencils for the first color (mine was white) on the canvas, paper side up, glossy side down, and iron on medium high heat. The shiny part of the freezer paper will fuse to the canvas and create a perfect stencil! Make sure the edges are stuck down well. Try holding the iron at an angle to get to all of the stencil edges.

DIY Easy Graphic Art | click through for the full tutorial!

Dip the brush in the paint and remove the excess onto the paper plate or cardboard. With a mostly dry brush, dab the paint onto the canvas around the stencil edge. Reload the brush and fill in the center of the shape. Try to get even coverage. Pull up the stencil and let dry.

DIY Easy Graphic Art | click through for the full tutorial!

Repeat the steps for each color/shape once the previous color is dry, overlapping the shapes.

DIY Easy Graphic Art | click through for the full tutorial! DIY Easy Graphic Art | click through for the full tutorial!

Enjoy as-is or layer it in a frame with a mat.

DIY Easy Graphic Art | click through for the full tutorial! DIY Easy Graphic Art | click through for the full tutorial!

I hope you try this out! I think it would be fun to do on a larger scale, on a great big canvas with spray paint. I have a big roll of freezer paper leftover to play with so I may just try it!

5

Tiny Paper Worlds by Anastassia Elias

Wednesday, February 25, 2015

I came across these incredible paper tube sculptures by Anastassia Elias on Pinterest and thought they were too good not to share.

Tiny papercut figures create miniature worlds inside the tubes that really come alive when backlit. I think I could stare at them for hours!


Check out Anastassia's portfolio for more paper tube sculptures and other paper art. She also has a Society 6 shop where you can purchase photographs of these pieces and prints of her other works.

*All images via Anastassia Elias' website or Society 6 site.

6

Bedroom Makeover: Art from Minted

Monday, February 16, 2015

The walls are freshly painted but I still have a couple larger projects to complete before I can finish my bedroom makeover project. Even so, I can't help but get excited about adding some new art to the space! I have a few pieces already that I'd like to incorporate, but I'd love to add a new piece or two of framed art.

Minted is a great online resource for art. There are so many lovely, limited edition prints to choose from. Even better, each print is available in multiple sizes and with different frame options so it's really easy to find the perfect piece. I think an abstract print would look great in my new bedroom, but I'm torn between graphic and high contrast or soft and painterly. Here are a few of my favorites of each.

Bedroom Makeover: Art from Minted
1. July Study 5 by Amelia Allen
2. Dash by Katie Craig
3. Waiting by Amelia Allen
4. Inked by Deborah Velasquez
5. Peonies in Vase by Kelli Hall
6. Out to Sea by Carolyn MacClaren
7. Mist Rises Over the Water by Renee Anne
8. Below Ravello by Kelli Hall

What do you think? Which one should I choose?

Disclosure: This post was sponsored by Minted. All opinions expressed are my own. Thanks for supporting the brands that keep Vitamini Handmade going!

2

Vintage Trailer Caravan Art Prints & Stamps

Tuesday, October 14, 2014

New: Vintage Trailer Caravan Art Print

I've been busy over here working on new products and I'm so excited that I finally get to share! First up are these new 11x14 Vintage Trailer Caravan prints in two colorways! I'm excited to be able to offer a larger format print than my usual 8x10s. They're high-quality art prints, digitally printed on matte stock with archival inks. I was going to say they'd look great in a kids room or nursery, but come to think of it, they'd be perfect in a kitchen, bathroom, living room, laundry room...hmm, I think that's everywhere!

New: Vintage Trailer Caravan Art Print New: Vintage Trailer Caravan Art Print

Available in mustard and blue or teal and coral. Both are up and listed in my online shop and on Etsy.

New: Vintage Trailer Caravan Rubber Stamp

I also have three new rubber stamp designs! Chose your favorite trailer style: canned ham, caravan, or Shasta style. Perfect for stamping up note cards and letters, or stamping your own wrapping paper. You can find them in my shop or on Etsy.

New: Vintage Trailer Caravan Rubber Stamp New: Vintage Trailer Caravan Rubber Stamp

10

Retro Illustrations by Emmanuelle Walker

Thursday, May 22, 2014

Hi, friends! I'm working on a new DIY project for tomorrow, but in the meantime I wanted to share these great retro-esque illustrations by Emmanuelle Walker entitled "Dogmobiles."
Dogs + Cars? Um, yes! Everything I love!! Especially these weiners!


Change the car from red to yellow and that'll totally be me someday. Check out more of Emanuelle's portfolio here.

And a big thanks to everyone who came out to say hi at the craft shows over the last two weekends! I'm still getting back in the groove after working two weekends back-to-back but it was so great to get out and meet some of you in person!

2

How to plan and hang a gallery wall.

Friday, February 14, 2014

Gallery wall layout
I love arranging art in clusters or galleries. When I'm planning an arrangement I typically spread everything out on the floor, take photos, select a layout, and then transfer the layout to the wall (much like I did with my kitchen plate wall).

Gallery wall layout
I've had a stack of framed art to go above my media shelves and around my tv for a few months and decided to get to it. Since I was going to be arranging the frames around the tv, playing with arrangements on the floor wasn't going to work. In this case I'd usually measure each piece and then draft different alternatives in AutoCAD. Not everyone has (or wants) access to this program so I went with an analog approach this time. You'll need a pen, scissors, painter's tape, and a roll of kraft or butcher paper.

Gallery wall layout Gallery wall layout
Trace each of your frames onto the paper. Cut each out and label which is which and which side of the paper is up. Take your time arranging and taping each piece of paper on the wall until you find the right layout. I started with 6 frames but ended up only using 5.

Gallery wall layout Gallery wall layout Gallery wall layout
Once you have a layout that you like, all you have to do is determine where the nails or picture hangers need to go for each frame. Mark these points directly on the paper, tap in the nail, then pull the paper away. No unnecessary nail holes!

Gallery wall layout
I like how asymmetrical this is, and that I could easily add more pieces if I want. It really completes the look of this wall and actually makes the room look bigger!

This was so easy I'm thinking I might go the paper and tape route next time. What do you think - how do you plan a gallery wall?


5

Playing with watercolors

Friday, February 7, 2014

Succulent Watercolors

I'd been wanting to play with watercolors for a few months and I finally grabbed the Windsor Newton set I've had since college and got to it. I started painting my Kalanchoe plant and had a lot of fun with it. It has some really great reds and oranges that were a good challenge to show with the watercolors. As soon as I was done with this one I started another! It's not quite done yet, but here's a little peek.

Succulent Watercolors

I hope you have a wonderful weekend. If you've been meaning to try out a different artistic medium, give it a shot! You'll either love it or hate it, but it'll get your mind thinking in new ways. 

1

Book Review: 100 Ways to Happy Chic Your Life by Jonathan Adler

Wednesday, January 29, 2014

Review: 100 Ways to Happy Chic Your Life, Adler
I'm a big fan of Jonathan Adler so when I spotted this book last week I knew I had to check it out.

Review: 100 Ways to Happy Chic Your Life, Adler
Oh man, I need a new doorknob.
Showcasing the dream home he built with husband Simon Doonan on Shelter Island, this book shows snapshots of everything from small details to large-scale decorating concepts, all in Adler's distinctive retro-bohemian style. Interior photography shots are broken up with hand sketched lists of great movies, music, and fashionistas. There are also a few DIY projects mixed in. I especially liked this block printed valentine.
Review: 100 Ways to Happy Chic Your Life, Adler
Flipping through the pages I found myself wishing I had a "Pin It" button in real life!  If you're looking to recreate the look for yourself many of the items pictured in the shots are from JA's own collection. There are also practical tips on how to style your bookshelves and how to use unusual items for new applications.
Review: 100 Ways to Happy Chic Your Life, Adler Review: 100 Ways to Happy Chic Your Life, Adler

There's also a great glossary in the back for all of those super-chic new terms you need to add to your vocabulary. I got a kick out of the "ornamental hermit." I remember learning about those in Landscape History class in college. Hmm, I wonder which one of my neighbors can be considered the ornamental hermit of the property...

Review: 100 Ways to Happy Chic Your Life, Adler

Don't take your decorating too seriously! Find 100 Ways to Happy Chic Your Life on Amazon. 
 

vitamini handmade © All rights reserved · Theme by Blog Milk · Blogger