80

DIY Faux Porcelain Cactus Ring Holder

Wednesday, March 25, 2015

DIY Faux Porcelain Cactus Ring Holder
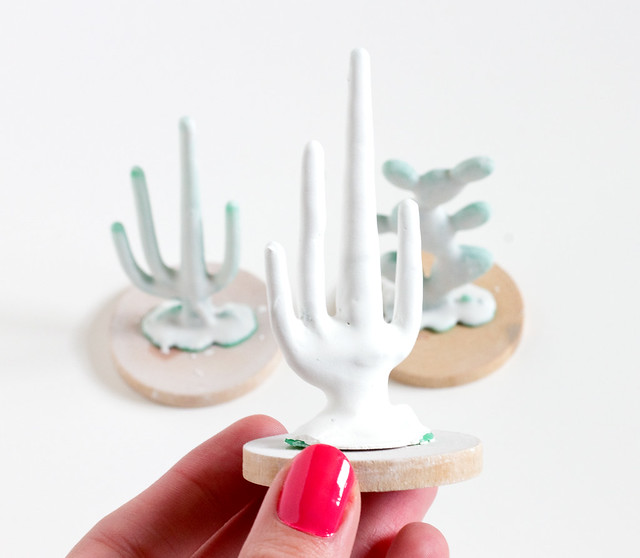
Sometimes the idea for a project just pops up and then you seek out the materials, but other times the materials themselves inspire a project. The latter was definitely the case for this project - I must have looked at these plastic cacti in Michaels ten times wondering what I could make with them. Then I remembered seeing a beautiful porcelain cactus ring holder online a while back and thought it would be super cool if I could try to recreate it. With a little bit of experimentation I figured out how to make these faux porcelain cactus ring holders with the help of a little plaster and white and gold paint! Best part is, you can make your own, too!

Here's what you'll need:
DIY Faux Porcelain Cactus Ring Holder
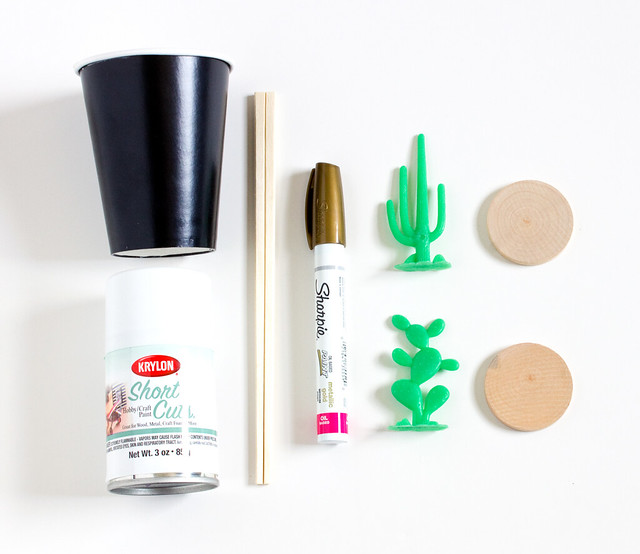
  • Plastic cacti. These came 3 to a package at Michael's
  • Wood disks. Mine were 1 3/4" diameter
  • Hot glue
  • Plaster (not pictured). Simple craft plaster is fine
  • Paper cup
  • Stir stick
  • White spray paint
  • Oil-based gold Sharpie
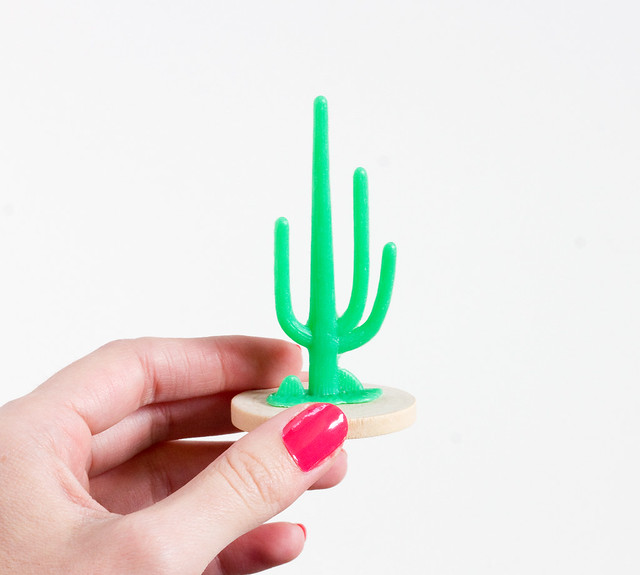
Hot glue the cactus to the center of the wood disk.
DIY Faux Porcelain Cactus Ring Holder
Mix up the plaster in the paper cup according to the directions (mine was 1 part cold water to 2 parts plaster). Stir it up well with the chopstick. It will start setting up quickly so be ready! When it's about the consistency of a milkshake, hold the wood disk and dip the cactus into the plaster until the plastic is all coated. If parts of the base aren't covered, spread the plaster around with a toothpick to get all of the nooks and crannies. I got the best results when I tipped the cup to the side and dipped one side of the cactus and then the other. Let dry upright. If a second dip is needed, let dry overnight and repeat.

DIY Faux Porcelain Cactus Ring Holder
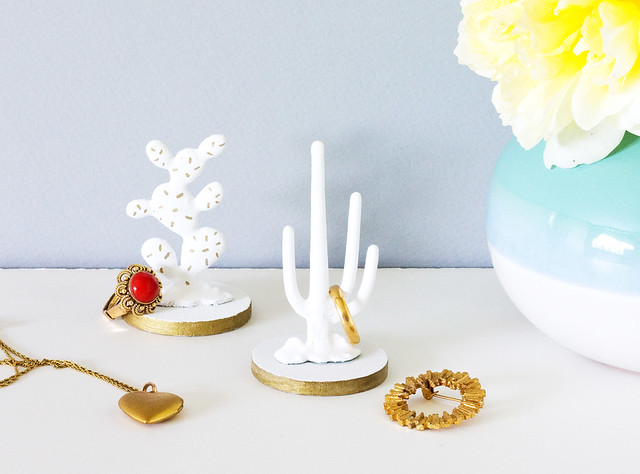
Let dry completely and then spray paint, 2-3 coats. Draw some gold accents around the base and on the cacti themselves if you'd like. I added a few prickles and dashed lines on some and left others plain.

DIY Faux Porcelain Cactus Ring Holder
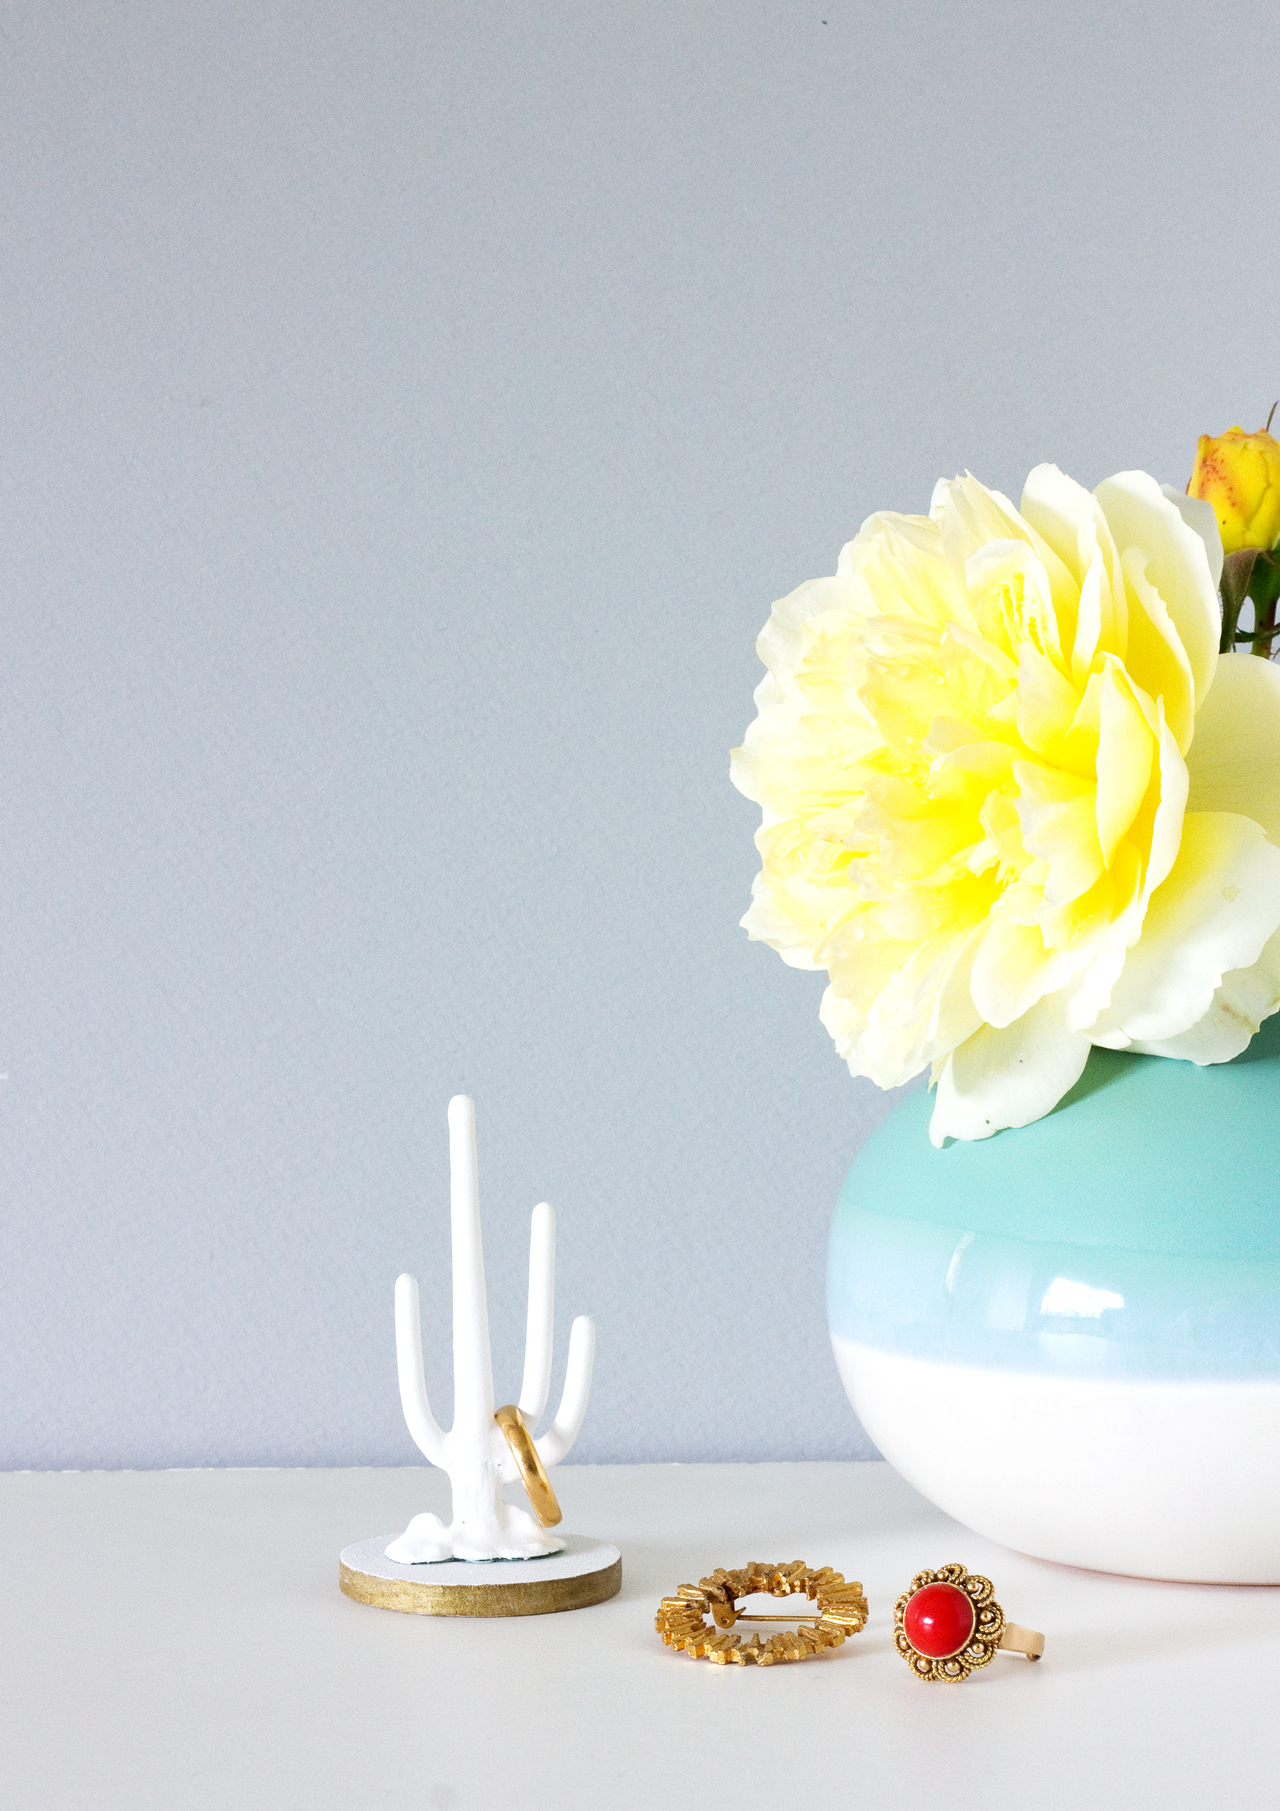
So cute, right? They make a sweet little addition to a dressing table, and for a perpetual jewelry stasher like myself, they're perfect for keeping rings organized. They look like porcelain and you'd never be able to guess that there's a cheap-o plastic cactus inside. Ha!

DIY Faux Porcelain Cactus Ring Holder DIY Faux Porcelain Cactus Ring Holder
P.S. I'm heading out to Craftcation tonight! I've been looking forward to this since last years' conference, so I'm super pumped! Let me know if you're going to be there! Follow me on Instagram to keep up with all the action. :) Have a great weekend!

49

Shop Update: Doxie Fabric, Mod Home Collection, & Rubber Stamps

Friday, March 20, 2015

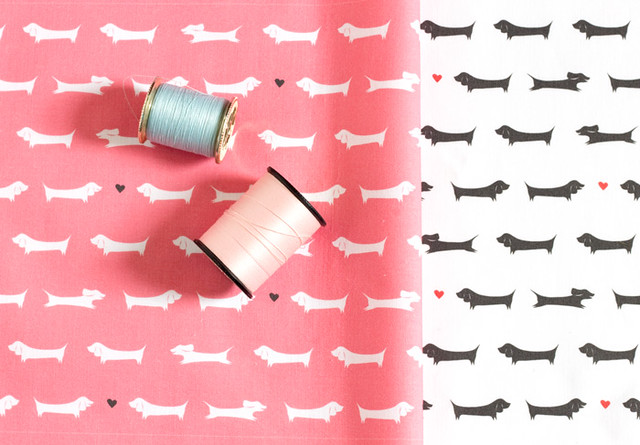
Dachshund Fabric Print by Vitamini - Dachshund Love

I've been designing and making lots of new products for the shop that I'm so excited to share! The newest arrival in the shop (just listed a couple days ago) is my new Dachshund Love fabric print. Available in black + white with red hearts and coral pink + white with black hearts. It's so cute, I can't wait to sew something with it!

Mod Home Collection Coasters by Vitamini
Also new to the shop is the start of a new collection called Mod Home. The collection will consist of housewares and accessories that are cool and contemporary with a touch of retro style. They'd look great in a sleek mid century home or a cute, colorful apartment.
Boomerang Retro Felt Coaster Set by Vitamini
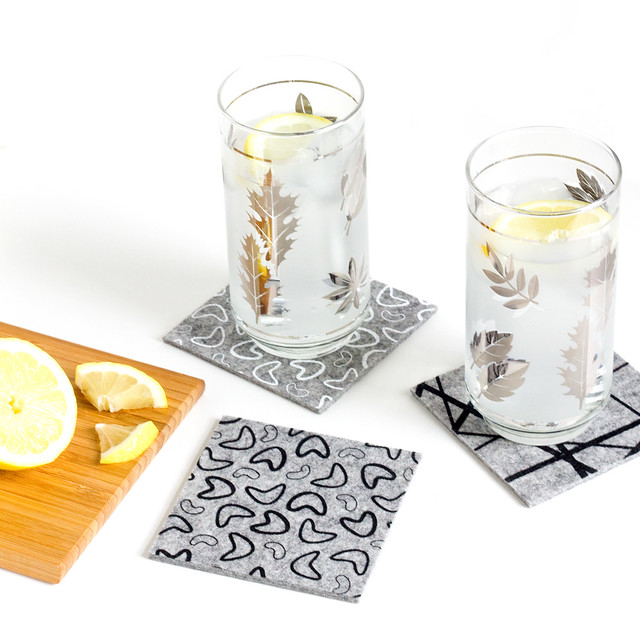
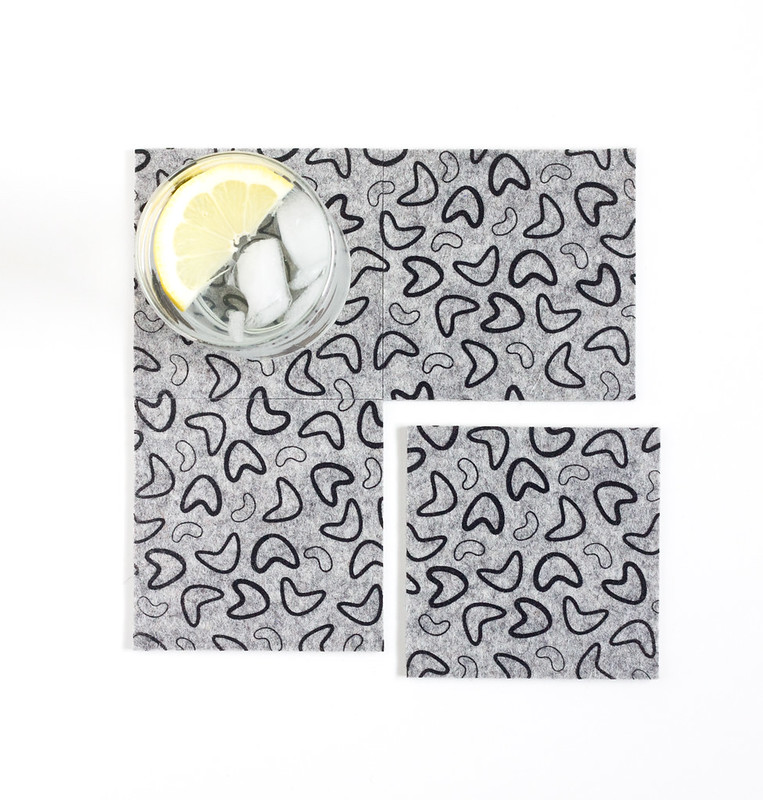
My first new products in this collection are sets of 100% wool coasters. They're screen printed by hand in two different designs - Power lines and Boomerang. A cool feature of these is that they work great individually but can be fit together to make a larger 8" square trivet.
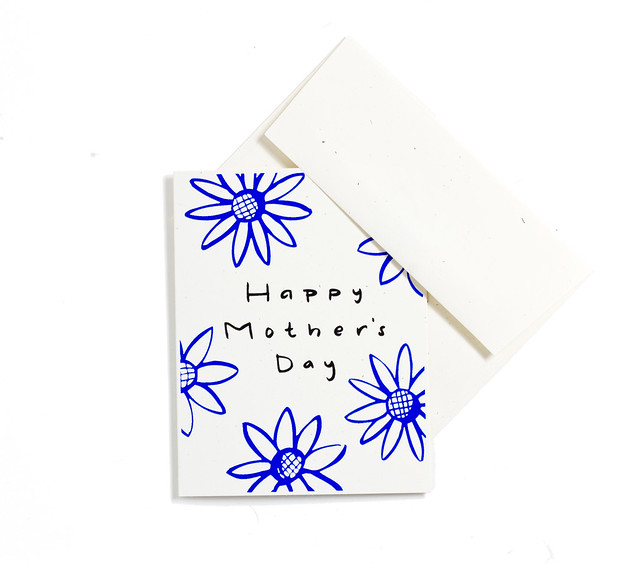
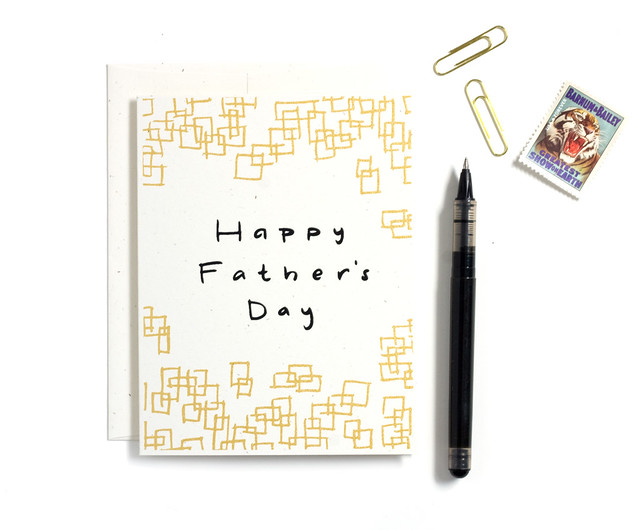
Mother's Day Card by Vitamini Father's Day Card by Vitamini
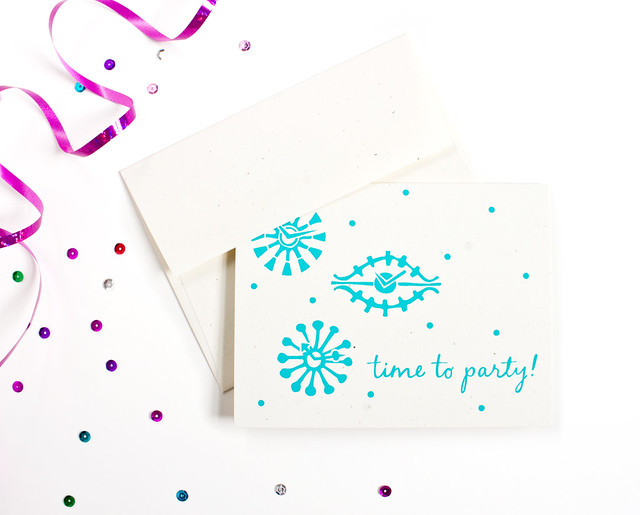
There are a few new greeting cards on the scene in the shop, too! Mother's Day and Father's Day are approaching, so I made new cards for the occasions. I designed this "time to party" card for all of those other special times. It features three Nelson-esque clocks with a bit of confetti and hand lettering.

Mid Century Style Card Time to Party by Vitamini That Stinks card by Vitamini
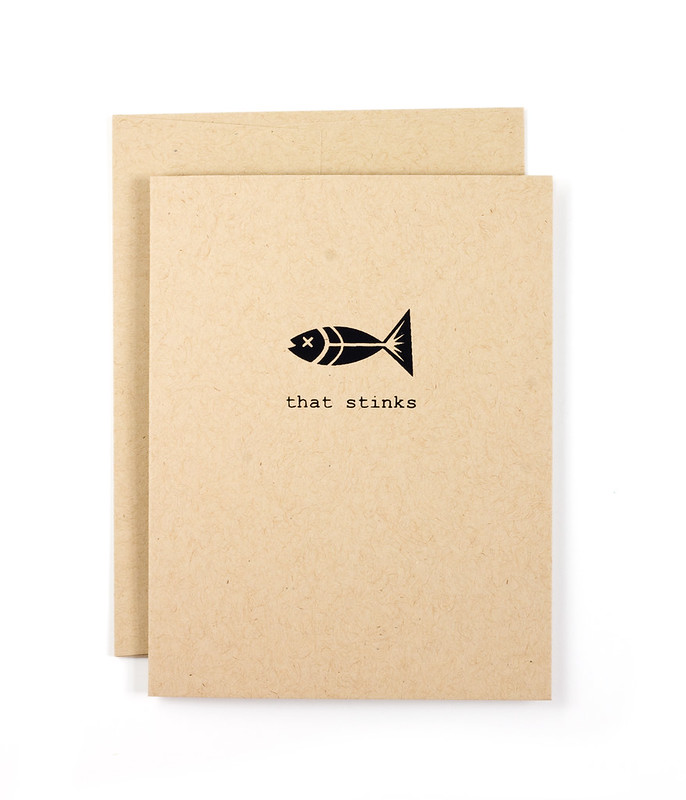
Sometimes the best thing you can do in a sucky situation is acknowledge it. Did your friend just get dumped by someone they didn't really like that much? Pull their groin playing basketball? Get a really bad haircut? Send them this card and let them know that "that stinks!"
New travel theme rubber stamps by Vitamini
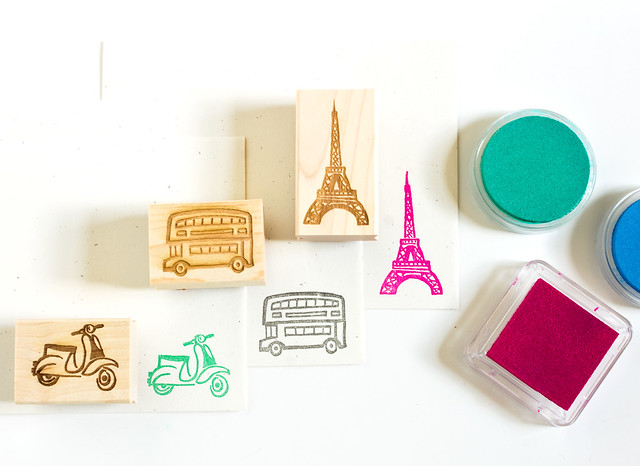
Last but not least, I have 3 new rubber stamps! They're based on my travel illustrations, with an Italian Vespa, Double Decker London Bus, and Eiffel Tower. They're perfect for adding some European flair to your mail and paper goods.

That's all the new stuff for now. I'm working on lots more, but they'll have to be put on hold for a bit while I get ready for Craftcation! This time next week I'll be hanging out with lots of other creatives in Ventura, learning a bunch and crafting as much as possible. I'll also be teaching my simple screen printing workshop, so I can't wait for that! If you're going let me know. I'd love to meet you!

27

DIY Leather Business Card Wallet

Tuesday, March 17, 2015

DIY Leather Business Card Wallet
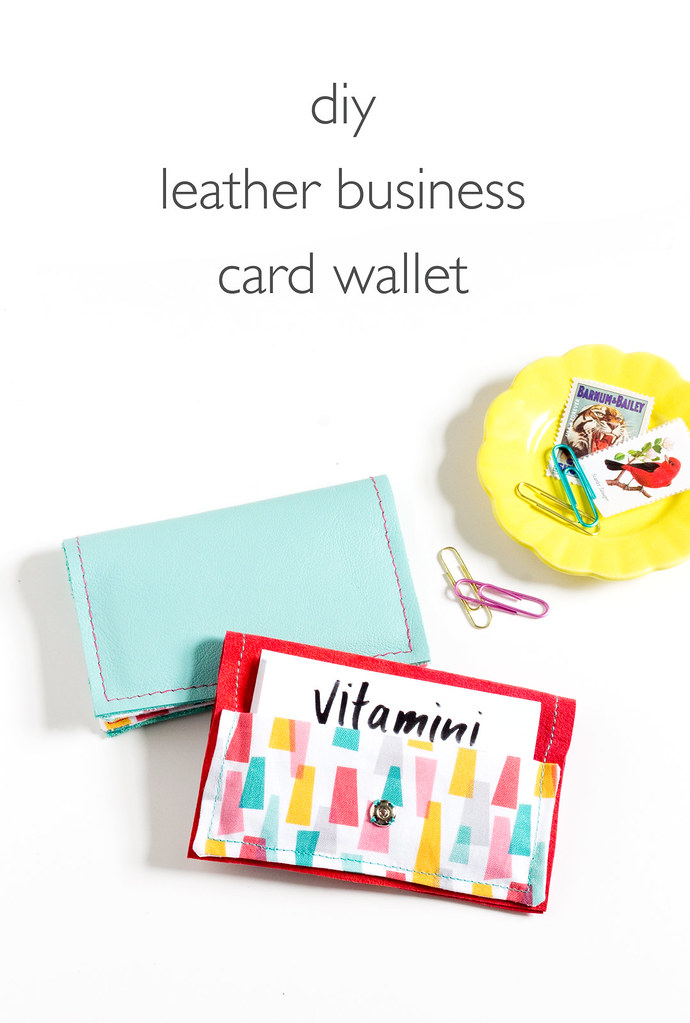
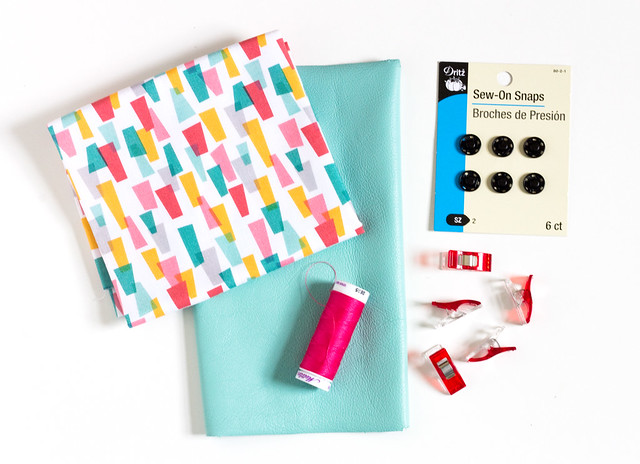
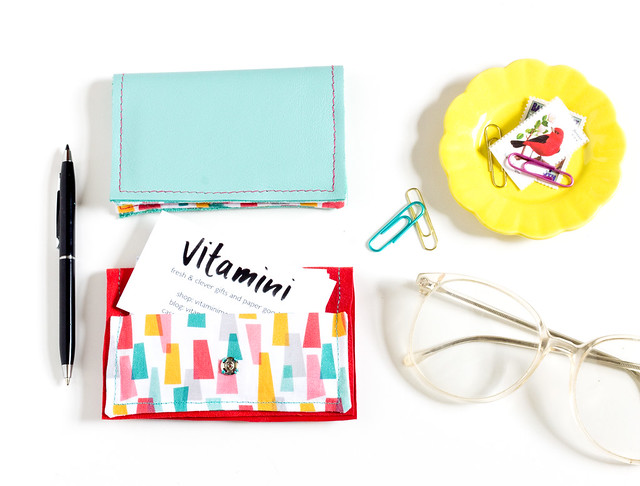
I'm getting ready for Craftcation (can't wait!) and decided to make a new business card holder so I can keep my shiny new business cards at the ready. I made these leather business card wallets with just a small piece of leather, two small pieces of fabric, and a snap - supplies you probably already have on hand! You could easily switch out the leather for vinyl and use up those small scraps of fabric you have lying around for the pockets. They're so easy to make, you'll probably want to make a few!

Here's what you'll need:
DIY Leather Business Card Wallet
  • 4.25" x 5.5" piece of leather
  • 2, 4" x 4.75" pieces of fabric. I used my jazzy print
  • Sew-on snaps. I used the size 2 snaps (shown) on the thicker leather, and size 1 snaps for the thinner red leather.
  • Needle and thread
  • Wonder Clips - They're perfect for holding layers together without making pinholes. I rarely use pins anymore!
  • Sewing machine with matching or contrasting thread and a needle intended for leather.
DIY Leather Business Card Wallet
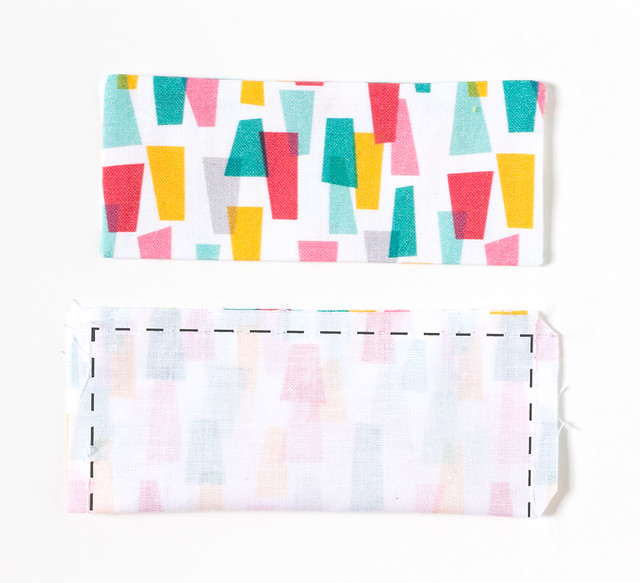
Fold the two pieces of fabric in half with the right sides touching, so they're 2" x 4.75" each. Sew around the three edges with a 1/4" seam allowance, leaving a small opening on one side. Turn right side out. Use a chopstick to help turn crisp corners. Press flat.
DIY Leather Business Card Wallet
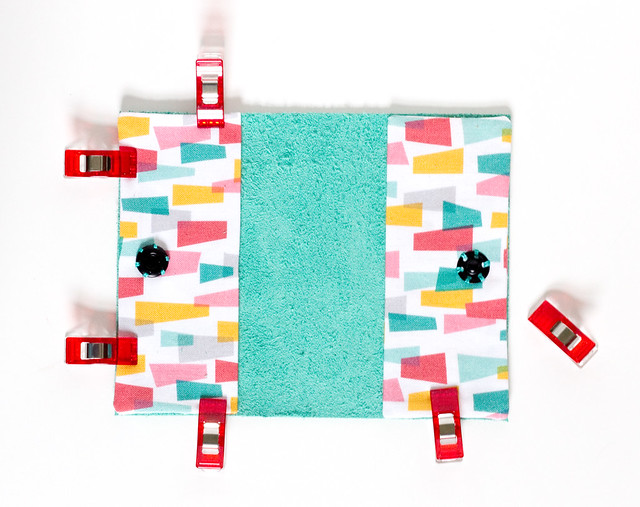
Mark a point in the center of each pocket, about 3/4" from the bottom edge. Hand sew the snaps on. Make sure to sew through both layers of fabric. Clip the pockets to each side of the leather, with the folded edge to the inside. Stitch around the perimeter with a 1/8" seam allowance, overlapping a few stitches at the end.

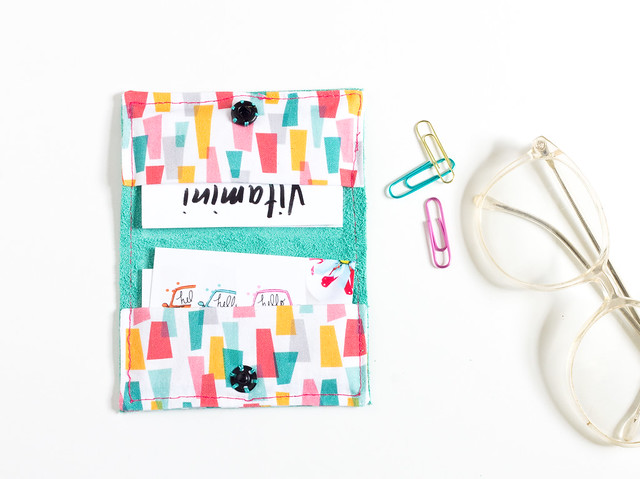
Trim any loose threads. Fill with business cards and enjoy! 
DIY Leather Business Card Wallet DIY Leather Business Card Wallet DIY Leather Business Card Wallet
I really love how they turned out. The pop of color and pattern on the inside is fun, too. I plan to keep one in each of my bags so I'm guaranteed to always have some cards on hand. One of these would make a nice handmade gift for a friend with a new job, don't you think? :)

97

10 Things My Dog Taught Me About Life

Friday, March 13, 2015

10 Things My Dog Taught Me About Life

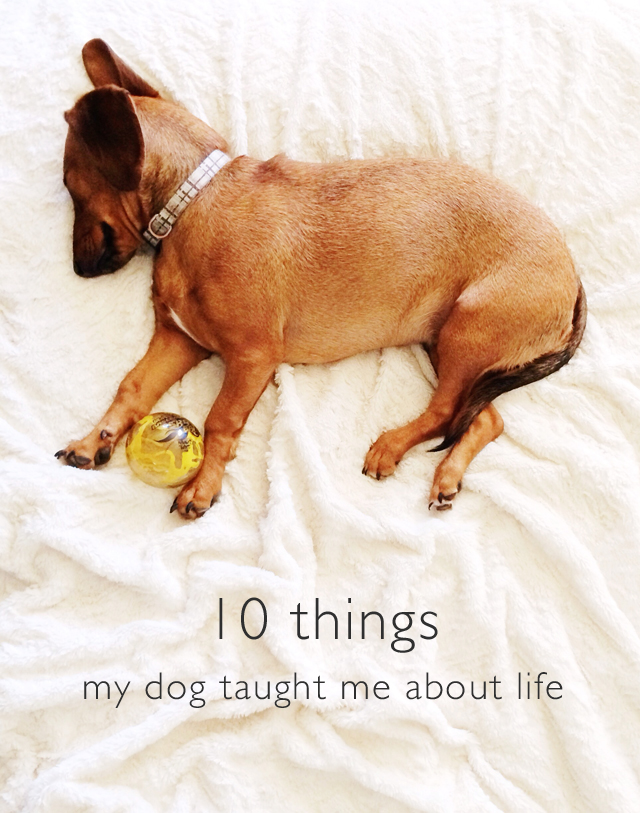
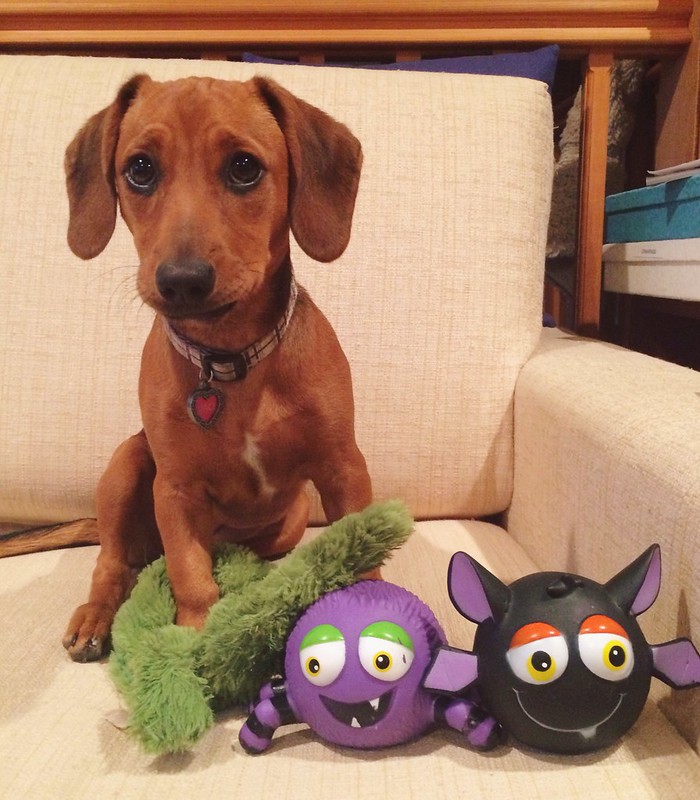
This past week marked 6 months since I brought my sweet, silly, crazy puppy home from the shelter. We've gone through a lot together since those first couple weeks; housebreaking, teething, first Christmas, and our first trip to the beach. She's learned so much about her new pack (me and my family), how to be a good puppy when she wants to be, and how to be bold when she wants attention. She's also taught me lots of good life lessons, and I'm grateful when she reminds me of things that I may lose track of during my usual routine.

1. Wake up with enthusiasm
This girl wakes up every day with a start and bounds down the hall, excited to be alive another day. It's hard to be in a bad mood first thing in the morning after watching her practically leap with joy. Each day that I wake up healthy, with a roof over my head and another chance to go after my dreams is a good day.

10 Things My Dog Taught Me About Life

2. Appreciate what you already have
All I have to do to get her interested in the toys she already has is put them in a basket and she'll go digging through it like it's Christmas morning! Sometimes you just have to repackage and fix up the stuff you've already got to find some new enthusiasm.

3. Be unapologetic about who you are
She doesn't try to be anything she's not. I wish I had a little more of that sometimes.

4. Take breaks
There's nothing like a cat-nap dog-nap or a brisk walk in the middle of the day. It's ok to take breaks.

10 Things My Dog Taught Me About Life

5. Look around, enjoy the scenery
I've never known a dog who likes looking around so much! She's perfectly content sitting outside, watching birds, looking into the distance, and sniffing the air. She reminds me to slow down and enjoy where I'm at.

6. Seek out your joy
Baci is so funny - she goes browsing, practically window shopping looking for things/trouble she can get into. I can't count how many times I've caught her in my closet sniffing around for stuff to steal and play with! It drives me crazy, but reminds me to continue to seek out the things I want, too. 

10 Things My Dog Taught Me About Life

7. Chase the chickens AKA Break the rules
Ok, don't do that - she did it once, and while I scolded her for it, I'm sure it was exhilarating at the time! Throw caution to the wind and break the rules once in a while.

8. Have an approachable, positive attitude
There's nothing like some puppy dog eye contact and happy tail wagging to get people to want to stop and say hi. I can't do the tail wagging thing, but I can do my best to show a happy, approachable attitude when I'm out and about. Especially since I have resting bitchface sometimes...

9. Get creative
This little chickadee is so good at making her own fun - she even throws her toys for herself! Make your own fun.

10 Things My Dog Taught Me About Life

10. Never leave your socks on the floor
They will get chewed up.

So there you have my top ten life lessons taught to me by this funny little dachshund mix. She continues to teach me new things every day, like the best way to get her out from under my bed when she's stolen one of my shoes. :) What about you - have you had a pet that taught you any good life lessons?

Have a great weekend!

268

DIY Easy Graphic Art

Tuesday, March 10, 2015

DIY Easy Graphic Art | click through for the full tutorial!

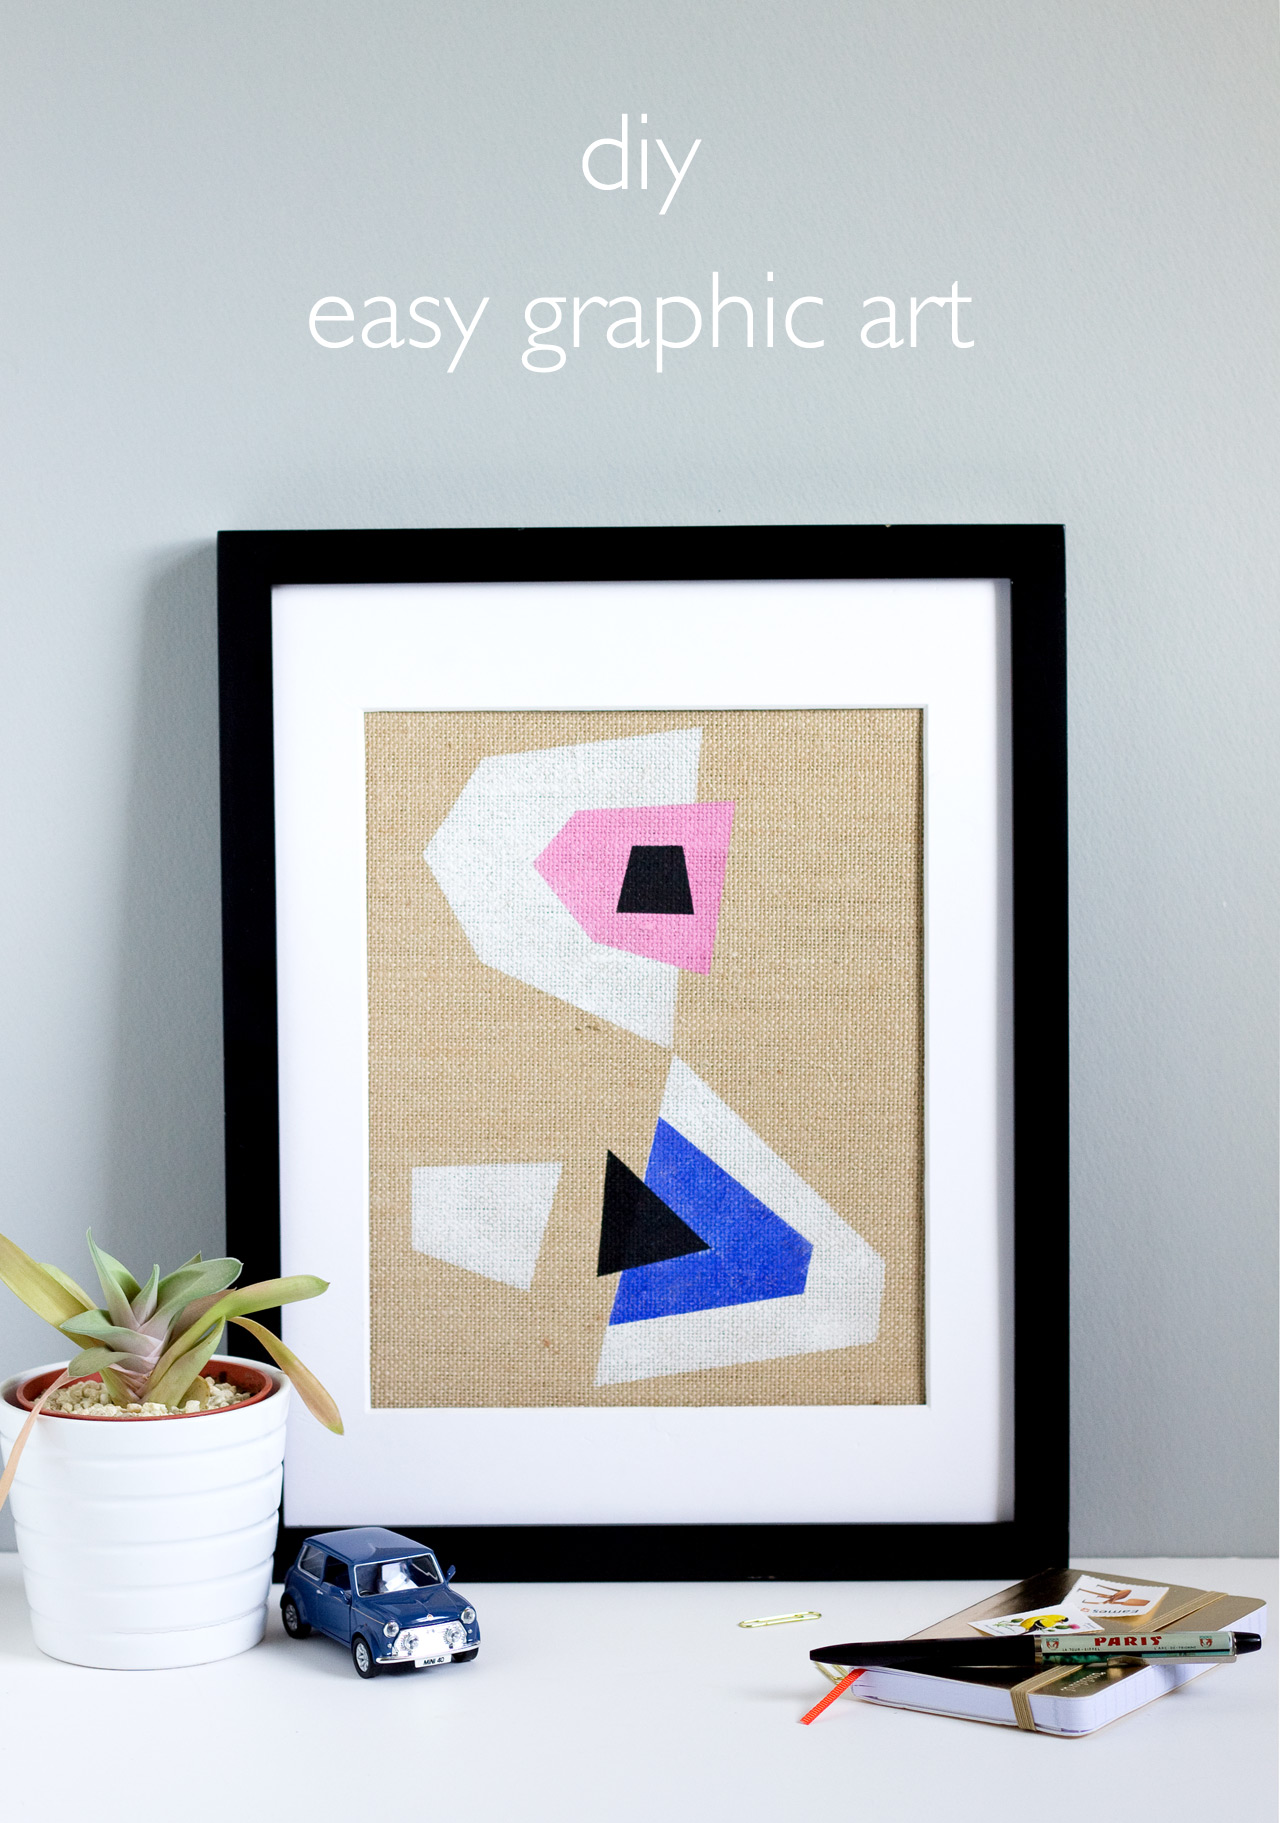
I'm still on a decorating kick, and now that two of my larger projects are completed for the bedroom redesign my mind is wandering back towards art. I started playing around with a few simple materials and whipped up these easy graphic art canvases in practically no time flat. I think you'll like this project for a few reasons: first because it's actually fun to do, second because the supplies are super inexpensive (seriously. like, a couple bucks per canvas), and third because the finished product just looks cool!

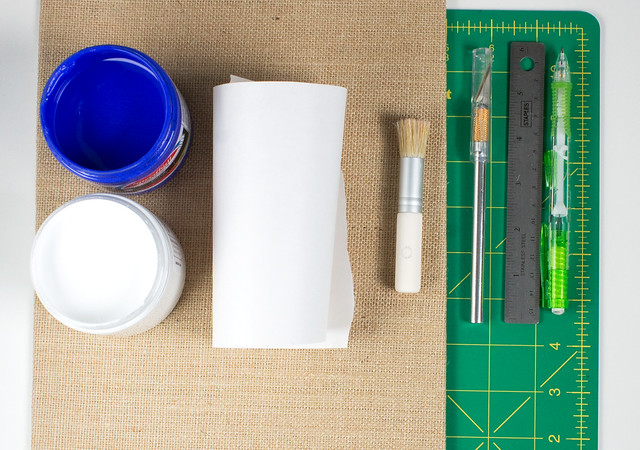
Here's what you'll need:

DIY Easy Graphic Art | click through for the full tutorial!
  • Reynolds Freezer Paper. You can find it in the grocery store
  • Paints. I used screen printing inks because I already had them, but acrylic craft paints would work, too
  • Paper plate or piece of cardboard
  • Stenciling brush
  • Burlap canvases. I got a 3 pack at Michael's for something like ridiculous like $4. Flat canvases work better than wood framed ones
  • Craft knife 
  • Cutting mat
  • Iron
  • Ruler 
  • Pencil
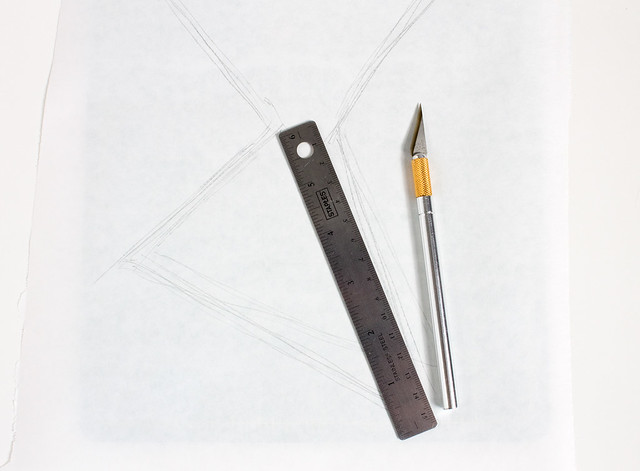
Sketch out some ideas for the layout. Simple shapes made with straight lines are the easiest, and it's best to apply the light colors first and the dark colors last, so keep that in mind when planning the layout.

Draw the shapes onto the paper side of the freezer paper and cut out with the craft knife. Place the stencils for the first color (mine was white) on the canvas, paper side up, glossy side down, and iron on medium high heat. The shiny part of the freezer paper will fuse to the canvas and create a perfect stencil! Make sure the edges are stuck down well. Try holding the iron at an angle to get to all of the stencil edges.

DIY Easy Graphic Art | click through for the full tutorial!

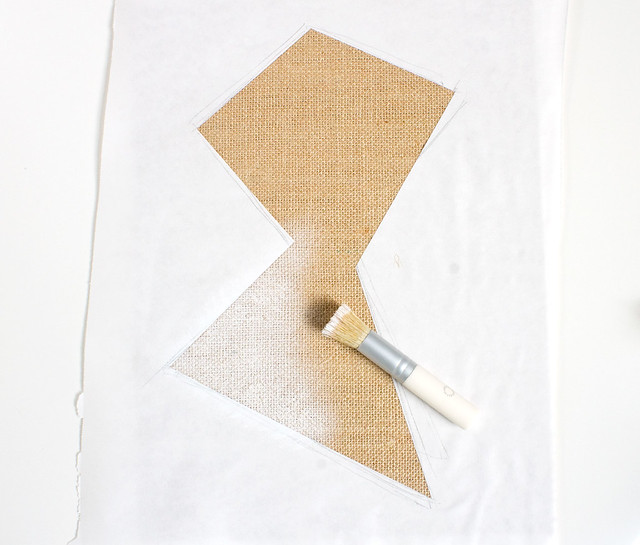
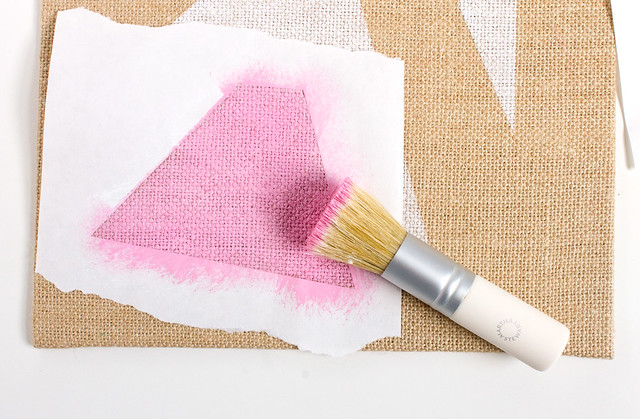
Dip the brush in the paint and remove the excess onto the paper plate or cardboard. With a mostly dry brush, dab the paint onto the canvas around the stencil edge. Reload the brush and fill in the center of the shape. Try to get even coverage. Pull up the stencil and let dry.

DIY Easy Graphic Art | click through for the full tutorial!

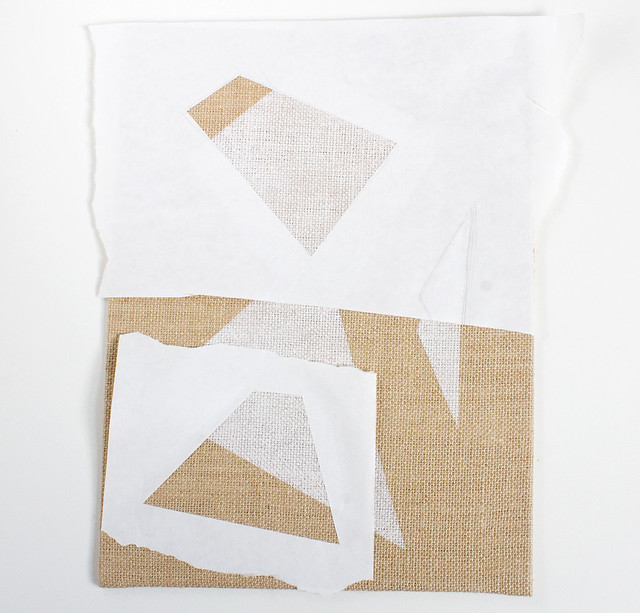
Repeat the steps for each color/shape once the previous color is dry, overlapping the shapes.

DIY Easy Graphic Art | click through for the full tutorial! DIY Easy Graphic Art | click through for the full tutorial!

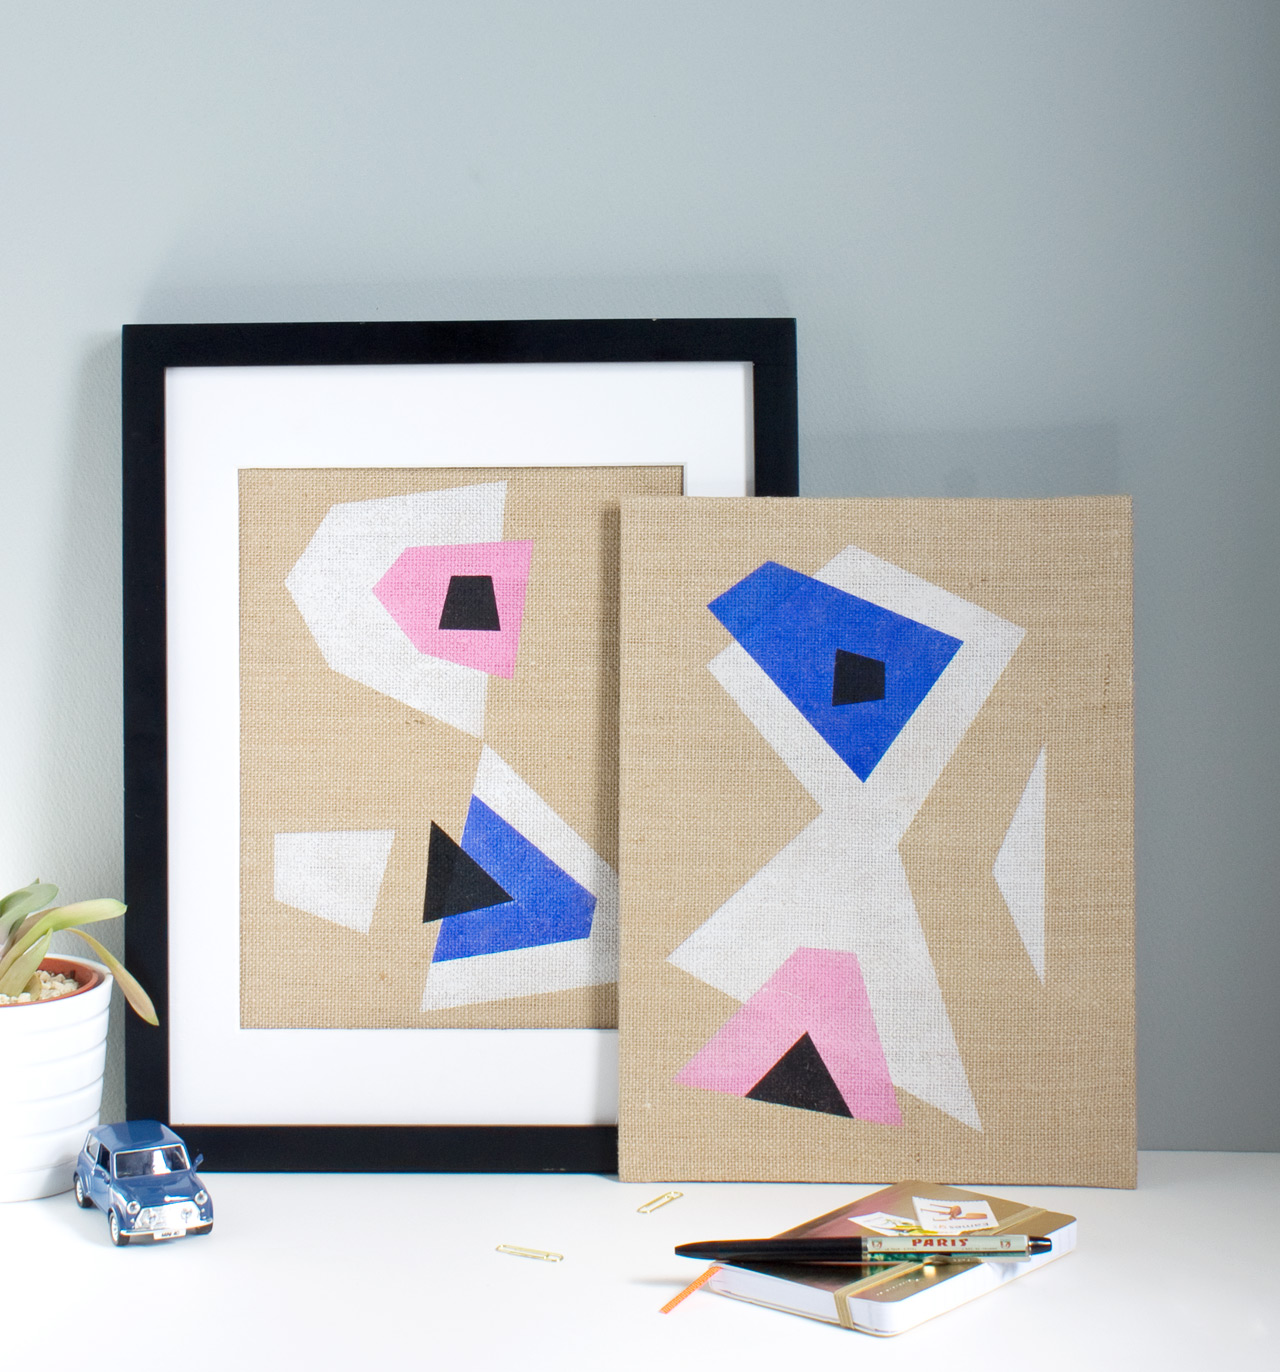
Enjoy as-is or layer it in a frame with a mat.

DIY Easy Graphic Art | click through for the full tutorial! DIY Easy Graphic Art | click through for the full tutorial!

I hope you try this out! I think it would be fun to do on a larger scale, on a great big canvas with spray paint. I have a big roll of freezer paper leftover to play with so I may just try it!

31

Bedroom Makeover: Mid Century Dresser Makeover - After

Friday, March 6, 2015

Mid Century Dresser Makeover - After

*Read about how I stenciled this wall, here.

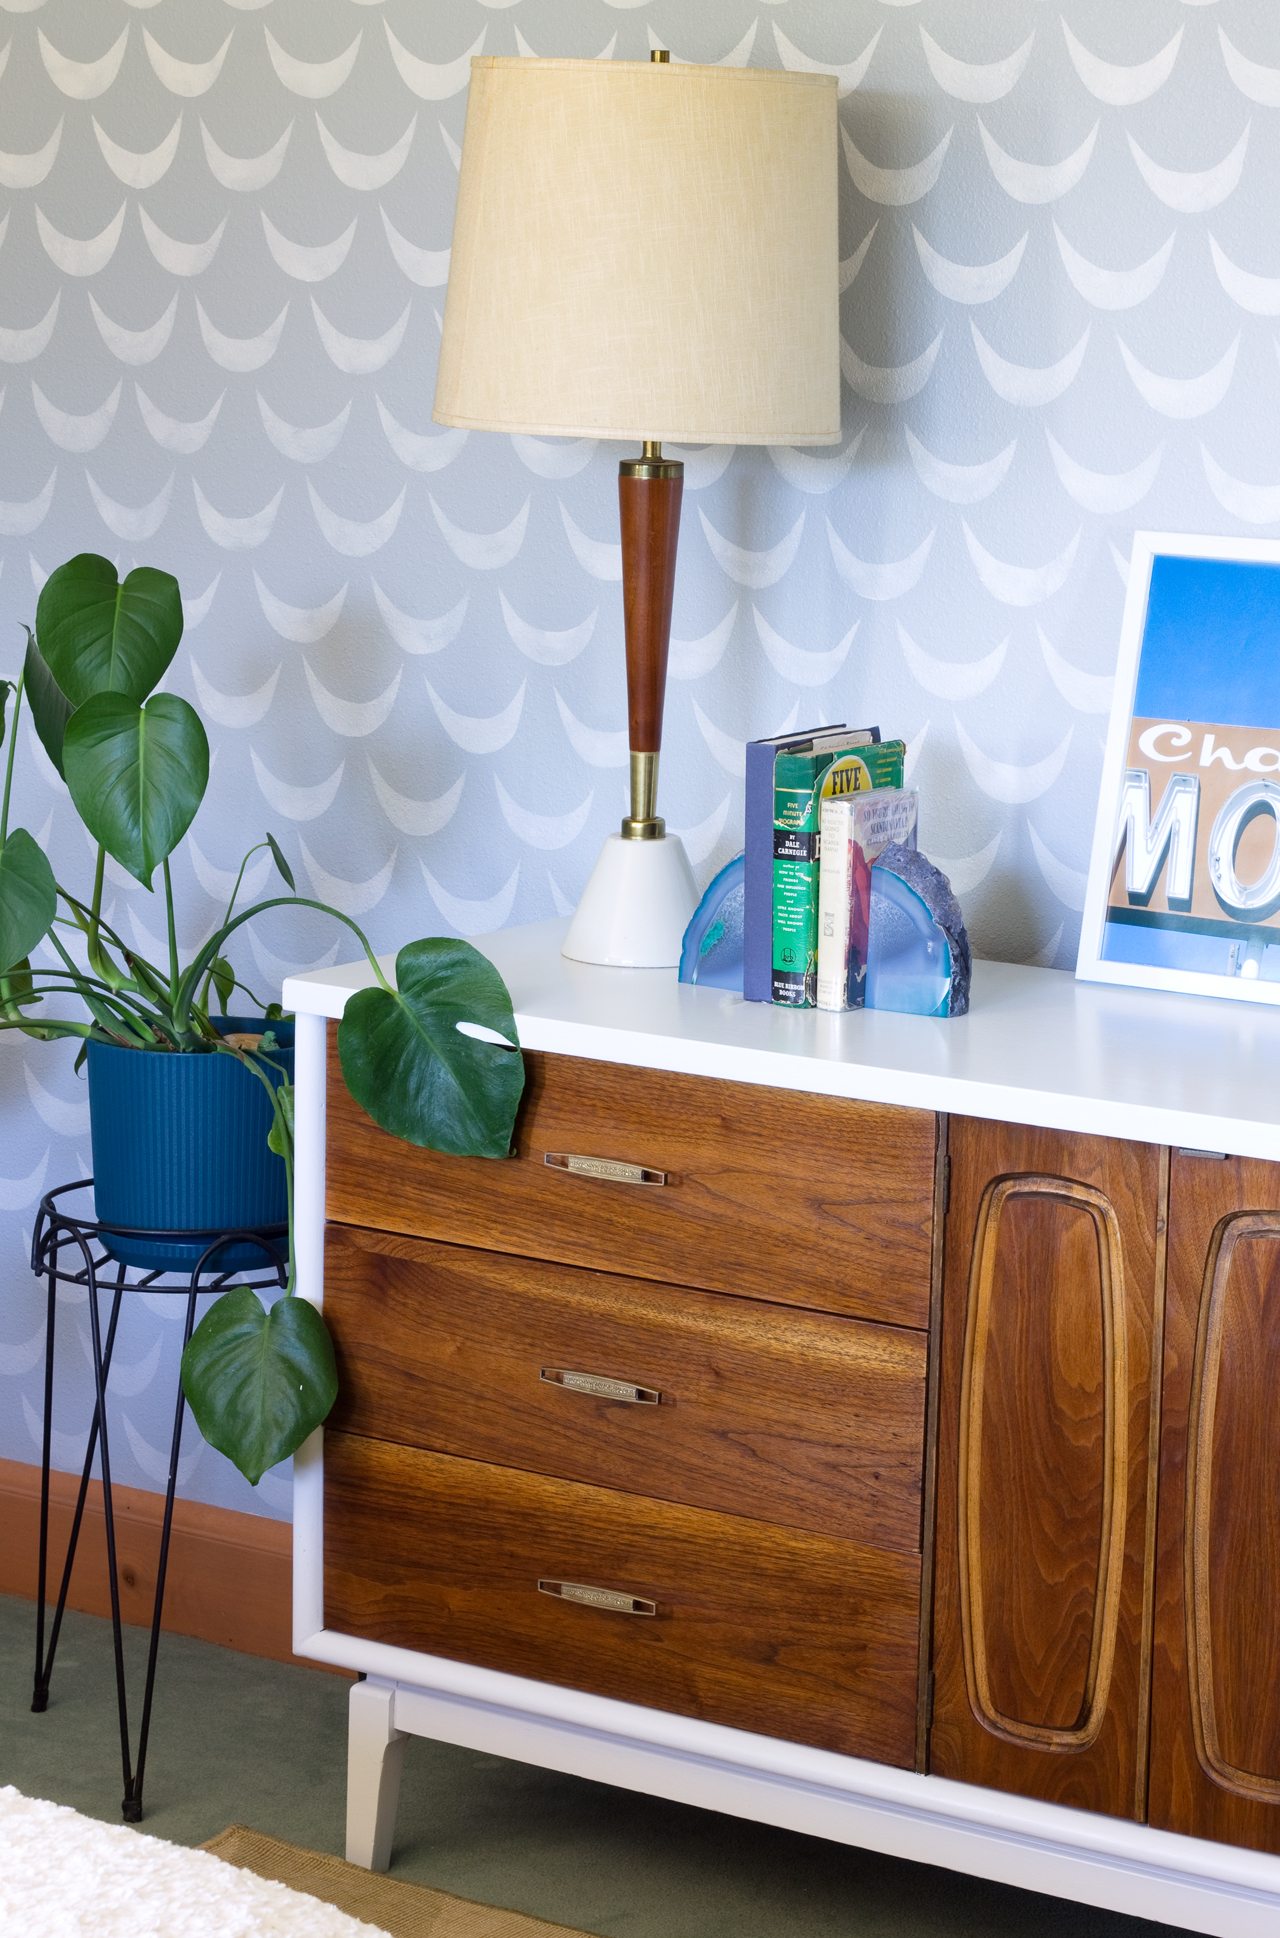
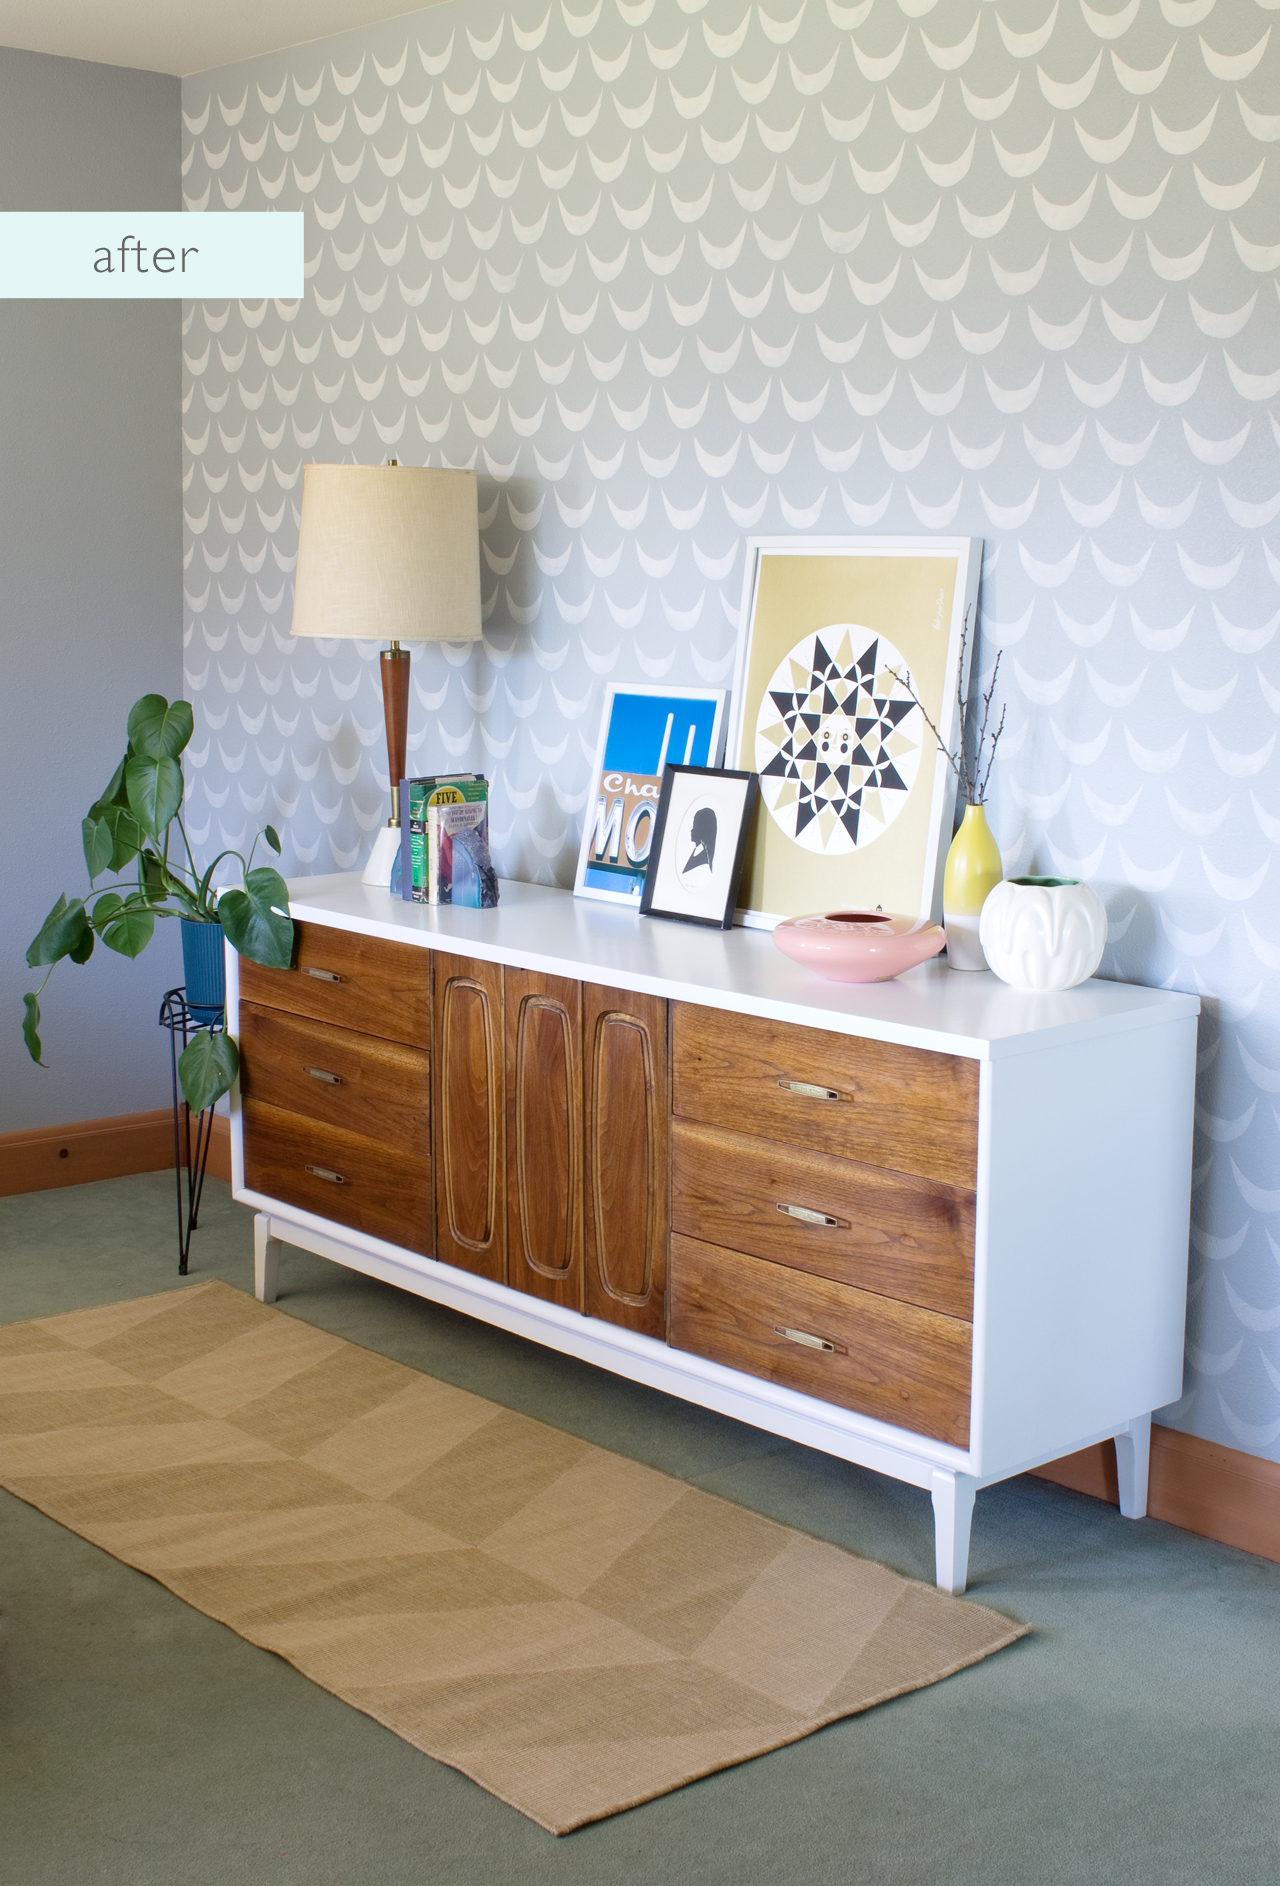
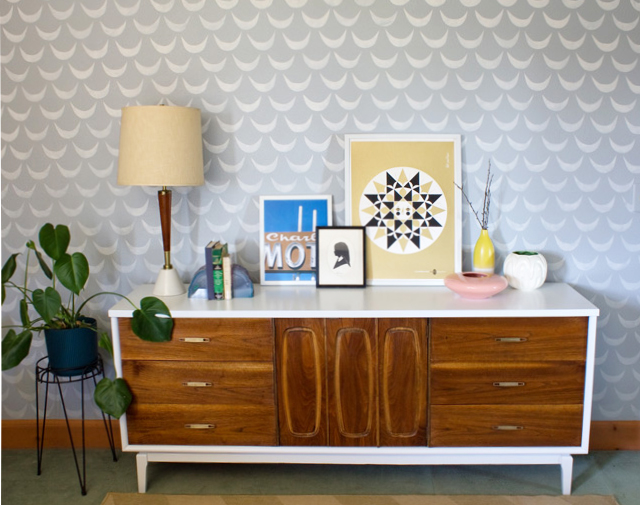
After lots of Saturdays of cleaning, sanding, and painting, my $10 Mid Century dresser is finally done! I'm so pleased with the way it came out, and honestly a little surprised that it turned out so well, considering what it looked like when I started. It's a really nice feature piece for my new bedroom space and will provide lots of storage. It didn't cost me much, besides the original $10 investment, a couple trips to the hardware store for supplies, and a few hours of elbow grease. I'm going to outline all of the details and steps of what I did, in case you find a dingy piece of furniture on the side of the road that you'd like to fix up but don't know where to start.

Here's what I used, in chronological order:
  • Screwdriver
  • Citri-Strip
  • Cheap paintbrush
  • Plastic scraper
  • Bar Keepers Friend
  • Toothbrush
  • Clean rags
  • Watco Teak Oil
  • Howard Feed-N-Wax
  • Orbital sander with 100, 120, and 180 grit sandpaper
  • Good quality paint brush
  • Rust-Oleum Enamel in White. I wanted a semi-gloss finish so I combined a can of flat white and a can of gloss white
  • Paint thinner for cleanup 
  • Safety supplies: eye protection, dust mask, gloves
Mid Century Dresser Makeover - After
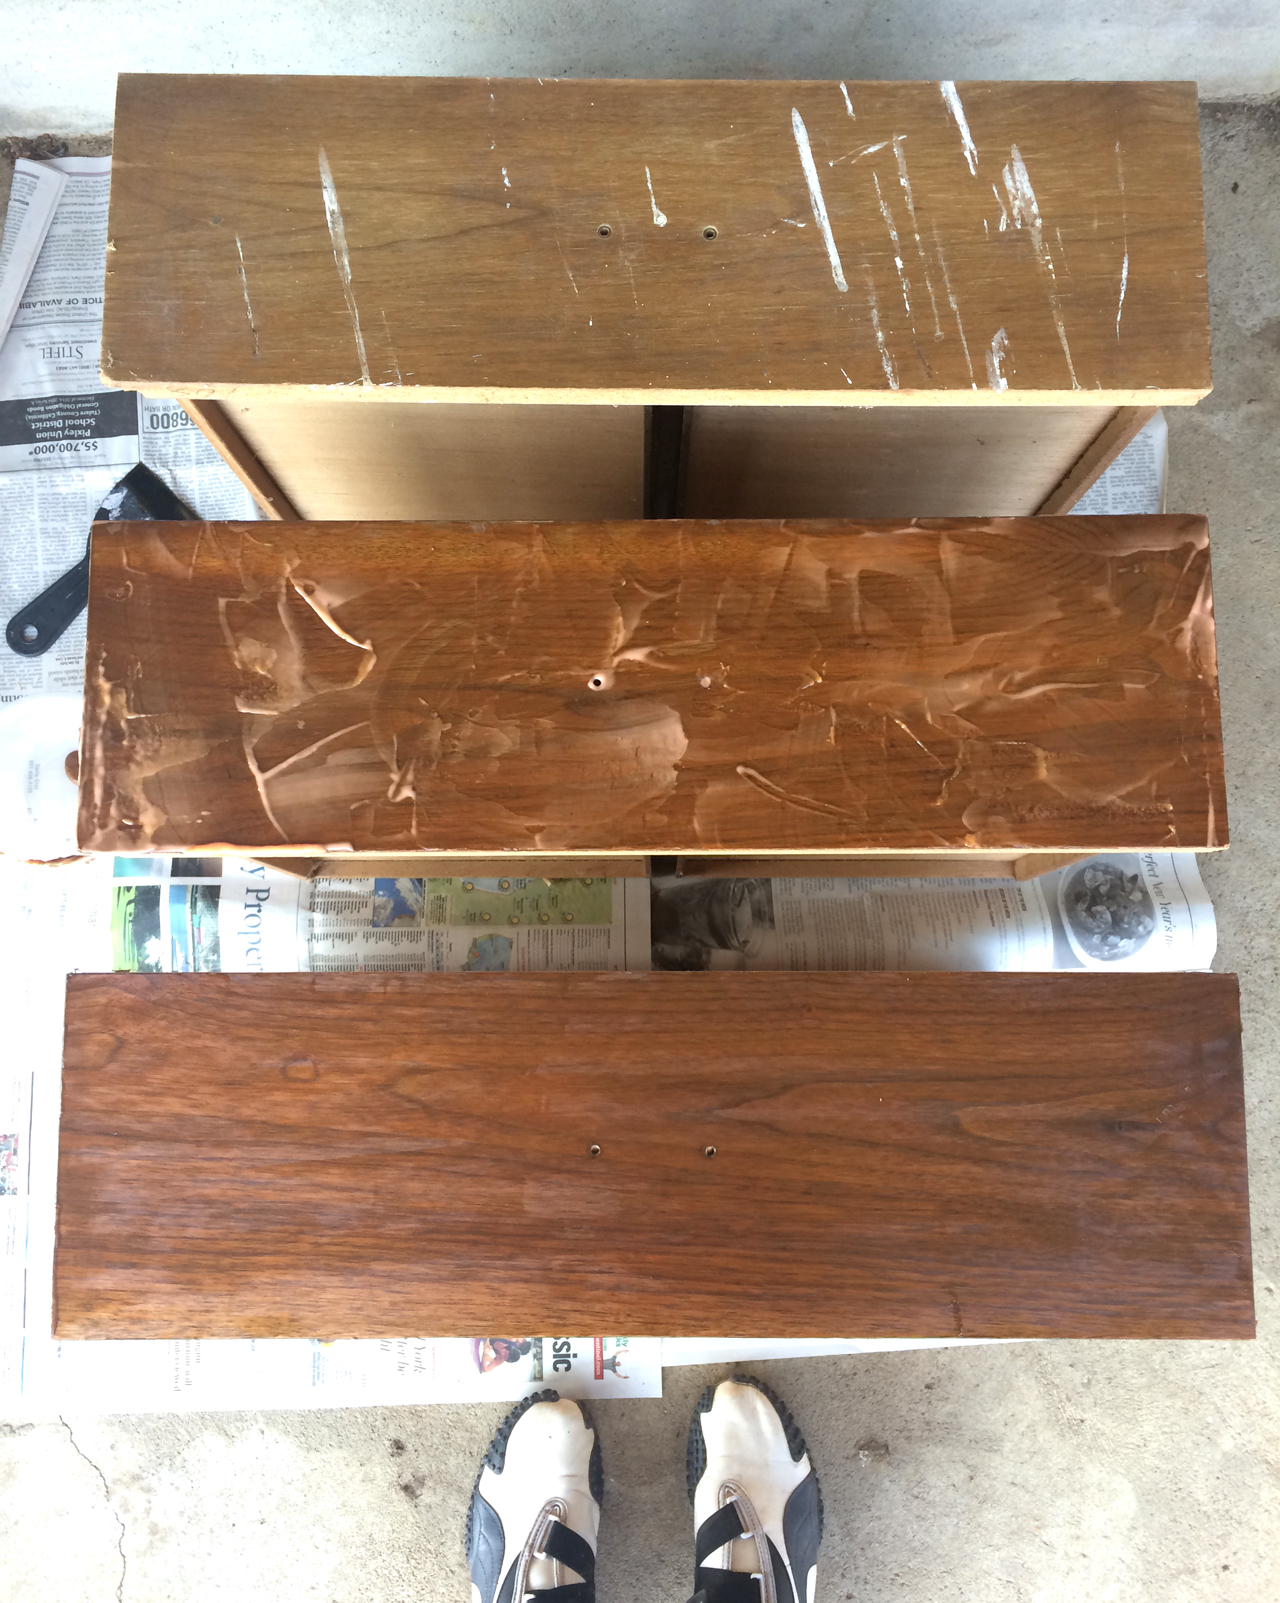
Drawers: I removed them, and the doors, from the unit and took off all of the hardware and set it aside in a bowl for later. I put a thick layer of Citri-Strip on the drawer fronts and doors with a disposable paint brush according to the directions, let it sit, and then scraped it off with a plastic scraper to remove the old finish. I repeated this two or three times to get all of the finish off and then wiped them down with a clean rag. I lucked out! The veneer on the drawers was still in good shape and had a nice grain after the finish and the old stain was removed. I wiped on the teak oil (I used the foam version) according to the directions and followed up with the Howard's Feed-N-Wax. 

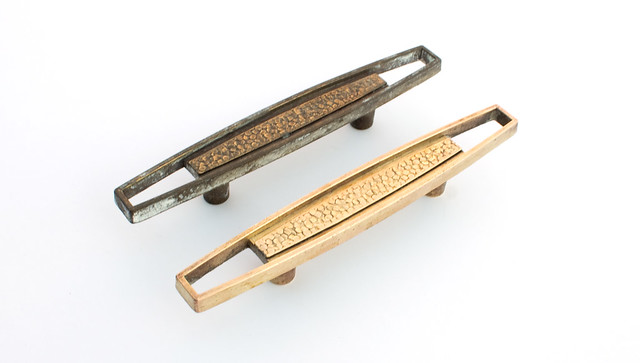
Hardware: I had no clue what these handles were made of, some sort of coated metal. They were tarnished and dirty, so I tried a couple different methods to clean them up. Soap and water didn't help at all, so I tried Bar Keepers Friend and it worked great! I just sprinkled it onto the damp hardware and held it in a gloved hand while I scrubbed with a toothbrush and then rinsed off. No need to paint the hardware when it cleans up this nicely!
Mid Century Dresser Makeover - After Mid Century Dresser Makeover - After
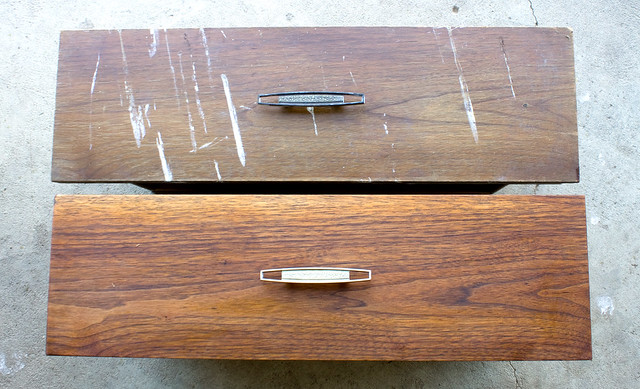
There's a before and after - Dingy, dirty (ieeu), and yellowed drawer with original hardware on the top. Cleaned, oiled, and waxed drawer with fresh hardware on the bottom. What a difference!

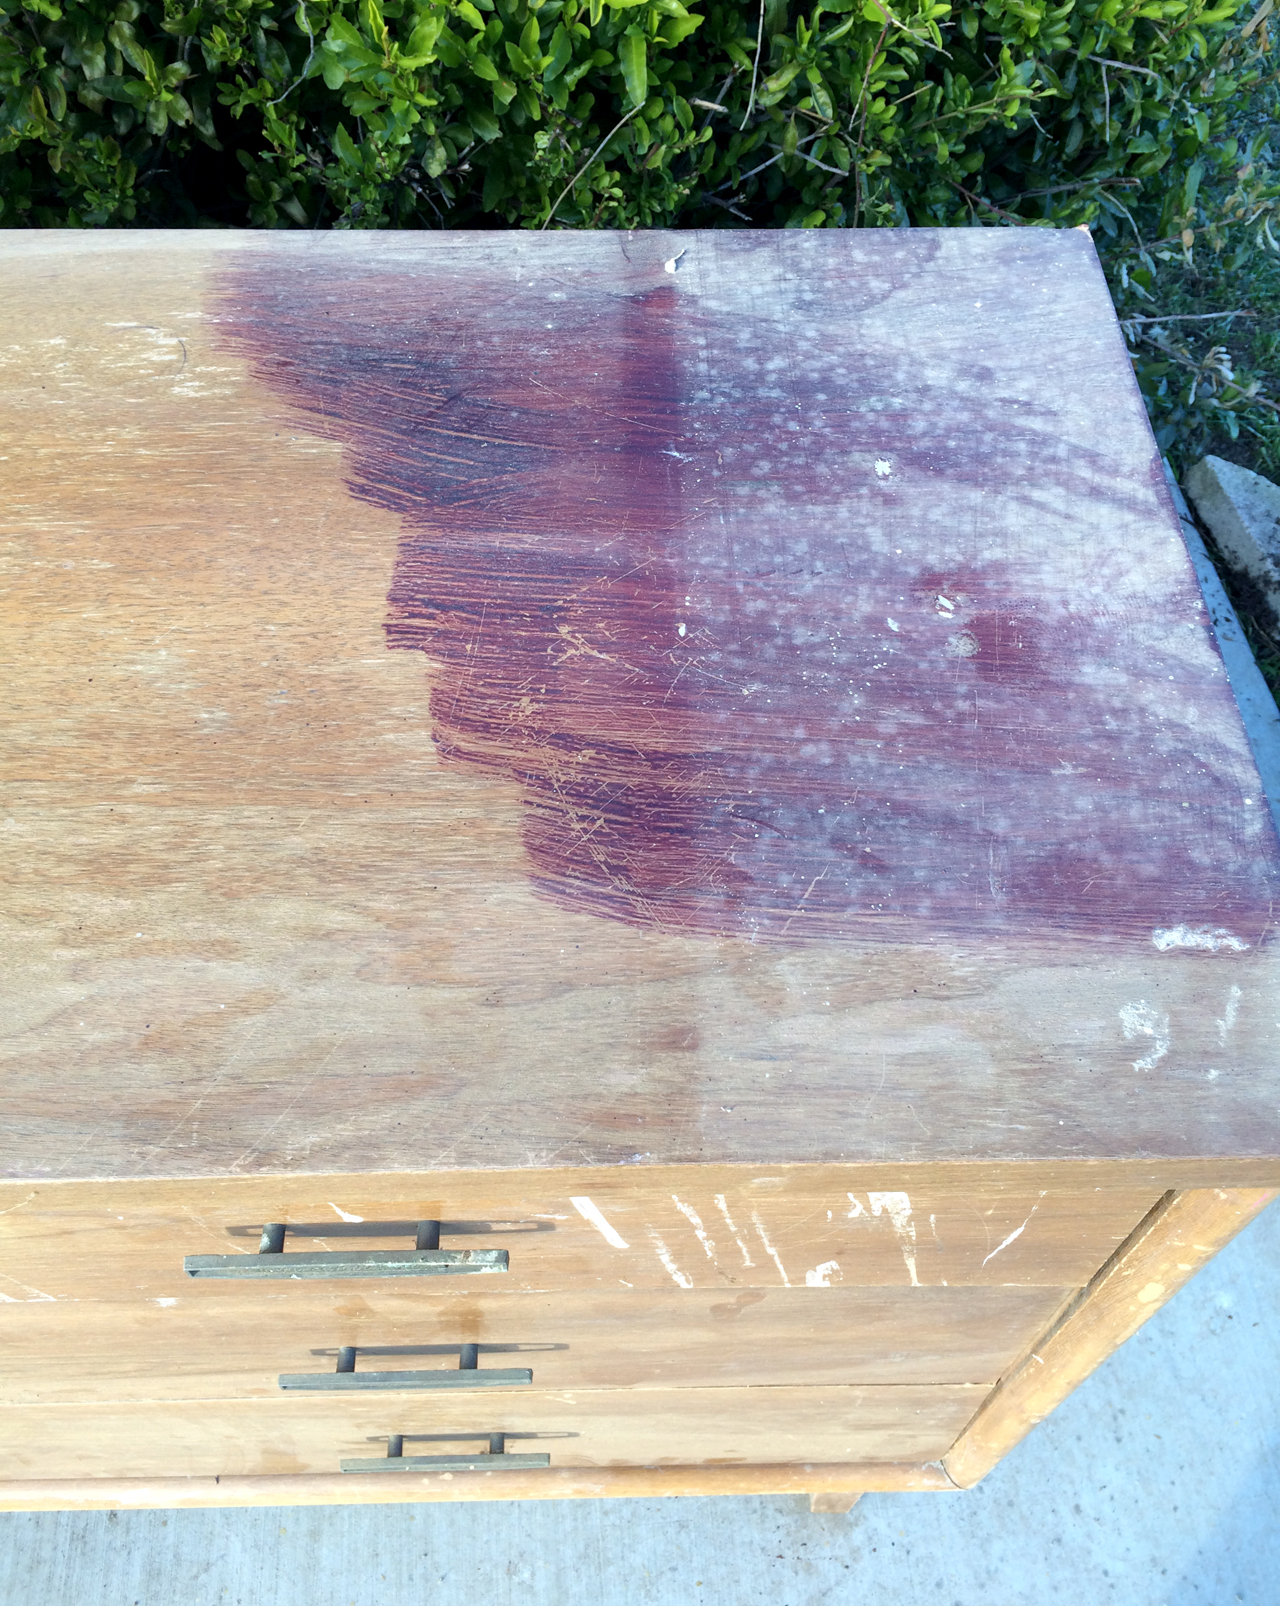
The Outside of the Dresser: I carefully sanded down the top and the sides with the orbital sander and 100 grit sandpaper, making sure not to sand through the veneer. The finish and the dark stain on the side came off surprisingly easily. The top was in pretty good shape, but there were a few large stains that couldn't be fixed. I decided to paint the outside of the piece to cover up the stains, so I went over the entire outside of the piece with 120 sandpaper to prep it for painting.

After doing some research, I decided oil-based enamel would be the way to go with this. It gives a hard, durable finish when it's cured which sounded great to me. I had never worked with oil-based paints before this, so it was a learning experience! They have fumes, so it's important to do the painting outside in a well-ventilated area. Also choose an area that doesn't have a lot of dust or bugs - this paint takes a while to cure and you don't want stuff sticking to the finish. I combined 1 quart of gloss white with 1 quart of flat white to get a semi-gloss finish and it was more than enough. Here are a few tips for working with oil-based paints:
  • Apply thin coats, starting on one side of the piece and working to the other side. 
  • Once you've put the paint down, leave it alone! Brush strokes will self-level as it dries. Going back to try to smooth out a mistake will only mess up the finish. You can always sand areas with fine sandpaper between coats to disguise bigger mistakes, but most will clear up on their own. 
  • Make sure not to use too much paint on vertical surfaces because it may sag and leave drips. Again, these can be fixed by sanding between coats.
  • Clean your brush with paint thinner
Overall, the outside of the dresser took 4 coats of paint (looking back I should have primed it beforehand, but I didn't have any oil-based primer so I skipped that step). I let each coat dry at least 24 hours before lightly sanding and recoating.

You can't see it in the photos, but I drilled an opening in the back of the piece for power cords to pass through, so I could use it as a tv stand later on. I just used a 1" hole saw in the back. All I would have to do is remove one of the drawers behind the center doors and use that area as a shelf for tv components, etc.

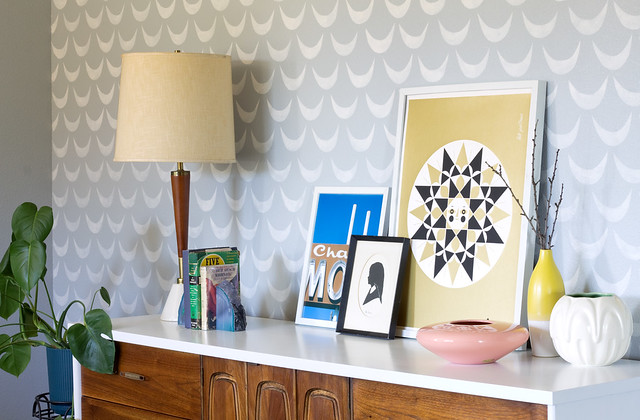
I put it all back together and I couldn't be happier with the finished piece! I love that it still has most of the warm wood tones, but the white exterior gives it a clean, modern look.
Mid Century Dresser Makeover - After Mid Century Dresser Makeover - After Mid Century Dresser Makeover - After
What about you - have you ever fixed up an old piece of furniture? Did you learn any good tricks along the way? I'd love to hear about them!

Have a great weekend! 

10

Bedroom Makeover: Mid-Century Dresser Makeover - Before

Tuesday, March 3, 2015

Mid Century Dresser Makeover - Before

It's killing me a little bit how long my bedroom makeover is taking, but that's real life, folks! I'm doing all of the work myself to help cut costs and delegating manual labor to the weekends so I can get my other work done during the week so progress is a little slow. Nonetheless, I'm nearing the finish line on one of my bigger projects for the bedroom and I'm so excited to share!
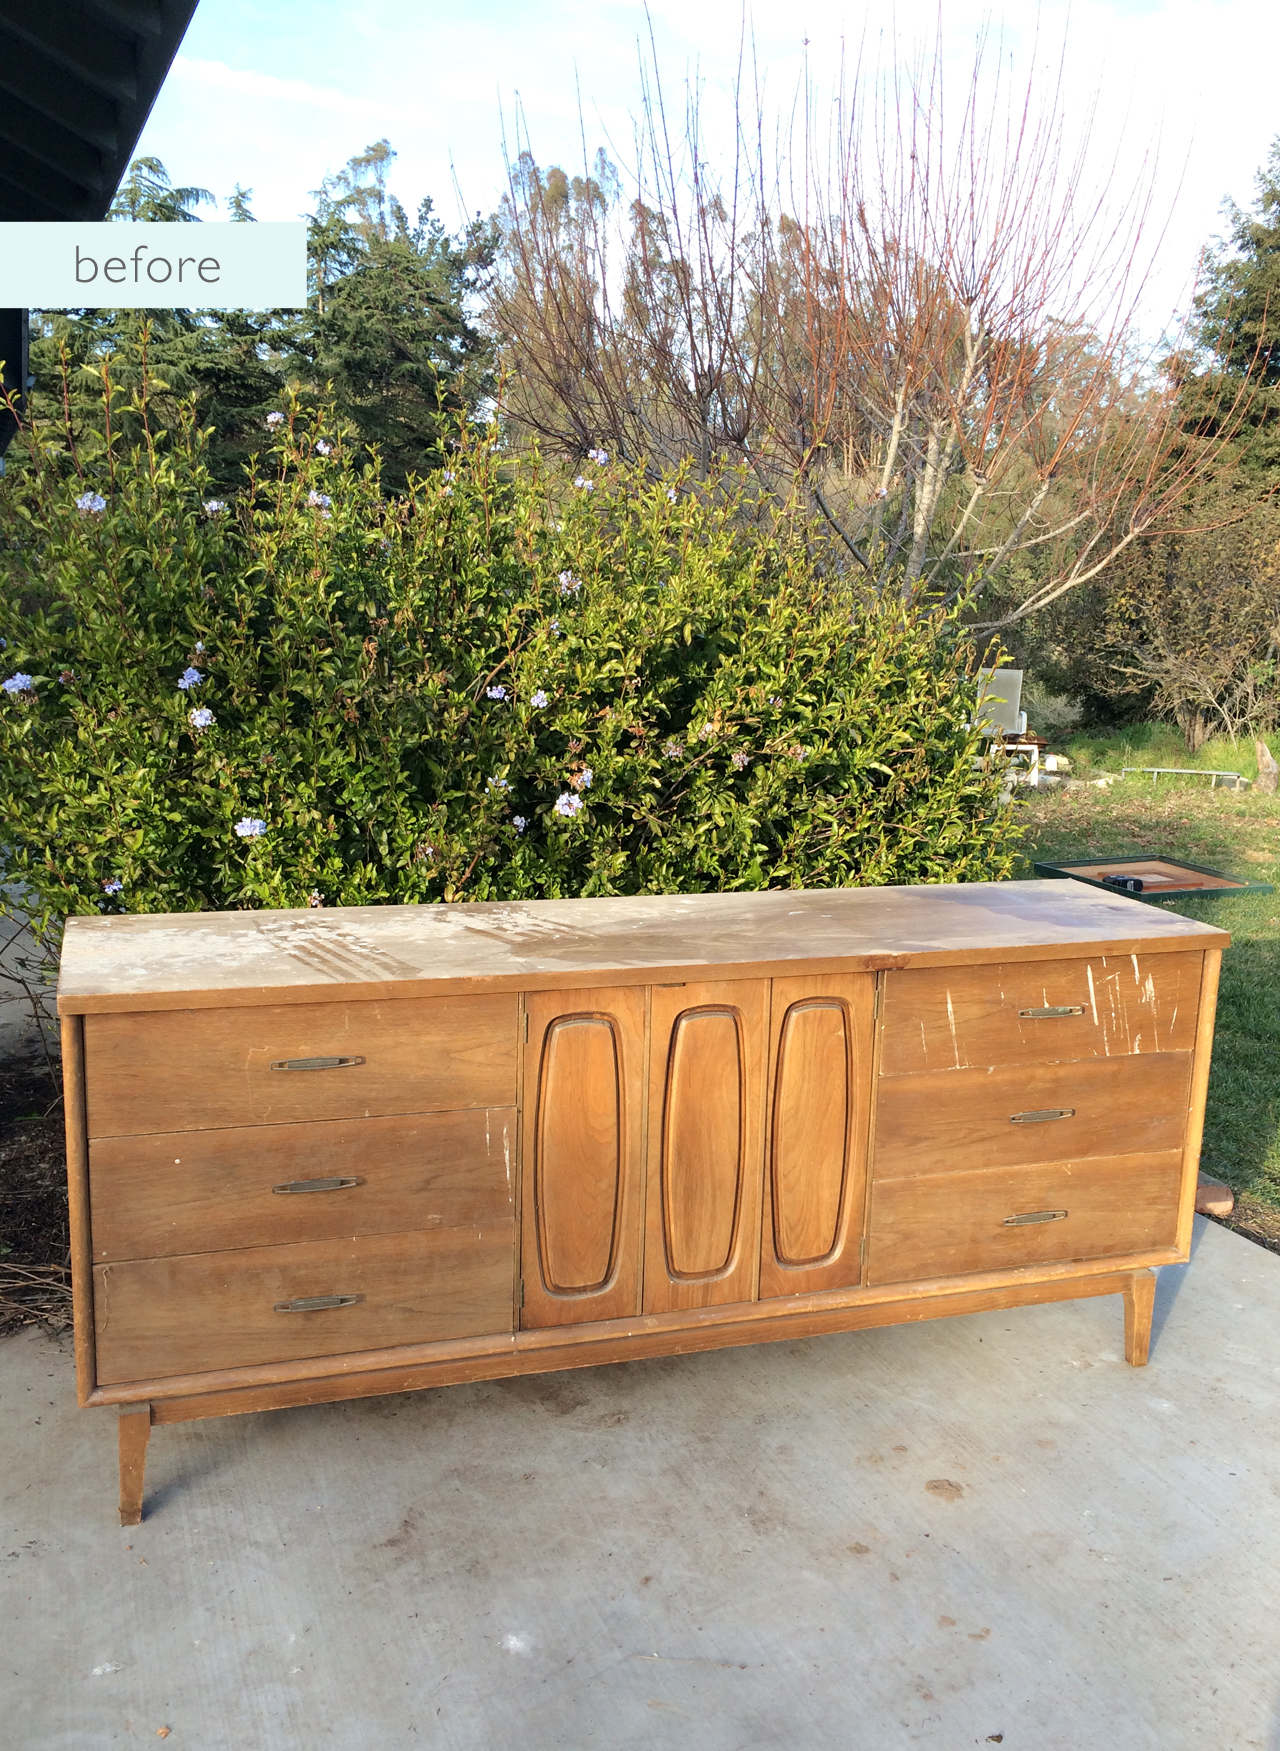
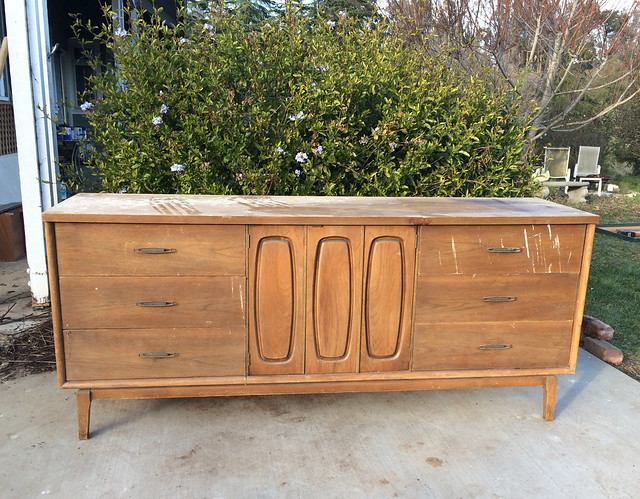
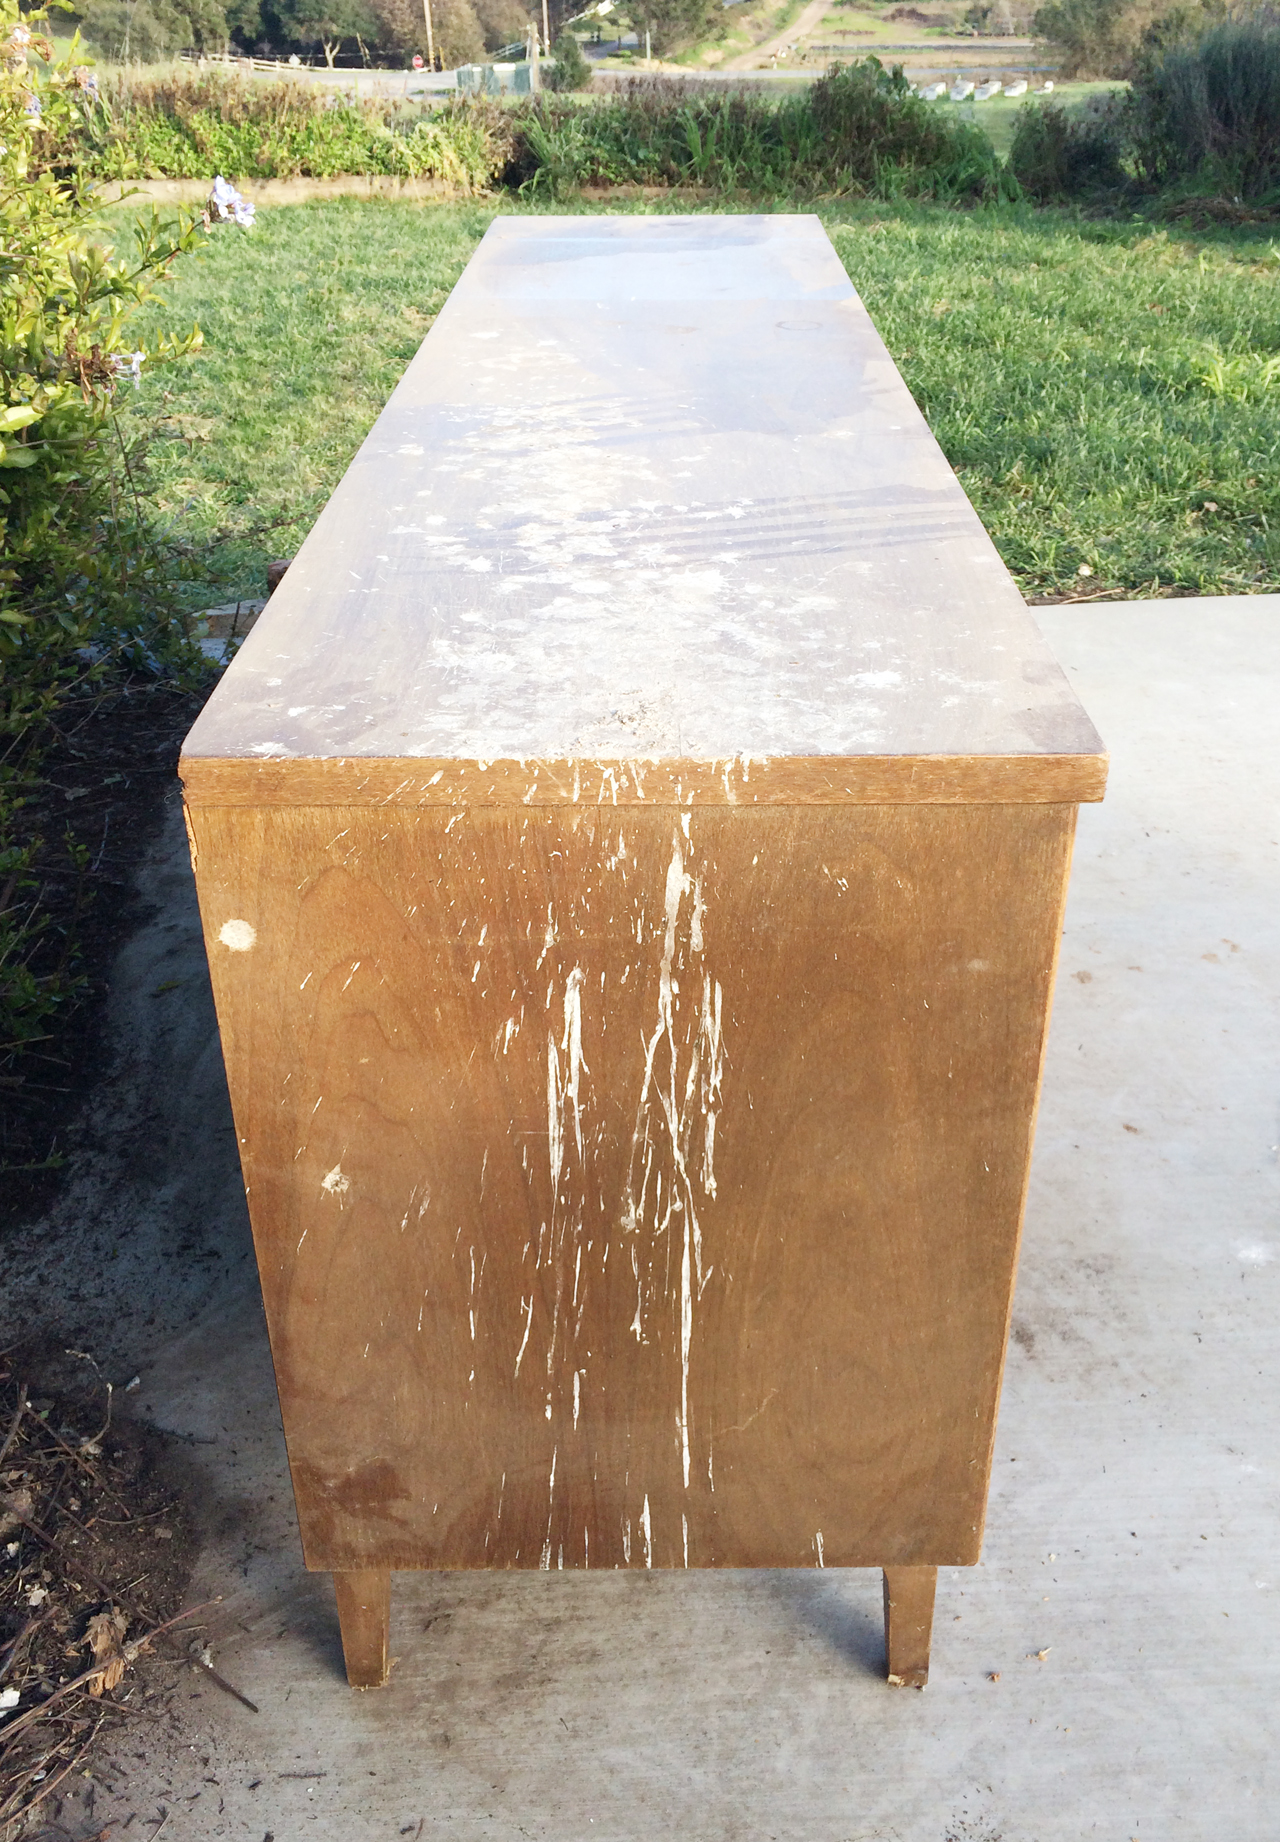
I stumbled across this mid-century dresser on the way to the grocery store one evening. It was on the side of the road, the only remnant from a church rummage sale earlier that day. I pulled a u-turn in the nearest driveway and handed over a $10 bill to the church lady for it. Sounds like a good deal, but I won't lie, a couple times I wondered if I paid too much. I seem to have a knack for wanting to save vintage things that are covered in bird poop...

Mid Century Dresser Makeover - Before Mid Century Dresser Makeover - Before

Enter screaming emoji here! Yeah, it was pretty nasty, but I was hoping with all my might that it could be salvaged, because how cool would it be to be able to say I paid $10 for a 6' long mid-century dresser with tons of storage?

The good:
  • The form is great - classic mid-century, low, long dresser/credenza
  • Pretty good condition - no sagging or broken pieces besides a drawer front that needed some glue
  • It's big! 9 total drawers (there are 3 behind the center doors) so it would be a useful storage piece
  • Cool hardware 
Mid Century Dresser Makeover - Before

The bad:
  • The finish (in addition to being under layers of dust and bird poo) was really dry and yellowed
  • There was a patch of dark stain that someone hastily smeared over one side of the top before realizing that it was a bad idea
  • The veneer on the top was stained in a couple areas 
  • The hardware would need some elbow grease
The good and bad:
  • It's not solid wood and would never be an heirloom piece. While it can be tricky to restore veneer, there's some freedom in knowing that I could confidently fix it up to make it work for my space without screwing up something my future grand kids would want to take to Antiques Roadshow. I'm pretty sure they'd laugh at the particle board top...
Come back later this week when I reveal the finished piece and show you exactly how I did it! 


vitamini handmade © All rights reserved · Theme by Blog Milk · Blogger