2

New DIY Gallery

Monday, March 25, 2013

DIY Gallery

I've been working on making the blog easier to navigate, so I made a DIY Gallery page! Each project has a photo that links the full blog post when you click it. Click away! I haven't added a link to it on my homepage yet, but in the meantime, you can find it right here.

3

Bumps in the road.

Thursday, March 21, 2013

I started out this week feeling inspired with a bunch of new ideas for the blog and my Etsy shops. I've been thinking that I need to quit wasting time just THINKING about things I want to do and start DOING them. Sounds good, right?!

flowering crabapple

Then Tuesday rolled around and my mom had a stroke. It was completely out of the blue and totally unexpected. She's barely 60 years old, healthy, doesn't smoke or drink, isn't overweight. I spent most of the last two days at the hospital with her and my sisters, talking to nurses and doctors trying to figure out what happened and what the damage is. The big thing that was affected is her speech.

So I'm still coping and trying to get through the days with a level head. My mom has a couple road blocks ahead, but hopefully we'll be able to get her into speech therapy as soon as possible. This is all very new, but if there's anything that this experience has reminded me, is that I really do need to start DOING because life is short and you never know where the next bump in the road will be.

But even in a place as depressing as a hospital parking lot, there were promising glimpses of spring on these beautiful flowering crabapple trees. Enjoy your first spring weekend of the year and make sure to hug your loved ones and let them know they're important to you.

134

DIY: Hand-carved stamps.

Tuesday, March 19, 2013

Hand carved stamps
Stamp carving is one of those activities that I tried a few years ago and didn't pick up again for a while. I recently bought a few stamp blocks and decided it would be a fun break from working on tax spreadsheets. If you're in the same position, I highly recommend it! Just remember to get those taxes done before April 15th!

Hand carved stamps

Back to the stamp carving! Here's what to do if you'd like to try it, and what you'll need:
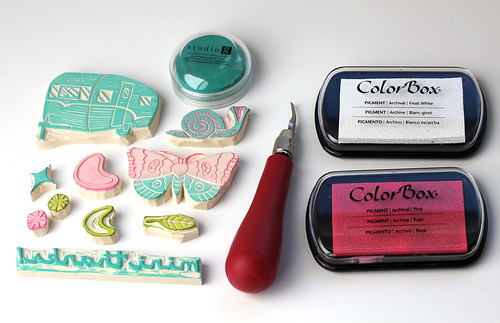
  • Speedball lino carving set. The handle comes with 5 interchangeable cutting blades.
  • Carving block. I've used both a pink Speedball block called Speedy Carve, and a white block called Speedball Speedy-Cut. I like the Speedy-Cut much better because it is thicker and doesn't require a wood or acrylic backing after the stamp is carved. Larger stamps may require this, but mine were never more than a few inches across.
  • Simple line drawings and shapes.
  • Stamp pads. I like pigment ink pads.

Sketch out a simple design. Straight lines are easier to carve than complex curvy lines, so keep that in mind when you're starting out. A leaf shape is a good one to start with. Sketch it in pencil on plain paper or tracing paper. Flip the paper over and lay on the block. Fit it into a corner so you can use the rest of the block for other stamps. Burnish, or rub, the reverse side of the paper with a bone folder, the smooth side of a spoon, or even your finger, to transfer the pencil linework onto the block.

Hand Carved Stamps
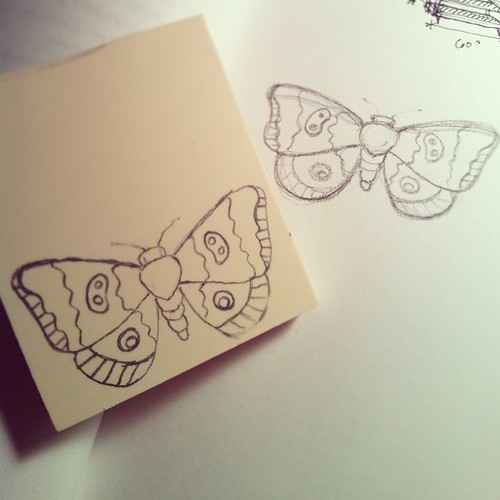
A moth from my sketchbook, transferred onto the stamp block.

Start with a steady hand and always cut away from yourself. Using a #1 blade, apply gentle pressure and push the blade into the surface of the block at an angle. Don't push so hard that the entire U-shaped blade goes under the surface of the block, just the lower portion. Be careful; the blades are sharp! Using this technique, carve out the pencil lines. It's better to carve with long, fluid strokes rather than short gouging digs. Rotate the block as needed to carve the curved lines. In some situations I've found that moving the block is easier than moving the blade to get the cuts just right.
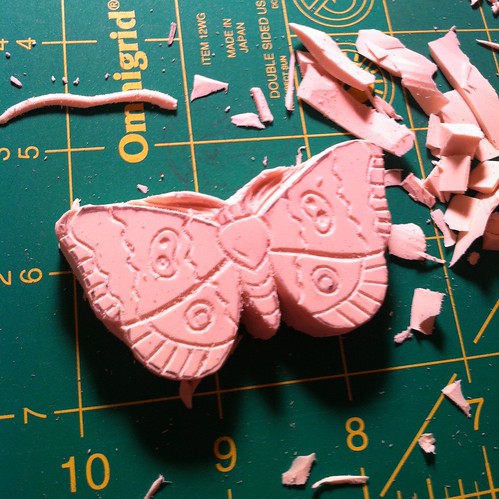
Hand carved moth stamp
Moth block carved!

Once the fine lines are carved, switch out the #1 blade with a #5 blade. Carve away the outside of the stamp. When the outside of the shape is clear and carved away, use an X-Acto knife or the flat blade that came with your set to cut the shape from the rest of the block. Wash it with warm water and gentle soap. Let dry.

Stamp it into the stamp pad, and try a couple test on scrap paper. If your stamp looks good, you're done! If there are some areas that need refining, go back and re-carve/remove those areas, and test it with the ink pad until you get it right. Stamp away with your 100% unique stamp!

Hand Carved Stamps
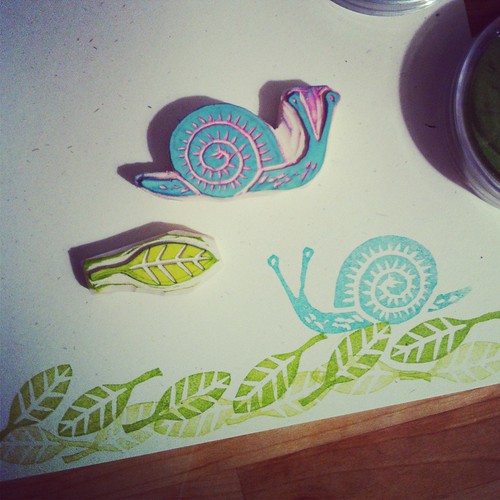
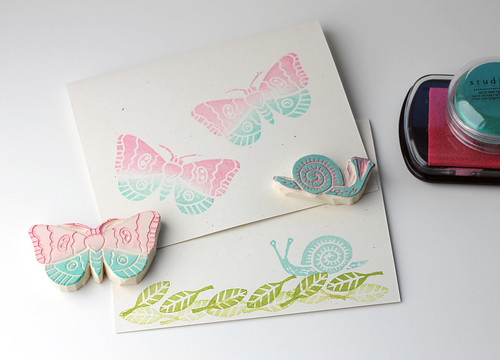
Simple leaf and snail stamps combine to make a fun spring-time card.
Varying the amounts of ink on the stamps can achieve different looks.

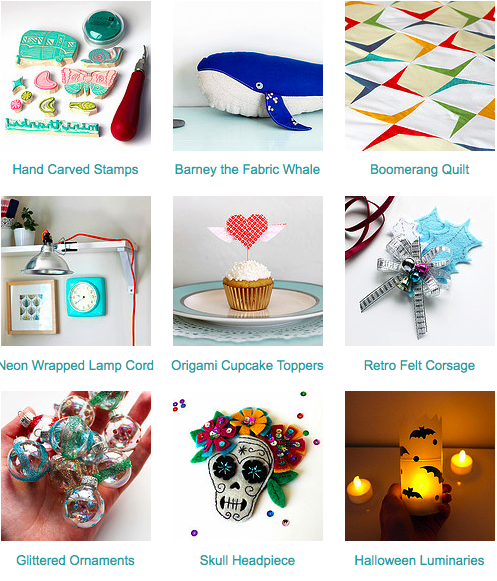
As with any craft technique, skill improves with practice, so keep at it. I've found that stamp carving is a very relaxing and therapeutic activity. Here are a few stamps I carved over a couple of evenings. I ran out of blocks, but I can't wait to get more!

Hand Carved Stamps
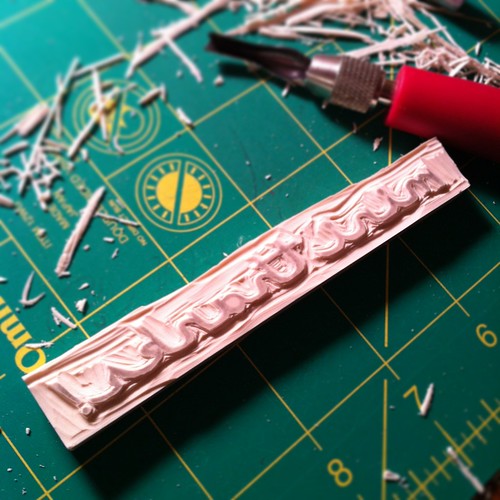
Trying my hand at text that reads "mini thanks!"
Remember, when carving words, they need to be carved in reverse!

If you're looking for a challenge, try carving words! It's tricky!

Hand carved stamps
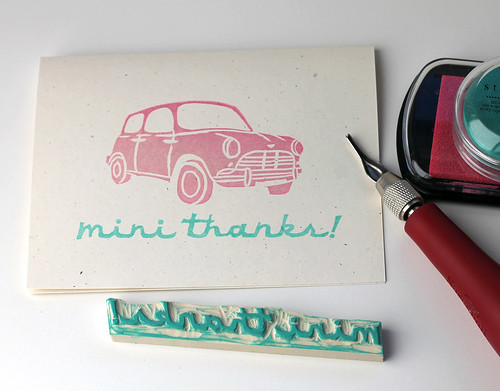
Text and image stamps combine to make this cute Mini Cooper card!
I'll be listing sets of these in my shop!

Hand carved stamps
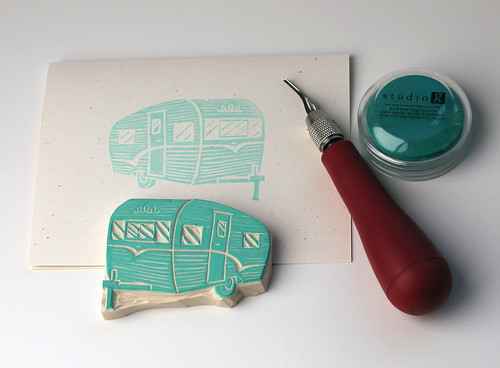
I couldn't resist trying my hand at a vintage-style trailer!
The fine lines were time consuming, but I love the effect.
Once you've carved stamps of your own, use them to create greeting cards, decorate packaging (I've been stamping that classic Mini all over my Vitamini shipping materials!), make framable art pieces, etc. If you use the correct ink, you can even stamp on fabric.

If you've been thinking about trying your hand at stamp carving yourself, I highly recommend it! I hope my project helped illustrate the process and inspired you to give it a whirl.

*Project and photos by Casey/Vitamini Handmade. All opinions my own.

3

In the works.

Friday, March 15, 2013

Friday is almost over, but there's still time to wish you a good one! I'm thrilled that the weekend is finally here - maybe I'll have a chance to catch up on some sleep and actually adjust to this time change! I've been developing a few new products for both Etsy shops that I can't wait to get photographed and listed. But, till then, here's a little peek at my newest creation for my vitamodern shop, if I don't end up keeping it all for myself.

Retro Vases Fabric by Vitamodern

Have a wonderful weekend!

2

Welded art.

Wednesday, March 13, 2013

Richard Starks Sculptures
Silicon Valley had its first sunny Sunday in a while here a couple weeks ago, so I made the trip out to my uncle, Richard Starks' place in Gilroy, California to check out his sculpture garden and workshop. I hadn't been out for a visit in a while and knew I'd be in for a treat, as he's been keeping busy forming, welding, grinding, and polishing many literally TONS of new sculptures. (Get it? Weight, not quantity. Those things are heavy!)

Richard Starks Sculptures Richard Starks Sculptures

He and my dad made hobbies of welding and metalworking as kids. It shouldn't be surprising that he became a high school shop teacher. Over the years he's created anything and everything from gym equipment, to custom car parts, to decorative wall hangings. Now that he's retired, he spends his free time sketching large-scale sculptures and building them, mostly out of cor-ten steel, in his workshop.

Richard Starks Sculptures Richard Starks Sculptures Richard Starks Sculptures
A peek inside his indoor gallery (that's him in the red). Spiders and I have never gotten along, but I love the spider web wall hanging! This pelican is another one of my favorites. In the background you'll see photos of other pieces (on the left is some memorabilia from my grandfather's travels around the world with his cruise band! The drumhead says "Tommy Starks and the Pajaronians").

Many of his pieces are dynamic geometric shapes with complex curves. They look different from all angles. I especially liked how the rusty orange fluid forms compliment the green of the surrounding planting.

Richard Starks Sculptures Richard Starks Sculptures
Apparently, Yahoo! thinks he's pretty cool, too. He was featured on their front page last week!

Richard Starks Sculptures
This giant boot and axe piece is currently taking the showcase spot in his front yard.

His pieces are currently being showcased in Napa and Sonoma Valley wineries, in Northern California towns, and in private collections. Check out his website for more photos of his work and a peek inside his workshop.

2

Mad Friday.

Friday, March 8, 2013

This week has been a total whirlwind! In addition to typical day job work, the CPRS Conference and Expo rolled into town. For a landscape architect, that means meeting lots of new vendors and potential clients, some field trips, and a couple happy hours. I'm feeling a little run down this morning, but I really perked up when I saw these Mad Men set photos over on Whorange. Donald Draper and classic cars. Seriously, just what I needed.

Mad Men S6 Set Photos
And wow, check out Harry Crane's 'burns! Mad Men will be kicking off Season 6 in less than a month. Yahoo!!

[photo credit:  Bauer Griffin, PacificCoastNews.com, via Whorange and Tom + Lorenzo]

15

DIY Neon Wrapped Lamp Cord

Tuesday, March 5, 2013

DIY Neon Wrapped Lamp Cord

I ordered a simple clip lamp from Amazon to help illuminate my work area. I loved its industrial look, but wasn't thrilled with the ugly brown cord. And since I planned on clipping it to a shelf, I knew the cord would be visible at all times. I decided on a simple fix. A wrap! Here's all you'll need to do it yourself:

DIY Neon Wrapped Lamp Cord

  • Clip Lamp. Also available at most hardware stores
  • Nylon twine in your color of choice, I used this great orange
  • A clothespin or other clip, to hold the string when you need to take a break

DIY Neon Wrapped Lamp Cord

To begin, tie a square knot at the top of the cord near the fixture leaving a tail of a couple of inches. Keep the rest of the cord bundled up in a twist-tie to make it easier to work with, and begin wrapping towards the plug end of the cord, over the string tail that you left from the knot. Here's the wrapping method that worked best for me:

DIY Neon Wrapped Lamp Cord DIY Neon Wrapped Lamp Cord DIY Neon Wrapped Lamp Cord

Wrap the string around the cord 5 or 6 times somewhat loosely. Holding the string tight with one hand, scoot the loops up, tightening the string until the wrap is tight and continuous. Push the string up to make sure that it's tight and doesn't have any gaps revealing the cord underneath. That's it!

DIY Neon Wrapped Lamp Cord

The wrapping takes a while: I did mine over the course of a week or so in the evenings while I watched movies or caught up on tv shows. When you need to take a break, just clip the cord and string to keep your spot and prevent unraveling. When you get to the very end, tie a few knots. Add a dab of glue to the knot if you need to. Trim the end of the string, and enjoy your snazzy new clip lamp!
 DIY Neon Wrapped Lamp Cord

3

Pics from my weekend.

Monday, March 4, 2013

Downtown Santa Cruz The California central coast was blessed with some lovely spring-like weather over the weekend and it felt so great to get outside. I took a morning trip to Santa Cruz yesterday and spent a couple of hours with my sister and brother in-law just walking around, looking at plants and trying to identify them, admiring historic homes, and enjoying the day. Here are a few of my favorite photos from our walk.

Above: Nice rock garden composition with California Poppy, Dusty Miller, Aeoniums, and a great grouping of Echeveria-like succulents. There's even one growing in the craggy boulder!

Downtown Santa Cruz

Great purple glass headlamps on this old Ford truck.

Downtown Santa Cruz
I love this big antique sign. Frogs in suits and top hats are always cool, if you ask me!

Downtown Santa Cruz
This street sign made me laugh and reminded me of Little Shop of Horrors.

Downtown Santa Cruz
Everywhere we went there were magnolias blooming! This white one had spectacular flowers and the sky above it was so deep blue.

Downtown Santa Cruz
Speaking of deep blue, this cool pressed tin sliding door and window moulding. Cool contrast of colors and materials on this building.

Downtown Santa Cruz
Very nice Leucospermum (cordifolium?) accented by reddish/brown boulders.
  Downtown Santa Cruz

Quite an intimidating cactus! This one was probably 8'-10' tall!
All photos are my own, taken with my iPhone 4. 

Happy Monday!
 

vitamini handmade © All rights reserved · Theme by Blog Milk · Blogger