3

All Things Paper, a new book!

Wednesday, February 27, 2013

I was so excited over the weekend to hear from my friend Ann from All Things Paper that the book she's been hard at work on, All Things Paper: 20 Unique Projects from Leading Paper Crafters, Artists, and Designers is currently being printed and will be out on bookstands on May 28th! I'm especially excited because one of my own projects, Citrus Slice Coasters is included as well!

All Things Paper

The book is available for pre-order here on Amazon, so make sure to checkout with a copy next time you're doing some online shopping. I can't wait to try out the projects myself. Happy Wednesday!

2

Ahh, friday.

Friday, February 22, 2013

I've had such a busy week! Deadlines at my day job, my living room painting project, and car problems (poor MINI!) have been keeping me on my toes over the past few days. But I'm happy to report that my walls are all painted and living room is generally put back together so I'll have some time to work on DIY projects this weekend! Yay! Have a good one!


I love this image of San Francisco, from here.

1

Painting is painful.

Monday, February 18, 2013

Blooming.
I try to keep things on the positive side here on the blog, but seriously, painting hurts. Muscles I never knew I had have not only made themselves known, but they're also demanding Advil. I spent most of this last weekend painting my living room. I shared photos of my chips and samples here, but ended up choosing something a little lighter than my first choice, Behr Gold Coast White, which started looking really yellow after I painted a sample in the corner. So I went with Cancun Sand instead and I'm really happy with it so far. I have one wall left to paint, but the room is already so much lighter and brigher. I feel like I don't even have to turn as many lamps on at night as before.

Behr Cancun Sand

I just need to power through the pain(t) for another night or so until it's done. Then I'll enjoy the product of all my hard work and make a note to myself to only take on a painting project when I need to punish myself for something. :) Thankfully, I did get a chance to get outdoors on Sunday to enjoy the sunshine and commune with nature before I got back to work. Here are a couple of photos from my walk around town. Can you tell I'm having fun playing with the Afterglow app?

Nature pics Nature pics

And, if you've noticed, I've got a shiny new url for the blog. It's just vitaminihandmade.com now! Links should automatically update from my previous address, but if you find they aren't working, make sure to update your bookmark with the new address.

Happy President's Day!

0

Happy Love Day!

Wednesday, February 13, 2013

girardinternationalheart

Happy Valentine's Day, friends!

Alexander Girard's 1967 "International Heart" says love in 16 languages. :)

6

Barney the whale.

Tuesday, February 12, 2013

Barney the Whale 
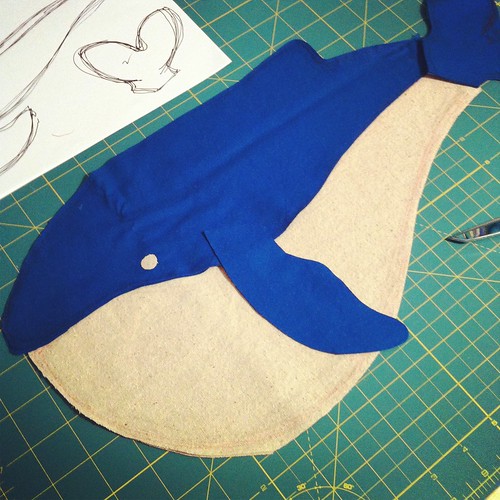
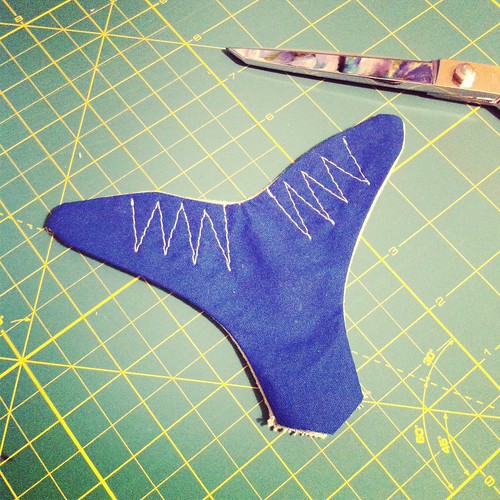
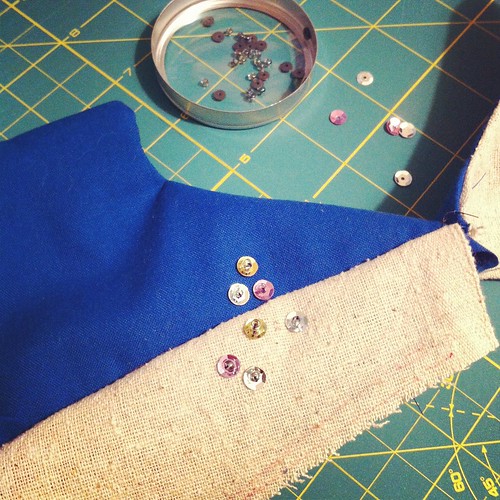
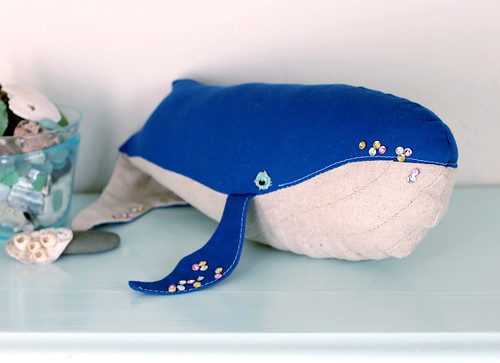
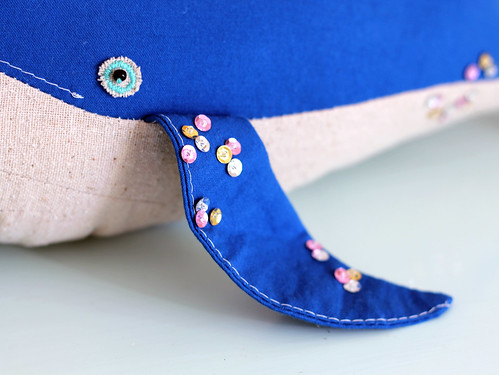
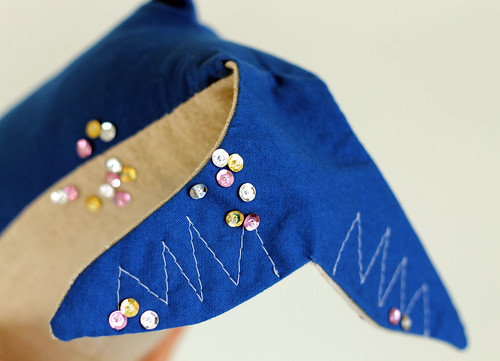
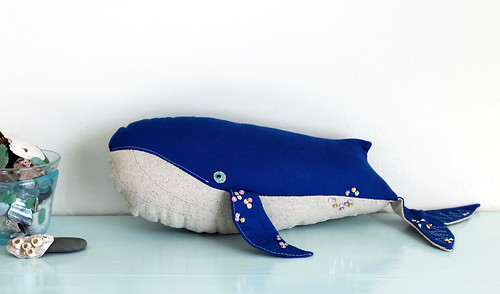
I'm slowly getting more adventurous with my sewing projects, and I'm really having fun with it! Months ago I saw this pin of a fabric whale on Pinterest and thought it was the sweetest. The original pin source is in Finnish, but there were some helpful photographs of the steps. So, last December, armed with some fabric and a little time, I decided to dive in and get started making one for my niece for Christmas!

Barney the Whale

I used a oatmeal fabric for the underside and a vintage deep blue cotton for the rest of the body, fins, and tail. I sketched out some rough pattern shapes on tracing paper, knowing I'd probably make a few adjustments here and there while I was sewing. Once I had all of the pieces assembled I tweaked the seams here and there to get the proportions too look right.

Barney the Whale
Barney the Whale
Barney the Whale

I didn't have any big black beads for the eyes, so I embroidered the oatmeal fabric using blue thread and added a small black bead to the center. I wanted to give this guy a little extra character, so I sewed on silver, gold, and pink sequins for barnacles! Too cute! After that, all that was left to do was to stuff it up and sew it closed. Once the first whale was done, I knew my heart would break giving him away, so I made another one for myself to keep.

Barney the Whale

Here he is! I named him Barney after all of his bling-bling barnacles. :)

Barney the Whale
Barney the Whale

0

Keeping busy.

Thursday, February 7, 2013

I've lived in my current apartment for almost a year now, and all of a sudden I have this nagging desire to paint my living room. The room has one large north-east facing window under a deep porch overhang. Needless to say, it doesn't get much light, and the builders-grade white/beige just looks drab and dingy. The walls haven't been painted in (I'm guessing) about 10 years anyway, so a paint job is definitely overdue. So I'm going to zip over to Home Depot over the weekend and get a couple samples to try out. I read that paints with yellow undertones can help to warm up rooms with little natural light, so those are the paint chips that I selected to try out.
Paint Colors
I taped them up on the wall last weekend and so far this color, Glidden's Gold Coast White (marked on the photo) is my favorite. It's crazy because looks like a light taupe when it's up on the wall, not at all like it looked in daylight and it really changes throughout the day. It's amazing what light can do to colors.

Paint Colors

And now I'm sitting here wondering how I'll unload and move my 6' tall bookcase. Hmm, I'll have to figure it out. No turning back now!

5

DIY: Origami winged heart cupcake toppers

Sunday, February 3, 2013

DIY Origami Heart Cupcake Topper  | www.vitaminihandmade.com
I think my favorite memories of Valentine's Day were from when I was a kid in elementary school. Not only did we get to make our own mail boxes for all the valentines we'd get (so fun), but we usually had a ton of desserts to feast on at the end of the day. What kid doesn't love a sugar rush? These origami heart cupcake toppers are not only fun to make, they remind me of those festive love-themed treats that I enjoyed at school as a kid.

Here's what you'll need:

DIY Origami Heart Cupcake Topper  | www.vitaminihandmade.com
  • Origami paper. 2 3/4" squares worked well with mini cupcakes. Increase the paper size for standard cupcakes
  • Toothpicks
  • Bone folder, if you have one
  • Low-heat hot glue gun

I learned the origami heart technique from this YouTube video. I took photos of each step to help you with the process, but make sure to watch the video if you're confused by any of the transitions. It may be worthwhile to try the technique with a larger piece of paper first to better understand the folds. Let's get started!

DIY Origami Heart Cupcake Topper  | www.vitaminihandmade.com 
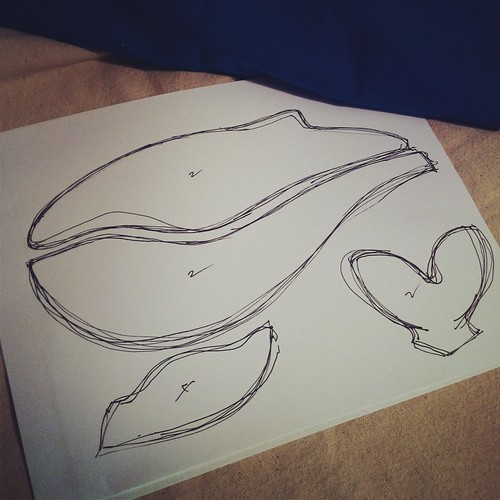
With the pattern or color down, fold the paper square in half, both ways, and unfold. Fold one side of sheet to the center and crease. Flip over. Fold top corner of each side of sheet to the center line. Flip over. Fold each side of the paper to the center line, and unfold. Flip over. Flip the top layer of paper up and flatten (see the video for more detail). Fold bottom section up to meet crease line. Flip the inside flaps out to form the wings. Fold this flap up, in half, and crease.

The next few steps form fan-type folds in the wings, folding each area you just created in half. It can be tricky to get narrow folds in with such a small piece of paper, so use your bone folder to reinforce the creases. Fold each corner of the top of the hearts down and to the center. Fold the heart tops down. Crimp the center of the wings with your fingernail, and flatten and spread out the wing ends.

Flip over. You're done with your winged heart!

DIY Origami Heart Cupcake Topper  | www.vitaminihandmade.com
To attach to the toothpick, flip over, add a dab of hot glue to the top of the toothpick, and scoot it under the wings. I added a weight to the top of the hearts and toothpicks while the glue dried, to ensure that they dried flat.

DIY Origami Heart Cupcake Topper  | www.vitaminihandmade.com
Make a bunch! Add your handmade toppers to a batch of mini cupcakes and they're ready to go to your next Valentine's Day party!

1

Happy weekend!

Friday, February 1, 2013

Tulips

Happy weekend, friends! January just flew by, didn't it? I'm working on a few new DIY projects for the blog and a few new products for my Etsy shops so I've been keeping myself busy!

I recently bought a 50mm lens for my DSLR and I've been having a lot of fun trying it out in different settings. It's really great for low-light detail shots like these that I snapped of my mini tulips as they turn translucent and drop their petals. 

Tulips

Tulips

I took all of these photos in the evening with light from a single lamp. I love the detail the lens captures and the soft bokeh effect it gives to the background. I'll definitely be spending more time getting to know this lens, but so far I'm loving it! Have a wonderful weekend!
 

vitamini handmade © All rights reserved · Theme by Blog Milk · Blogger