




216

DIY Ombre Sequin Ornaments

Wednesday, December 9, 2015

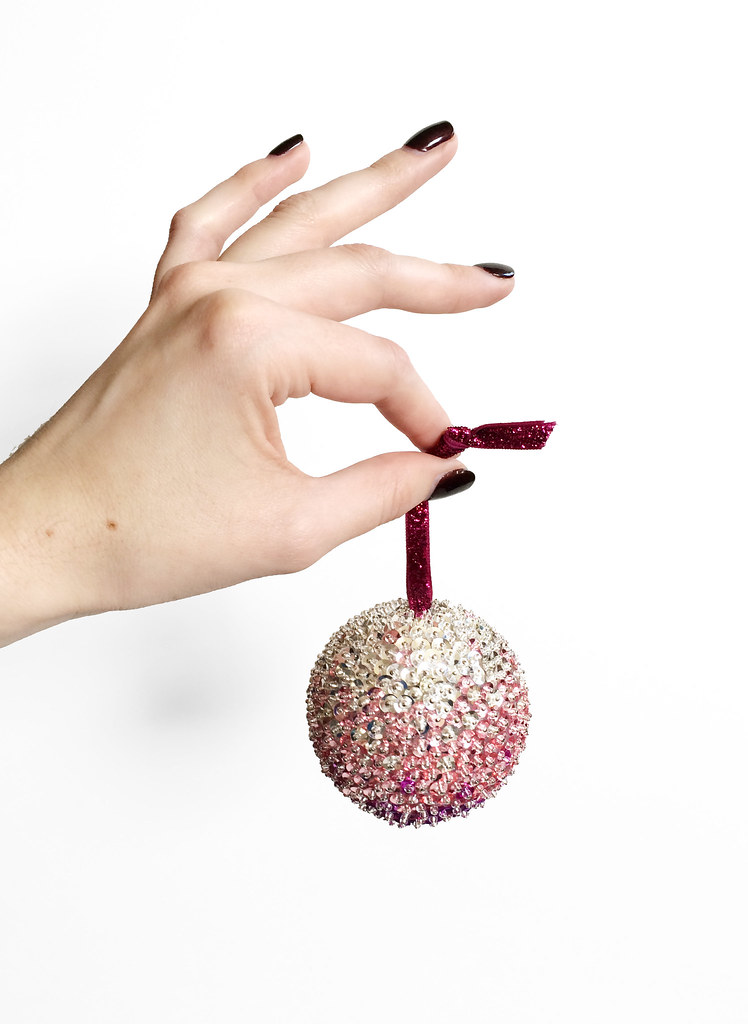
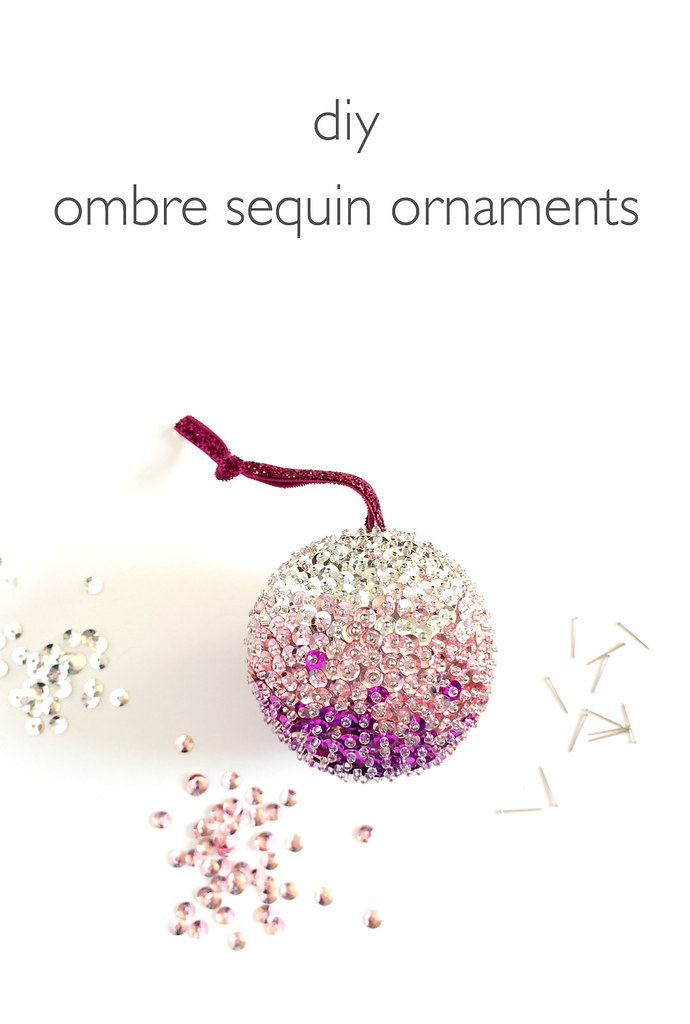
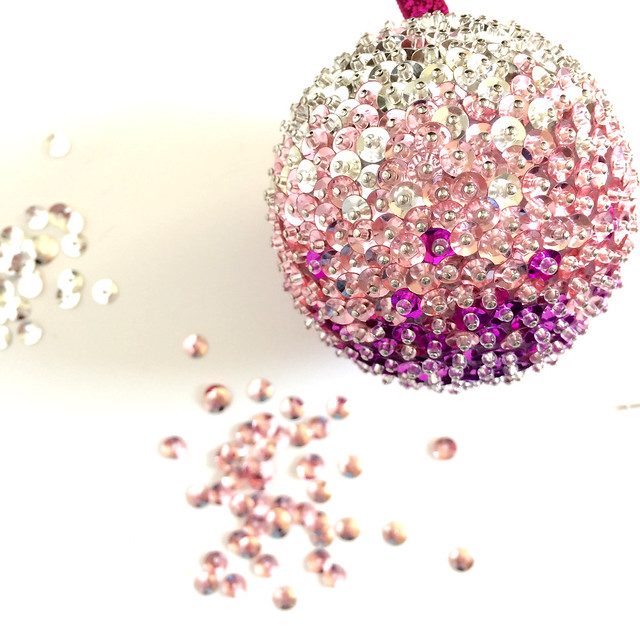
DIY Ombre Sequin Oraments Beaded, sequin-covered ornaments were a popular craft in the 60's and I have distinct memories of admiring them on my grandma's Christmas tree every year as a kid. If it was sparkly, I was all over it and those ornaments were the shiniest things around! I've been meaning to try making my own modern interpretation for years so I finally made the time and came up with these ombre sequined ornaments. I'm so excited with how they turned out! While the materials are really inexpensive and the technique is simple, it takes a while to do. It's not a quick craft by any means! I made mine over a couple evenings, sitting down in front of Netflix (Broadchurch, watch it!) whenever I had the time. This is the sort of craft that will become an heirloom so take your time and don't rush it. It's actually a pretty relaxing activity once you get going and the results are absolutely stunning. No one will believe you made it yourself!

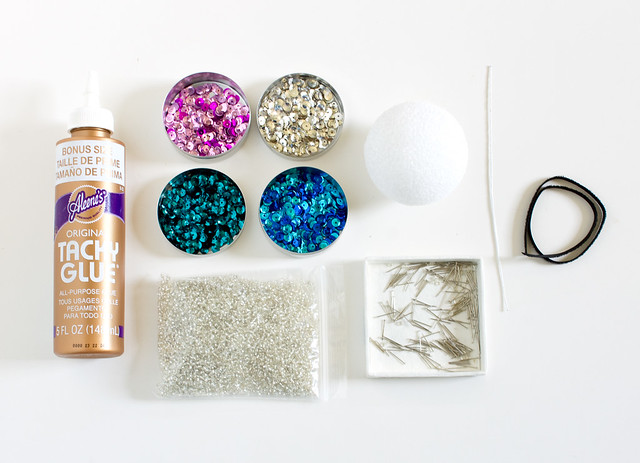
Here's what you'll need:
DIY Ombre Sequin Oraments
  • Sequin pins. These are shorter than regular pins and they come in silver or gold
  • Sequins. You'll need at least three different shades to get an ombre affect
  • Seed beads in the color of your choice. I chose clear with silver lining
  • Tacky glue
  • 2 1/2" Styrofoam balls
  • Ribbon
  • Short length of wire. Any gauge will work
  • A tray or shoebox lid to work on
  • Small containers

DIY Ombre Sequin Oraments

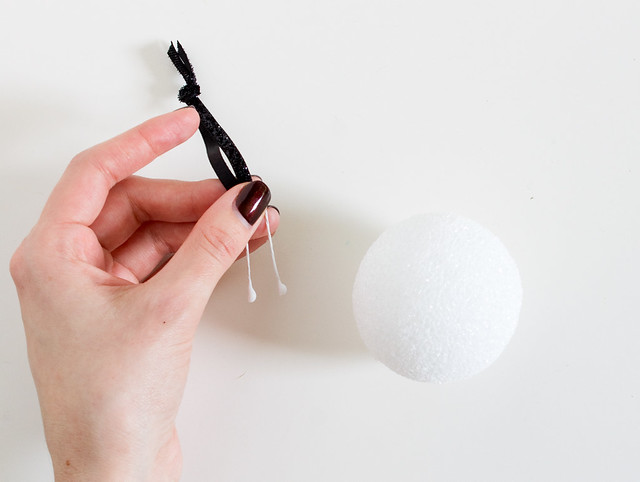
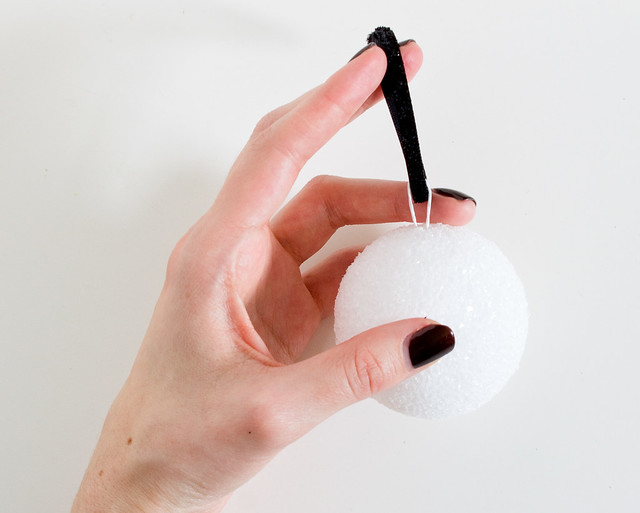
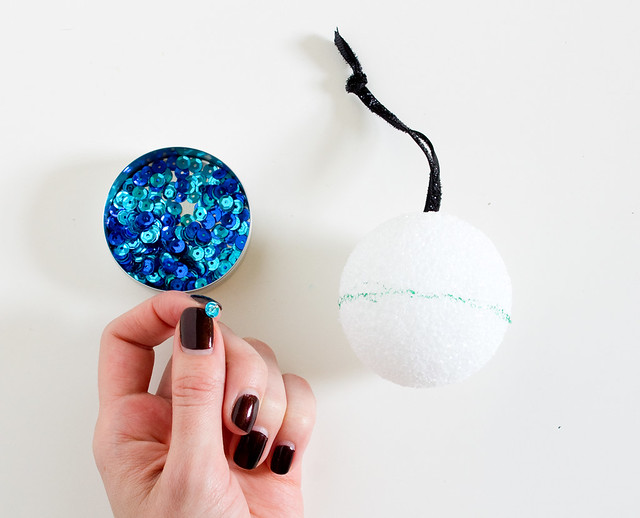
Separate the sequin colors into containers. Pour some of the beads into a shallow container. Cut a length of ribbon about 8" and tie the ends. Make a U shape with the wire, hook the end around the ribbon loop, and add some tacky glue to the ends. Push the wire into the top of a styrofoam ball until ribbon is flush with the top of the ball. Let dry. Draw a line around the center of the ball with a permanent marker, to help guide the ombre design.
DIY Ombre Sequin Oraments DIY Ombre Sequin Oraments

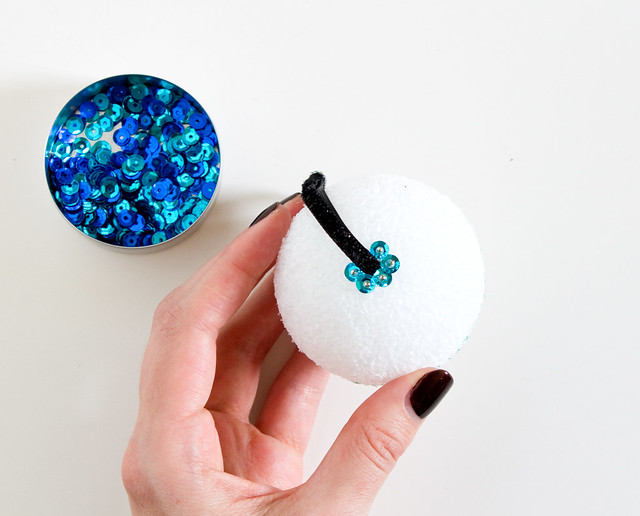
Thread a bead onto a pin, followed by a sequin in your lightest color. Make sure it's right side up - u shape instead of n shape for maximum sparkle! Dip the end of the pin in some tacky glue, and push the pin into the top of the ball right next to the ribbon. Continue adding beads and sequins all the way around the ribbon, slightly overlapping each so the styrofoam doesn't show through.
DIY Ombre Sequin Oraments

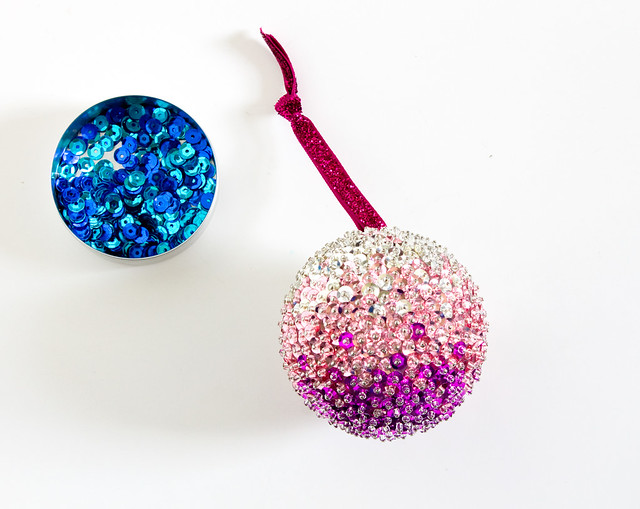
Keep going!! When you get about a third of the way down, start transitioning to the middle color sequins, and then to the last color about 2/3 of the way down. I mixed in a few sequins of the next color here and there to make the color transition more gradual.
DIY Ombre Sequin Oraments

tips
  • Instead of trying to thread each tiny bead onto the pin, just slide the pin through the container of beads. You'll pick one or a few up every time.
  • Squirt out some glue onto a scrap of cardboard and dip the pin ends into into that. Make sure to use glue - you don't want the pins falling out when you're finished! 
  • Set up all of your little containers and glue inside a tray or shoebox lid. This will help keep sequins, beads, and pins from going all over the place if it gets bumped, and makes it easier to put aside when you want to take a break.
DIY Ombre Sequin Oraments DIY Ombre Sequin Oraments

These ornaments are so pretty - even better in person! I love the ombre look, but you can try other designs and patterns, too. Stripes, swirls, polka dots. When I bought my supplies I also got a styrofoam cone that would make the prettiest Christmas tree. We'll see if I have enough time to tackle that! I'm not even done with the aqua/teal/blue one yet! :) I hope you'll try making some yourself!

DIY Ombre Sequin Oraments
P.S. Check out lots of projects from holidays past in the DIY Gallery!

*this post contains affiliate links
51

DIY Easy Fabric Art

Wednesday, July 29, 2015

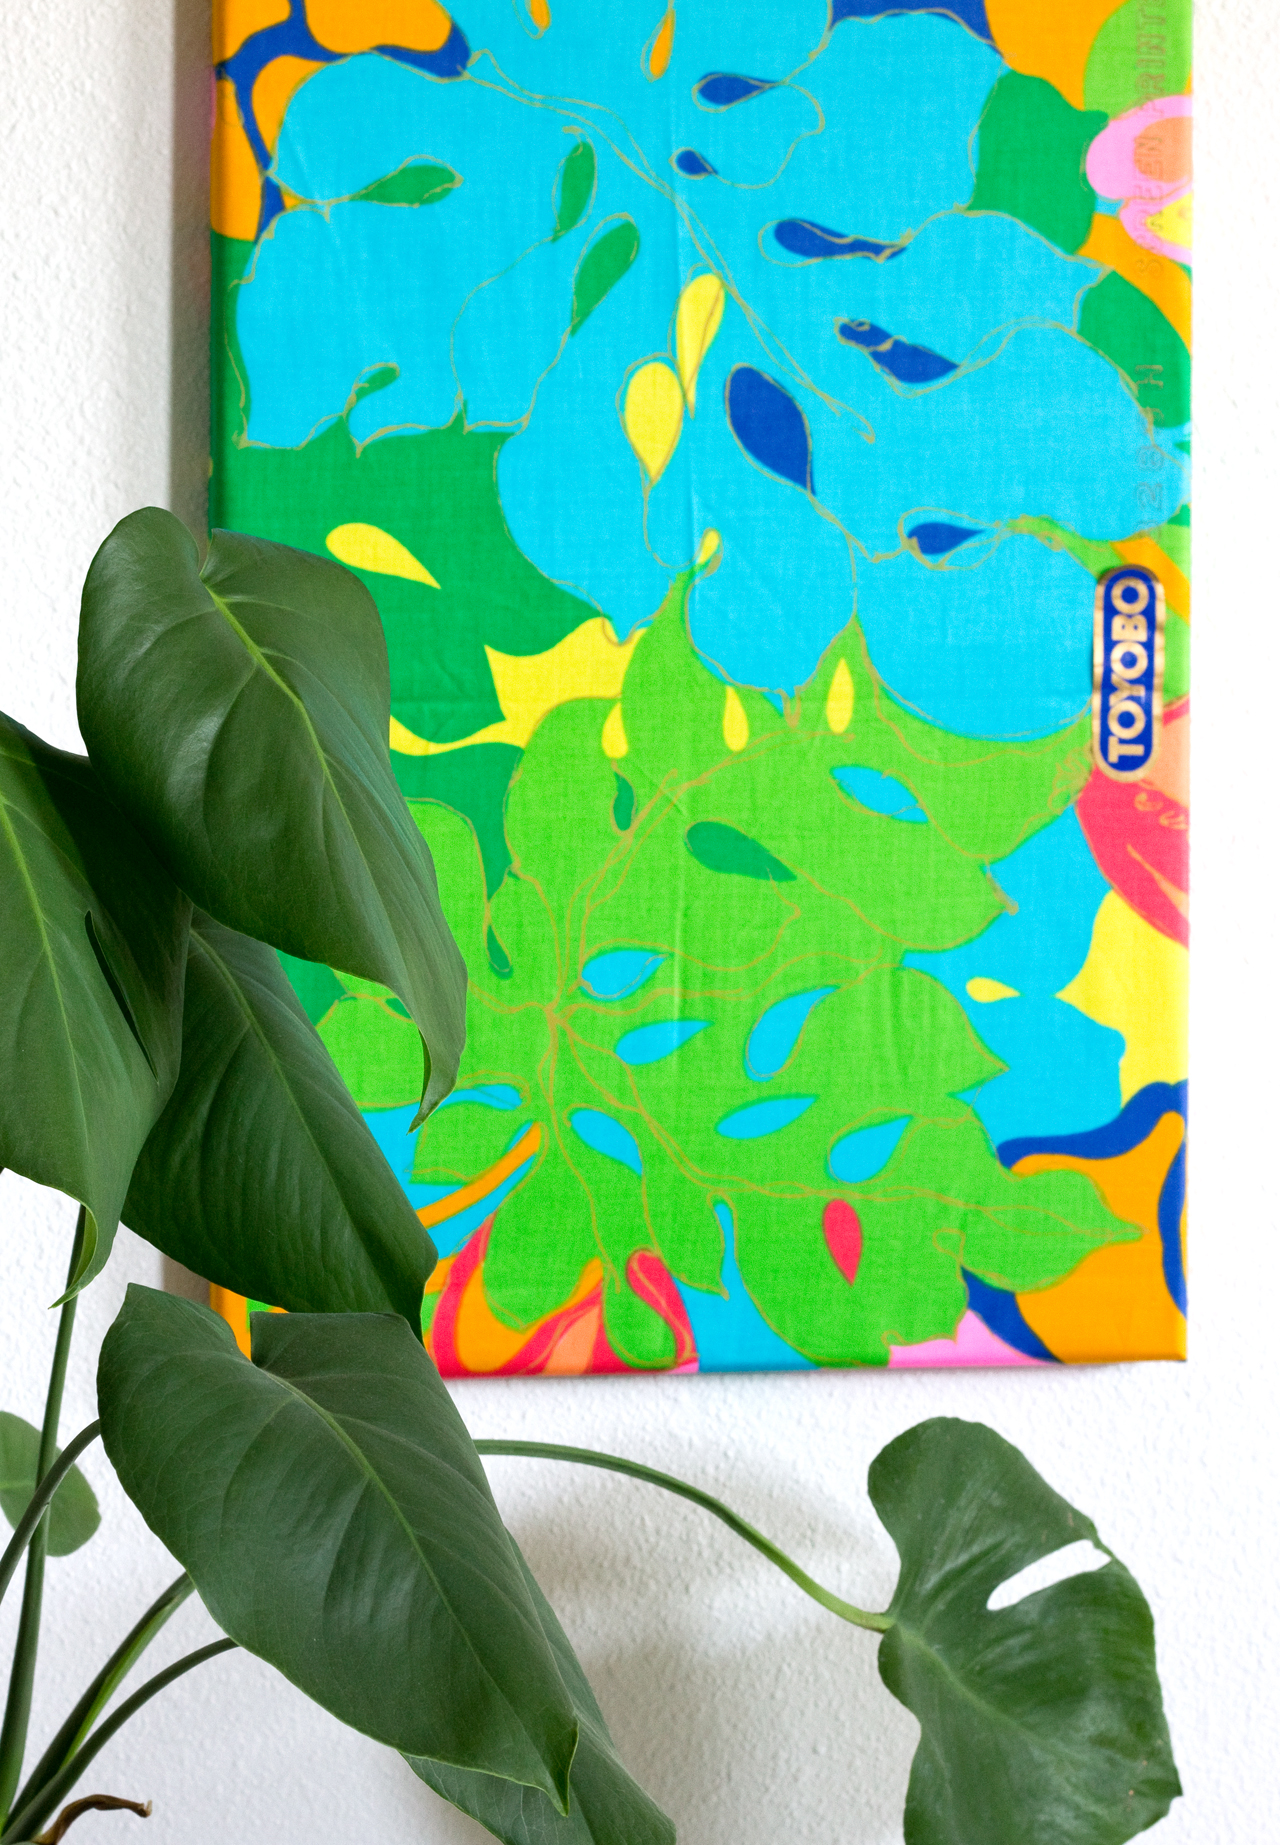
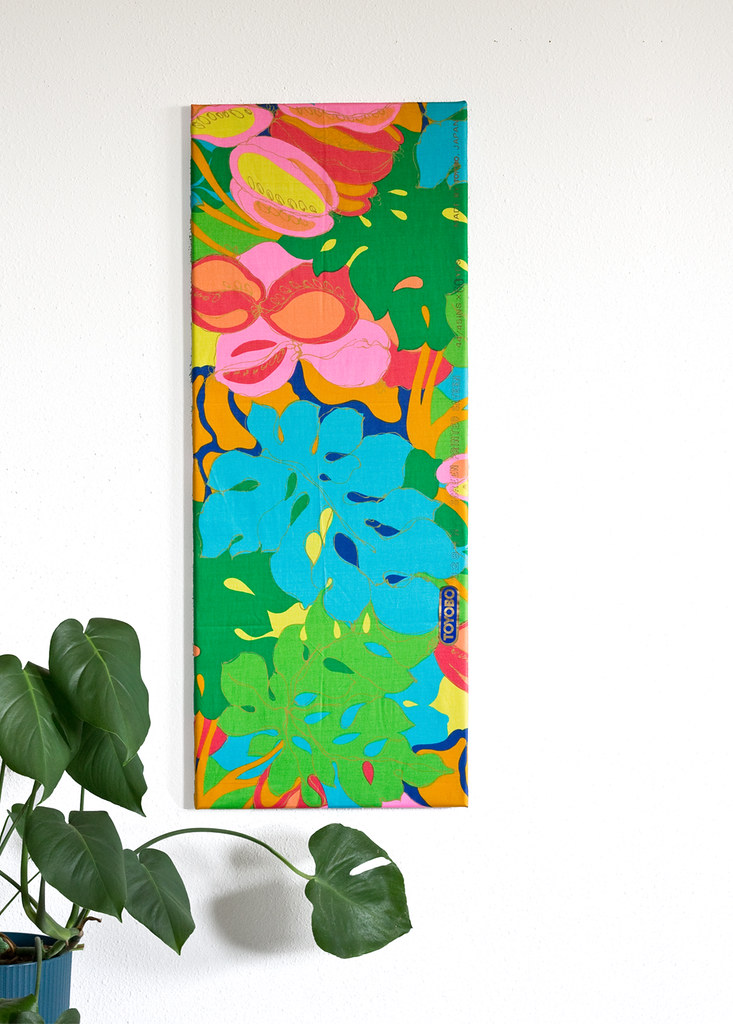
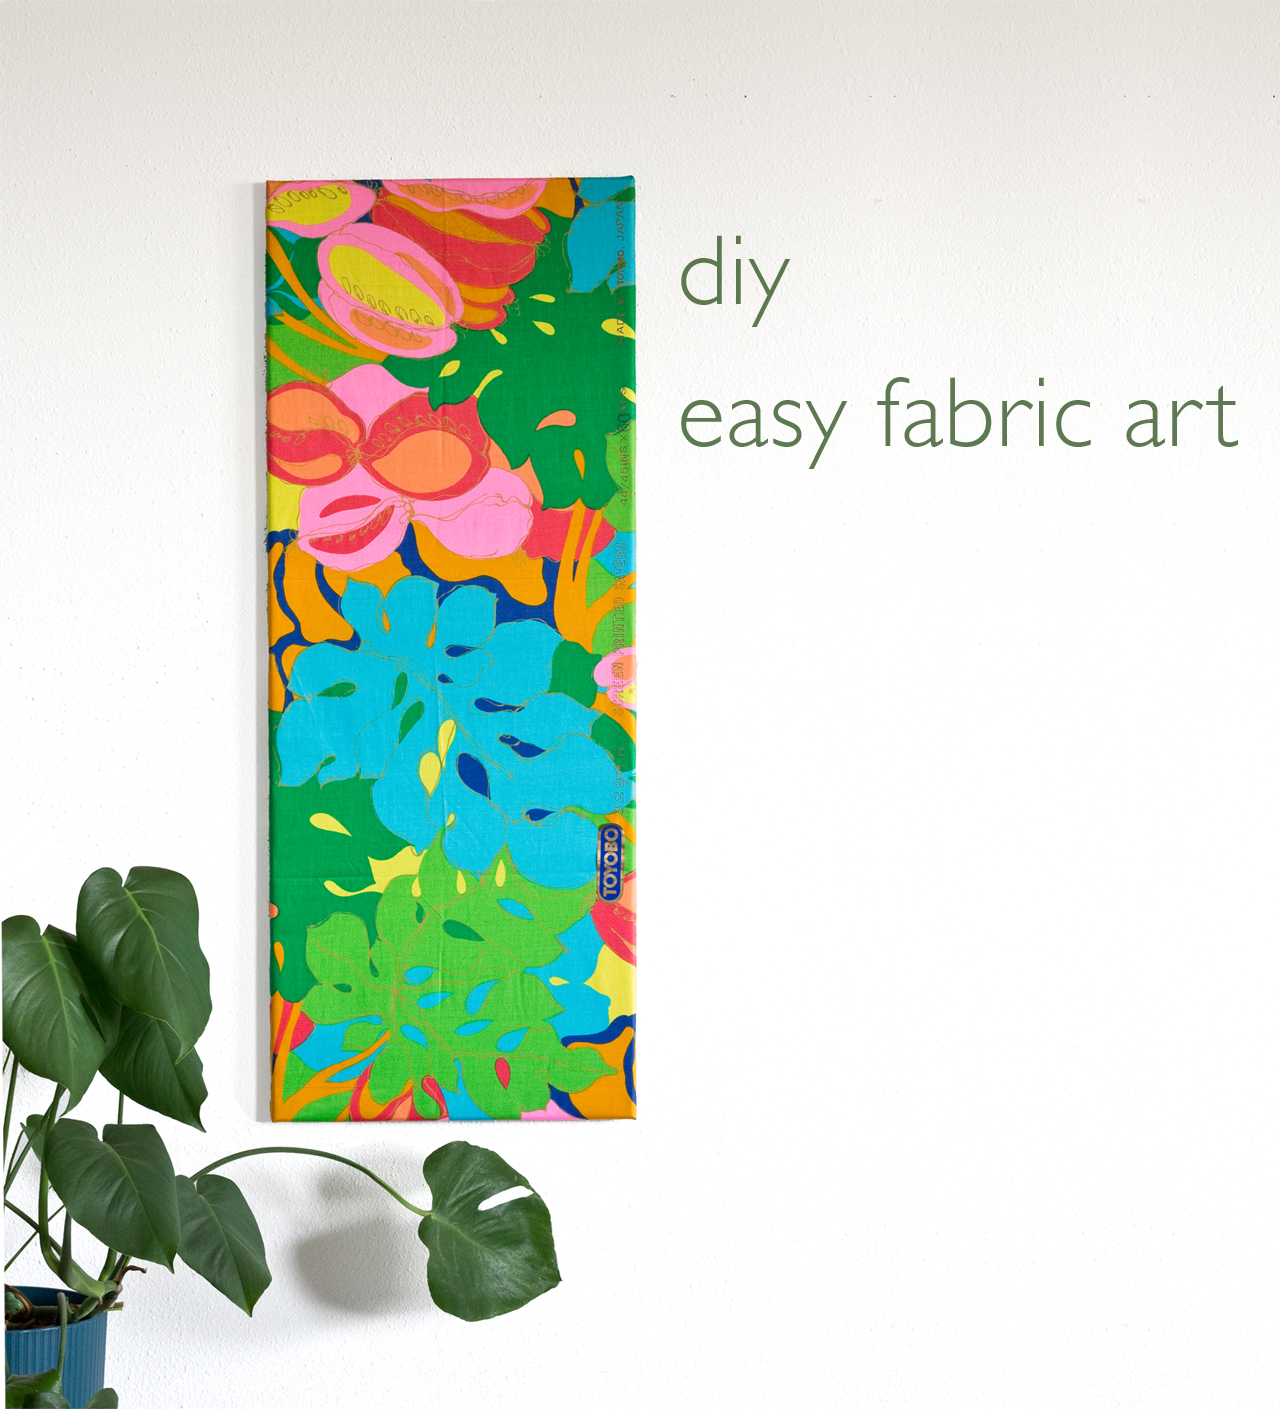
DIY Easy Fabric Art by Vitamini Handmade There's nothing better than a large piece of art in a room, but unfortunately, buying big framed art can get pretty expensive. I found a bunch of great vintage Japanese fabrics at a Buddhist Temple rummage sale last summer for a steal - something like $1 for the whole bundle. The prints were so great but the dimensions of the pieces were odd; long and skinny and not quite large enough to sew much with. I noticed this bright tropical print in my fabric stack the other day and realized it would look great on the wall! I have a trick for hanging up fabric panels on the wall that looks super professional but is actually so easy to DIY and inexpensive, too (the whole thing cost less than $10). I can't wait to share!
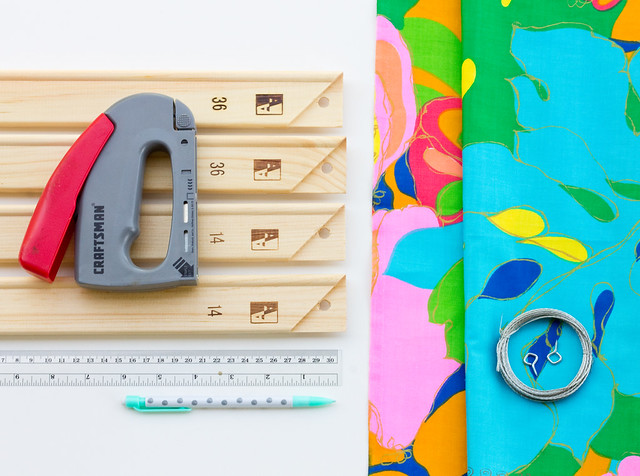
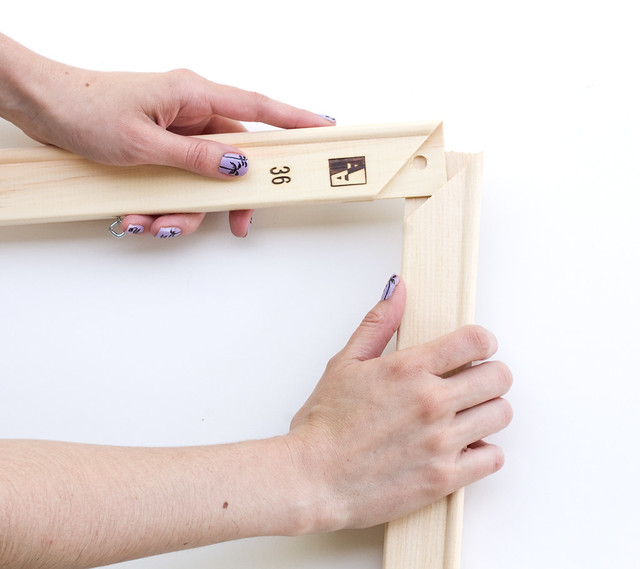
I love using wood canvas stretcher bars for this project because not only are they inexpensive but  you can also buy them in the exact dimensions that you are looking for. That said, this project could also be done with a picture frame.

Here's what you'll need:

DIY Easy Fabric Art by Vitamini Handmade
  • Fabric panel. Large scale prints work better than smaller ones
  • Canvas stretcher bars, 2 for the width and 2 for the height, both about 4" shorter in width and length than your fabric panel. These 4 stretcher bars cost me about $8 total (cool, right?!)
  • Staple gun with staples. I love this Craftsman staple gun. So easy to use.
  • Picture wire and "i" screws
  • Ruler and pencil

DIY Easy Fabric Art by Vitamini Handmade
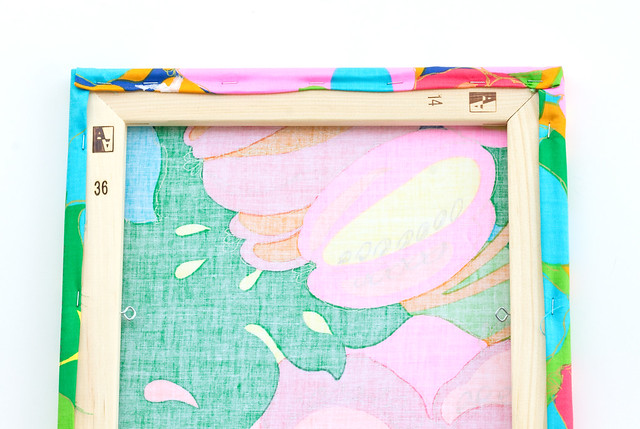
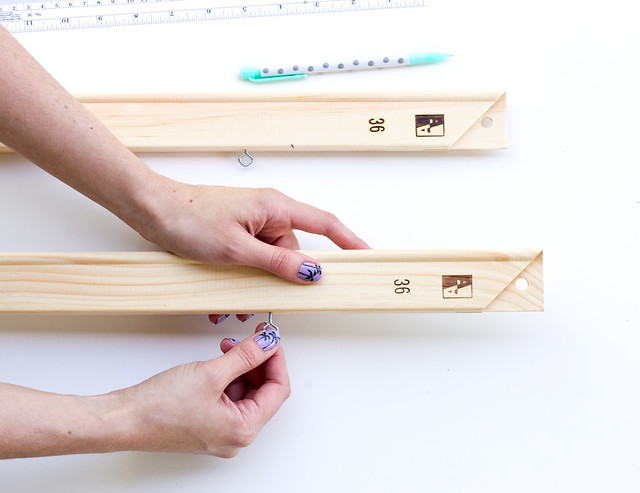
Measure and mark the location for the "i" screws on the vertical pieces. Since mine was tall (14" x 36") I measured 7" down from the top of each side. Twist in the screws.
DIY Easy Fabric Art by Vitamini Handmade
Join the frame pieces. Mine made a pretty sturdy fit, but if yours are loose you can staple over the corners to secure.

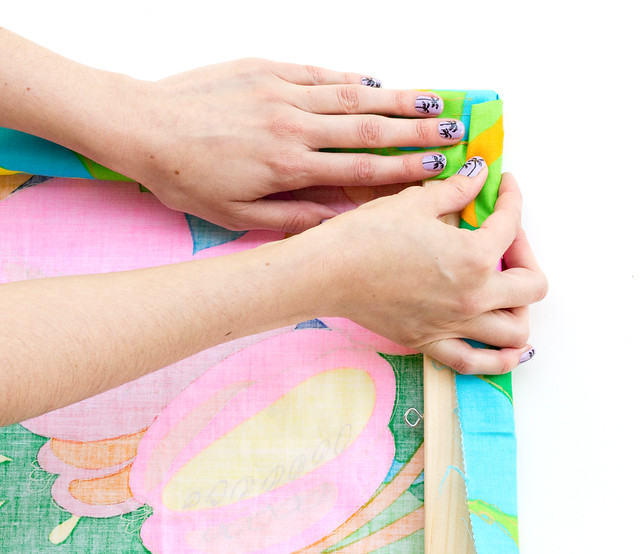
Lay the fabric face down and center the frame over it. Make sure you've oriented the fabric so you know which way is up and the screws are near the top of the panel. Fold the edge of fabric down about half and inch, then fold it over the side of the frame. Staple in the center. Repeat on the opposite side of the frame, pulling the fabric taught before you staple once the center. Repeat on the other two sides. Continue folding over, pulling taut, and stapling on opposite sides, until the fabric is anchored all the way around the frame. DIY Easy Fabric Art by Vitamini Handmade DIY Easy Fabric Art by Vitamini Handmade DIY Easy Fabric Art by Vitamini Handmade
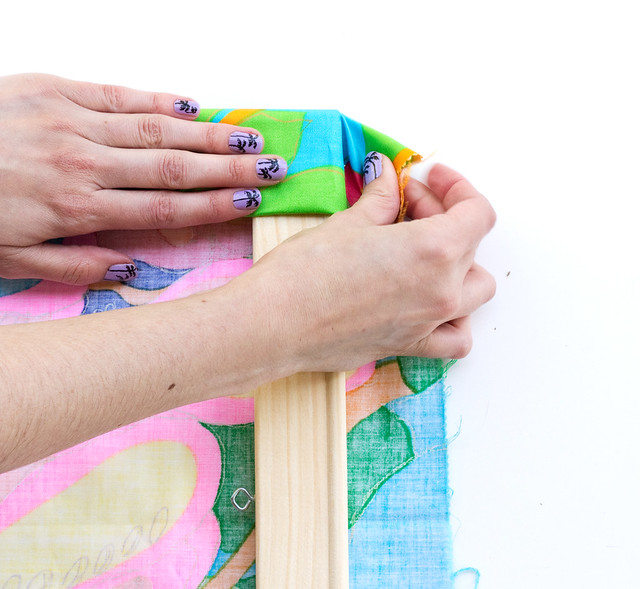
When you get the the corners, fold the fabric like wrapping a present to get a smooth corner and staple.

DIY Easy Fabric Art by Vitamini Handmade
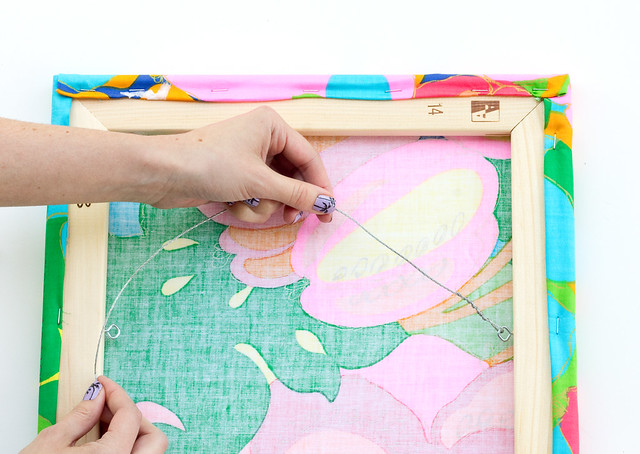
Attach the picture wire to the "i" screws and twist the ends. Done! Hang from a picture hanging hook. Enjoy your big, custom artwork!

DIY Easy Fabric Art by Vitamini Handmade DIY Easy Fabric Art by Vitamini Handmade DIY Easy Fabric Art
This technique is a great way to make a big, high-impact piece of art for just a few bucks. Look for fabrics from your favorite designers to stretch and make art. I have a large scale Marimekko print that I've had hanging up for years. It still looks great and no one can tell it's not an expensive canvas print.

P.S. Like my palm tree nails? Learn how to do it yourself with my palm tree mani diy!

217

DIY Modern Staghorn Fern

Monday, June 22, 2015

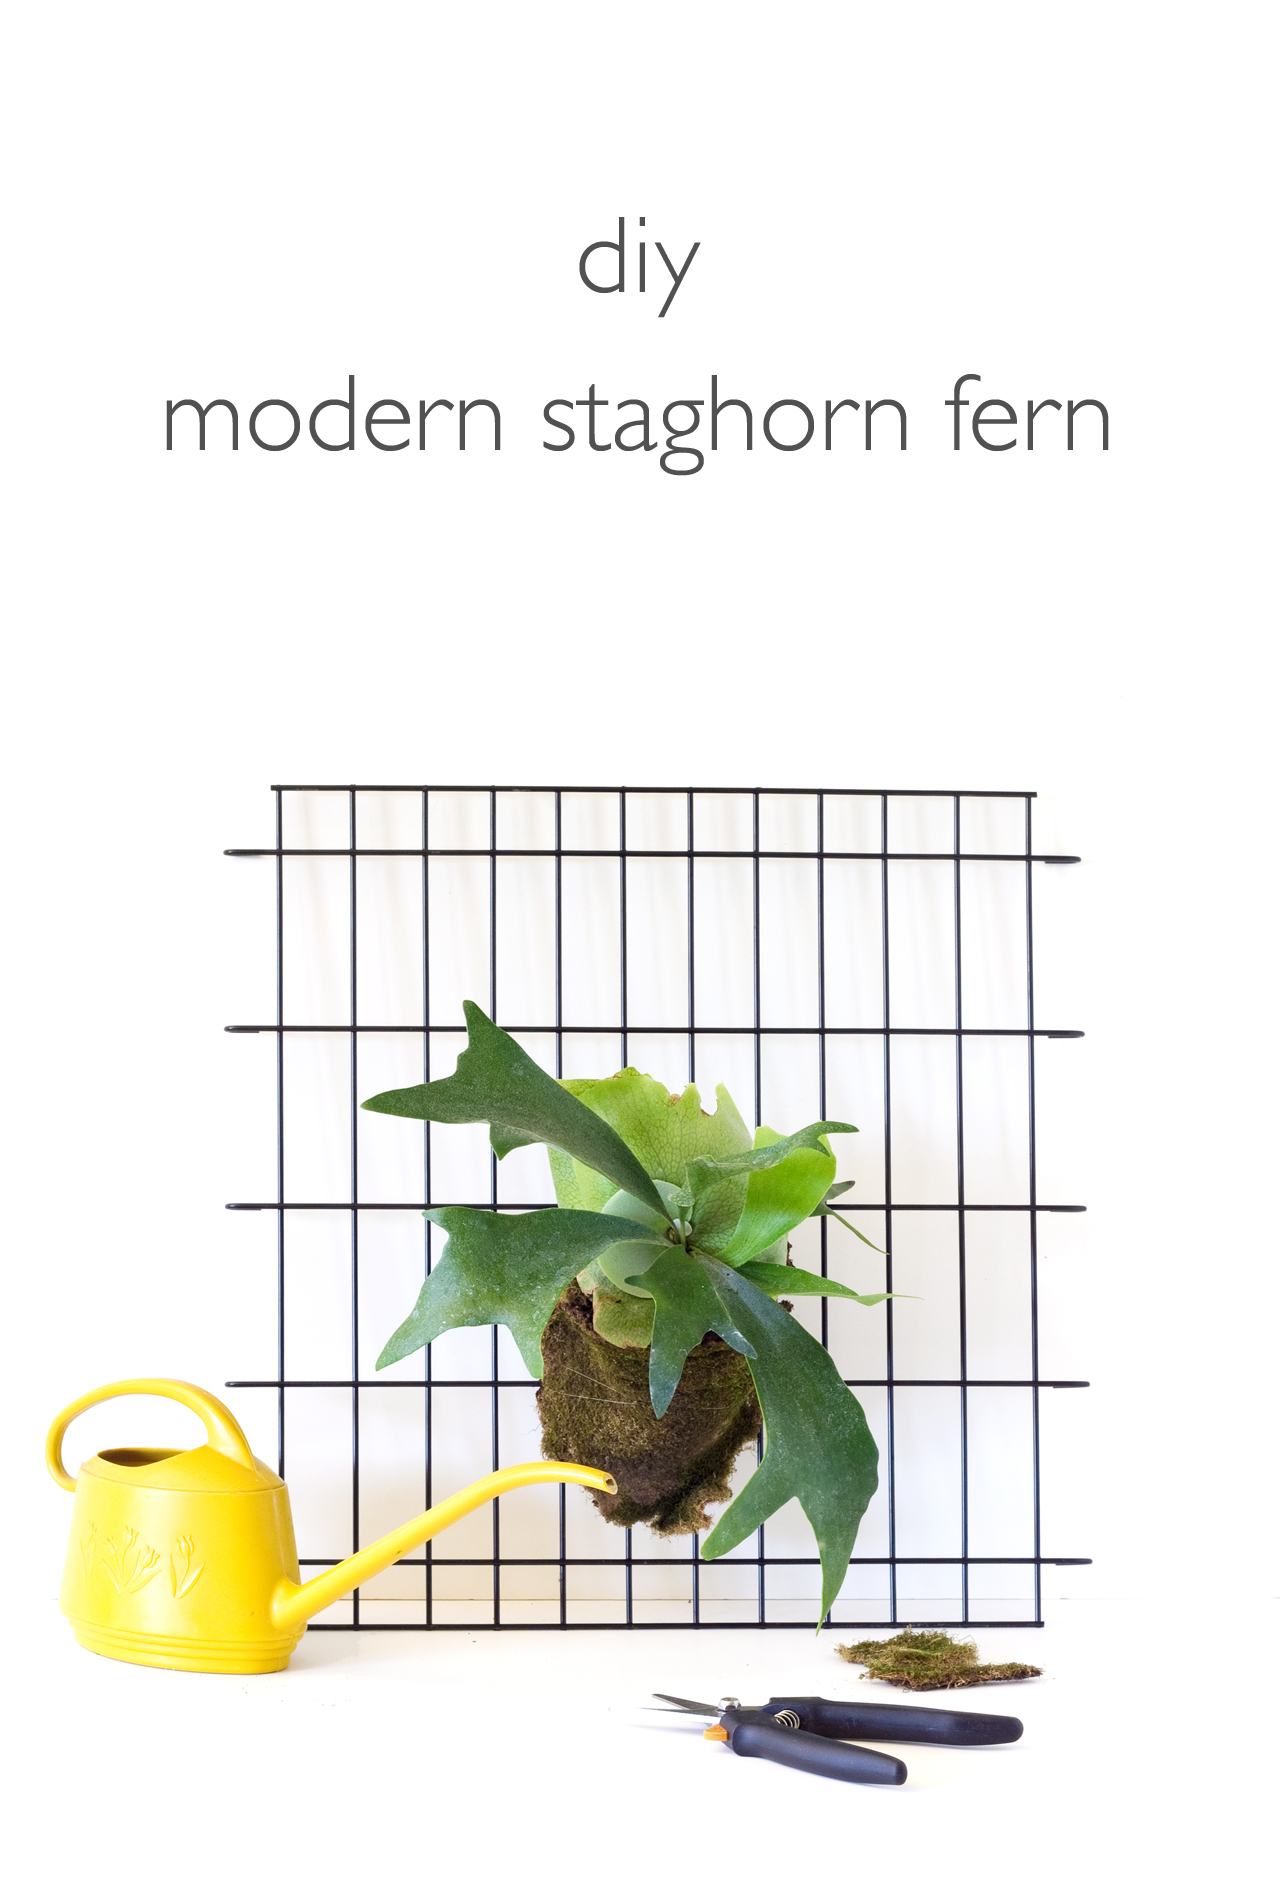
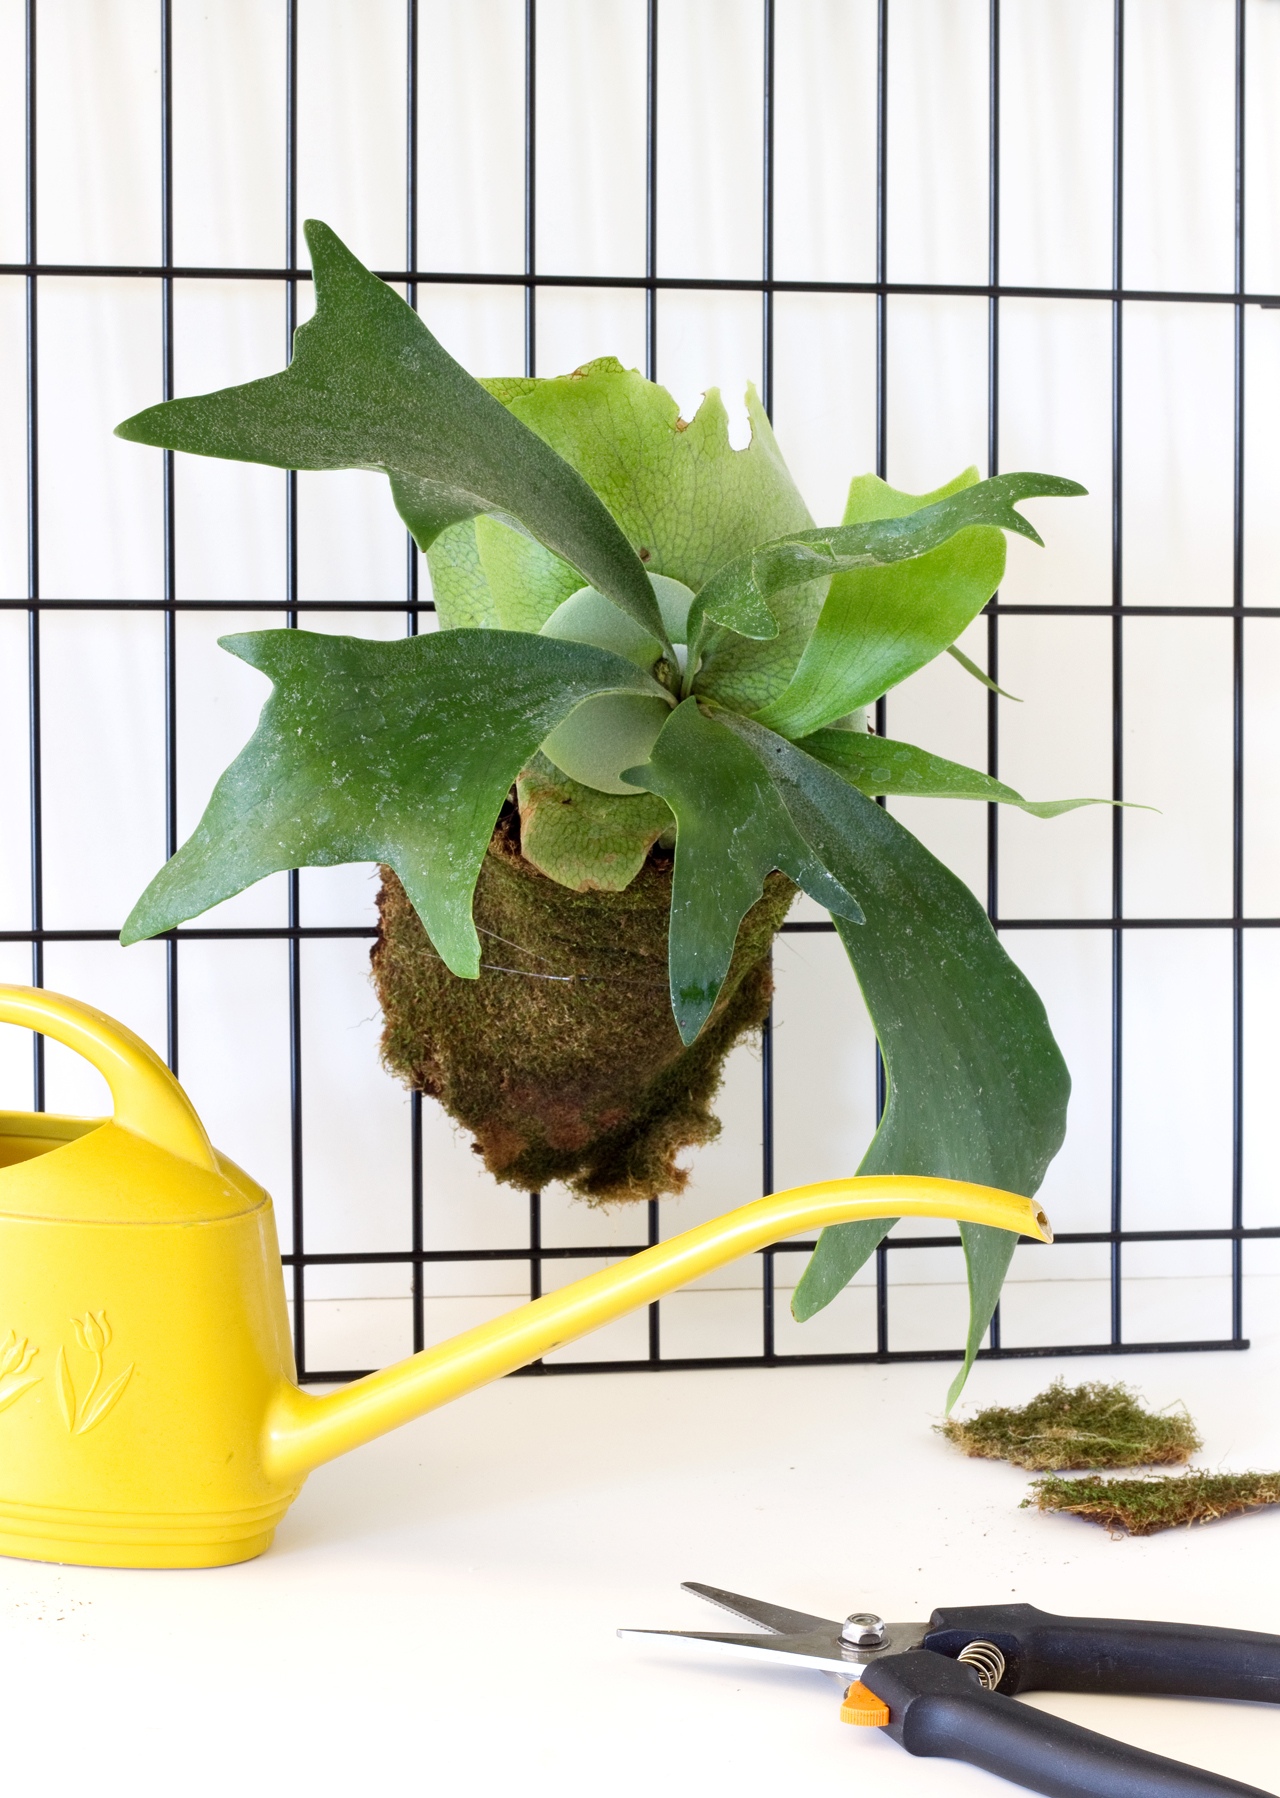
DIY Modern Staghorn Fern | click through for the tutorial and care tips! Hey, did I tell you guys I love plants? I've been on the hunt (ha!) for a staghorn fern for a few years, so I was thrilled when I came across some for sale at a orchid show I attended a couple weeks ago. Staghorn ferns are named for their resemblance to, well, the horns of a stag. They're epiphytes, which means they naturally attach themselves and grow on the trunks and branches of other trees and shrubs. They can also be attached to other vertical surfaces and hung on the wall. They're really cool plants! When I originally picked mine up I planned to mount it to a slab of weathered wood, but I changed my mind and decided instead to attach it to a piece of wire metal mesh. The clean lines of the metal combined with the leafy, organic form of the fern really gives it a modern look. It would look great hanging inside or outside!

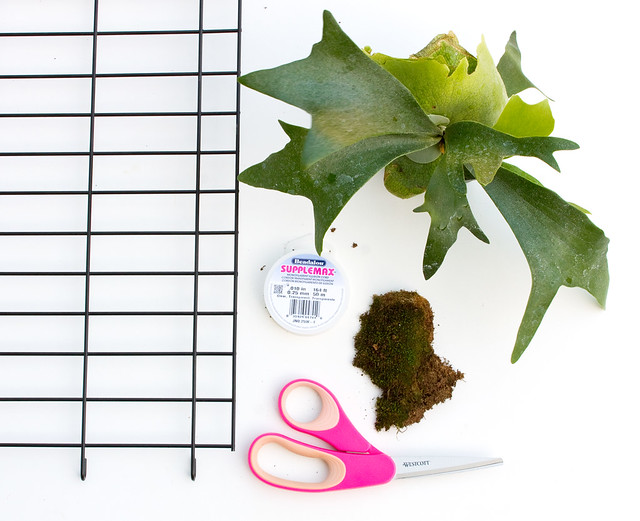
Here's what you'll need to make a modern hanging staghorn fern of your own:
DIY Modern Staghorn Fern | click through for the tutorial and care tips!
  • Staghorn Fern. I bought mine at a local orchid show, but you can find them online and in specialty nurseries.
  • Sheet Moss
  • Monofilament or fishing line (I used clear beading line from my mobile project)
  • Hooks and/or spacers for hanging on the wall. My wire panel has loops on the sides that would prevent it from hanging flush against the wall - that is good! If your panel is flat it would be best to hang it 1/2" or so away from the wall so the moisture doesn't affect it. Try using pegboard spacers for the installation.
  • Metal grid. Repurposed (I always see these at the thrift shop) or you can buy and paint a piece of wire mesh from the hardware store. Mine was a divider for my puppy's crate!  
  • Scissors

DIY Modern Staghorn Fern | click through for the tutorial and care tips!

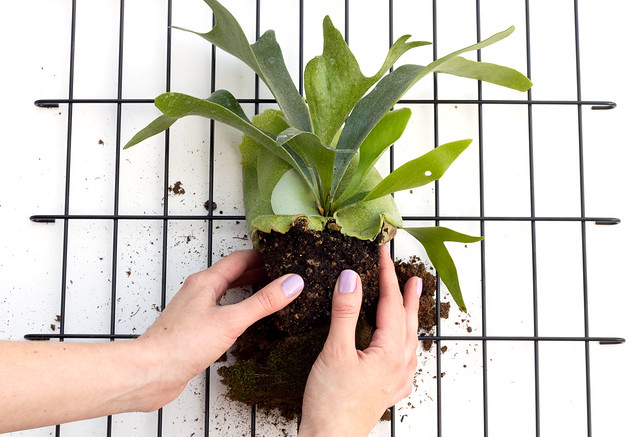
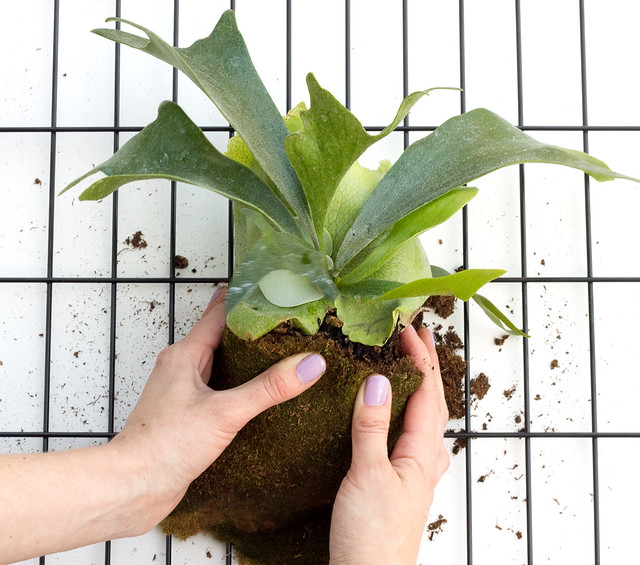
Cut a few pieces of moss and dampen in a bowl of water. Lay the metal panel on your work surface and create a little "nest" shape where you want the fern to go. Make it thicker on the side that will become the bottom when it's standing up. Remove the pot from the fern, remove any loose soil, and loosen the root ball. Don't be afraid to use a little muscle loosening the roots. Set the fern in the moss nest.

DIY Modern Staghorn Fern | click through for the tutorial and care tips!

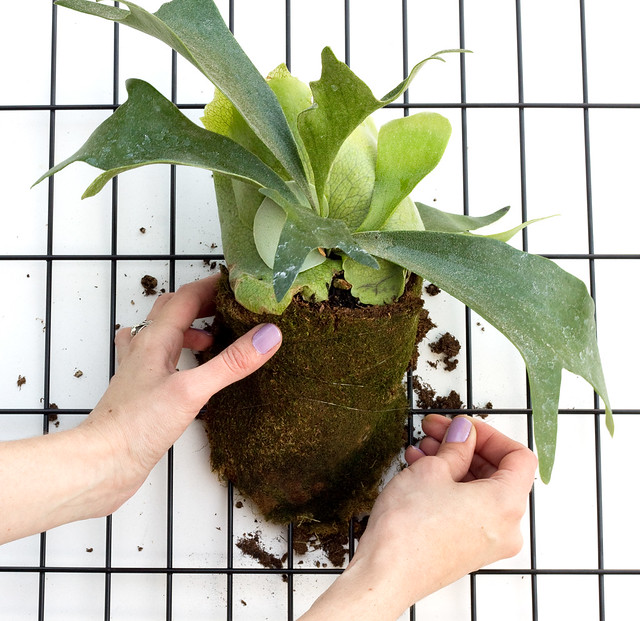
Cut another piece of moss to go over all of the exposed soil. I was able to do this with one piece, but use more if you need to fill in any open areas. Bundle the moss around the roots, covering up any exposed soil.

DIY Modern Staghorn Fern | click through for the tutorial and care tips!

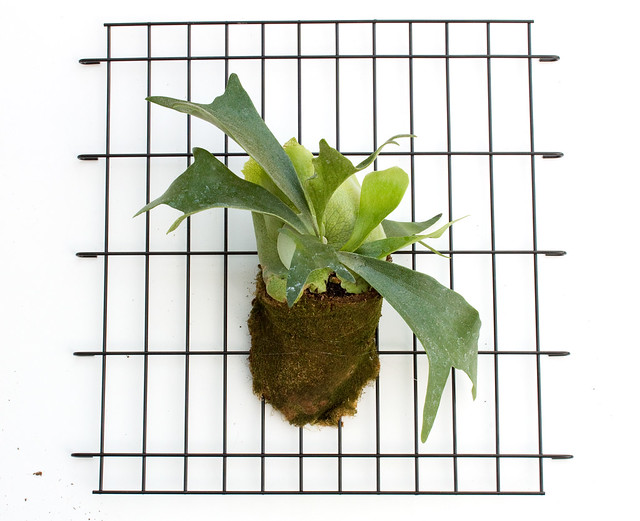
Cut a length of the monofilament, about 3' long. Tie the end to the wire mesh next to the edge of the plant. Pull the line directly across the plant, making sure to go under all of the leaves (so it only makes contact with the moss) and loop on the other side. Repeat, looping back and forth until the entire base of the fern is securely attached to the wire grid. Tie off the end. Tuck additional bits of moss around any visible monofilment if you'd like, to help conceal it.

DIY Modern Staghorn Fern | click through for the tutorial and care tips!

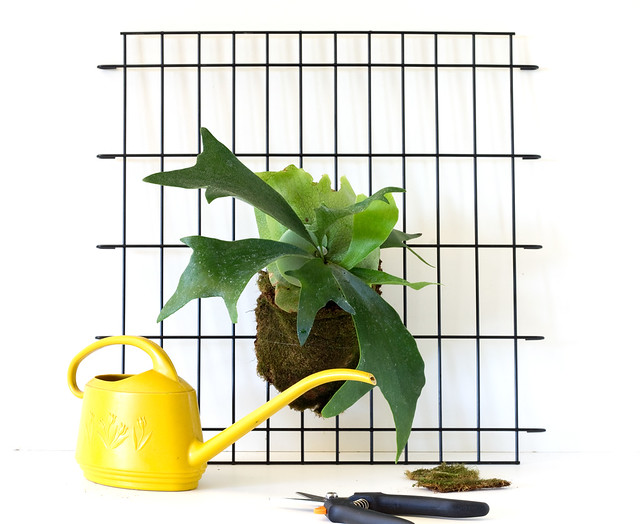
Screw in a two hooks on the wall and hang, or just lean it against a wall. If placing it outside, it will do best in a bright area with no direct sunlight. Morning sun is ok, but it will burn in direct afternoon sun. Bring inside during the colder months to avoid frost. It also likes humidity so place it near a water source like a pond, or hang it in the bathroom when you shower. Give it a soak once a week or when the soil and moss feel dry.

DIY Modern Staghorn Fern | click through for the tutorial and care tips! DIY Modern Staghorn Fern | click through for the tutorial and care tips!

I can't wait for this guy to grow! Do you have any experience with staghorn ferns? Aren't they cool?

76

DIY Eames Inspired Mobile

Friday, May 8, 2015

DIY Eames Inspired Mobile | click through for the full tutorial!
The Eames' are some of my creative idols. Not only was their work prolific and diverse (architecture, furnishings, fabric prints, toys, fantastical sculptures, film) but they were their most active during my favorite era in design - the 1950's and 60s. I'm really into mid century fabric prints and on of my favorites is their "Dot Pattern."

Ray Eames and her "Dot Pattern" 1947. Photo via American Treasures of the Library of Congress
This print is simple, but has so much movement. It always reminded me of mobiles, and since I'm still working on my bedroom redesign I thought it would be fun to make a mobile inspired by the "Dot Pattern" print to go in the room. I love that mobiles add energy and interest to a space. They're also really relaxing to watch - whoever said they were just for babies? :)

This mobile is very simple to make, and inexpensive, too! The supplies cost me less than $10, and as usual, I still have some supplies left over. So let's get started!

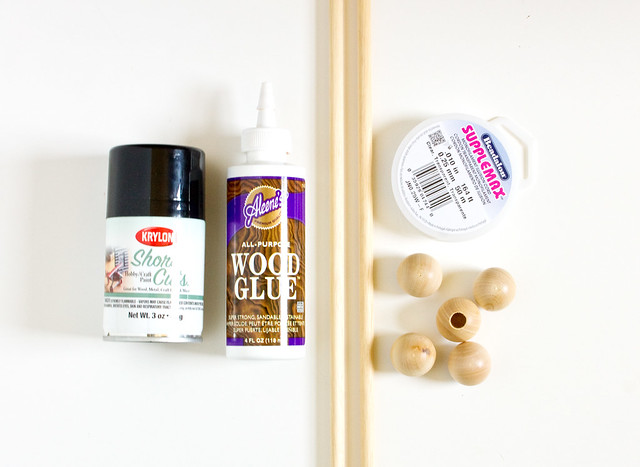
Here's what you'll need to make an Eames Inspired Mobile for yourself:

DIY Eames Inspired Mobile | click through for the full tutorial!
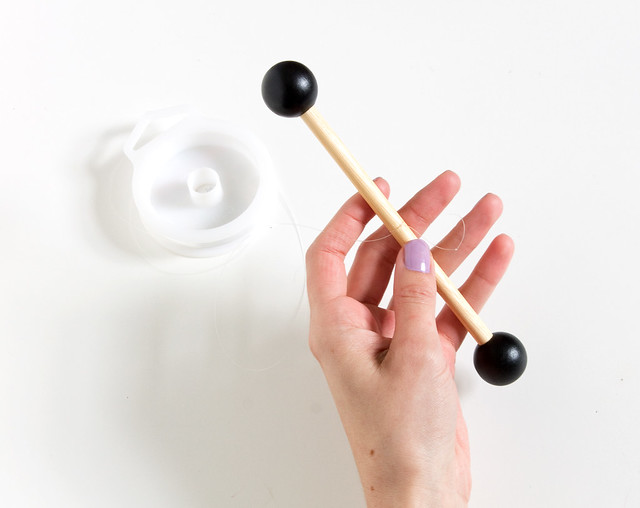
  • Wood dowels. I used 2, 36" lengths. 5/16" diameter
  • Wood balls. I used 1" Dowel Caps with pre-drilled 3/8" holes. This size fit the dowels perfectly. They came in a bag of 16
  • Wood glue
  • Clear monofilament, fishing line, or beading thread. I used 0.25mm monofilament cord, found in the jewelry section at the craft store
  • Black spray paint
  • Clear spray sealer (optional)
  • Additionally: scissors, something to cut the dowels (I have one of these from my model making days and it's great), screw hook for the ceiling
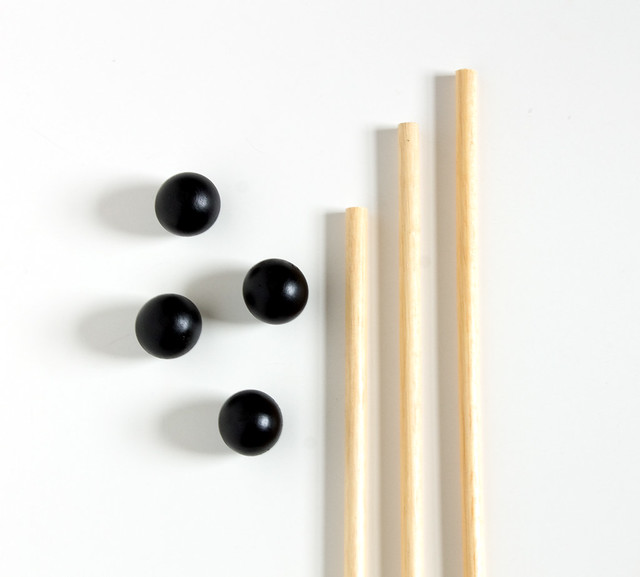
Spray paint the wood balls with a few coats of the black paint, enough to get even coverage. Spray seal the dowel rods (not necessary, but it does improve the wood tones on the dowels). Decide on an arrangement and cut the dowels to size. I used 5 pieces, 18" 14", 10", 8", and 6" lengths.

DIY Eames Inspired Mobile | click through for the full tutorial!
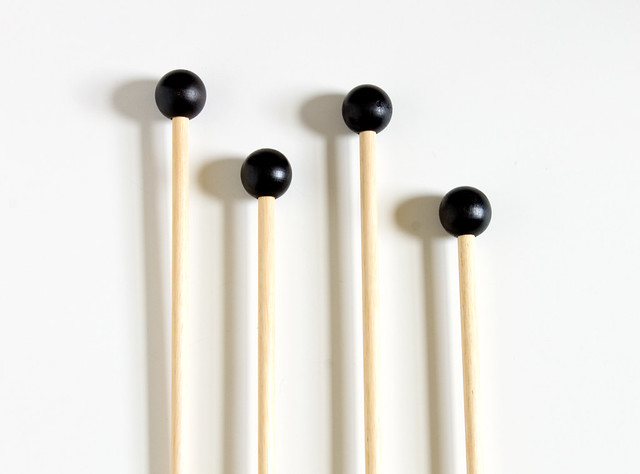
Glue the balls to the end of each dowel and let dry.

DIY Eames Inspired Mobile | click through for the full tutorial!
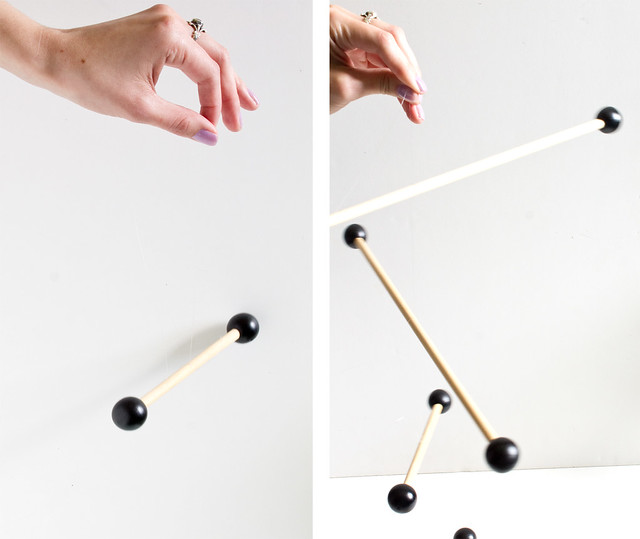
Cut a length of monofilament longer than you think you'll need, about 4'. Starting with the piece that will be on the bottom of the mobile, tie a square knot tightly around the center of the dowel. Hold the monofilament in one hand and balance the dowel, scooting it back and forth until you find the center point and the dowel hangs evenly on each side. Allow about 4" of line, and tie on the second to last piece, tying a tight square knot and then balancing. Repeat with the other 3 pieces. Add a dot of glue over each knot to keep it from moving if you'd like.

DIY Eames Inspired Mobile | click through for the full tutorial! DIY Eames Inspired Mobile | click through for the full tutorial!

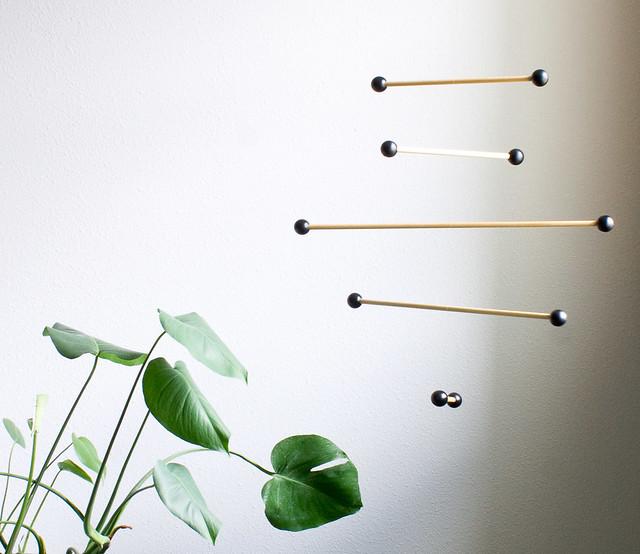
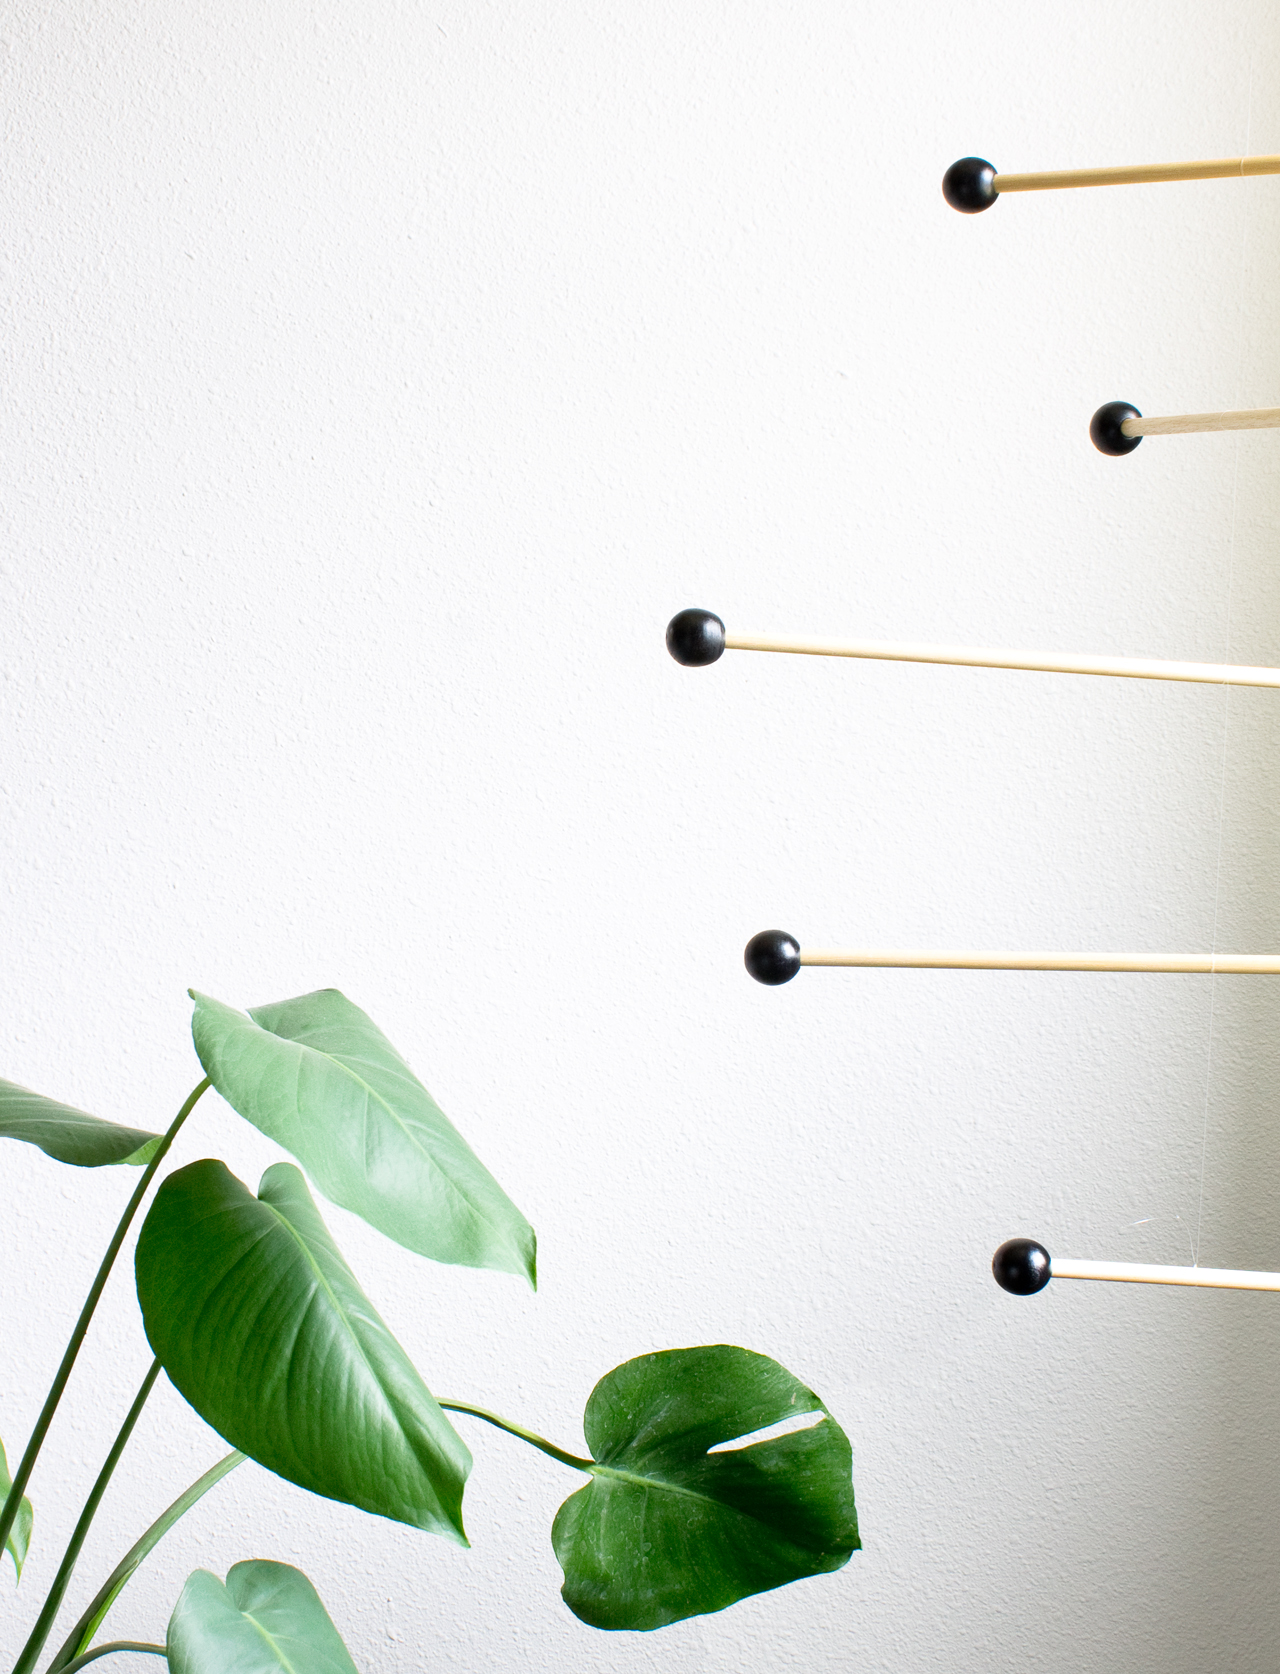
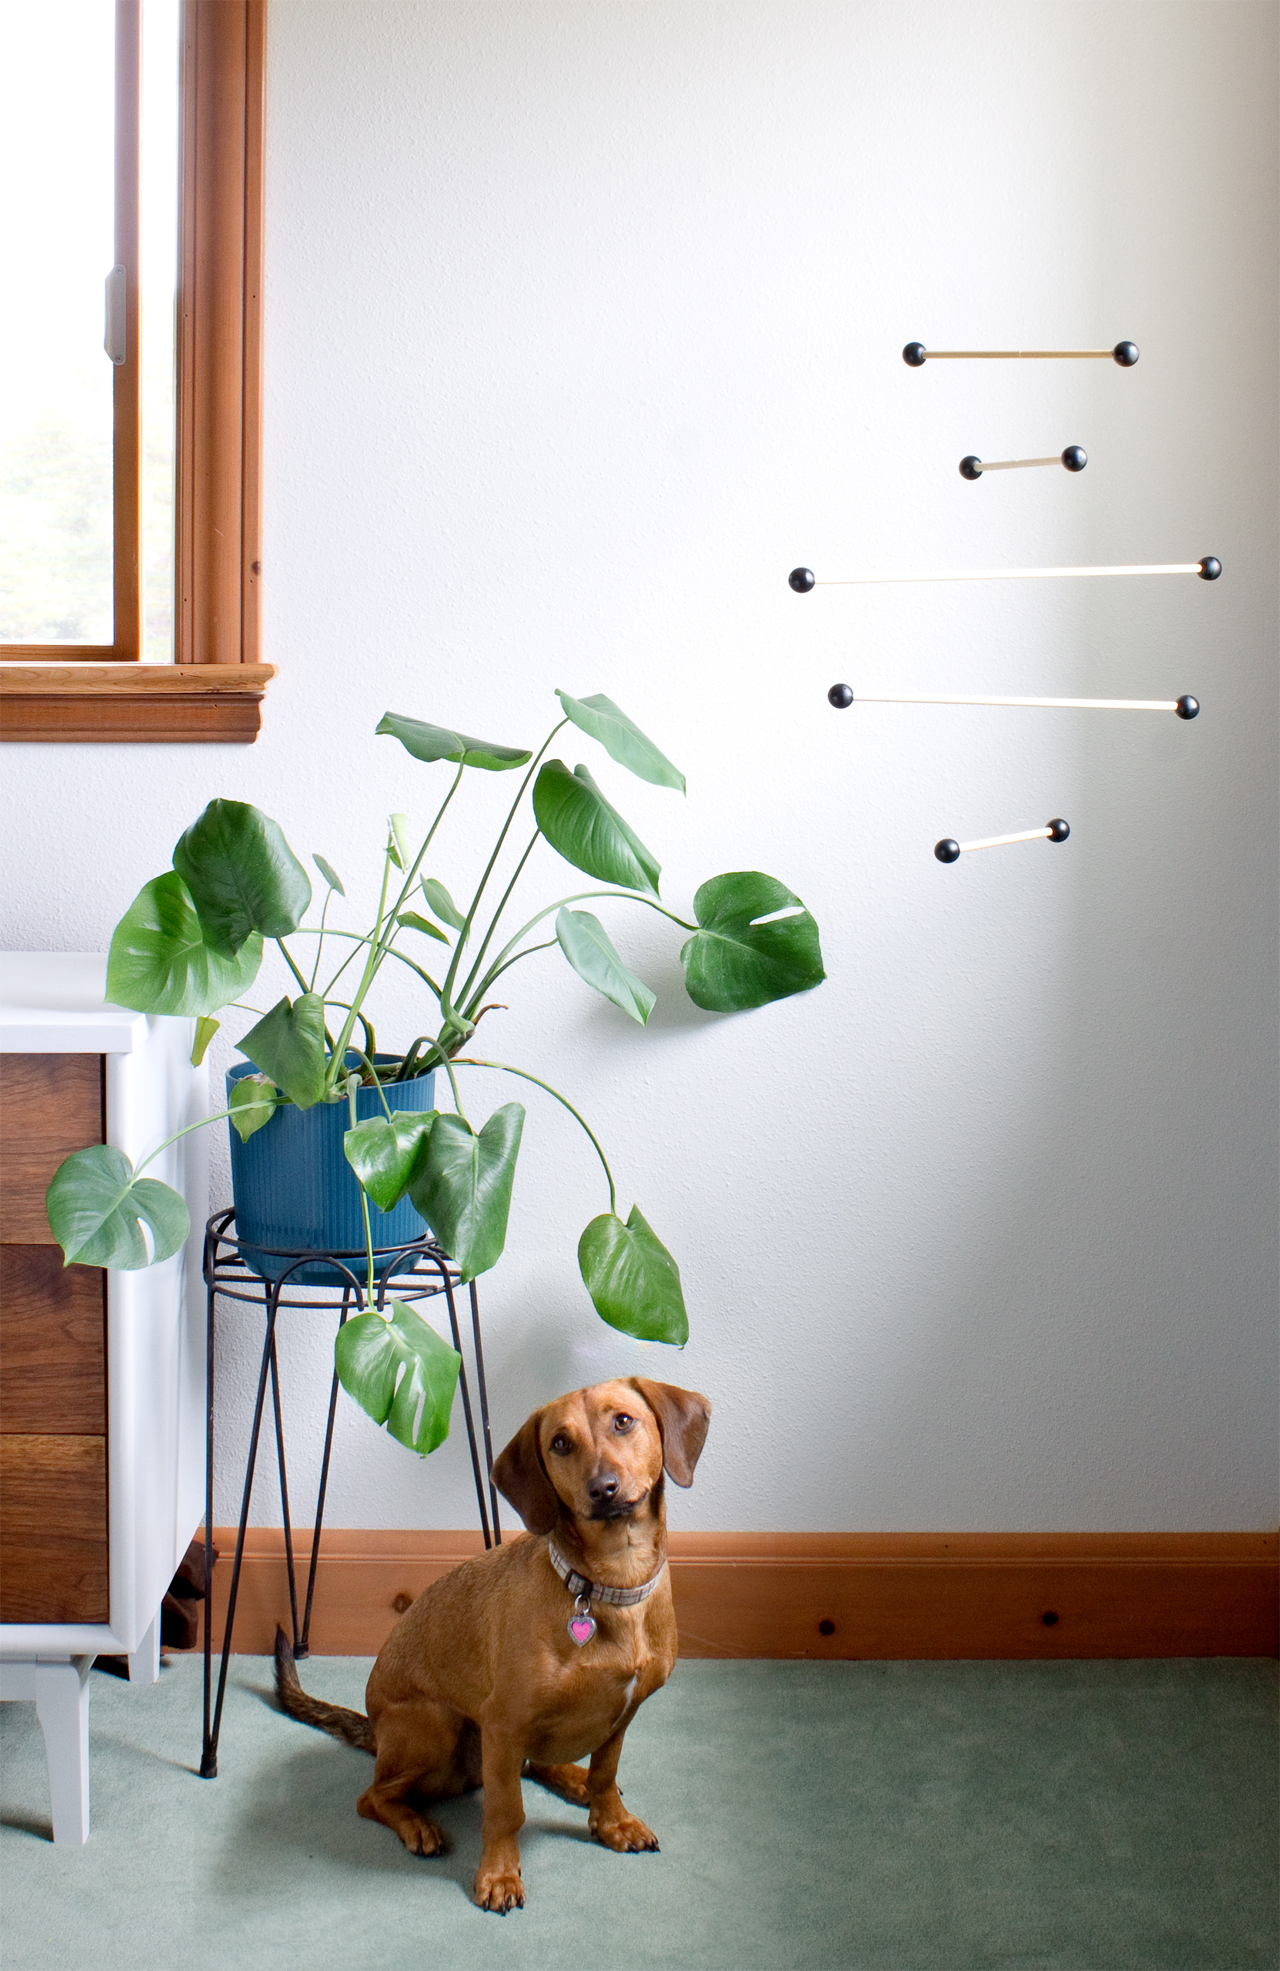
Tie a loop in the end of the line and hang from a hook in the ceiling. Watch it move! I love how the clear line makes it look like the pieces are floating. Just a little bit of air movement is all you need to get it to spin. It looks different from every angle.

DIY Eames Inspired Mobile | click through for the full tutorial! DIY Eames Inspired Mobile | click through for the full tutorial! DIY Eames Inspired Mobile | click through for the full tutorial!
Baci loves it, too! Have a great weekend! I'm a vendor at Patchwork Show in Oakland this Sunday, so stop by if you're in town.

P.S.  Wondering which plants would suit your Eames Case Study House best? (We can dream, can't we?) Check out this post from the archives.

81

DIY Faux Porcelain Cactus Ring Holder

Wednesday, March 25, 2015

DIY Faux Porcelain Cactus Ring Holder
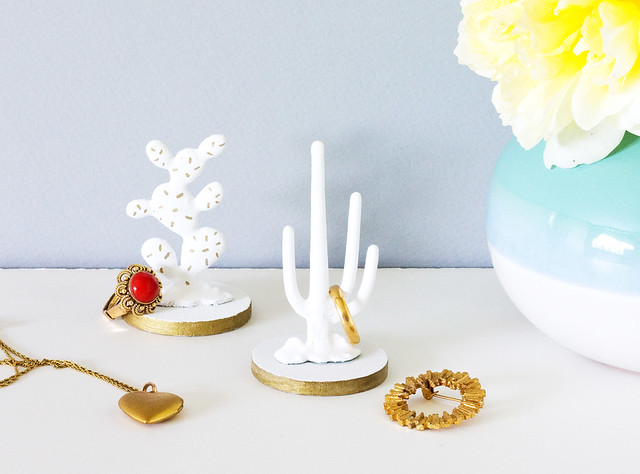
Sometimes the idea for a project just pops up and then you seek out the materials, but other times the materials themselves inspire a project. The latter was definitely the case for this project - I must have looked at these plastic cacti in Michaels ten times wondering what I could make with them. Then I remembered seeing a beautiful porcelain cactus ring holder online a while back and thought it would be super cool if I could try to recreate it. With a little bit of experimentation I figured out how to make these faux porcelain cactus ring holders with the help of a little plaster and white and gold paint! Best part is, you can make your own, too!

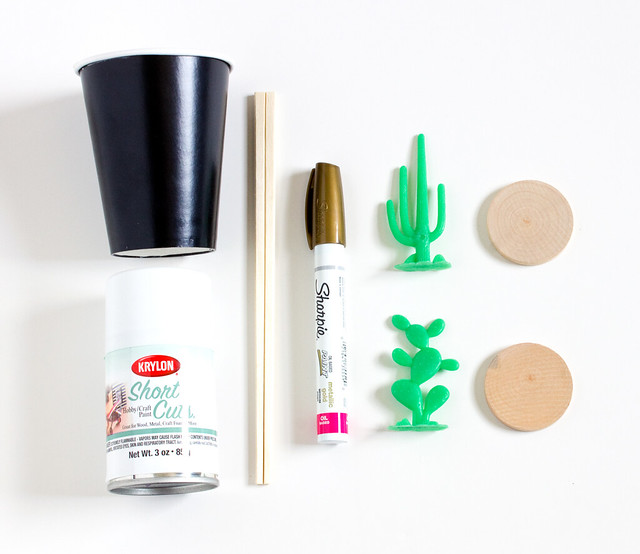
Here's what you'll need:
DIY Faux Porcelain Cactus Ring Holder
  • Plastic cacti. These came 3 to a package at Michael's
  • Wood disks. Mine were 1 3/4" diameter
  • Hot glue
  • Plaster (not pictured). Simple craft plaster is fine
  • Paper cup
  • Stir stick
  • White spray paint
  • Oil-based gold Sharpie
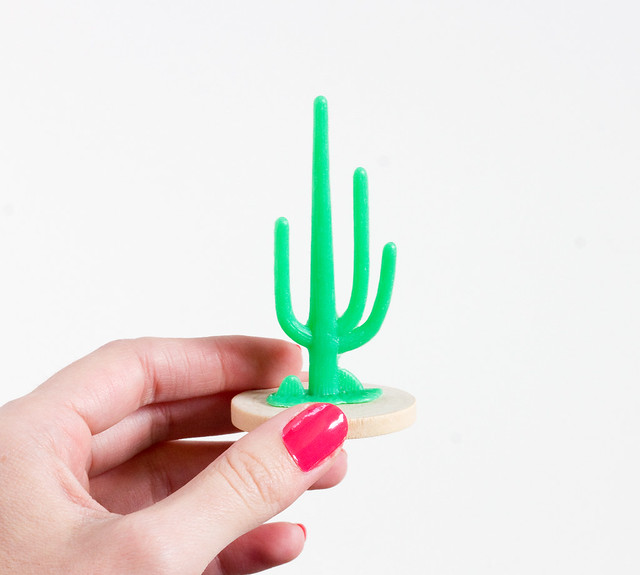
Hot glue the cactus to the center of the wood disk.
DIY Faux Porcelain Cactus Ring Holder
Mix up the plaster in the paper cup according to the directions (mine was 1 part cold water to 2 parts plaster). Stir it up well with the chopstick. It will start setting up quickly so be ready! When it's about the consistency of a milkshake, hold the wood disk and dip the cactus into the plaster until the plastic is all coated. If parts of the base aren't covered, spread the plaster around with a toothpick to get all of the nooks and crannies. I got the best results when I tipped the cup to the side and dipped one side of the cactus and then the other. Let dry upright. If a second dip is needed, let dry overnight and repeat.

DIY Faux Porcelain Cactus Ring Holder
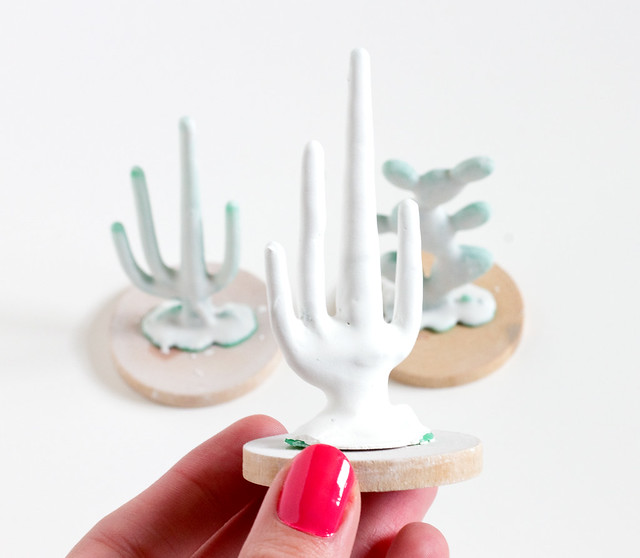
Let dry completely and then spray paint, 2-3 coats. Draw some gold accents around the base and on the cacti themselves if you'd like. I added a few prickles and dashed lines on some and left others plain.

DIY Faux Porcelain Cactus Ring Holder
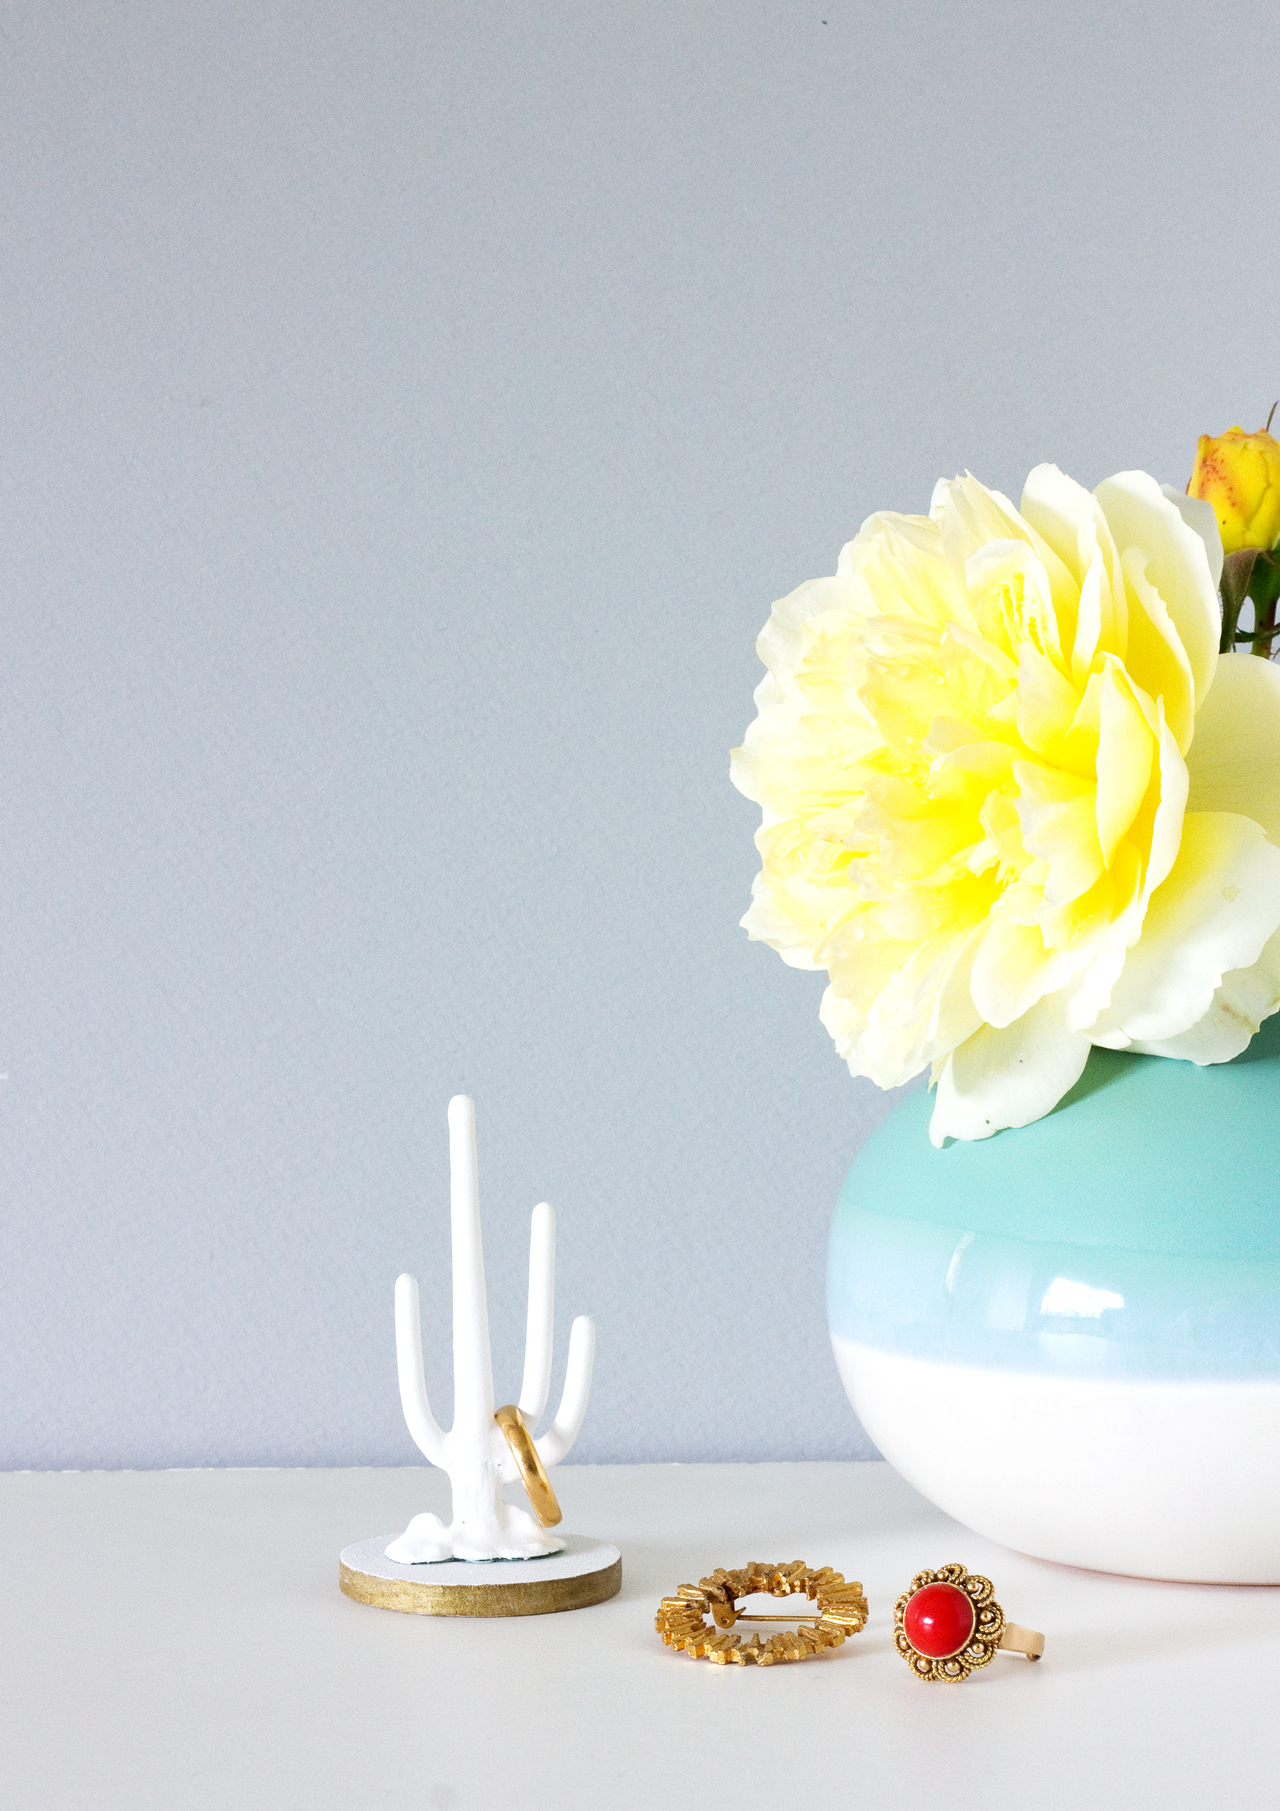
So cute, right? They make a sweet little addition to a dressing table, and for a perpetual jewelry stasher like myself, they're perfect for keeping rings organized. They look like porcelain and you'd never be able to guess that there's a cheap-o plastic cactus inside. Ha!

DIY Faux Porcelain Cactus Ring Holder DIY Faux Porcelain Cactus Ring Holder
P.S. I'm heading out to Craftcation tonight! I've been looking forward to this since last years' conference, so I'm super pumped! Let me know if you're going to be there! Follow me on Instagram to keep up with all the action. :) Have a great weekend!
456

DIY Easy Graphic Art

Tuesday, March 10, 2015

DIY Easy Graphic Art | click through for the full tutorial!

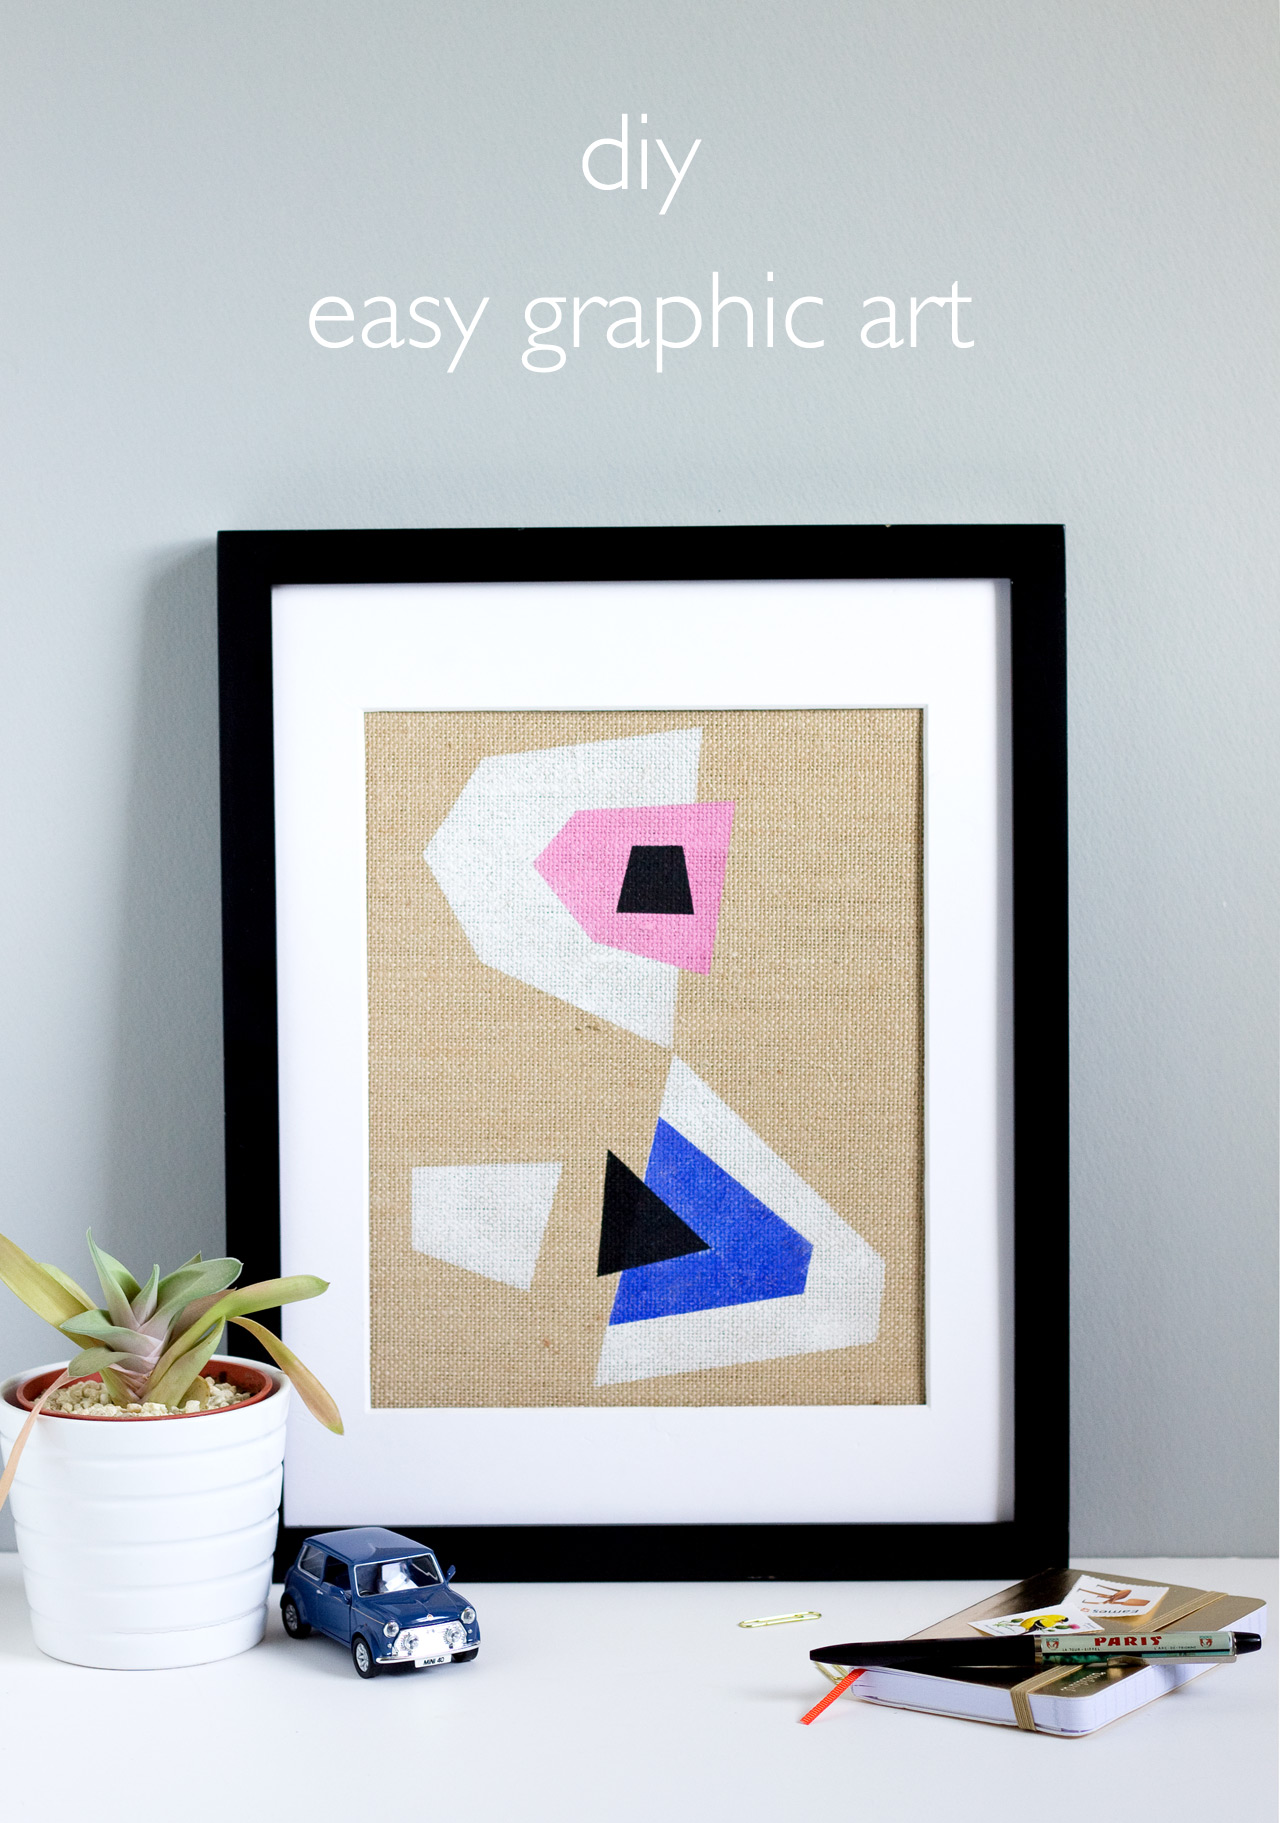
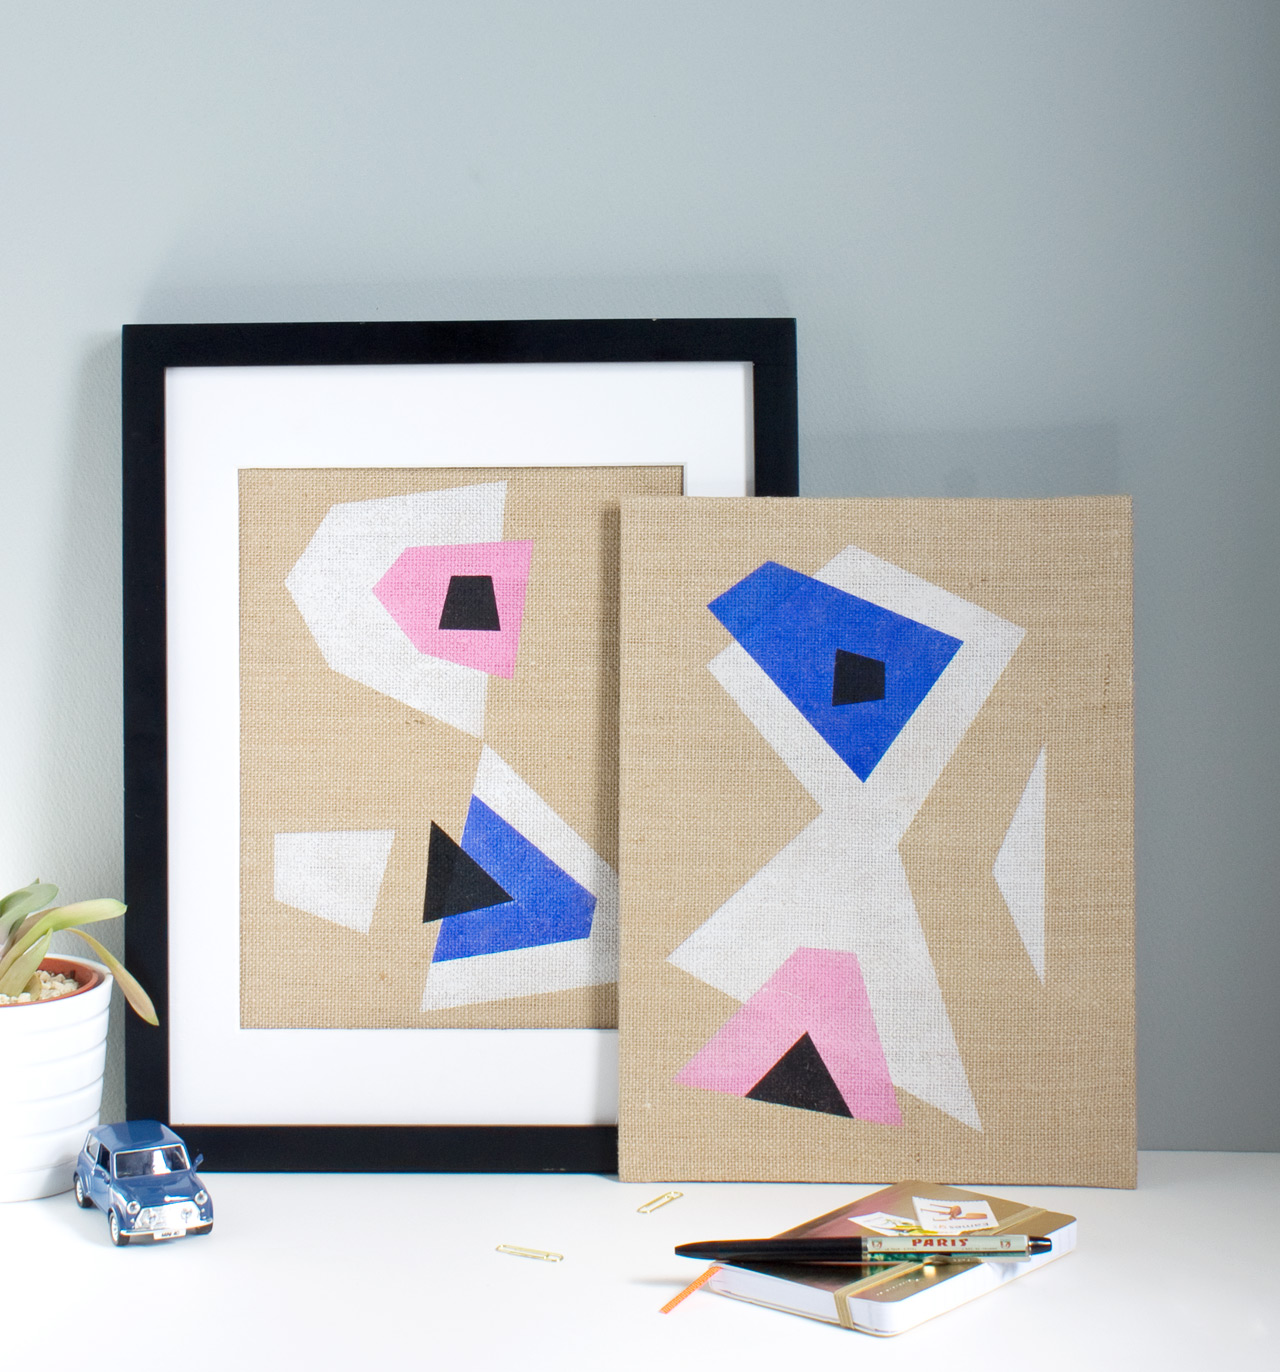
I'm still on a decorating kick, and now that two of my larger projects are completed for the bedroom redesign my mind is wandering back towards art. I started playing around with a few simple materials and whipped up these easy graphic art canvases in practically no time flat. I think you'll like this project for a few reasons: first because it's actually fun to do, second because the supplies are super inexpensive (seriously. like, a couple bucks per canvas), and third because the finished product just looks cool!

Here's what you'll need:

DIY Easy Graphic Art | click through for the full tutorial!
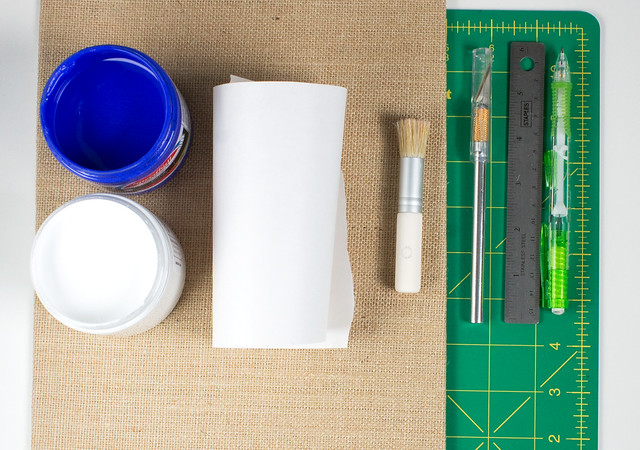
  • Reynolds Freezer Paper. You can find it in the grocery store
  • Paints. I used screen printing inks because I already had them, but acrylic craft paints would work, too
  • Paper plate or piece of cardboard
  • Stenciling brush
  • Burlap canvases. I got a 3 pack at Michael's for something like ridiculous like $4. Flat canvases work better than wood framed ones
  • Craft knife 
  • Cutting mat
  • Iron
  • Ruler 
  • Pencil
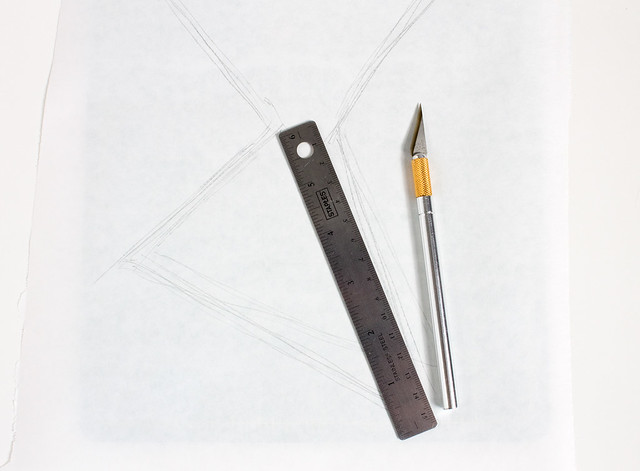
Sketch out some ideas for the layout. Simple shapes made with straight lines are the easiest, and it's best to apply the light colors first and the dark colors last, so keep that in mind when planning the layout.

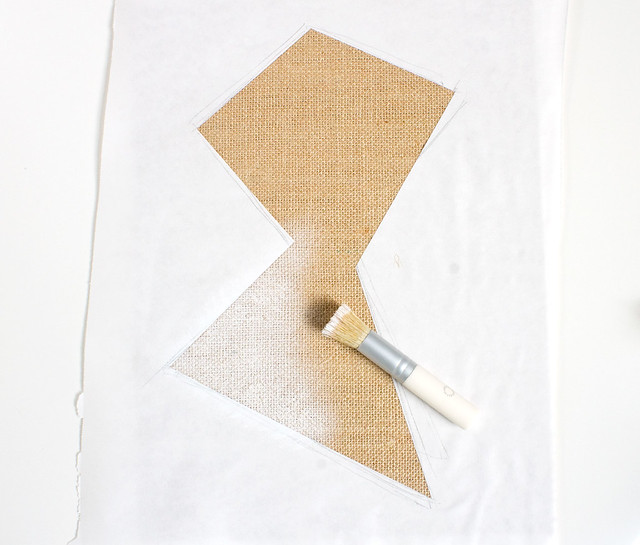
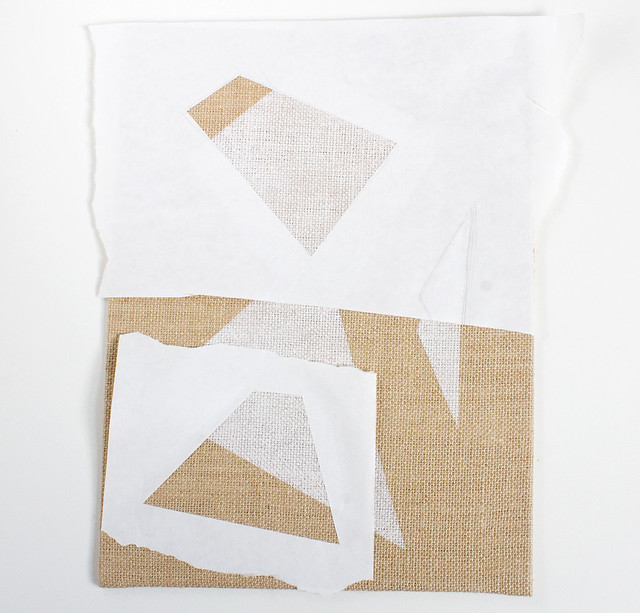
Draw the shapes onto the paper side of the freezer paper and cut out with the craft knife. Place the stencils for the first color (mine was white) on the canvas, paper side up, glossy side down, and iron on medium high heat. The shiny part of the freezer paper will fuse to the canvas and create a perfect stencil! Make sure the edges are stuck down well. Try holding the iron at an angle to get to all of the stencil edges.

DIY Easy Graphic Art | click through for the full tutorial!

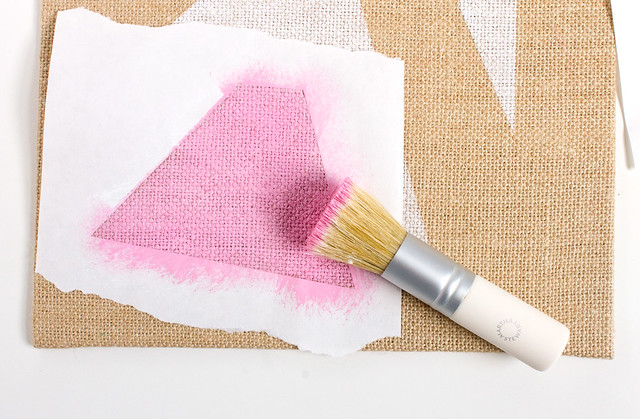
Dip the brush in the paint and remove the excess onto the paper plate or cardboard. With a mostly dry brush, dab the paint onto the canvas around the stencil edge. Reload the brush and fill in the center of the shape. Try to get even coverage. Pull up the stencil and let dry.

DIY Easy Graphic Art | click through for the full tutorial!

Repeat the steps for each color/shape once the previous color is dry, overlapping the shapes.

DIY Easy Graphic Art | click through for the full tutorial! DIY Easy Graphic Art | click through for the full tutorial!

Enjoy as-is or layer it in a frame with a mat.

DIY Easy Graphic Art | click through for the full tutorial! DIY Easy Graphic Art | click through for the full tutorial!

I hope you try this out! I think it would be fun to do on a larger scale, on a great big canvas with spray paint. I have a big roll of freezer paper leftover to play with so I may just try it!
 

vitamini handmade © All rights reserved · Theme by Blog Milk · Blogger