



218

DIY Ombre Sequin Ornaments

Wednesday, December 9, 2015

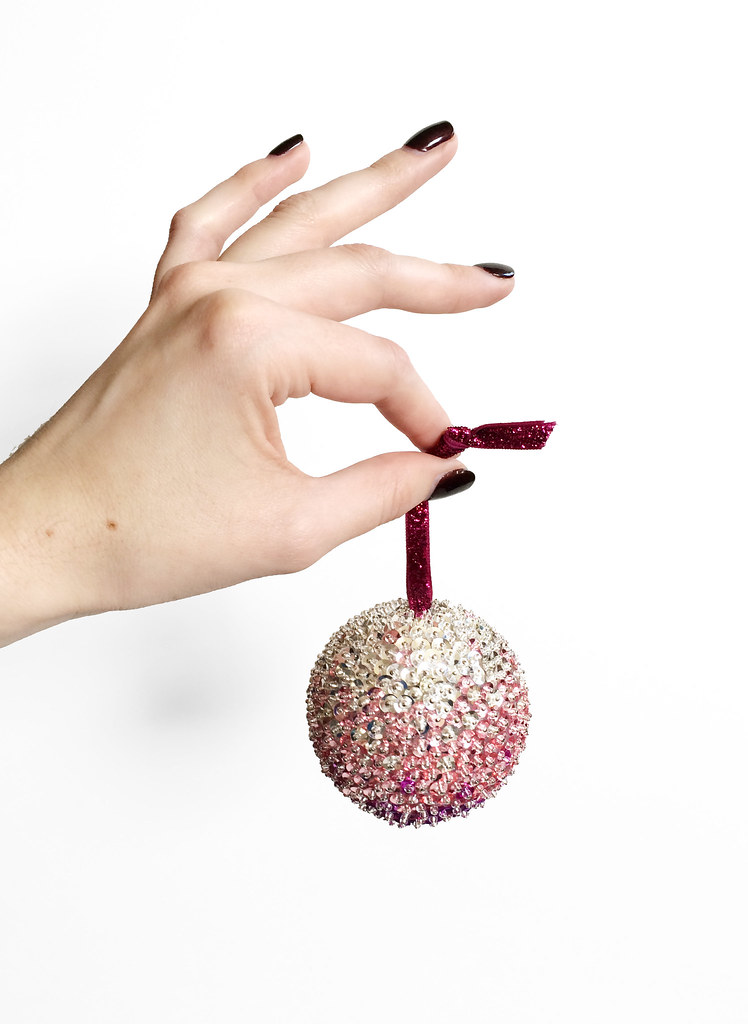
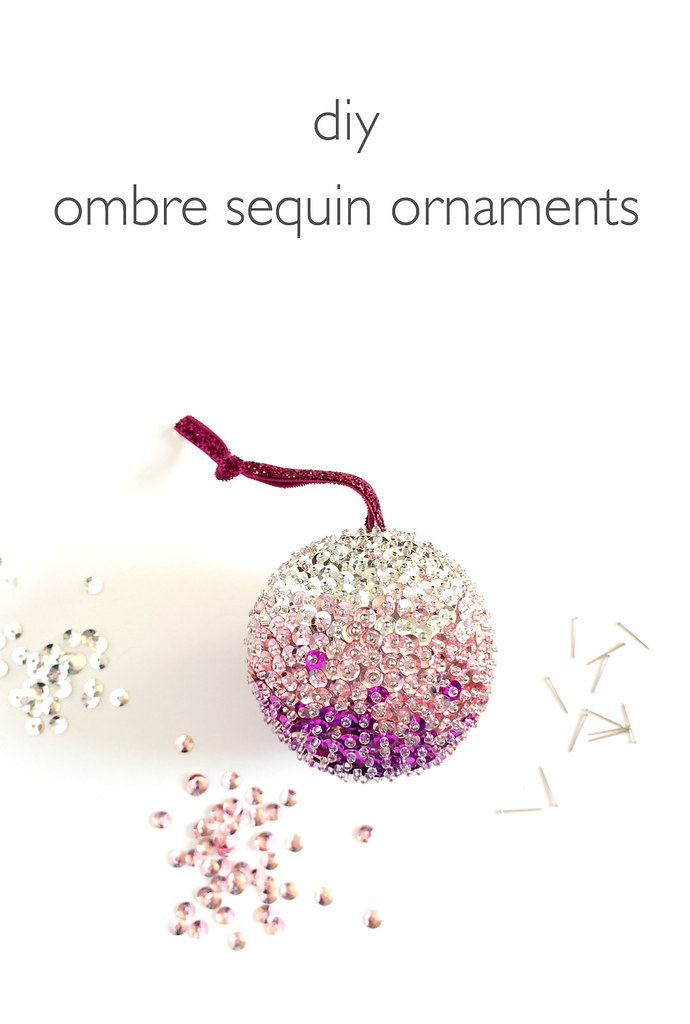
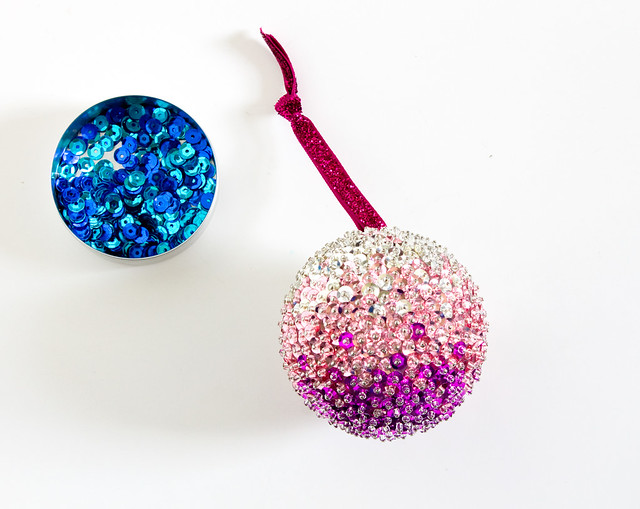
DIY Ombre Sequin Oraments Beaded, sequin-covered ornaments were a popular craft in the 60's and I have distinct memories of admiring them on my grandma's Christmas tree every year as a kid. If it was sparkly, I was all over it and those ornaments were the shiniest things around! I've been meaning to try making my own modern interpretation for years so I finally made the time and came up with these ombre sequined ornaments. I'm so excited with how they turned out! While the materials are really inexpensive and the technique is simple, it takes a while to do. It's not a quick craft by any means! I made mine over a couple evenings, sitting down in front of Netflix (Broadchurch, watch it!) whenever I had the time. This is the sort of craft that will become an heirloom so take your time and don't rush it. It's actually a pretty relaxing activity once you get going and the results are absolutely stunning. No one will believe you made it yourself!

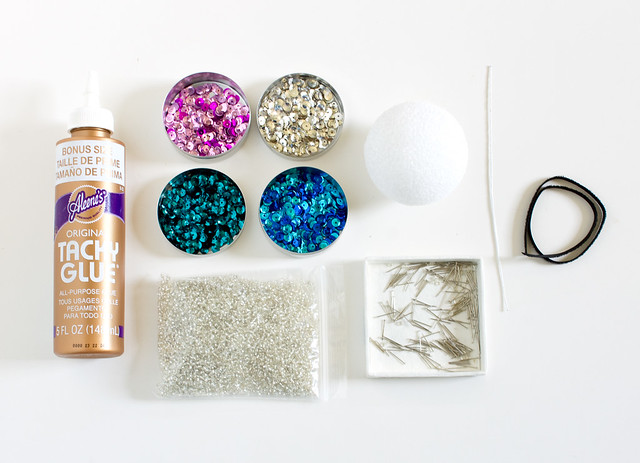
Here's what you'll need:
DIY Ombre Sequin Oraments
  • Sequin pins. These are shorter than regular pins and they come in silver or gold
  • Sequins. You'll need at least three different shades to get an ombre affect
  • Seed beads in the color of your choice. I chose clear with silver lining
  • Tacky glue
  • 2 1/2" Styrofoam balls
  • Ribbon
  • Short length of wire. Any gauge will work
  • A tray or shoebox lid to work on
  • Small containers

DIY Ombre Sequin Oraments

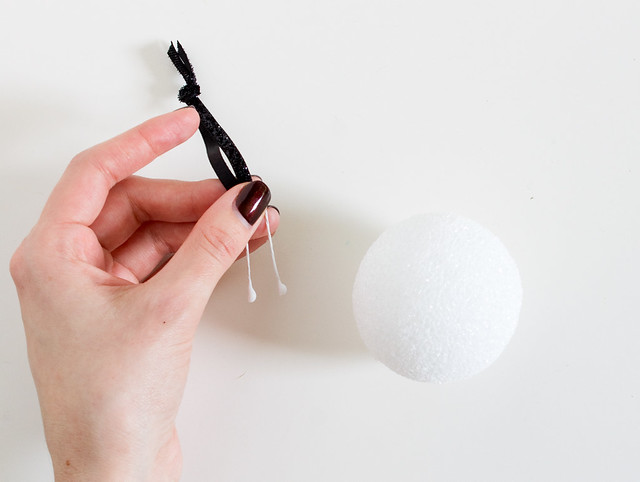
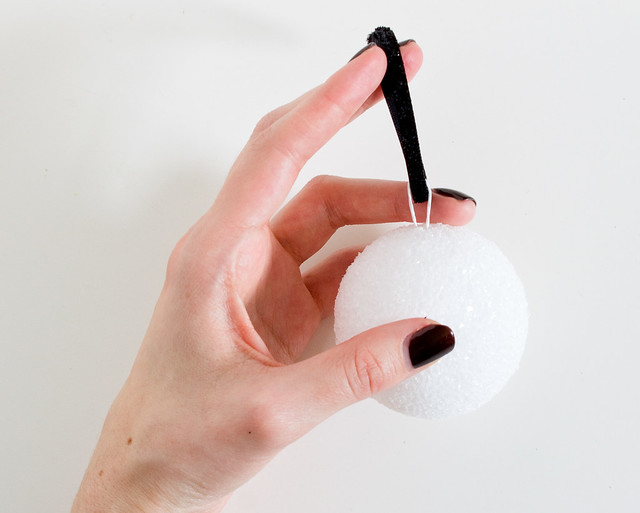
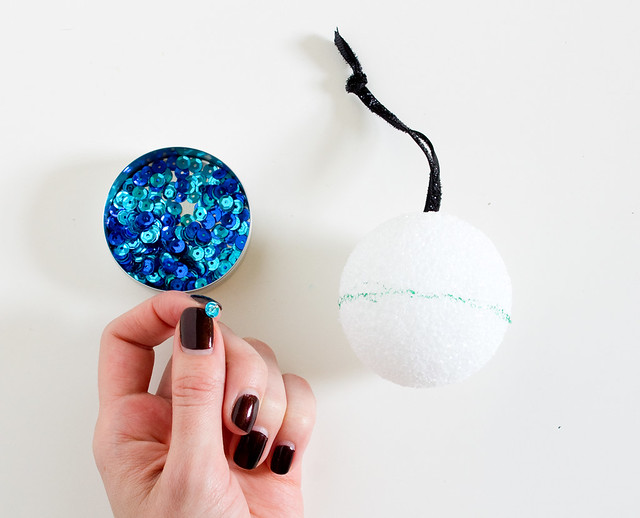
Separate the sequin colors into containers. Pour some of the beads into a shallow container. Cut a length of ribbon about 8" and tie the ends. Make a U shape with the wire, hook the end around the ribbon loop, and add some tacky glue to the ends. Push the wire into the top of a styrofoam ball until ribbon is flush with the top of the ball. Let dry. Draw a line around the center of the ball with a permanent marker, to help guide the ombre design.
DIY Ombre Sequin Oraments DIY Ombre Sequin Oraments

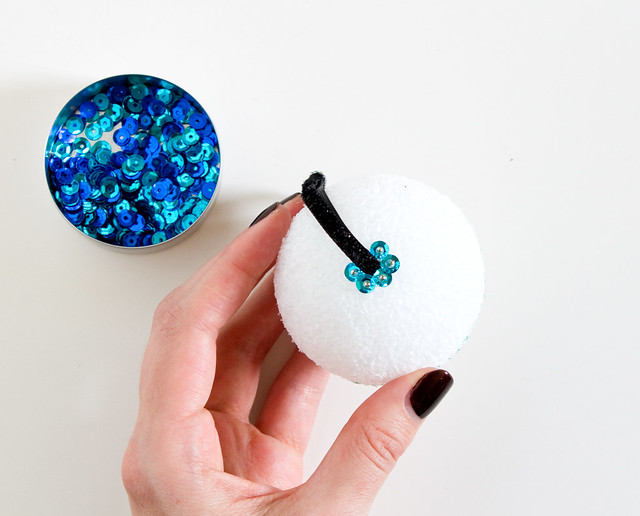
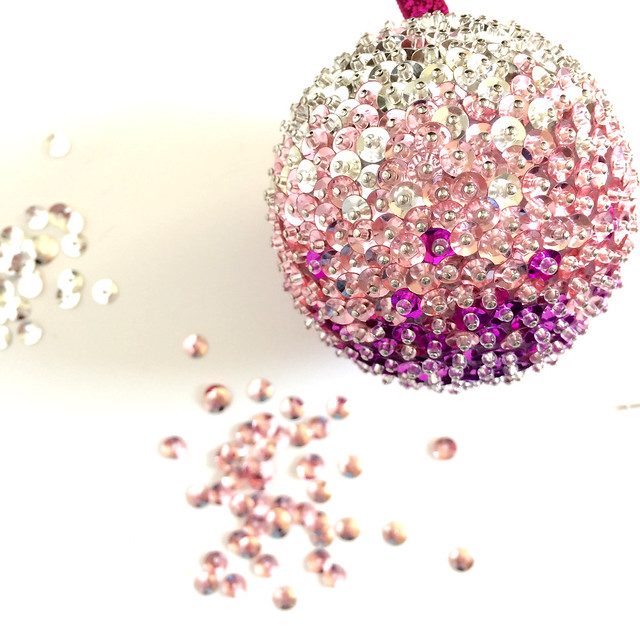
Thread a bead onto a pin, followed by a sequin in your lightest color. Make sure it's right side up - u shape instead of n shape for maximum sparkle! Dip the end of the pin in some tacky glue, and push the pin into the top of the ball right next to the ribbon. Continue adding beads and sequins all the way around the ribbon, slightly overlapping each so the styrofoam doesn't show through.
DIY Ombre Sequin Oraments

Keep going!! When you get about a third of the way down, start transitioning to the middle color sequins, and then to the last color about 2/3 of the way down. I mixed in a few sequins of the next color here and there to make the color transition more gradual.
DIY Ombre Sequin Oraments

tips
  • Instead of trying to thread each tiny bead onto the pin, just slide the pin through the container of beads. You'll pick one or a few up every time.
  • Squirt out some glue onto a scrap of cardboard and dip the pin ends into into that. Make sure to use glue - you don't want the pins falling out when you're finished! 
  • Set up all of your little containers and glue inside a tray or shoebox lid. This will help keep sequins, beads, and pins from going all over the place if it gets bumped, and makes it easier to put aside when you want to take a break.
DIY Ombre Sequin Oraments DIY Ombre Sequin Oraments

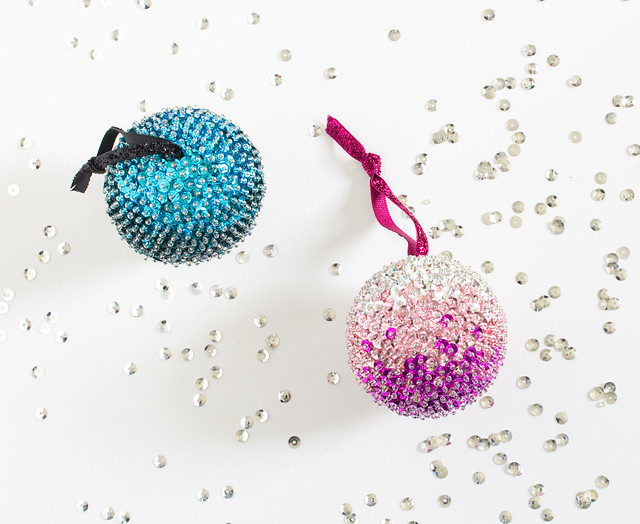
These ornaments are so pretty - even better in person! I love the ombre look, but you can try other designs and patterns, too. Stripes, swirls, polka dots. When I bought my supplies I also got a styrofoam cone that would make the prettiest Christmas tree. We'll see if I have enough time to tackle that! I'm not even done with the aqua/teal/blue one yet! :) I hope you'll try making some yourself!
DIY Ombre Sequin Oraments
P.S. Check out lots of projects from holidays past in the DIY Gallery!

*this post contains affiliate links

101

Thankful

Thursday, November 26, 2015

Crepe paper ombré

Happy Thanksgiving, everyone! I'm reflecting a little on all of the things I'm thankful for, and you, the readers of my blog came to mind immediately. 2015 has been quite a year for me, both professionally and personally. While the changes and adjustments haven't always been easy, I think they've prepared me for lots of awesome things to come! Thank you for stopping by to read a post, craft a new diy, or leave a comment, even when the posts have been few and far between. I'm looking forward to sharing lots of new content in the coming months.

Have a great day, eat lots of delicious food, and let your loved ones know how thankful you are to have them in your life.

*I'm also super-thankful for craft supplies. Photo above of some hand dyed crepe paper, via my Instagram

102

DIY Halloween Flower Vases

Wednesday, October 7, 2015

DIY Halloween Flower Vase | click through for the full tutorial!

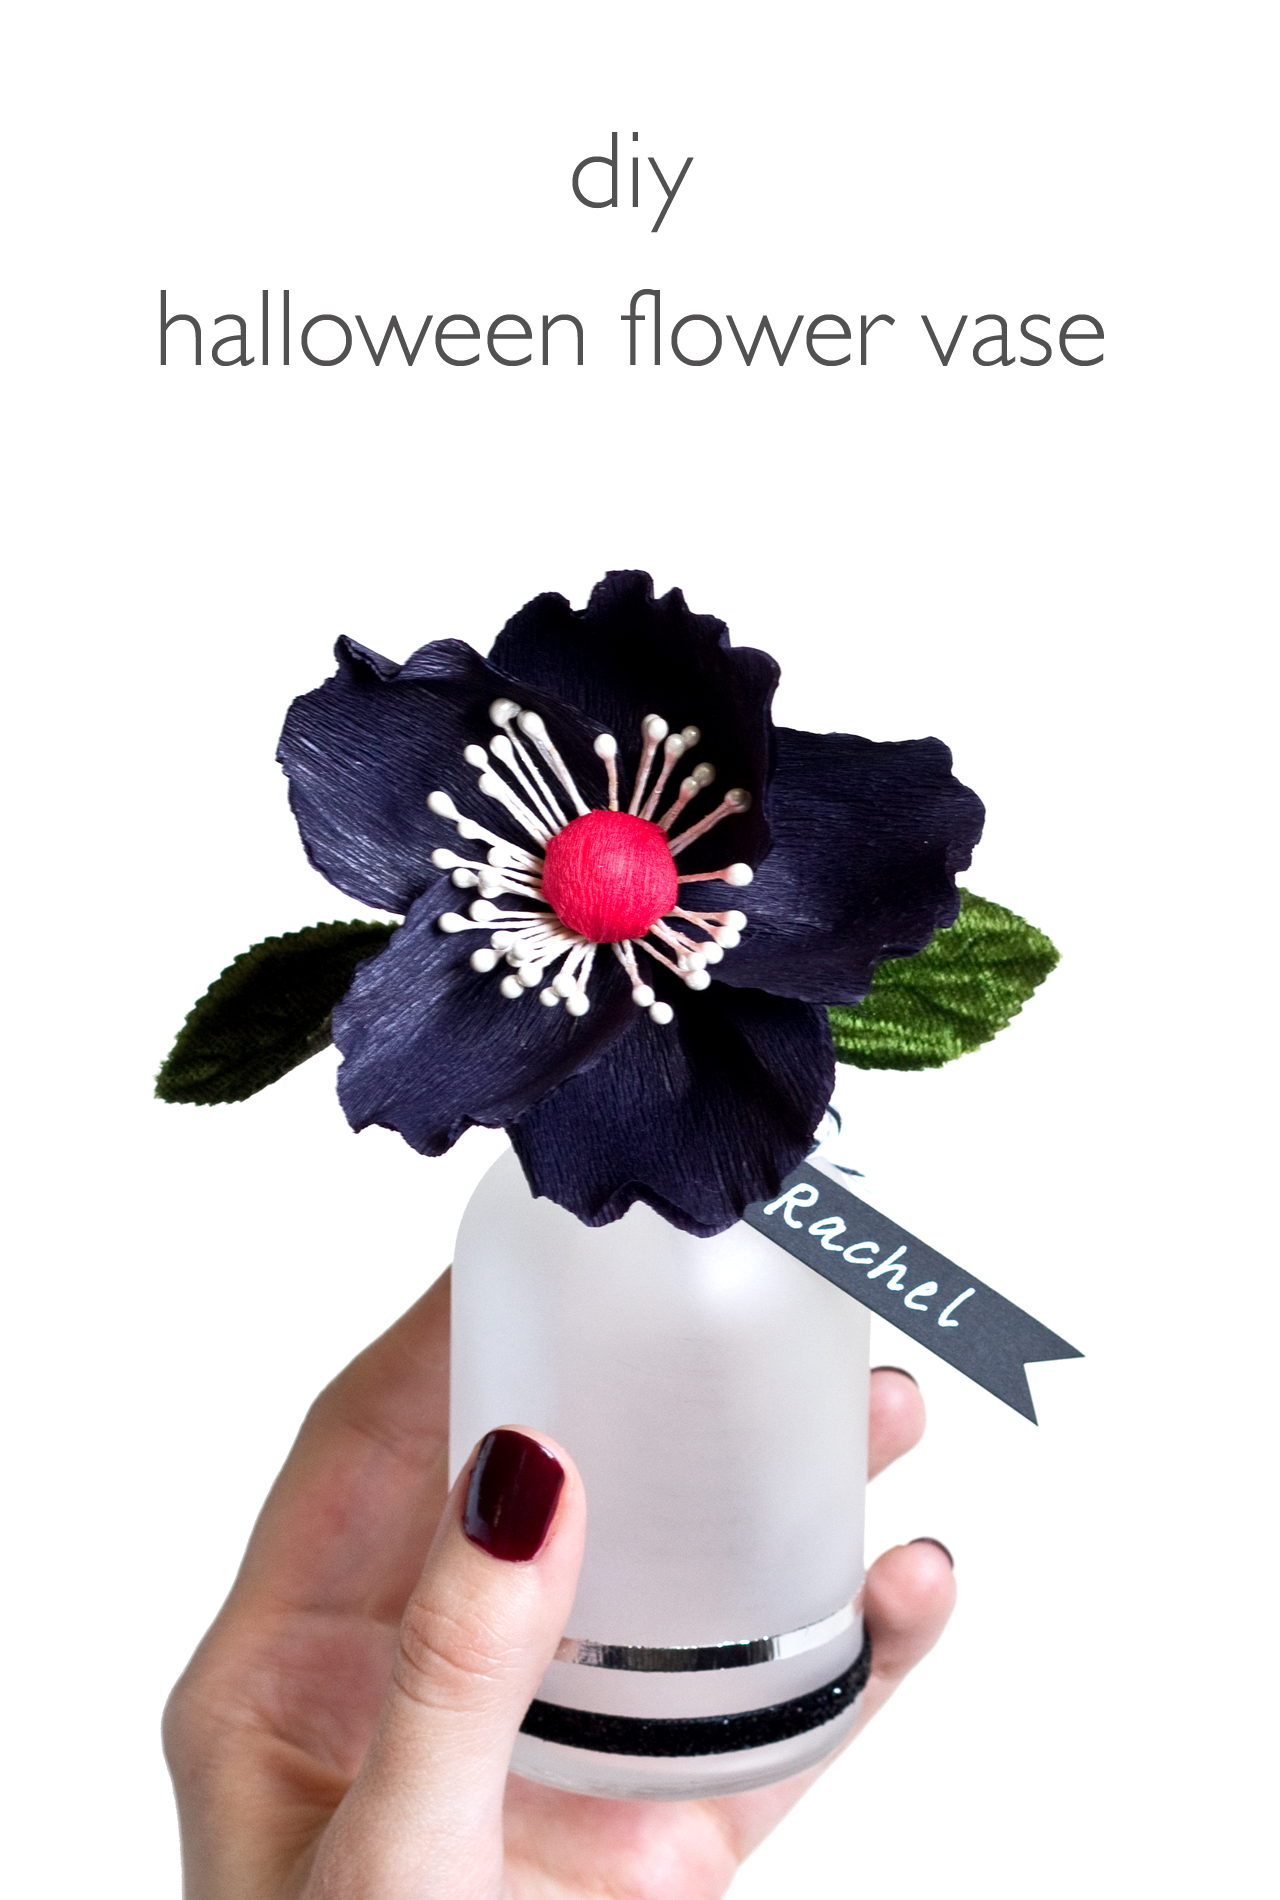
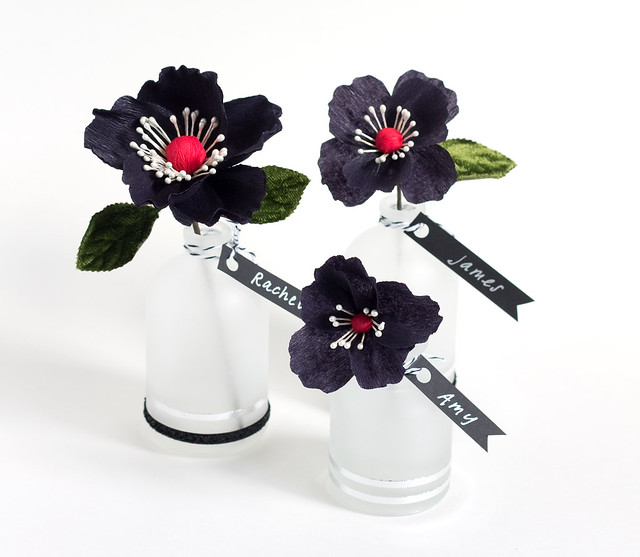
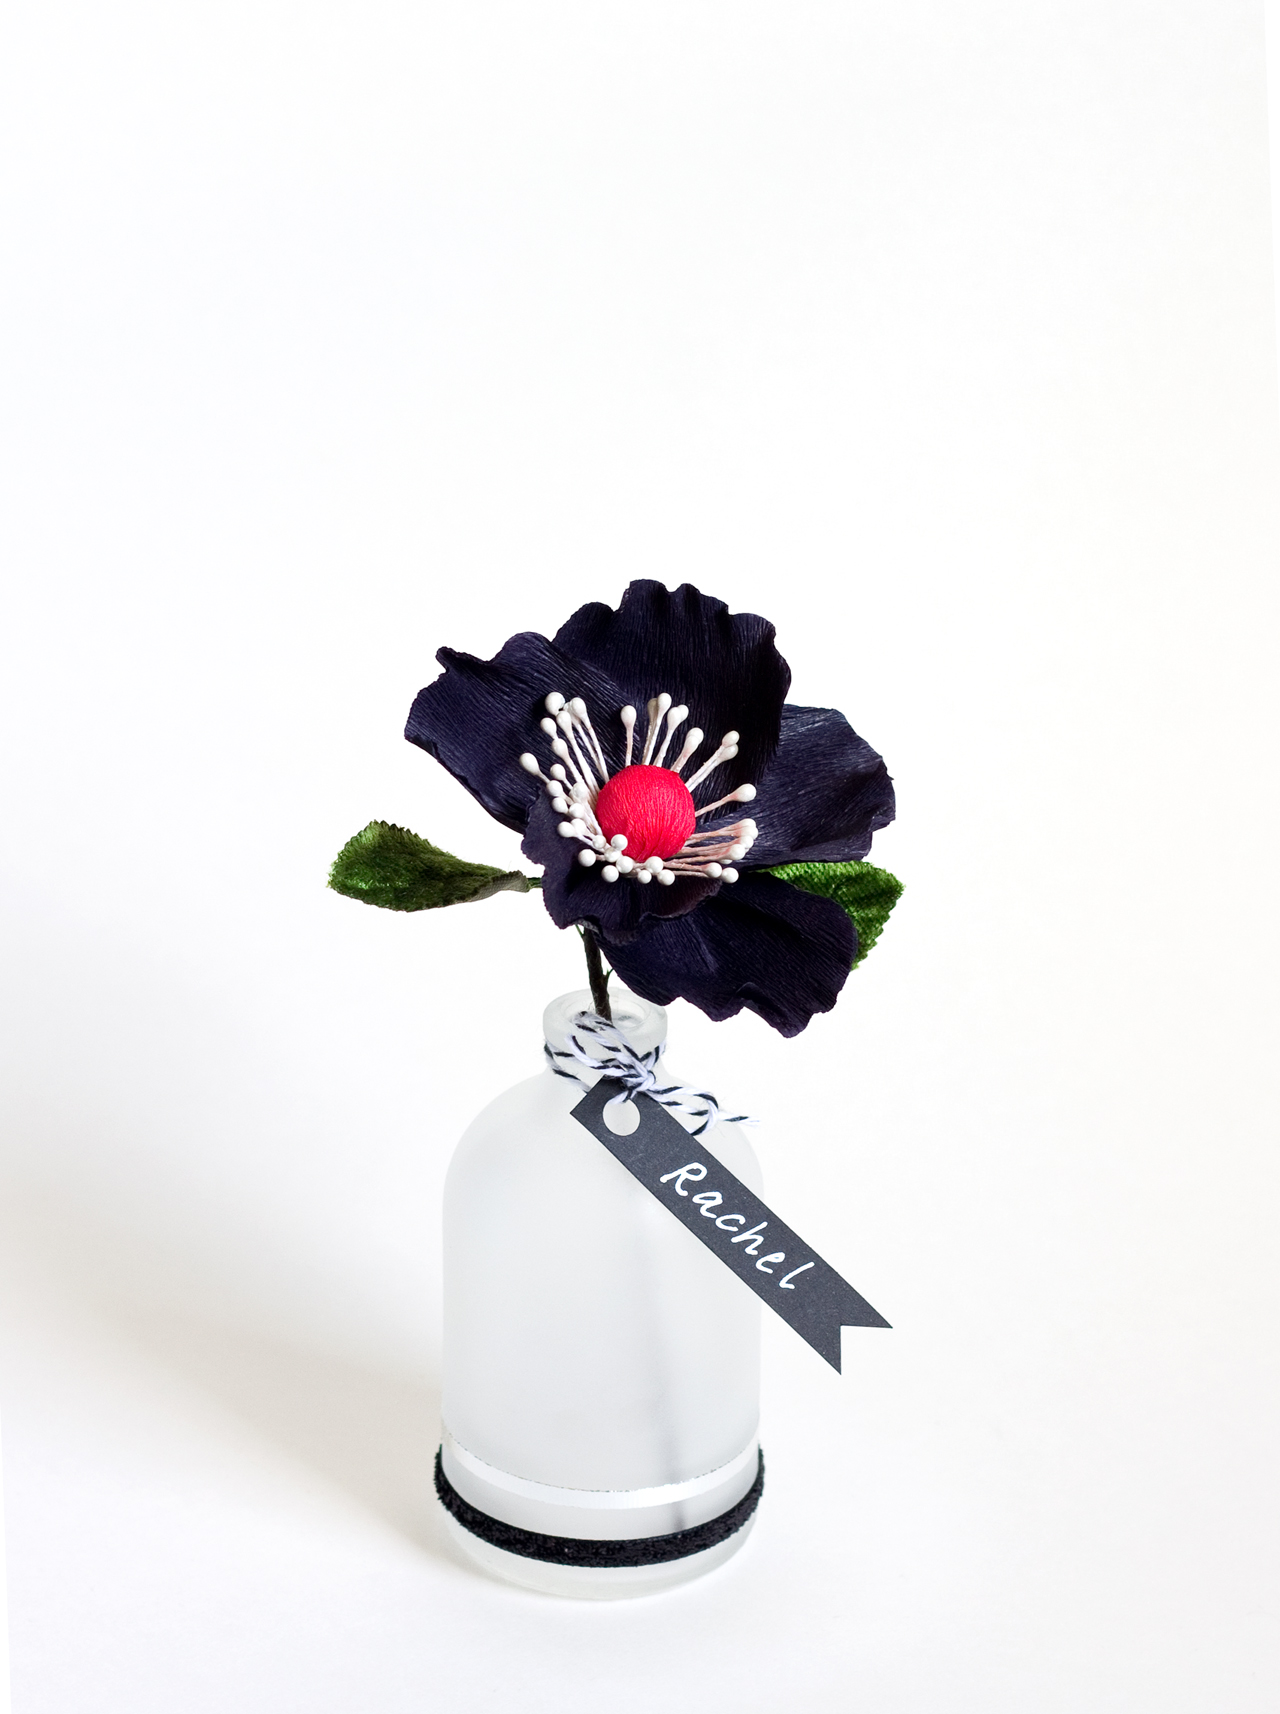
Halloween season, how I love thee! I spotted these adorable little frosted vases at Michael's a few weeks ago, and as per my usual style, bought them with no idea what I'd do with them. I thought they'd be perfect for Halloween, though. They look like little apothecary bottles, don't you think? It wasn't until after I started playing around with paper flowers again that I realized they'd make perfect little flower vases, but they'd need a little bit of embellishing. You can use lots of different materials for this project - ribbons, foils, faux flowers, real, or paper ones like I did.

Here's what you'll need:
DIY Halloween Flower Vase | click through for the full tutorial!
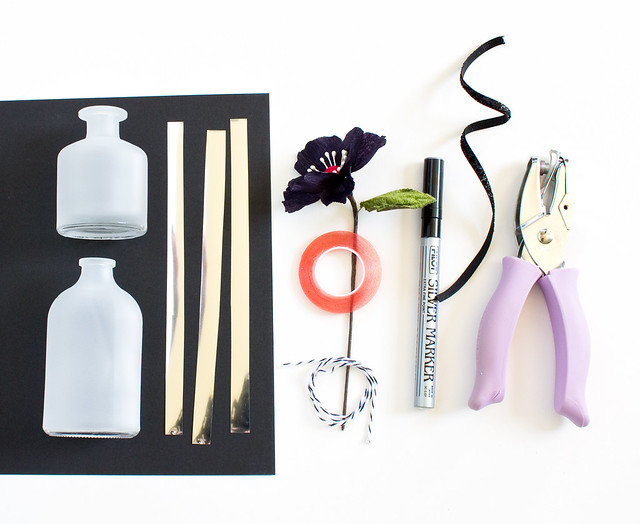
  • Mini frosted vases. These came in packages of 2 at Michaels for something super cheap like $3
  • Double-sided scrapbooking tape. This stuff is super strong and comes in all sorts of widths. I used 1/8"
  • Transfer foil (This was the same brand I used but mine came in silver, gold, and copper colors)
  • Ribbon, baker's twine
  • Black paper
  • Silver or white pen
  • Hole punch
  • Flowers. Faux, real, paper, whatever you'd like. I made these black paper flowers myself. Craft stores carry Halloween themed silk flowers or you could use grocery store mums.

DIY Halloween Flower Vase | click through for the full tutorial! DIY Halloween Flower Vase | click through for the full tutorial!

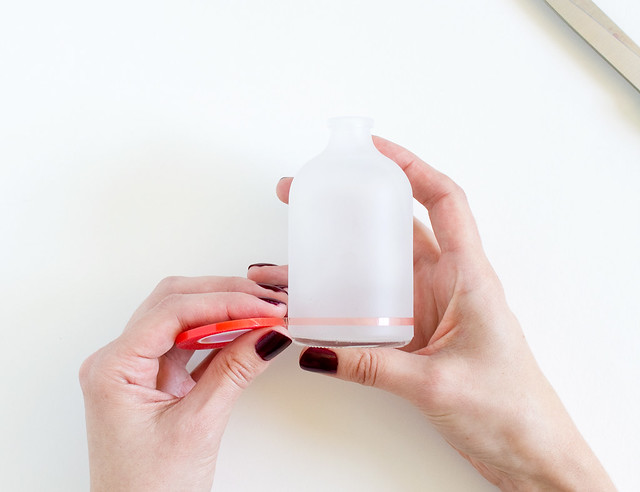
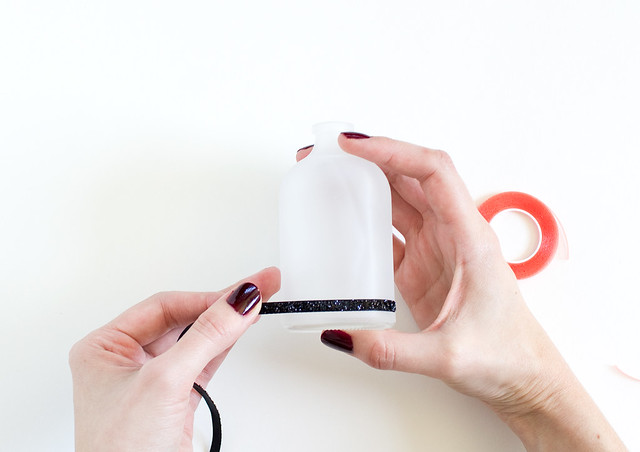
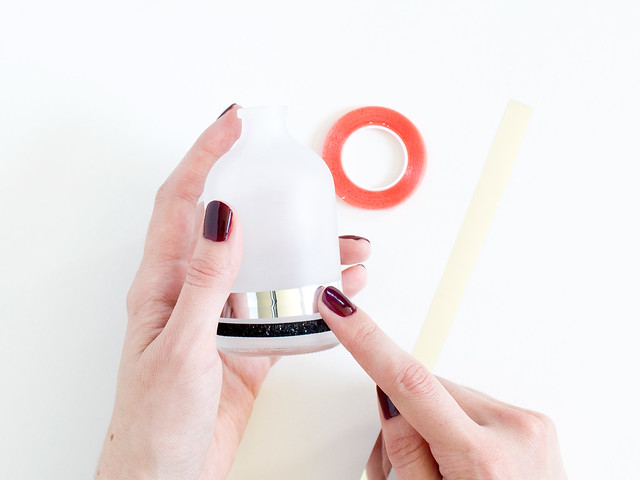
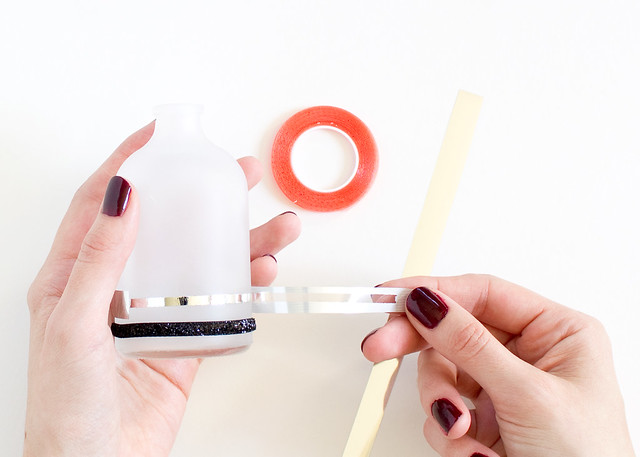
Unroll a bit of the tape and stick it onto the bottom of the vase. Continue all the way around till the ends meet, and trim. Pull up the orange plastic to expose the other sticky side, and stick on the ribbon, match the ends and trim. So easy!
DIY Halloween Flower Vase | click through for the full tutorial! DIY Halloween Flower Vase | click through for the full tutorial! DIY Halloween Flower Vase | click through for the full tutorial! DIY Halloween Flower Vase | click through for the full tutorial!

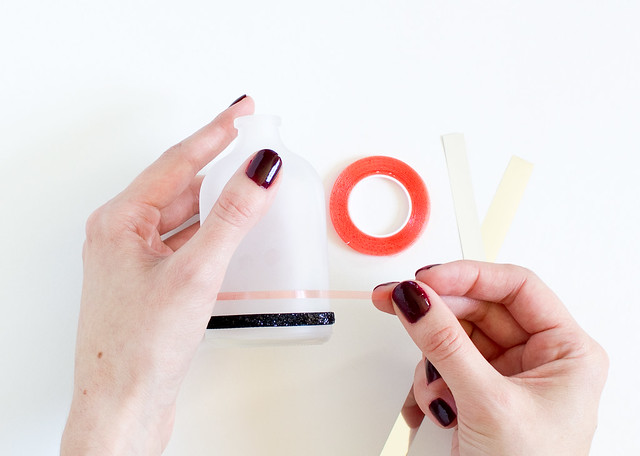
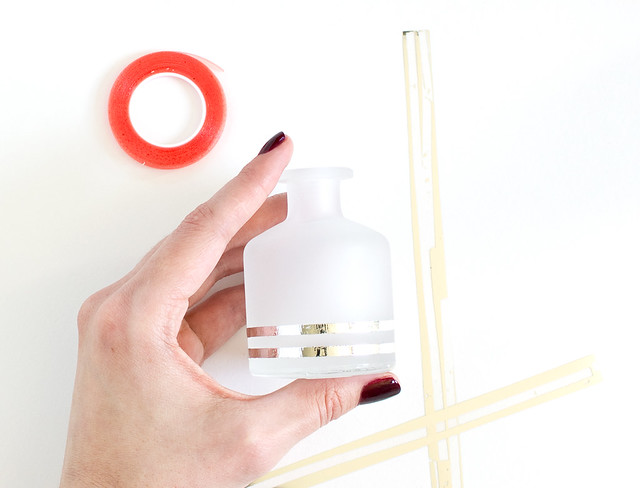
You could easily just make a bunch of ribbon stripes, but I thought a metallic touch would be nice, so I repeated the steps with this foil transfer in silver. Once you expose the sticky tape again, just apply the silver strips with the shiny side up. Rub the strip down with your finger and then pull up. You're left with a super-crisp silver stripe!

DIY Halloween Flower Vase | click through for the full tutorial!

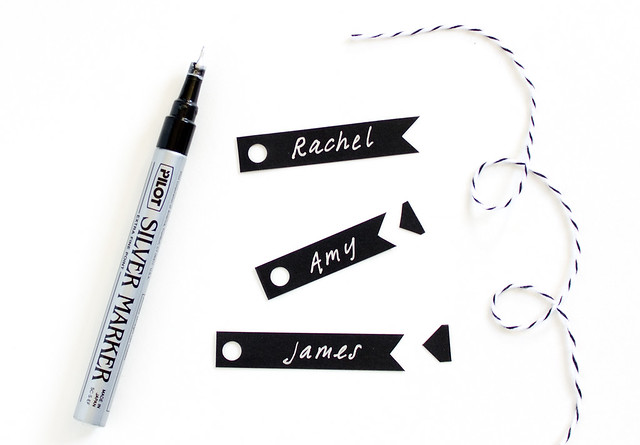
Cut a strip of black paper, notch one end and hole punch the other end. Write our your party guest's names and tie with ribbon or baker's twine. Add your Halloween flower and that's it!

DIY Halloween Flower Vase | click through for the full tutorial! DIY Halloween Flower Vase | click through for the full tutorial!

These would make adorable place cards at an October dinner or cute little party favors. They're so easy to make and customize. Plus the tape is fully removable so you can switch it up later if you decide. I like these so much I think I'll keep a few around all year. I hope you like them, too!

P.S. Check out my DIY Gallery page to see lots of diys from Halloween's past!

11

Cheers to the 4th!

Friday, July 3, 2015

source

Happy 4th of July weekend, friends! For all you lovers of vintage packaging and typography, check out these great graphics on these packages of fireworks.

source

source


source

source
So great, right? If you want to see lots more, click on the sources!

P.S. Looking for something special to add to your red, white, & blue outfit? Check out this patriotic paper flower headband project!

9

Happy Easter!

Friday, April 3, 2015


Happy Easter to you, my friends! I've been catching up on work this week and also trying to get over a cold, so I'll be taking it easy and eating lots of candy. :)

If you're looking for a last minute project, I have lots of good ones in the archives! See all of the Easter DIYs from years past right here.

*Photo of Mary Tyler Moore surrounded by bunnies via Mitch O'Connell

7

DIY Sneaky Easter Eggs

Wednesday, April 1, 2015

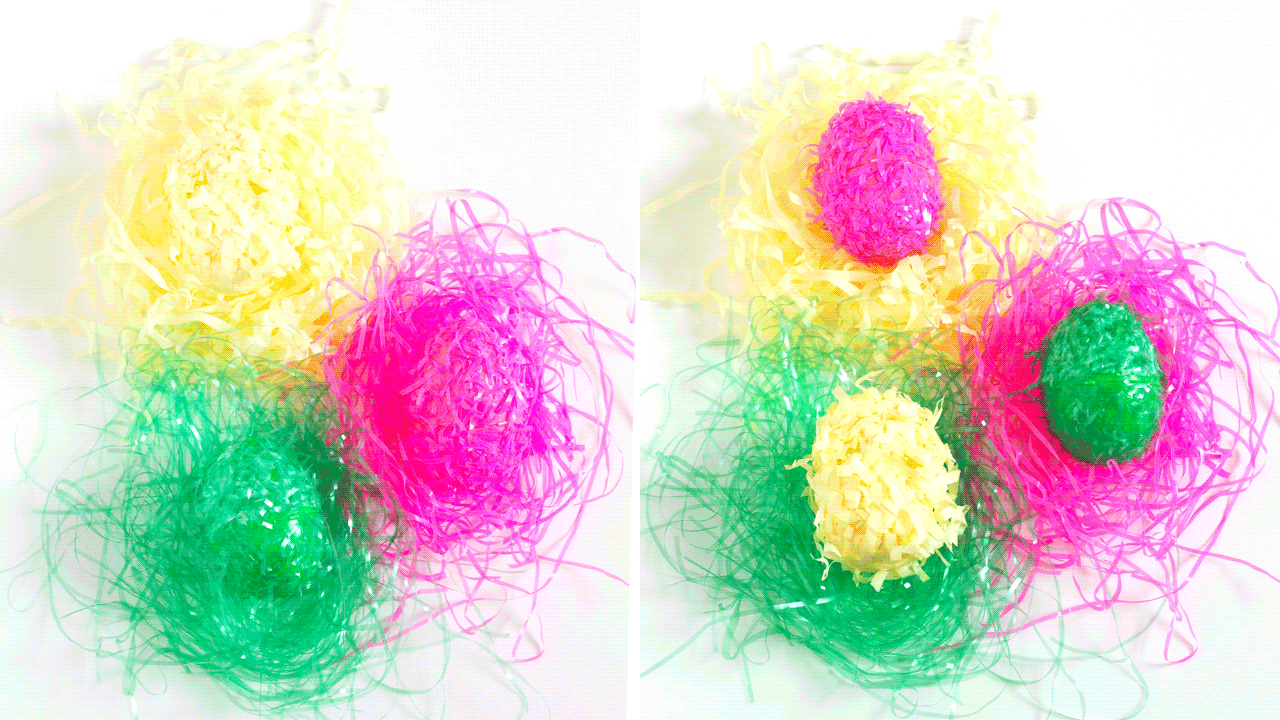
DIY Sneaky Easter Eggs With Easter so close to April Fool's Day this year I thought it would be fun to come up with a little practical joke from the Easter Bunny. These eggs will practically disappear in the Easter basket because of their funny Easter grass camouflage. They're cute on their own, too, almost like colorful cocoanut macaroons, in egg form.
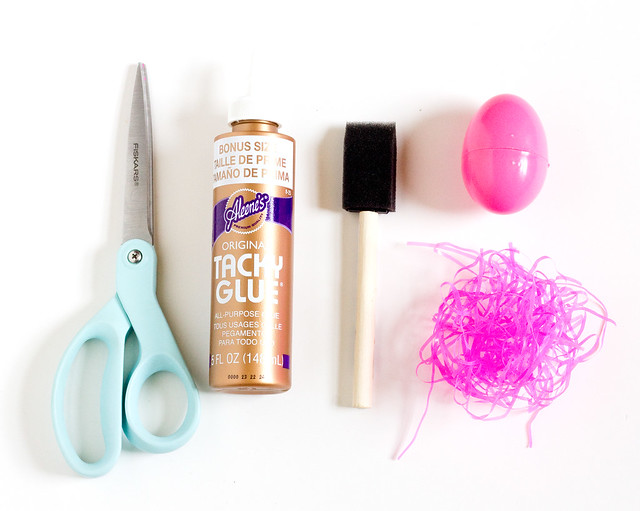
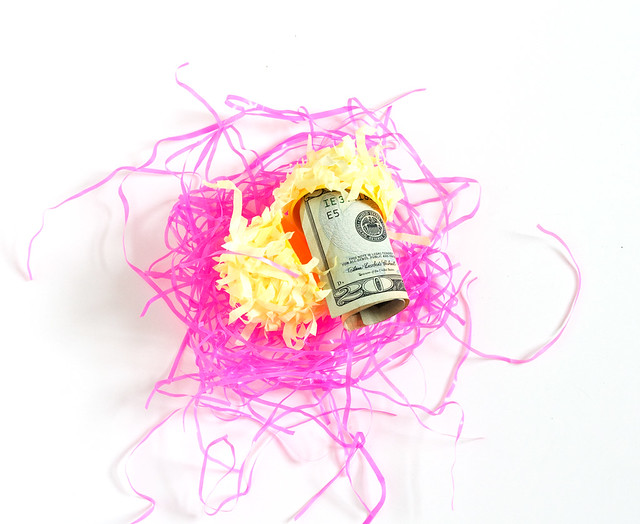
I used Easter grass (basket filler) for this project, but you could use real grass clippings instead for outdoor egg hunts. It would be perfect for older kids and adults who are looking for an extra challenge. Hide the best prizes in the camouflaged eggs!

Here's what you'll need:
DIY Sneaky Easter Eggs
  • Easter grass - I used opaque pink, transparent green, and yellow paper grass
  • Plastic eggs in the same colors as the grass
  • Thick glue - I used Tacky Glue but regular white glue would work, too
  • Foam brush
  • Scissors
Grab a handful of grass and trim it into a bowl. Cut varying sizes with the largest about 3/4" long.
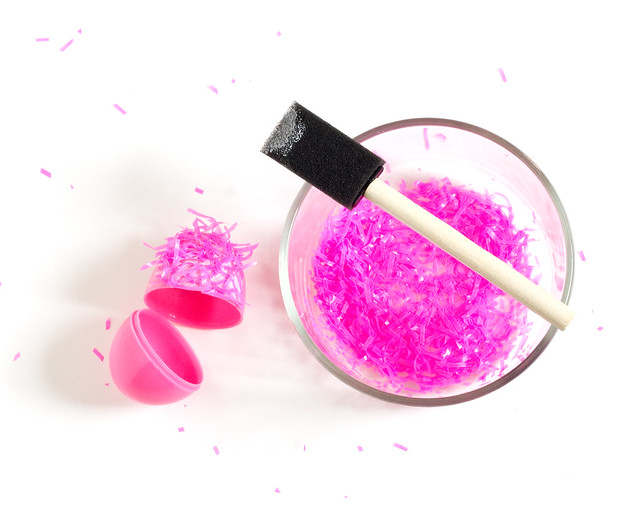
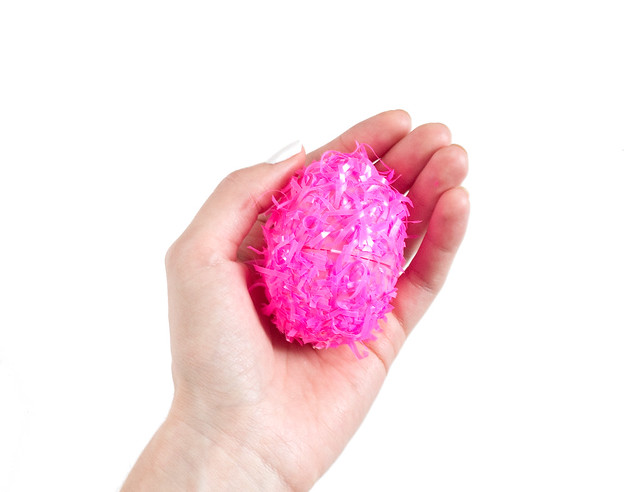
Open up an egg and brush the glue onto one side. Lay it in the bowl of the grass trimmings and cover all of the exposed glue. Repeat with the other side of the egg, making sure not to get glue on the seam. Let dry.
DIY Sneaky Easter Eggs
That's it! Fill them with prizes and hide them in Easter baskets. I had to take pictures of them on different colored grass because they blended in so well they practically disappeared!
DIY Sneaky Easter Eggs

DIY Sneaky Easter Eggs

DIY Sneaky Easter Eggs

Cute, clever, and so easy! I know my 6 year old niece will get a kick out of these on Easter. I hope you'll make a few! Happy April Fool's Day!

59

DIY Paper Carnation Valentine

Thursday, February 12, 2015

DIY Paper Carnation Valentine

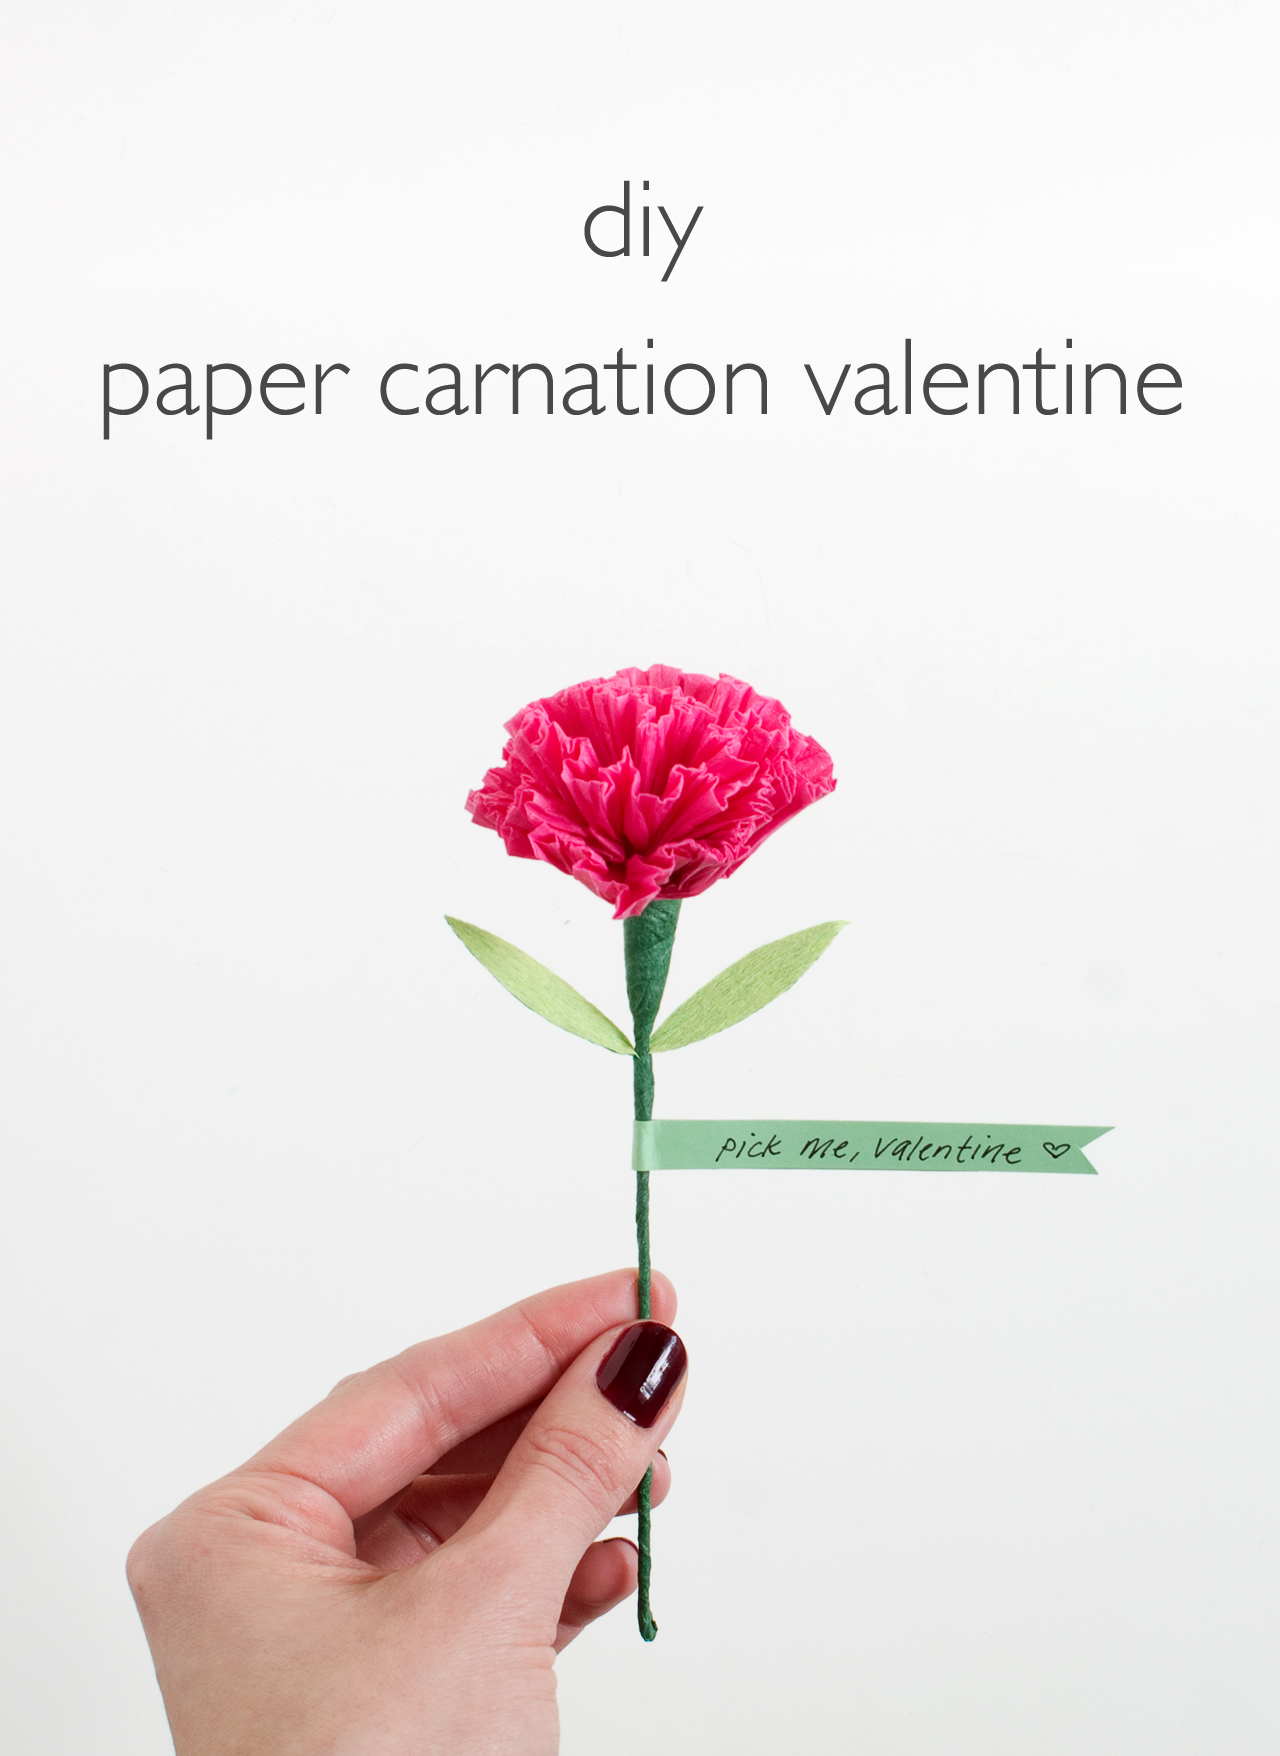
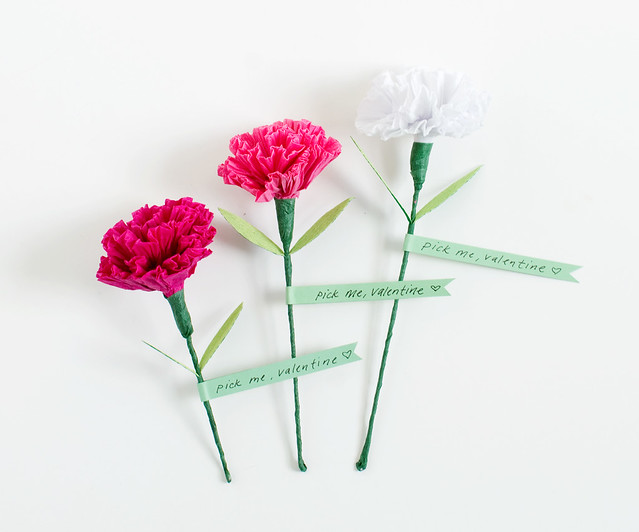
I couldn't let Valentine's Day season pass by without coming up with some sort of paper flower project! Enter the sweet, reliable carnation. You can always find bunches of them in the grocery store in every shade, they're super inexpensive, and they last forever. Carrie Bradshaw did say that carnations were making a comeback! (Nevermind that she said that like 15 years ago...)

I love the look of this paper carnation since it has more dimension than single ply tissue flowers. The crinkly petals almost look real and they're easy and inexpensive to make. All pluses in my book! Add a sturdy stem and a sweet love note and you've got a unique valentine flower for your loved ones.

Here's what you'll need:

DIY Paper Carnation Valentine
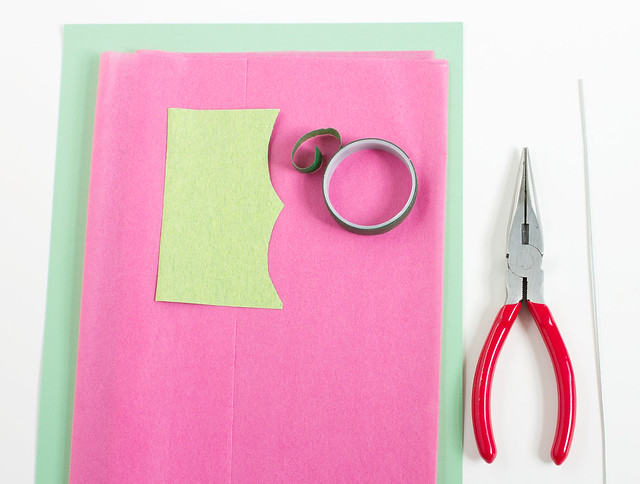
  • Tissue paper. One 10" square per flower
  • Green cardstock
  • Green crepe or tissue paper
  • Green floral tape
  • Floral wire, about 6" lengths
  • Pliers
  • Scissors
  • Paper glue

DIY Paper Carnation Valentine

This is the folded carnation design that I've adapted for this project. I've outlined the steps here with words and photos for clarity, but feel free to refer to the original for more info.

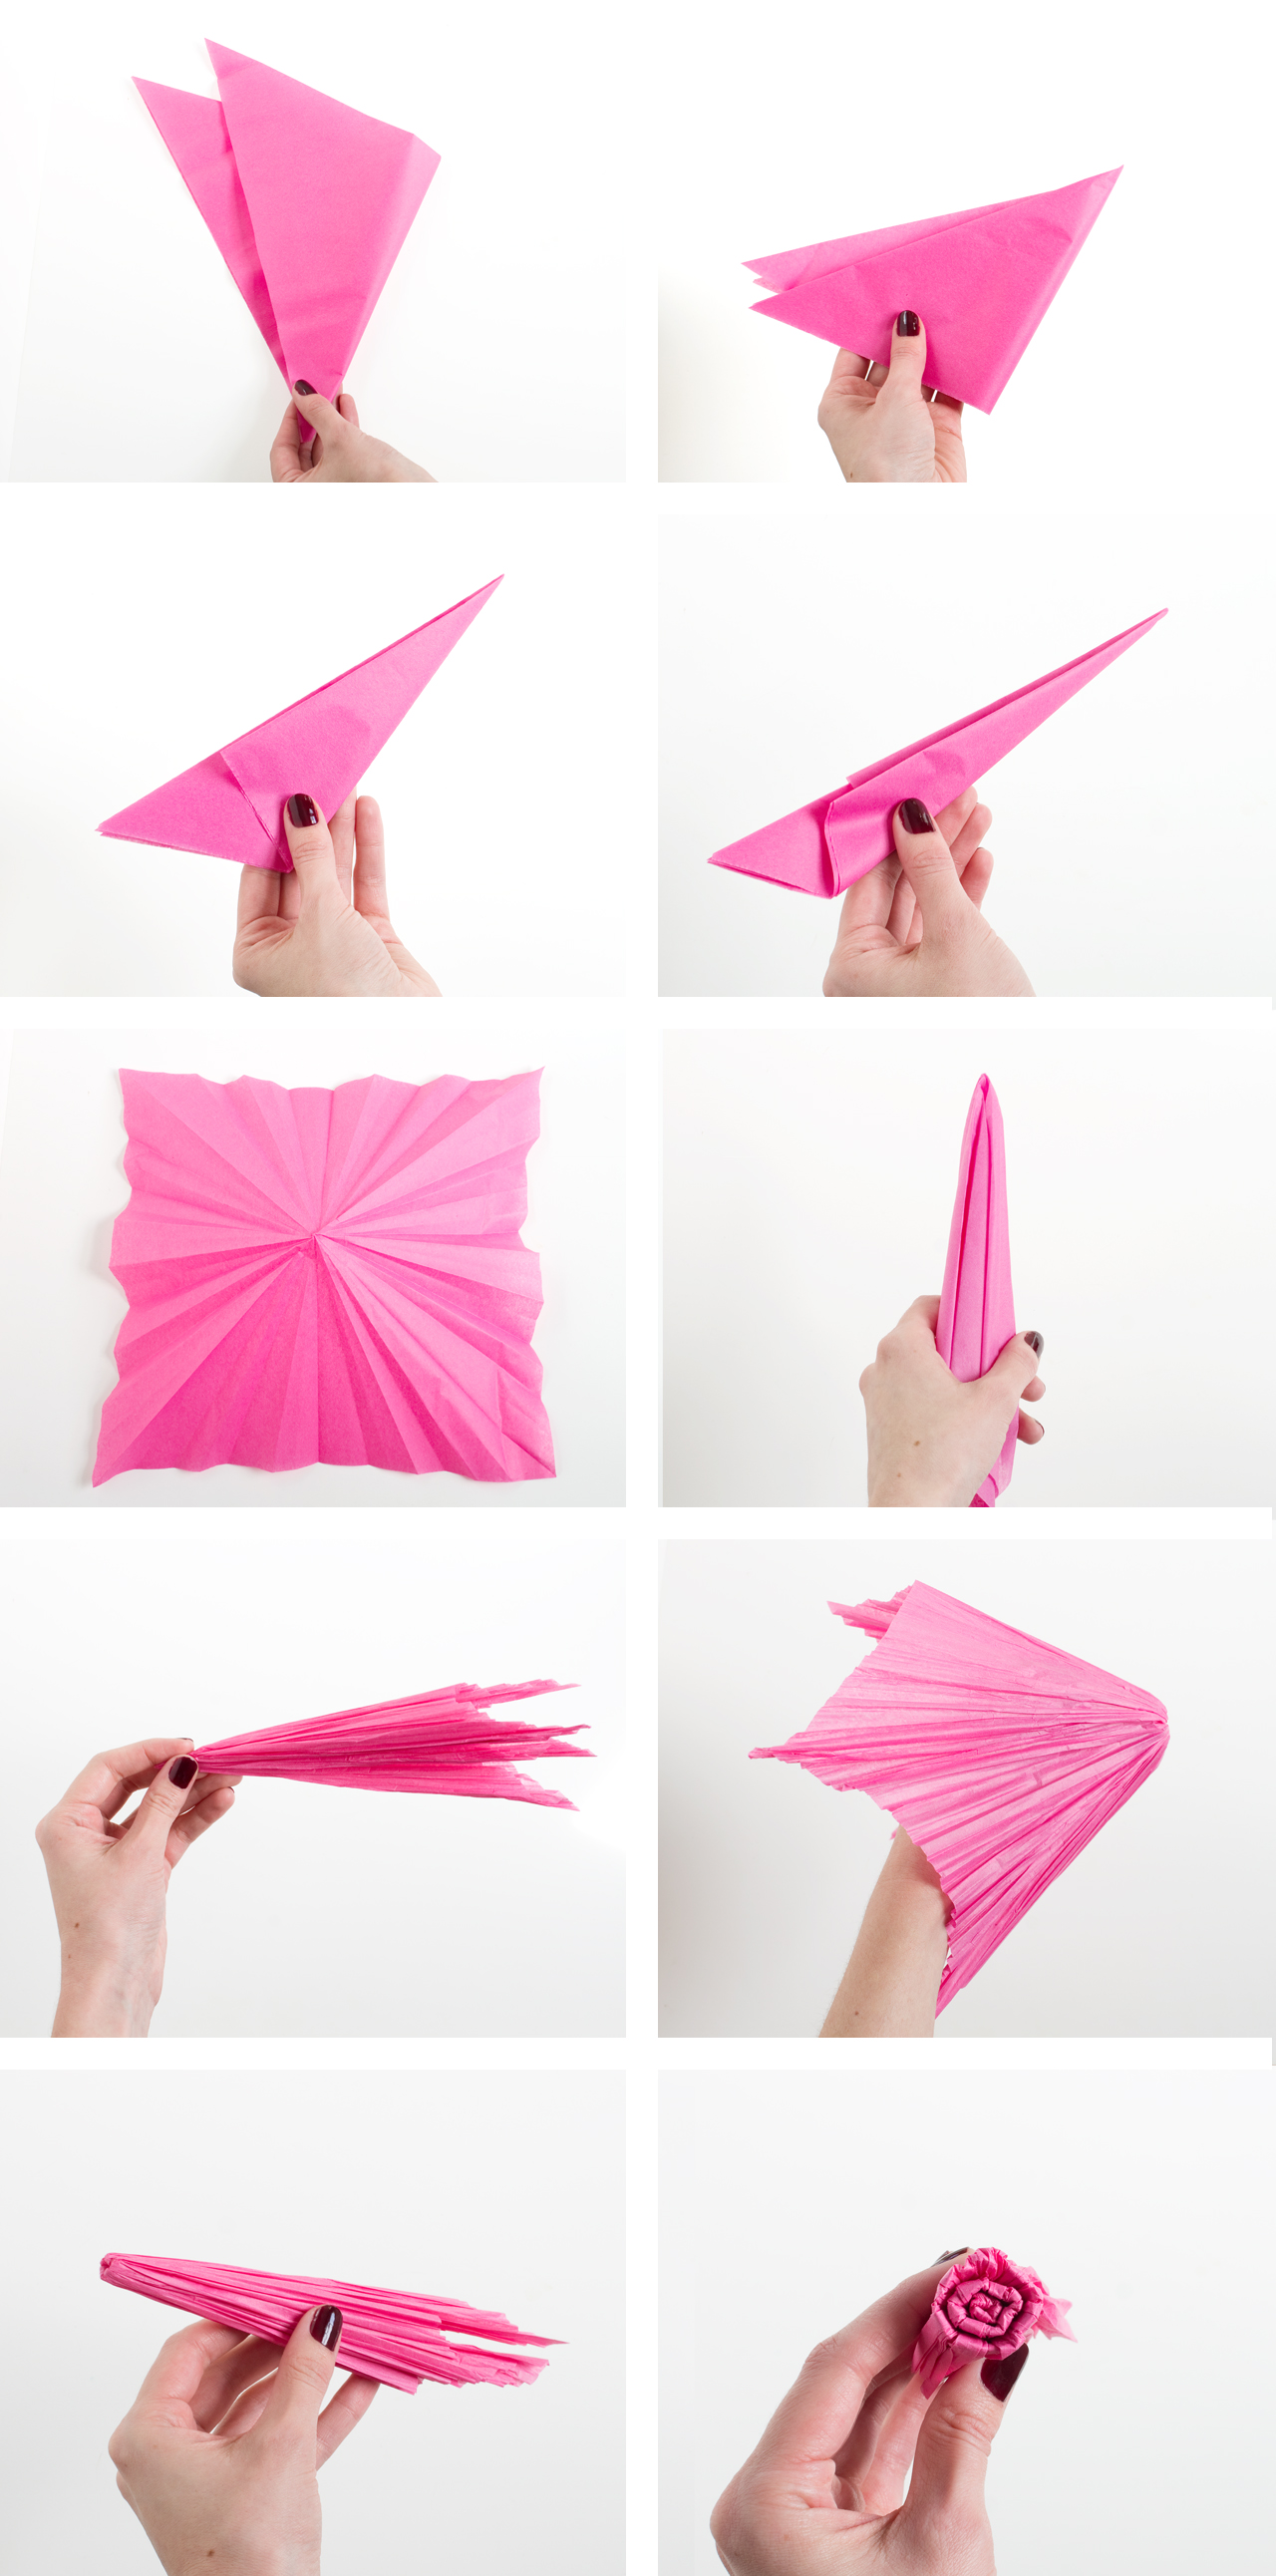
Fold the tissue square in half diagonally, and then again, and again. These steps create fan-like folds from the center of the tissue paper square. Continue folding in half until the paper is a narrow blade-like shape. Unfold. Gather the paper by the center and and crease downwards. Open the paper up and repeat multiple times. This step is creating very small vertical pleats in the paper. The more you open and re-crease the paper like this the more realistic folds the petals will have. Holding the paper horizontally with your right hand, pinch about 3/4" of the end and hold with your left hand. Flip the remaining paper back over your left hand, and crease around the fold you just made. Continue pinching about 1" of the paper and folding backwards until you have three rows of petals.

DIY Paper Carnation Valentine

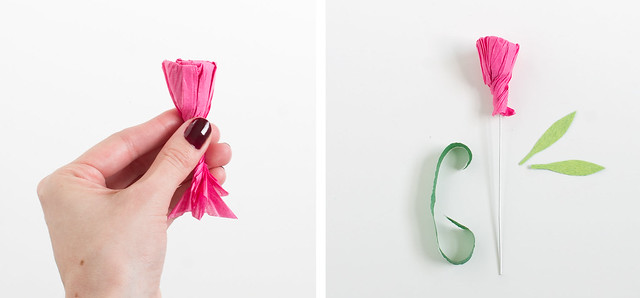
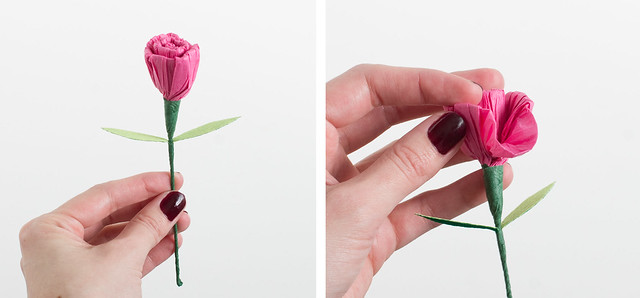
Twist the base and cut off the excess paper. Wrap with floral tape around the wire and the leaves.

DIY Paper Carnation Valentine DIY Paper Carnation Valentine

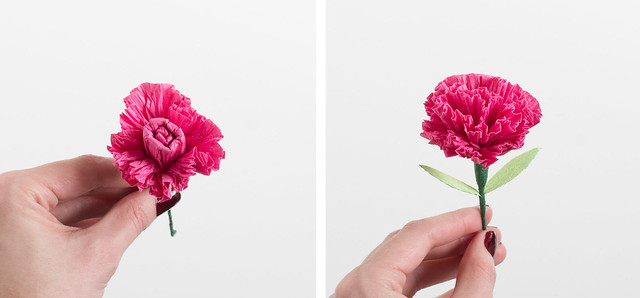
Here's the fun part! Starting with the outside petal, carefully spread out the creases in the paper. Gather the flower in your hand as you go to fold the petals towards the center of the flower. Continue with the other two rows of petals.

DIY Paper Carnation Valentine

Cut a narrow strip of cardstock and write a "pick me, valentine" on the right side. Add some paper glue to the left side and fold over the stem and secure.

DIY Paper Carnation Valentine DIY Paper Carnation Valentine
So cute! I hope you give these sweet little flowery valentines a try! What do you think - are carnations still making a comeback?

18

DIY Heart Manicure

Tuesday, January 27, 2015

DIY Heart Manicure | www.vitaminihandmade.com

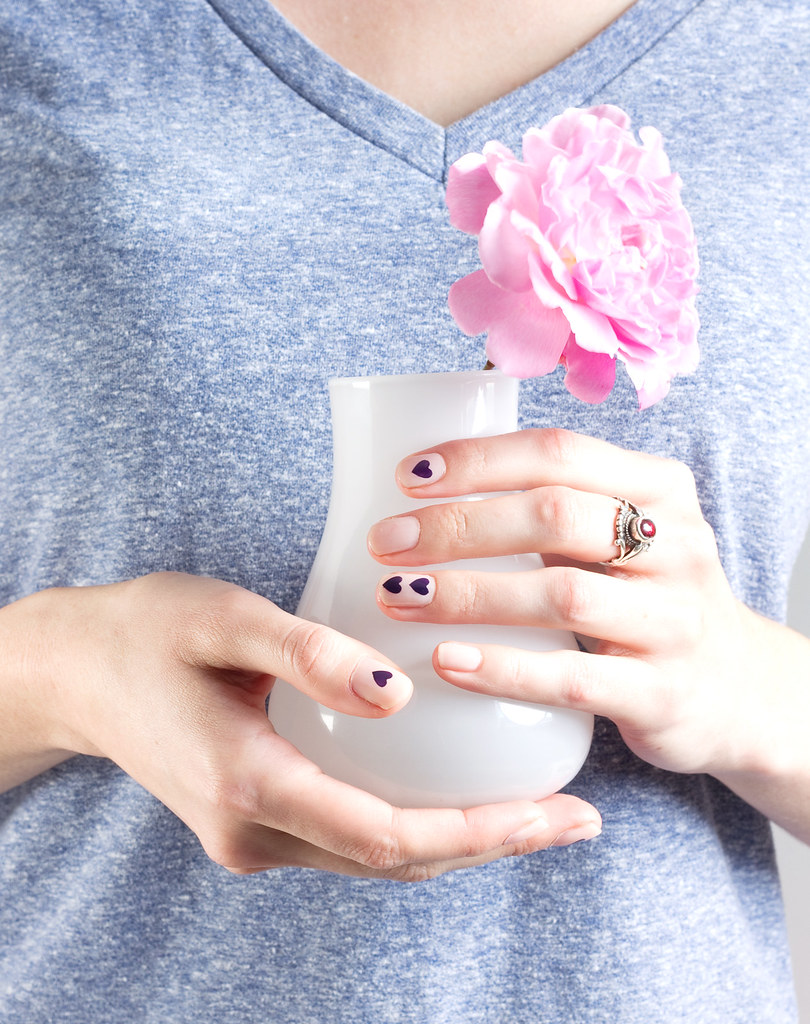
I love painting my nails myself, so I'm always looking for easy ways to make my home manicures a little more special. What's more special than hearts? Here's a super easy way to customize a plain manicure for Valentine's Day, or any other day when you want to some cute little hearts on your nails.
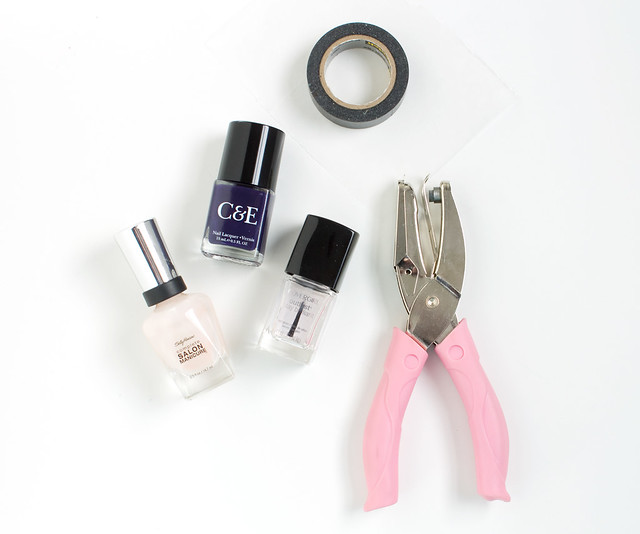
Here's what you'll need:
DIY Heart Manicure | www.vitaminihandmade.com

  • Light colored base coat of nail polish. I used Sally Hansen Shell We Dance
  • Contrasting accent color. I used this deep purple/almost black from Crabtree and Evelyn called Eggplant
  • Clear top coat
  • Washi tape
  • Wax paper
  • Heart hole punch

Start with 2 coats of the base color and let dry.

DIY Heart Manicure | www.vitaminihandmade.com

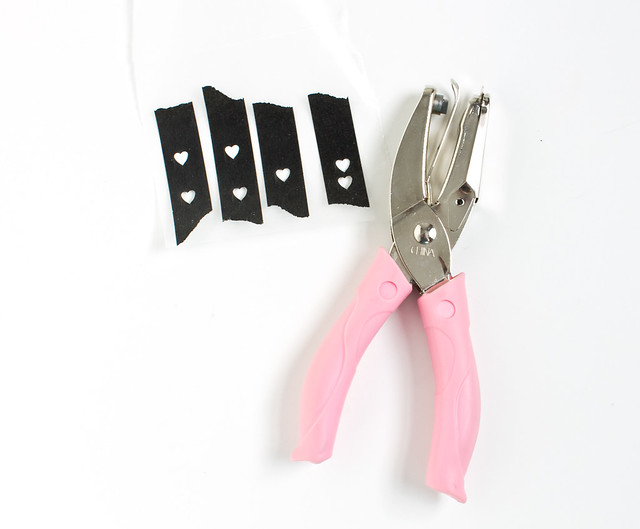
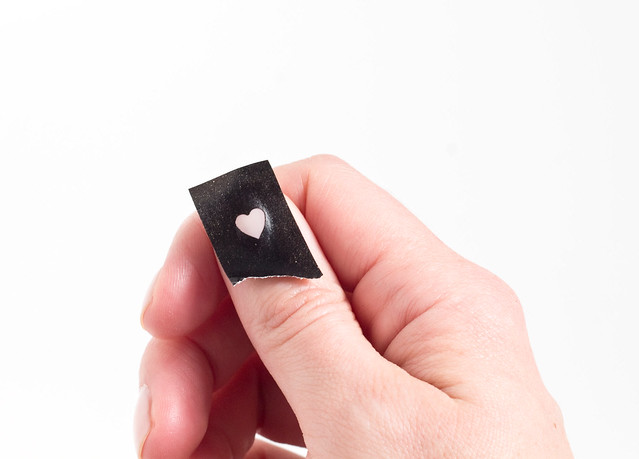
Lay some strips of washi tape onto a small piece of wax paper. Punch out one or two hearts per piece of tape. Here's a little trick if your punch is getting stuck on the paper: double a piece of scrap paper and lay it under the tape/wax paper while you punch to get cleaner edges.

DIY Heart Manicure | www.vitaminihandmade.com

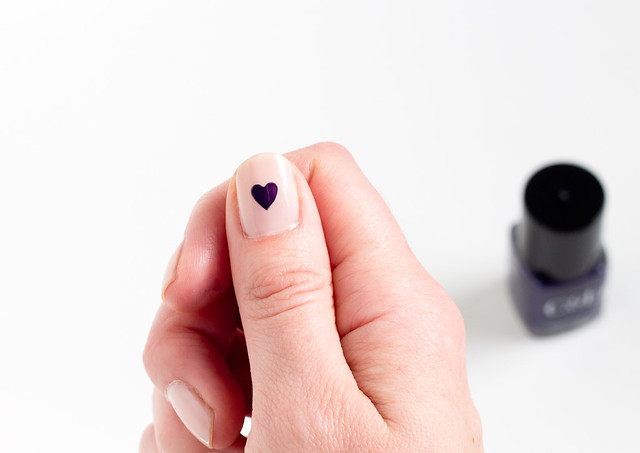
Pull the tape up from the wax paper and center the heart over the nail. Make sure the edges of the heart are stuck down. Paint over the heart area with the accent polish and then carefully pull up the tape while it's still wet.

DIY Heart Manicure | www.vitaminihandmade.com DIY Heart Manicure | www.vitaminihandmade.com

Continue on the other nails. Finish off with a coat or two of clear top coat once the hearts have dried.

DIY Heart Manicure | www.vitaminihandmade.com

Enjoy your new nails! Let's put hearts on everything, mmkay?


vitamini handmade © All rights reserved · Theme by Blog Milk · Blogger