14

DIY Mini Easter Dome

Monday, March 31, 2014

DIY Mini Easter Dome
There's just something about miniature nature scenes that just say "Easter!" to me. As a kid I was enthralled with my grandma's collection of sugar eggs. You know the ones, with hard as rock frosting decorations on the outside and a little viewing window. I loved looking at the little scenes inside those eggs. On one of my recent wandering trips around Michael's recently, I came across these little glass domed plates and thought they'd be perfect for a mini Easter display.

Here's what you'll need:

DIY Mini Easter Dome
  • Mini Display Dome found at Michael's
  • Mini speckled eggs. I found a bunch of pink and green eggs at Michael's. Similar  
  • Moss or lichen. I found mine on the ground after a windstorm, but you can buy bags of moss in the floral section at the craft store
  • Sticks, twigs, and small pieces of bark. Again, foraged during an afternoon walk.
  • Parchment colored paper
  • Hot glue gun
  • Scissors
  • Pliers to trim wire
DIY Mini Easter Dome

1. Optional: Paint a few of eggs with acrylic paint for more color variety (I painted the blue ones). Add some speckles with black or brown paint and a toothpick.
2. Break off a few small pieces of bark and glue them together to make a little raft-like shape. Make sure it's small enough to fit inside the lid of the dome.
3. Glue on a few small pieces of moss.
4. Clip the wires off of the mini eggs and hot glue them onto the raft.

DIY Mini Easter Dome

To make the little flags, hand write, stamp, or print out your Easter messages. I typed out a few in a simple font and printed them on a natural toned speckled piece of paper. Cut messages to size, leaving an extra 1/2 inch on the left side. Add a little bit of glue to a piece of wire (just trimmed from the eggs) and fold the flag around it.

DIY Mini Easter Dome

Once the flag is dry, trim the wire to size, about 1" tall. Experiment with placement in the arrangement. It is important to attach it to the left side of the raft so the entire paper fits inside the dome. Once you've found a good spot for it, add a dab of hot glue to the end and secure at an angle behind the eggs.

Glue the arrangement to the bottom of the plate with some hot glue. Add the dome over the top. Add a couple dots of hot glue to secure the lid to the base if you'd like.

DIY Mini Easter Dome

How cute are these? You can add another layer of personalization by tying on a little flag with a name to the top of the lid. Wouldn't they make the sweetest little place cards for Easter dinner?

DIY Mini Easter Dome DIY Mini Easter Dome

17

The New American Dream.

Friday, March 28, 2014

Spirit Magazine - The American Dream

My mom went on a trip a couple weeks ago and brought the issue of Spirit (Southwest's magazine) home for me and said I just had to read this one article. I finally got around to it this morning, and it was such a great read I thought you would enjoy it, too.

"The New American Dream" by Taffy Brodesser-Akner is about entrepreneurs who traded in the corporate desk job and created more fulfilling careers for themselves.
"The changing economy is spurring a radical new approach to living, and to earning a living. And for a growing number of creative entrepreneurs, that approach seems to be working."
I was so happy to find that the entire article is online. Check it out!

Spirit Magazine - The New American Dream

Now I'll spill the beans on what's been going on in the past few months and why this article really hit home for me. I quit my job right before Thanksgiving. I had known for a long time that I needed to rearrange things in my life. Juggling my Etsy business, craft blog, full-time job, and whatever tiny bit of a social life I could manage had worked fine over the past 5 years, but I knew I didn't want another 5 years of it. Additionally, recent health problem in the family (my mom's stroke last year and my dad's heart disease and battle with cancer) had reminded me that HEY, LIFE'S SHORT! Finally, after many stressed-out evenings and lots of tears I decided to make a change. A very scary change for a practical gal like myself. I walked away from my job of over 5 years (and the steady paycheck, health benefits, and stability that it provided) in favor of going it on my own.

What I've been up to since then: you may have noticed, but I'm expanding my line of handmade gifts and stationery. I've been working on my own shop website outside of Etsy and hope to start adding new wholesale accounts. I also will be working on some sponsored posts here on the blog and possibly some advertising. Cause, you know, a girl's gotta pay her bills!

Do I have it all figured out yet? No way. Is it scary? Hell, yes. Am I happy? More than I've been in a very long time.

So that's that! I hadn't planned on writing this post at all, but when I read the article this morning it just made sense to share. And now I don't know why I waited this long.

Oh, wait, I do know why. It was because I was scared. But I'm working on that.

176

Easy Polkadot Manicure

Wednesday, March 26, 2014

Dotty Nail Wraps

I came across these Sally Hansen Nail Effects Strips on sale at Walgreens last week and decided to give them a try. And guess what? I'm really impressed!

I did them on Friday night and here we are on Wednesday and they're still looking great! The application was a little involved, though. You have to first prep your nails to ensure good sticking action. Then you align each strip to the edge of your cuticle, and carefully stretch the rest of the strip to fit the nail. I pulled too hard on the first one and ripped it, so be gentle! File off the excess and make sure the edges are really stuck down with the little wooden stick provided in the box. The package comes with 16 strips (strange number if you ask me) but I got all of my nails covered using only 8. Just cut the unused ends off of your strips to use on your other nails. :)
Dotty Nail Wraps

I topped everything off with two coats of clear nail polish and it seemed to help everything stay put. I'm not easy on my nails by any means, so I'm very happy with how well they have held up over the past few days. Overall, it's a fairly easy (and cheap!) way to get a cute custom-looking manicure.

The pattern I used is called On the Dot. I couldn't find it on Amazon, but they carry lots of other colors and patterns. I'm sure your local drug store has them, too. 

6

New Fabric Print: Vintage Trailer Caravan

Friday, March 21, 2014

Retro Fabric Prints

Happy first Friday of Spring! The weather is heating up and I'm finding myself spending more and more time outside, dreaming up trips to the beach, hikes, and camp-outs. I was thinking about warm-weather getaways in kitschy vintage campers when I created this new fabric print. Here it is: Vintage Trailer Caravan!

Retro Fabric Prints Retro Fabric Prints
It's available in a multi-color option and black and white on Kona cotton. Both coordinate really well with my other retro-themed fabric prints.
Retro Fabric Prints

I can't wait to dive into these and sew up some cute stuff!

Retro Fabric Prints

Remember the Retro Ranch print I used for my Cafe Curtains? I listed this one for sale, too!

Retro Fabric Prints Retro Fabric Prints
These retro-themed prints are all listed for sale in my Etsy shop.

4

Top Tips for Thrifting

Wednesday, March 19, 2014

Top Tips for Thrifting

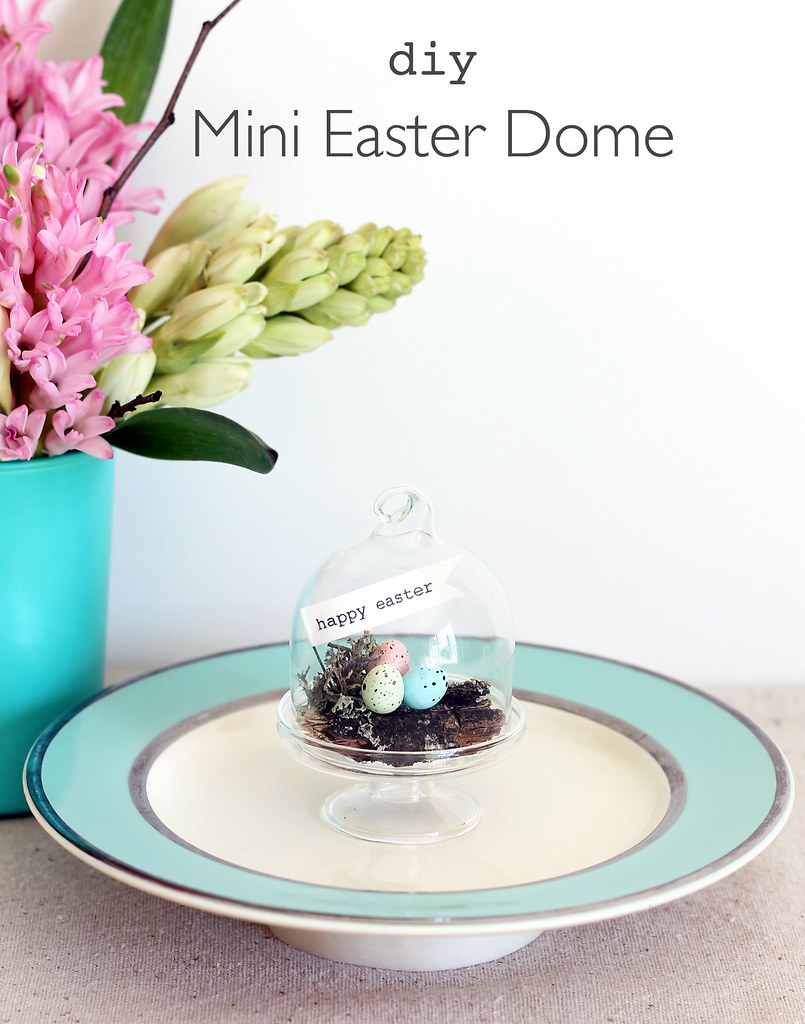
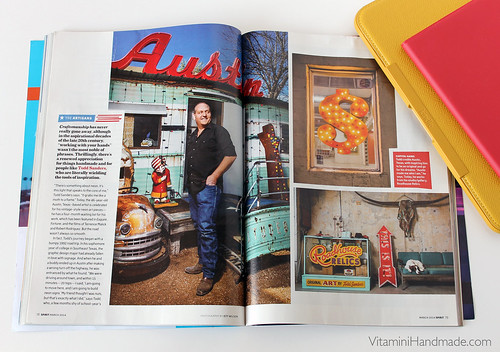
I've been a thrift shopper my whole life. It started when I was a kid and I'd tag along with my mom or help her at church rummage sales. I inherited from her the thrill of the hunt and it's still one of my favorite activities. It's like modern treasure hunting. I think I've gotten fairly good at my thrifting and wanted to share some of my tips with you! Twelve to be precise!

When I go shopping I mainly look for housewares and furniture, but these tips can be applied to pretty much anything you can buy second hand!

Top Tips for Thrifting
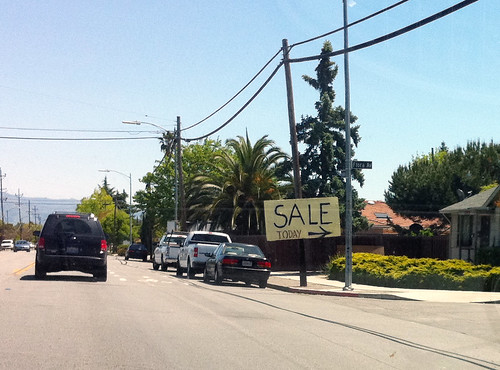
I don't know if the sale was as impressive as the sign.
Be willing to stop in and take a look.
You never know when you'll come across a great store or yard sale.

Top Tips for Thrifting
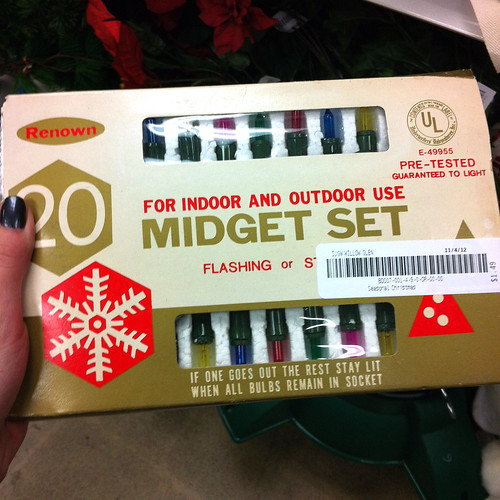
Sometimes the packaging is better than the product!
Go shopping alone, or with someone else who enjoys browsing, too.
It's no fun when you get to a great store and the person you're with wants you to hurry up and leave. Some people just aren't suited for thrift shopping. That's ok, just don't go with them! Find some other friends and family members who like the thrill of the hunt and go with them. I like shopping with my mom because she's great at recognizing potential in an item, or a unique style, or just something that may be valuable. Plus I got my love of junk shopping from her, so we think alike in those terms. I've also found some of my favorite pieces when I was shopping alone. Plus you don't have to worry about that awkward moment when you and your friend want the same killer Pyrex bowl.

Top Tips for Thrifting
Lane coffee table I snagged for $35
Look once, look twice, look again.
I can't tell you how many times I've discovered a really cool item that I originally missed the first time around the store. Sometimes it's hard to see the good stuff when it's surrounded by junk, so take your time and look again.

Top Tips for Thrifting
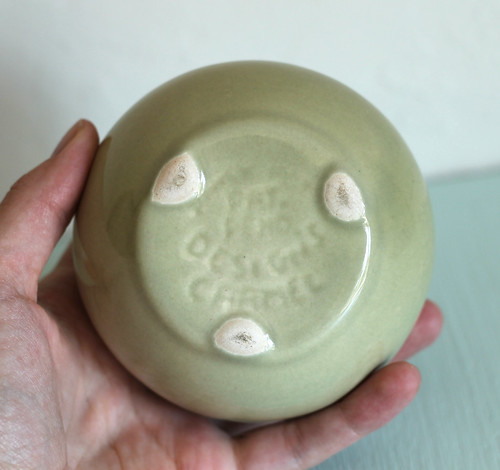
Locally made ceramic vase
Find a label or maker's mark.
The best way to identify a piece (and its potential value) is by finding a label or a maker's mark. If you were looking at a set of dishes with a couple missing pieces you may be able to locate those pieces online to complete your set. Look for a label and learn about what you're looking at.

Top Tips for Thrifting
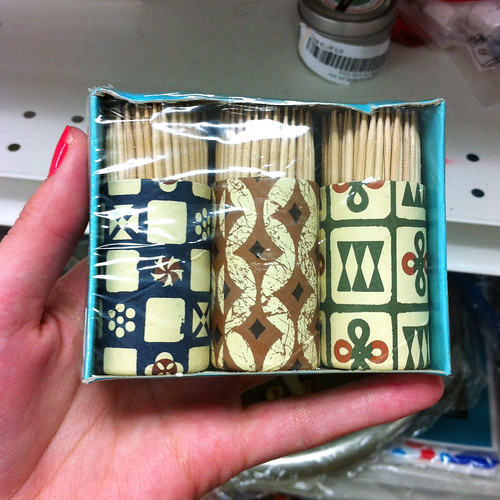
Cute set of toothpicks! Great for a party.
Take a smart phone for the on-the-fly research.
I recently purchased a cast iron enamel pan that had some stains in the bottom. When I was still in the store I did a quick search on my phone to see if the stains were bad damage or if I could live with them. I found out the stains were only cosmetic and picked up a new pan for $5! It's also fun to see what that item you're holding is currently going for on eBay. About $40 for that same pan!

Top Tips for Thrifting
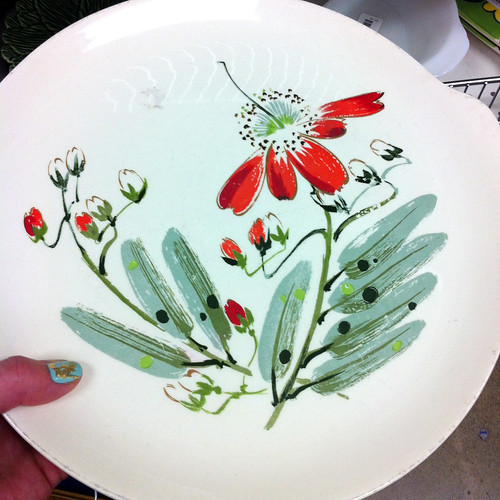
Unique plate pattern.
Look for damage.
Is that beautiful glass beverage dispenser that you just put in your cart actually cracked and broken on one side? (Oops, that happened to me once! Thankfully the store accepted returns.) Take a really good look at the items your considering. Pass on it if the damage is beyond repair or makes it unusable.

Update a jewelry box
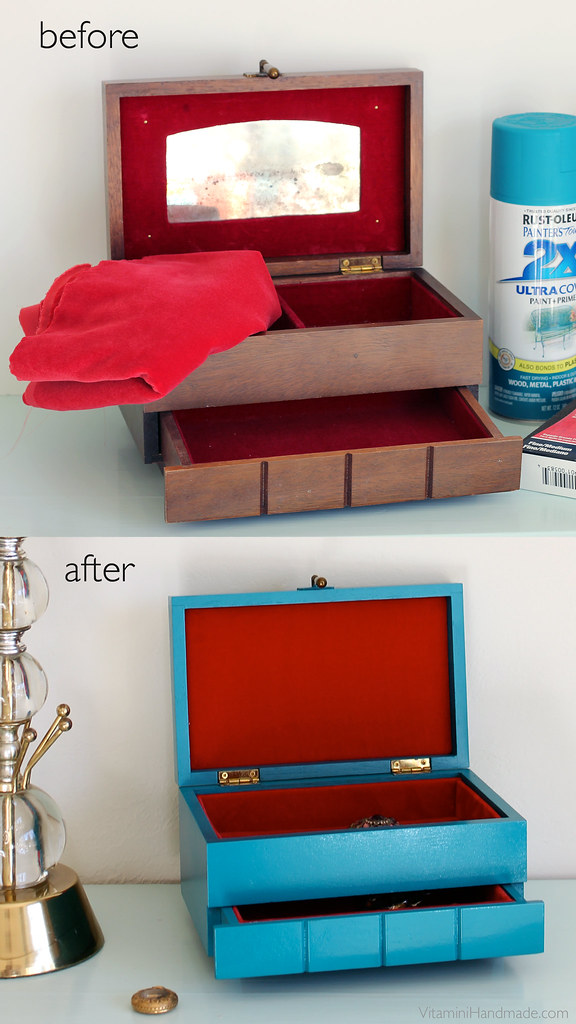
The original finish on this jewelry box was drab and damaged. A little overhaul made it look brand new!
Look for potential.
Would it look 10 times better after a good cleaning? Could that chair's wobbily leg be fixed by just tightening a few screws? Can it use a fresh coat of spray paint? Take all of these things into consideration when looking around. Items tend to look worse than they really are under those harsh fluorescent lights.

Top Tips for Thrifting
Vintage folding chairs in great shape.
Is it useful?
You can typically find lots of useful well-made items at the thrift store for less than what they'd cost brand new. Go ahead and spend a couple bucks on that Springform pan. You'd never find one new for that price.

Top Tips for Thrifting
I love the graphics on vintage record covers. You can usually find these for just a couple bucks. Buy a few and frame them to make some unique wall art.

Do you love it?
If you love it, go for it. Life's too short to regret buying that wonderfully-terrible velvet painting or that insanely huge 70's lamp.

Top Tips for Thrifting
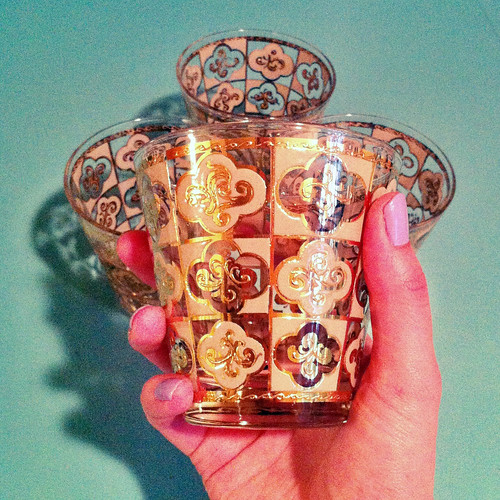
This set of gold cocktail glasses would be a great housewarming gift.

Would someone you know love it?
I've bought some great gifts at thrift stores over the years. Don't forget to think about the tastes of your friends and family while you're looking around. You may find that perfect, unique piece!

Top Tips for Thrifting
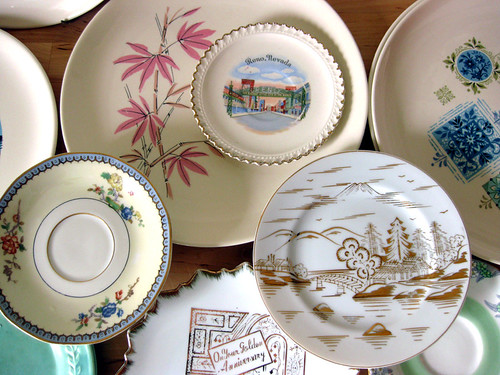
My entire collection of plates for my plate wall came from thrift shops.

Make friends with the sales people.
Sales people can give you the inside scoop on when new deliveries arrive, or when the next great sale is. Be nice to them. They may give you some useful insider info.
 
Top Tips for Thrifting
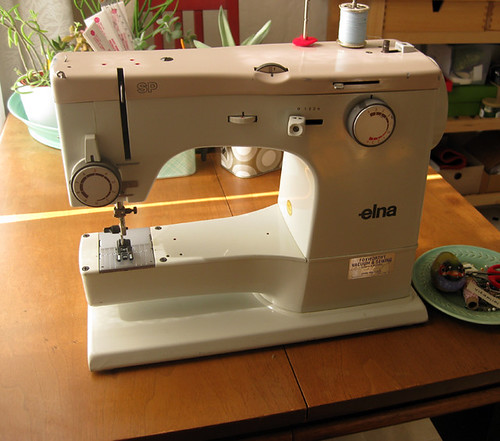
My $20 Elna works like a charm.

Keep your expectations low.
You really never know what you're going to find, so don't get your hopes up. I've left thrift stores empty handed many times. Sometimes there just isn't anything good. That's ok. Keep an open mind and stop in whenever you can. The more often you look, the better chances that you'll find a great deal.

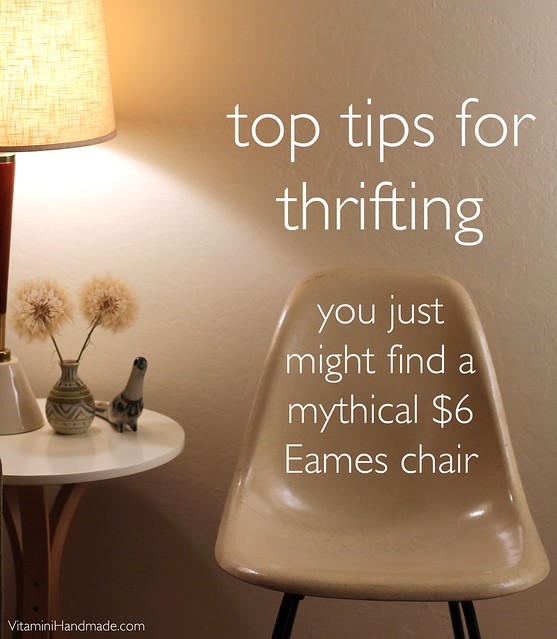
Which brings us to the first image. Yes, people, I did it! I found the mythical Eames chair (I actually found 2)! Priced for $6 each! If I can do it, so can you. Just keep at it. You're bound to come across that incredible find that you'll brag about for years.

Speaking of which, have you made any great thrift scores lately? I'd love to hear about it!

8

Just Keep Going.

Friday, March 14, 2014

"Keep Going" original watercolor
I started playing around with watercolors a few weeks ago and showed you a little peek. I'm happy to say I finally finished the bigger watercolor this week. It took me a month, but I took my own advice and Kept Going! I think succulents are the perfect symbol of persistence, growing through tough conditions, slow and steady, just keeping at it.

"Keep Going" original watercolor

I'm at a point in my life where I need to just keep at it, so this is the perfect reminder.

Keep Going Original Watercolor All of the succulents shown are in my collection except the one at the top, the string of hearts. Since I can't have any pets, I'm realizing that my plants kinda take that spot in my life. Is there such a thing as a crazy plant lady? If so, that is totally me. Have a wonderful weekend!

4

Reverse Macro Photography

Tuesday, March 11, 2014

Macro lens hack

I was cruising around some blogs last week and read this post on Wit & Whistle about a macro lens hack that she tried. I don't have a macro lens for my camera so I had to give it a try. Of course I chose to take photos of my succulents.

Macro lens hack Macro lens hack

Alisa Burke describes how to do it with a 50mm lens. Just take it off the camera body, flip it around, and hold it tight against the camera. Varying the distance from the subject will give you the focus. While it was very difficult to get a clear shot, I sure had fun trying!

Macro lens hack

The sun was going down and made these pretty lens flares. I held the camera (and the lens) for these shots, but I think I'll try it with a tripod next time. Have you ever tried this technique?

8

DIY St. Patrick's Day Corsage

Thursday, March 6, 2014

DIY St. Patrick's Day Corsage
I remember the terror I felt as a kid walking into school and realizing that it was St. Patrick's Day and I wasn't wearing any green! That only happened a couple of times, but it was enough to make me learn my lesson. As an adult, I plan on being prepared for every March 17th so I made these paper four-leaf clover corsages for extra anti-pinch insurance. And you can make your own!

DIY St. Patrick's Day Corsage
You will need:
  • Double-sided or florist crepe paper in green.
  • Floral tape in green
  • Wrapped floral wire lengths, about 3" each
  • Ribbon
  • 3/4" bar pin
  • Hot glue gun
  • Scissors
DIY St. Patrick's Day Corsage
Cut a 1 3/4" x 3 1/2" rectangle of the crepe with the grain running the short way. Cut out four heart-shaped leaves with a long stem from the rectangle. My finished leaves are about 1 1/2" tall by 3/4" wide. Fold and crease each leaf in half.

DIY St. Patrick's Day Corsage DIY St. Patrick's Day Corsage

Cut a 4" length of floral tape. Start with one leaf, wrap it around the wire with the tape, pulling the tape taut. Continue adding the 3 other leaves. The easiest method I found for this was to wrap one leaf, then wrap it's opposite leaf, then proceed with the other two.

DIY St. Patrick's Day Corsage
Open up the leaves and refine the shape of the clover. Stretch the centers of the leaves with your fingertips, to achieve a slight dome on each side of the center fold. Done! Make two more!

DIY St. Patrick's Day Corsage

Gather the three clovers in an arrangement that you like. I mixed the colors and heights of mine. Add a dot of hot glue to the back of the bunch and wrap with the ribbon a few times until secure. Finish the ribbon end with another dot of glue in the back. I used this awesome green glitter ribbon, but if you want something a little less fabulous, go with black or a solid green.

Glue on the bar pin. Tie a bow with the ribbon and glue to the front. Bend the tops of the clovers forward and bend the bottom of the stems outward.

DIY St. Patrick's Day Corsage

Pin it on and strut your lucky stuff! St. Paddy's is on a Monday this year, so make a few extras for your friends at the office. Your choice if you want to trade them for donuts, but that's what I would do.

2

Polka Dot Manicure

Tuesday, March 4, 2014

polka dot nails

There's nothing like a fun manicure to pep you up so when I spotted this new "Color Show" nail polish at CVS last week I had to give it a try. I love how it looks layered over this lavender polish. It reminds me of the paint splatter look that was so popular in the 80's.

polka dot nails

The colors I used are Essie Full Steam Ahead and Maybelline Clearly Spotted.


vitamini handmade © All rights reserved · Theme by Blog Milk · Blogger