38

DIY Easy Fabric Art

Wednesday, July 29, 2015

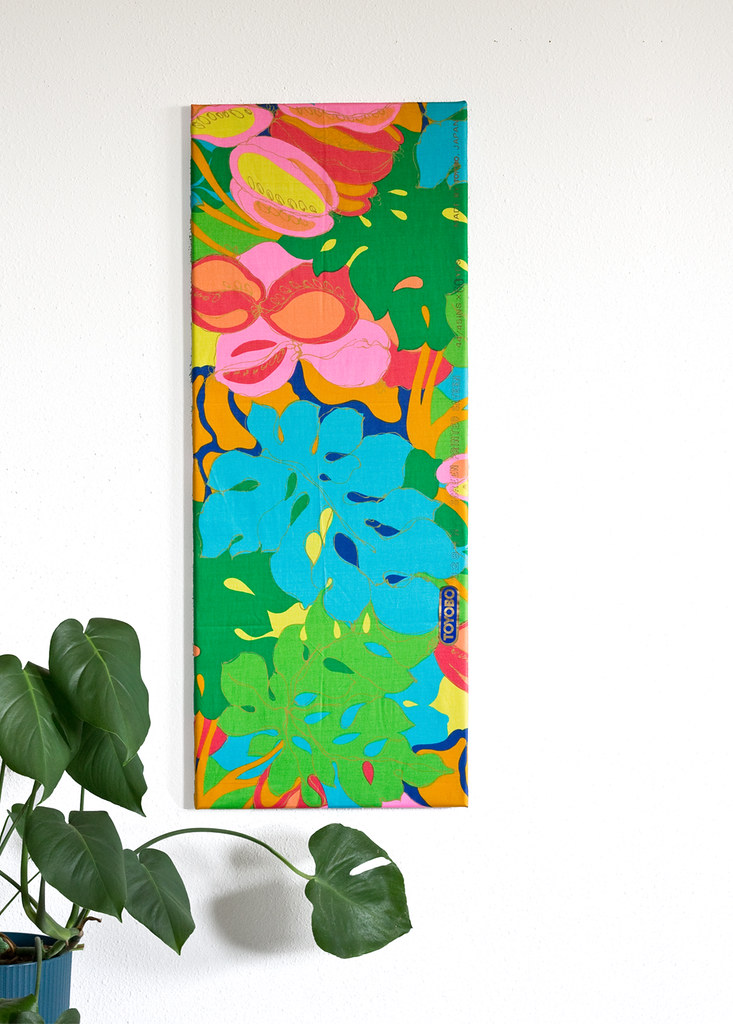
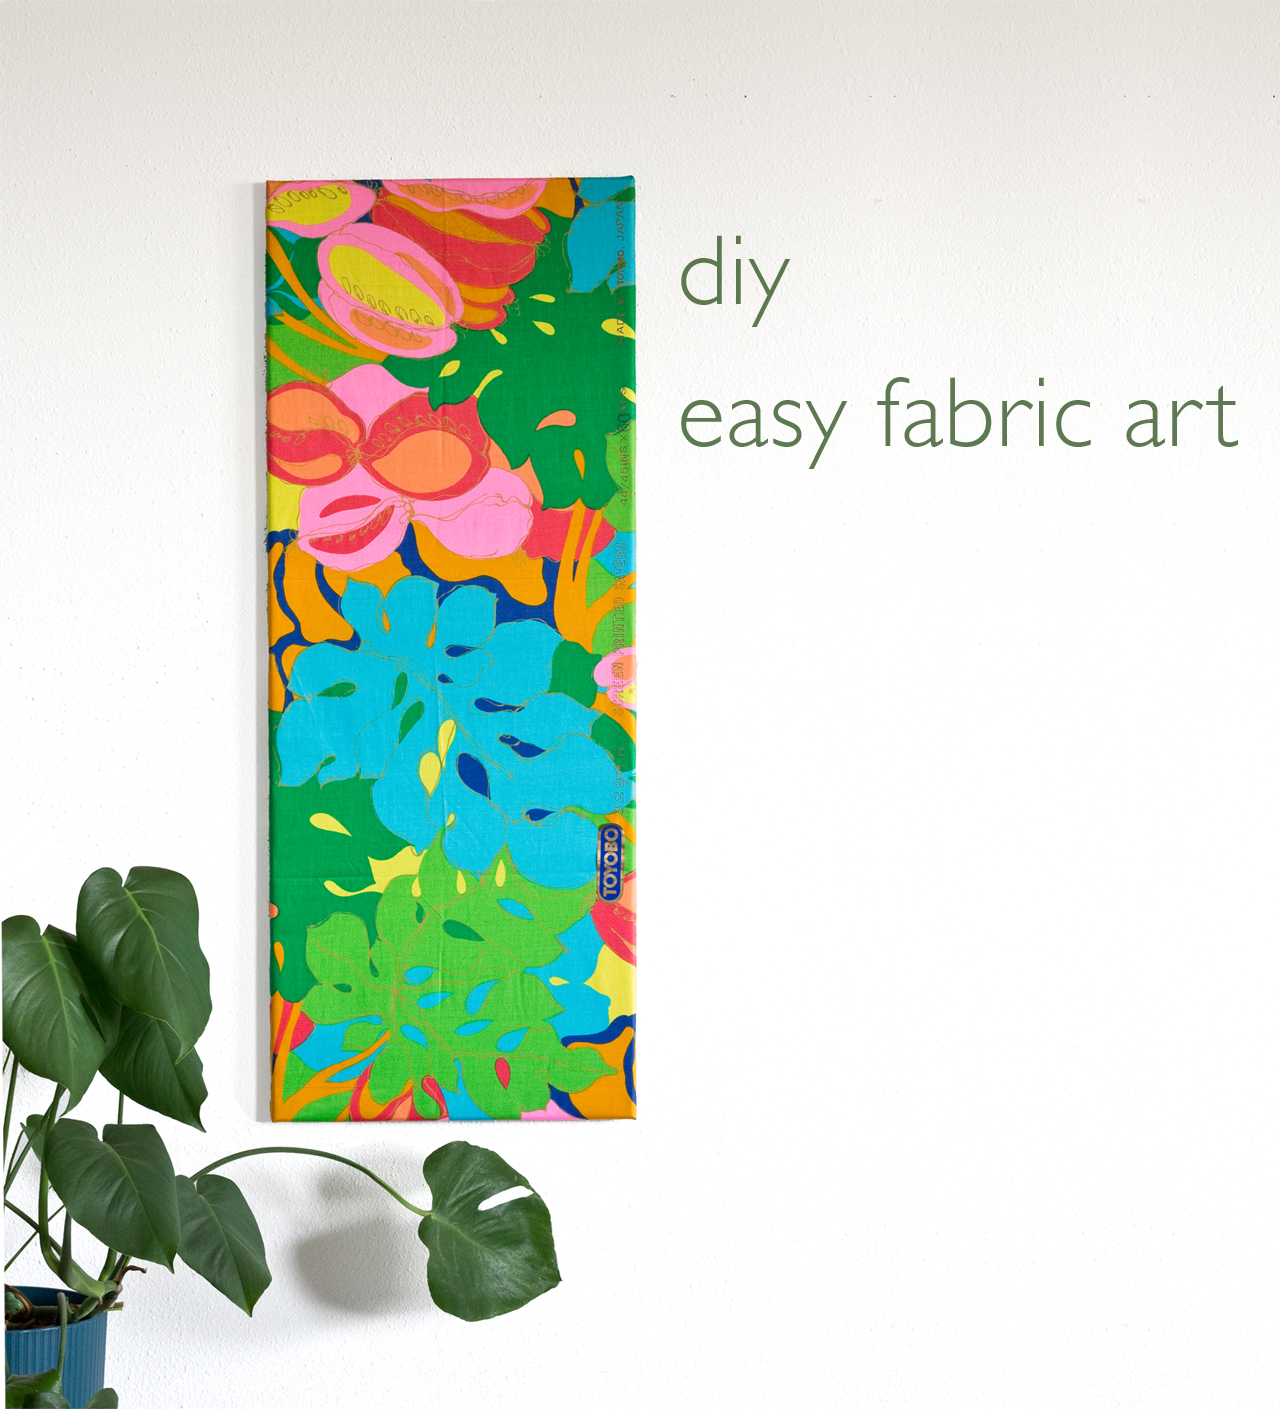
DIY Easy Fabric Art by Vitamini Handmade There's nothing better than a large piece of art in a room, but unfortunately, buying big framed art can get pretty expensive. I found a bunch of great vintage Japanese fabrics at a Buddhist Temple rummage sale last summer for a steal - something like $1 for the whole bundle. The prints were so great but the dimensions of the pieces were odd; long and skinny and not quite large enough to sew much with. I noticed this bright tropical print in my fabric stack the other day and realized it would look great on the wall! I have a trick for hanging up fabric panels on the wall that looks super professional but is actually so easy to DIY and inexpensive, too (the whole thing cost less than $10). I can't wait to share!

I love using wood canvas stretcher bars for this project because not only are they inexpensive but  you can also buy them in the exact dimensions that you are looking for. That said, this project could also be done with a picture frame.

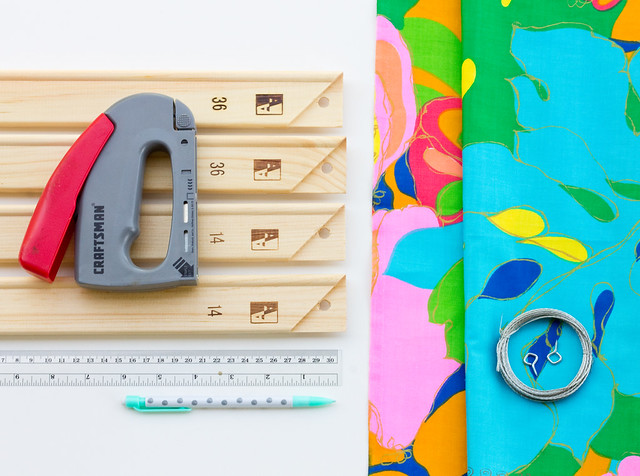
Here's what you'll need:
DIY Easy Fabric Art by Vitamini Handmade
  • Fabric panel. Large scale prints work better than smaller ones
  • Canvas stretcher bars, 2 for the width and 2 for the height, both about 4" shorter in width and length than your fabric panel. These 4 stretcher bars cost me about $8 total (cool, right?!)
  • Staple gun with staples. I love this Craftsman staple gun. So easy to use.
  • Picture wire and "i" screws
  • Ruler and pencil

DIY Easy Fabric Art by Vitamini Handmade
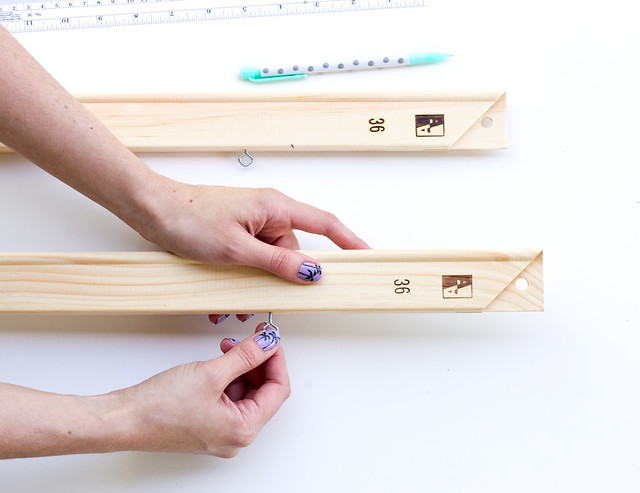
Measure and mark the location for the "i" screws on the vertical pieces. Since mine was tall (14" x 36") I measured 7" down from the top of each side. Twist in the screws.
DIY Easy Fabric Art by Vitamini Handmade
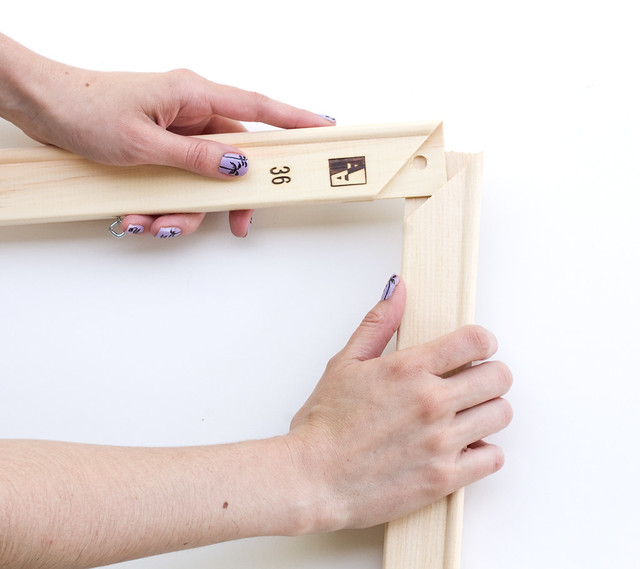
Join the frame pieces. Mine made a pretty sturdy fit, but if yours are loose you can staple over the corners to secure.

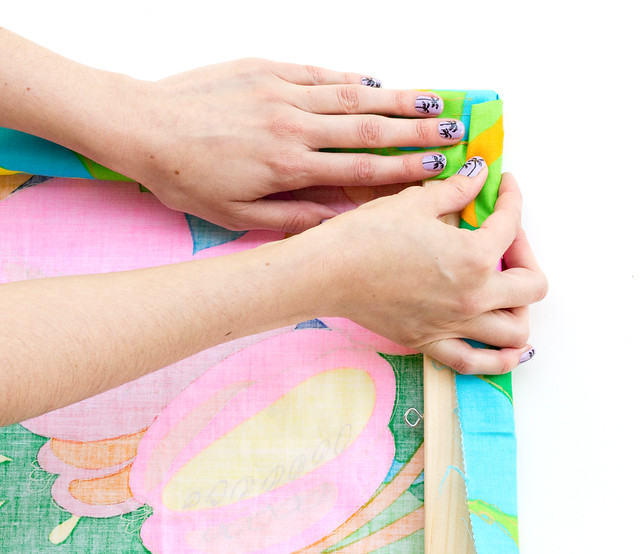
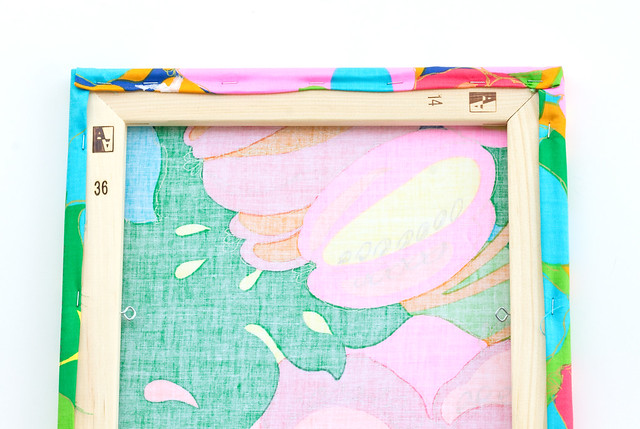
Lay the fabric face down and center the frame over it. Make sure you've oriented the fabric so you know which way is up and the screws are near the top of the panel. Fold the edge of fabric down about half and inch, then fold it over the side of the frame. Staple in the center. Repeat on the opposite side of the frame, pulling the fabric taught before you staple once the center. Repeat on the other two sides. Continue folding over, pulling taut, and stapling on opposite sides, until the fabric is anchored all the way around the frame. DIY Easy Fabric Art by Vitamini Handmade DIY Easy Fabric Art by Vitamini Handmade DIY Easy Fabric Art by Vitamini Handmade
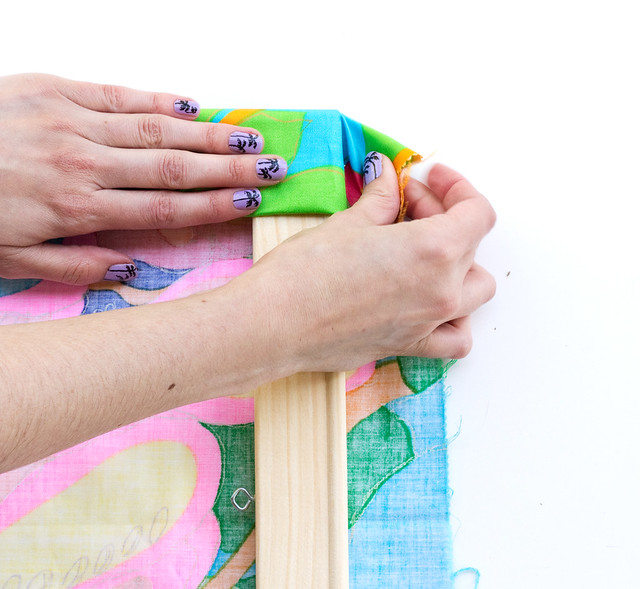
When you get the the corners, fold the fabric like wrapping a present to get a smooth corner and staple.
DIY Easy Fabric Art by Vitamini Handmade
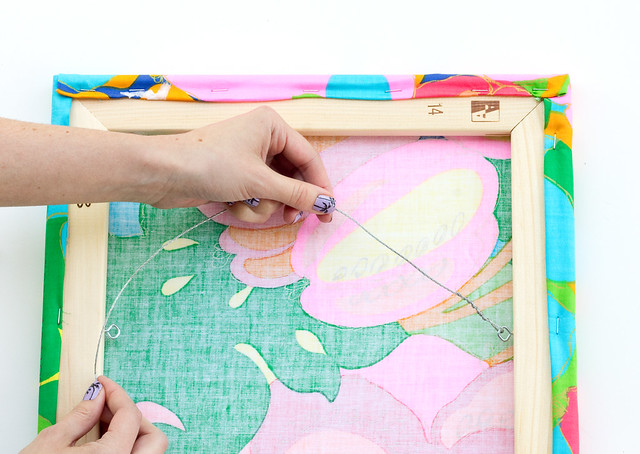
Attach the picture wire to the "i" screws and twist the ends. Done! Hang from a picture hanging hook. Enjoy your big, custom artwork!
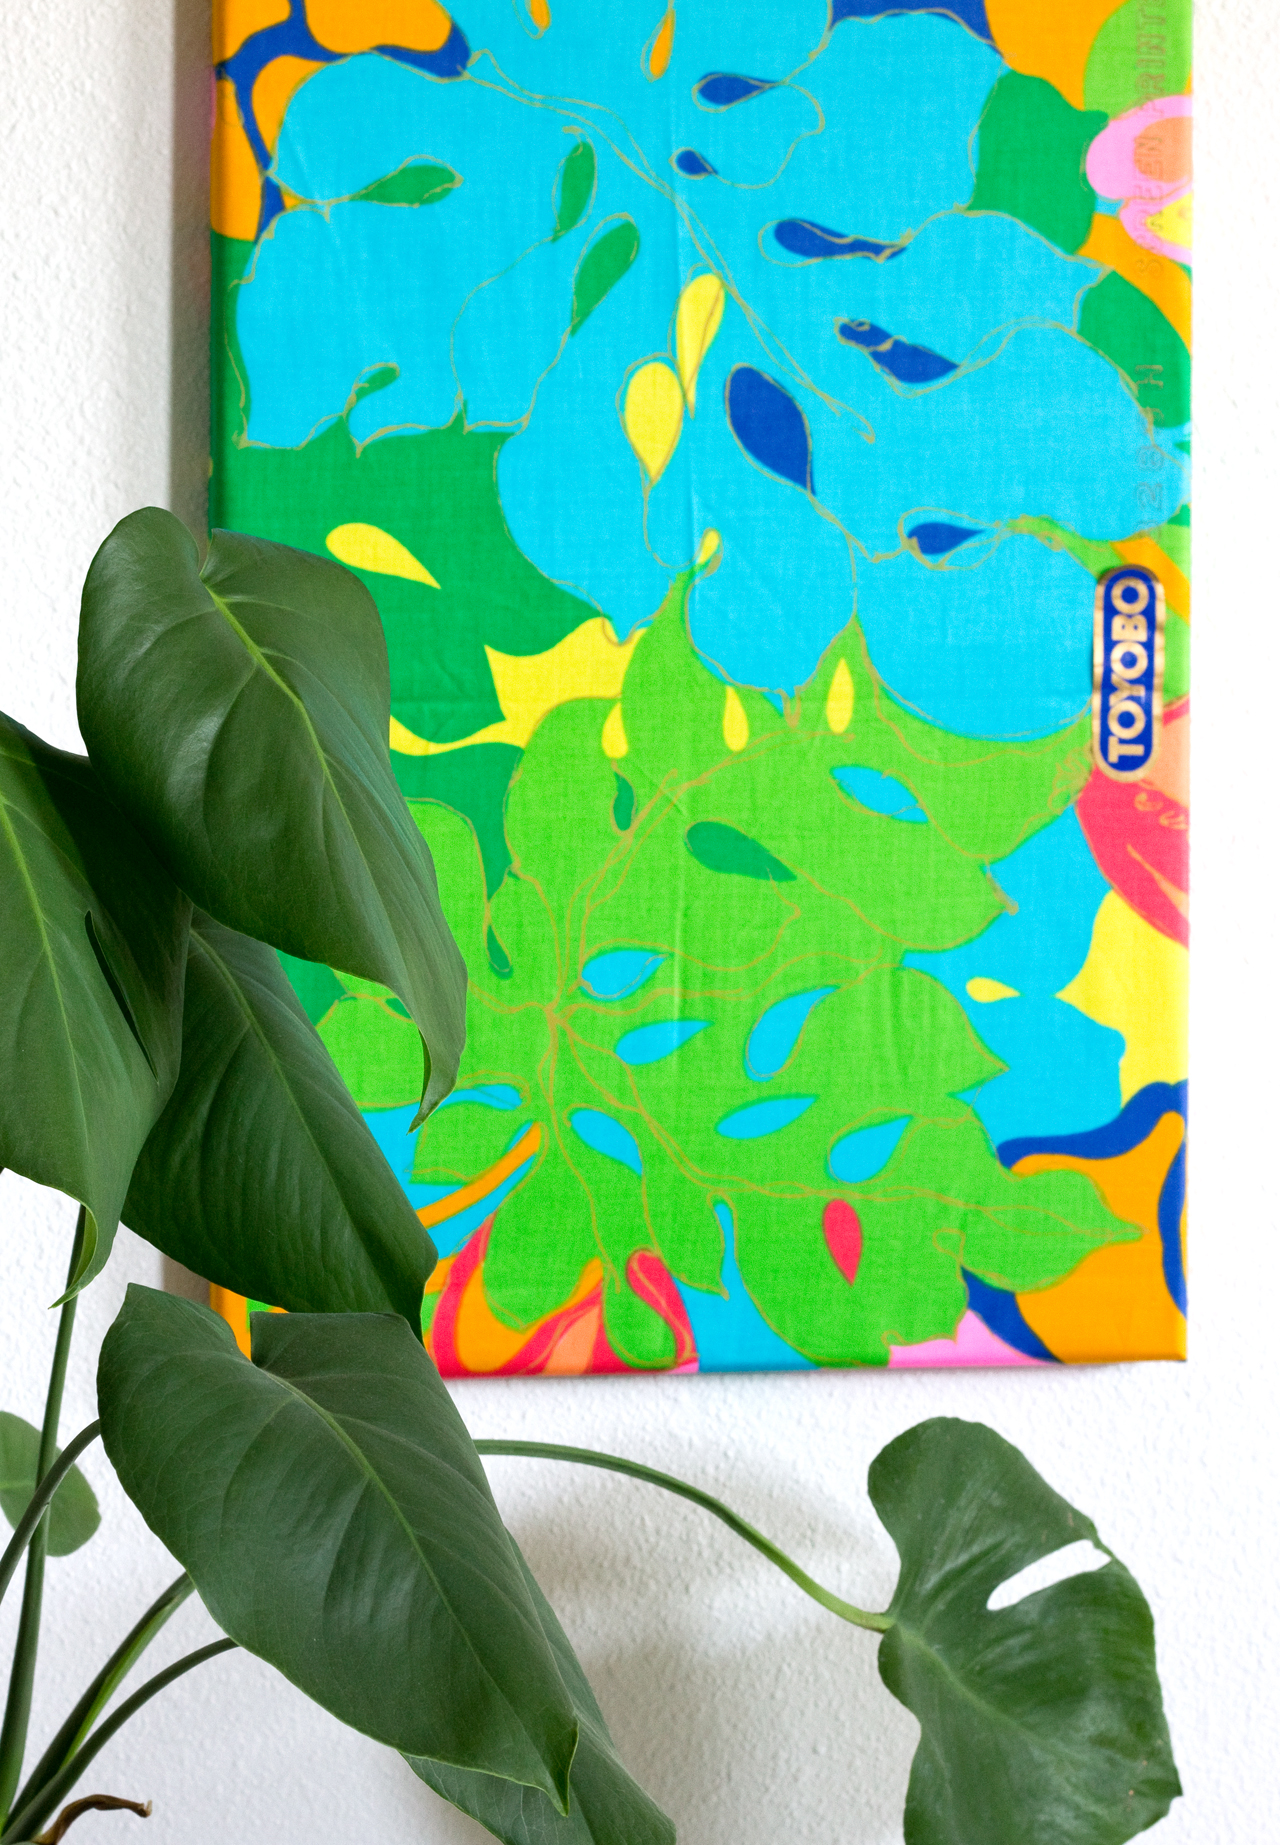

DIY Easy Fabric Art by Vitamini Handmade DIY Easy Fabric Art by Vitamini Handmade DIY Easy Fabric Art
This technique is a great way to make a big, high-impact piece of art for just a few bucks. Look for fabrics from your favorite designers to stretch and make art. I have a large scale Marimekko print that I've had hanging up for years. It still looks great and no one can tell it's not an expensive canvas print.

P.S. Like my palm tree nails? Learn how to do it yourself with my palm tree mani diy!

34

Bedroom Makeover: Mid Century Dresser Makeover - After

Friday, March 6, 2015

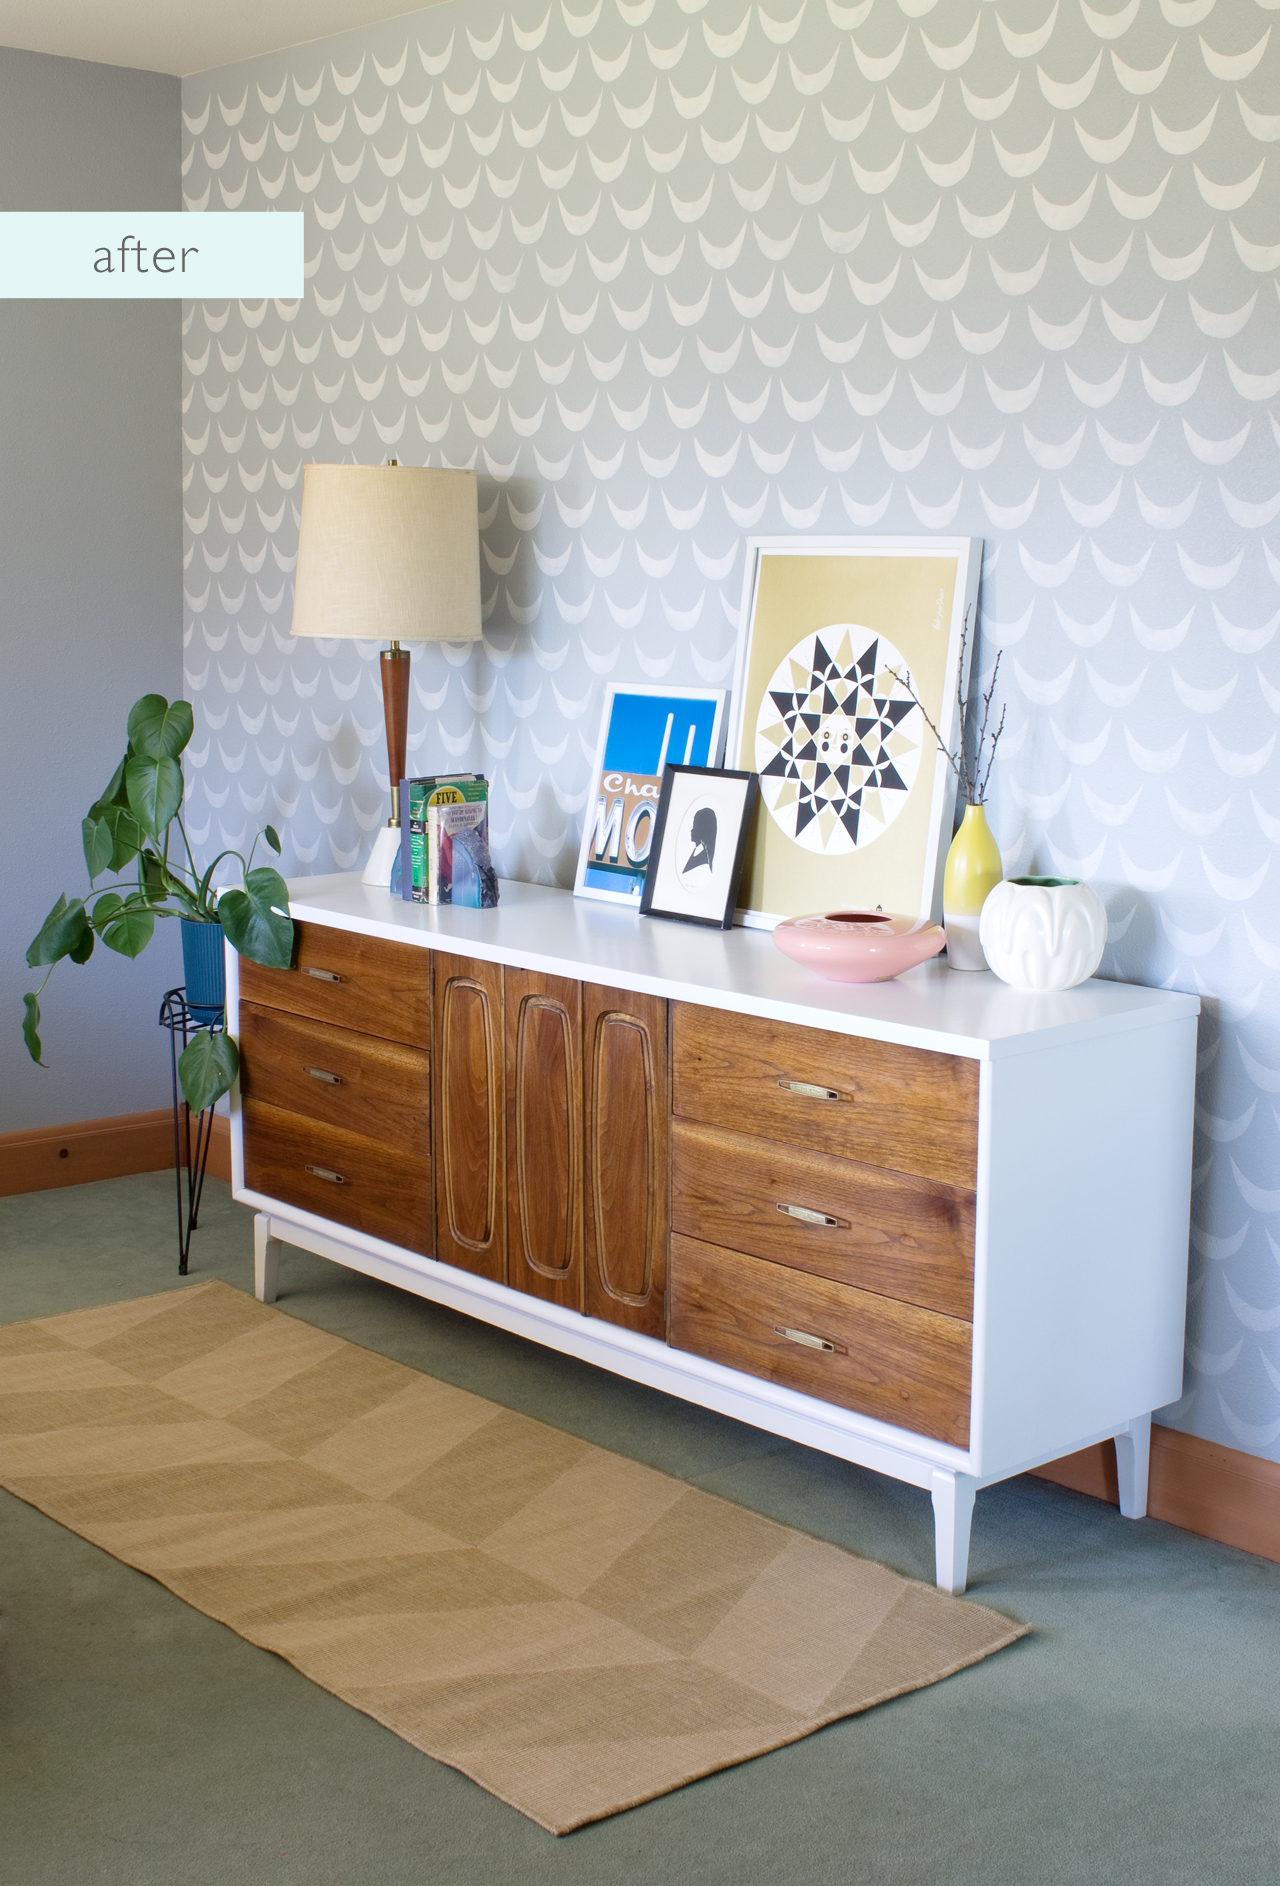
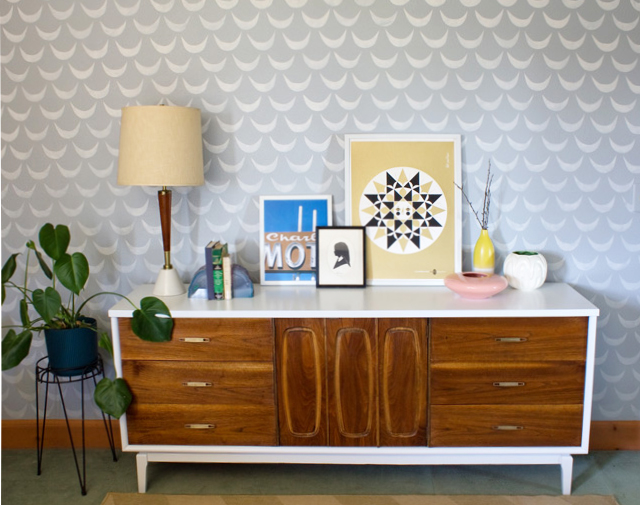
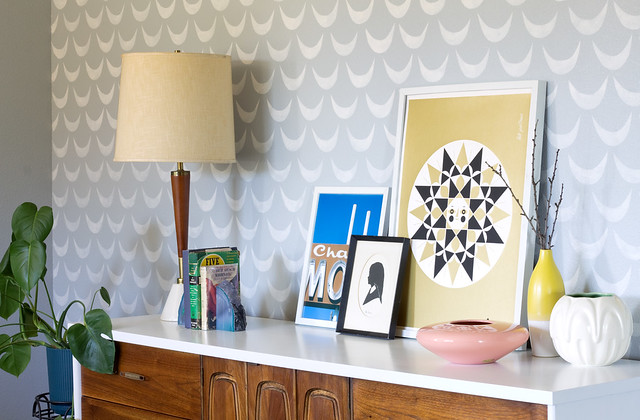
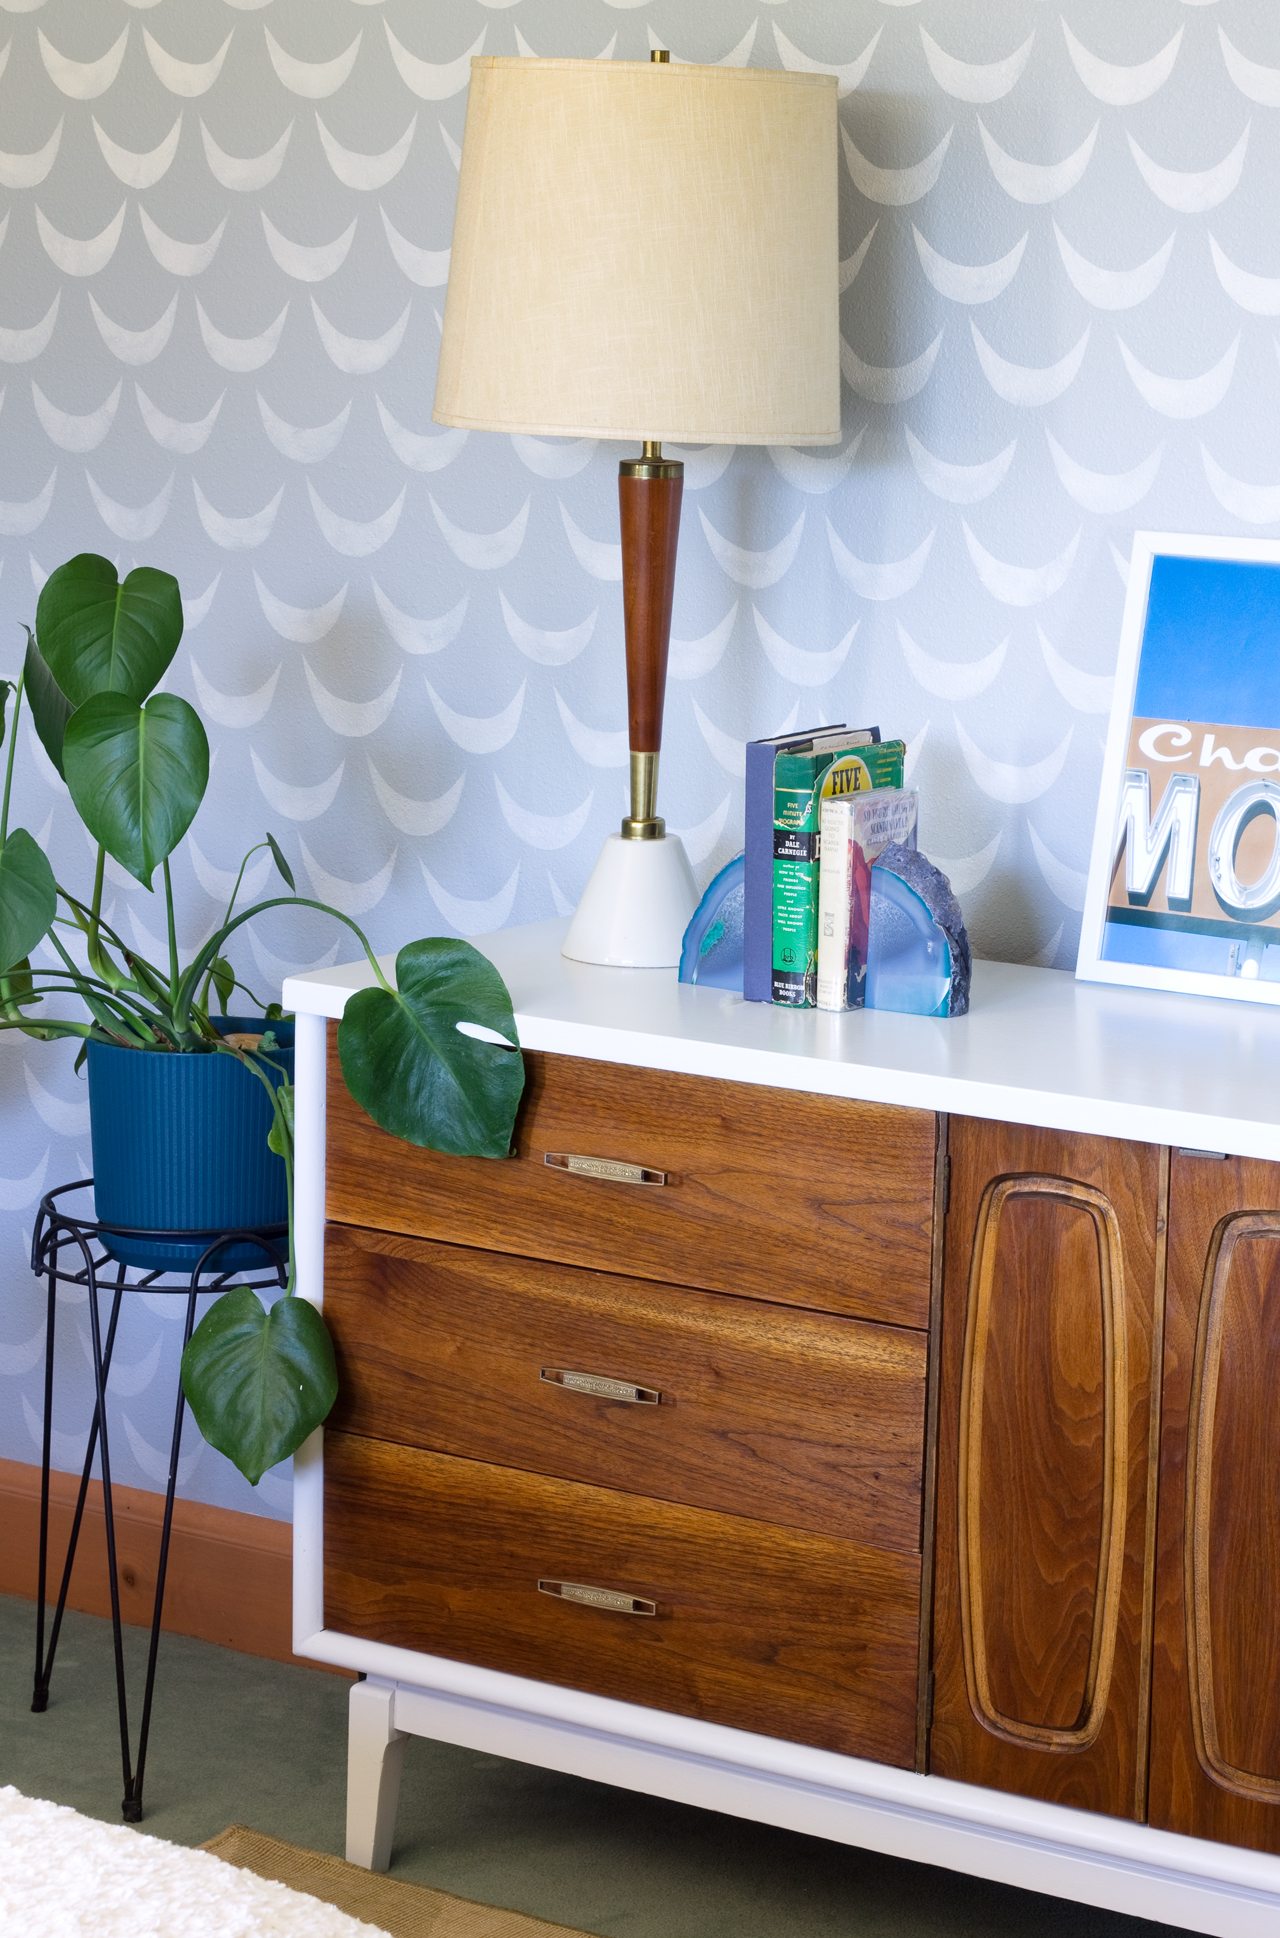
Mid Century Dresser Makeover - After

*Read about how I stenciled this wall, here.

After lots of Saturdays of cleaning, sanding, and painting, my $10 Mid Century dresser is finally done! I'm so pleased with the way it came out, and honestly a little surprised that it turned out so well, considering what it looked like when I started. It's a really nice feature piece for my new bedroom space and will provide lots of storage. It didn't cost me much, besides the original $10 investment, a couple trips to the hardware store for supplies, and a few hours of elbow grease. I'm going to outline all of the details and steps of what I did, in case you find a dingy piece of furniture on the side of the road that you'd like to fix up but don't know where to start.

Here's what I used, in chronological order:
  • Screwdriver
  • Citri-Strip
  • Cheap paintbrush
  • Plastic scraper
  • Bar Keepers Friend
  • Toothbrush
  • Clean rags
  • Watco Teak Oil
  • Howard Feed-N-Wax
  • Orbital sander with 100, 120, and 180 grit sandpaper
  • Good quality paint brush
  • Rust-Oleum Enamel in White. I wanted a semi-gloss finish so I combined a can of flat white and a can of gloss white
  • Paint thinner for cleanup 
  • Safety supplies: eye protection, dust mask, gloves
Mid Century Dresser Makeover - After
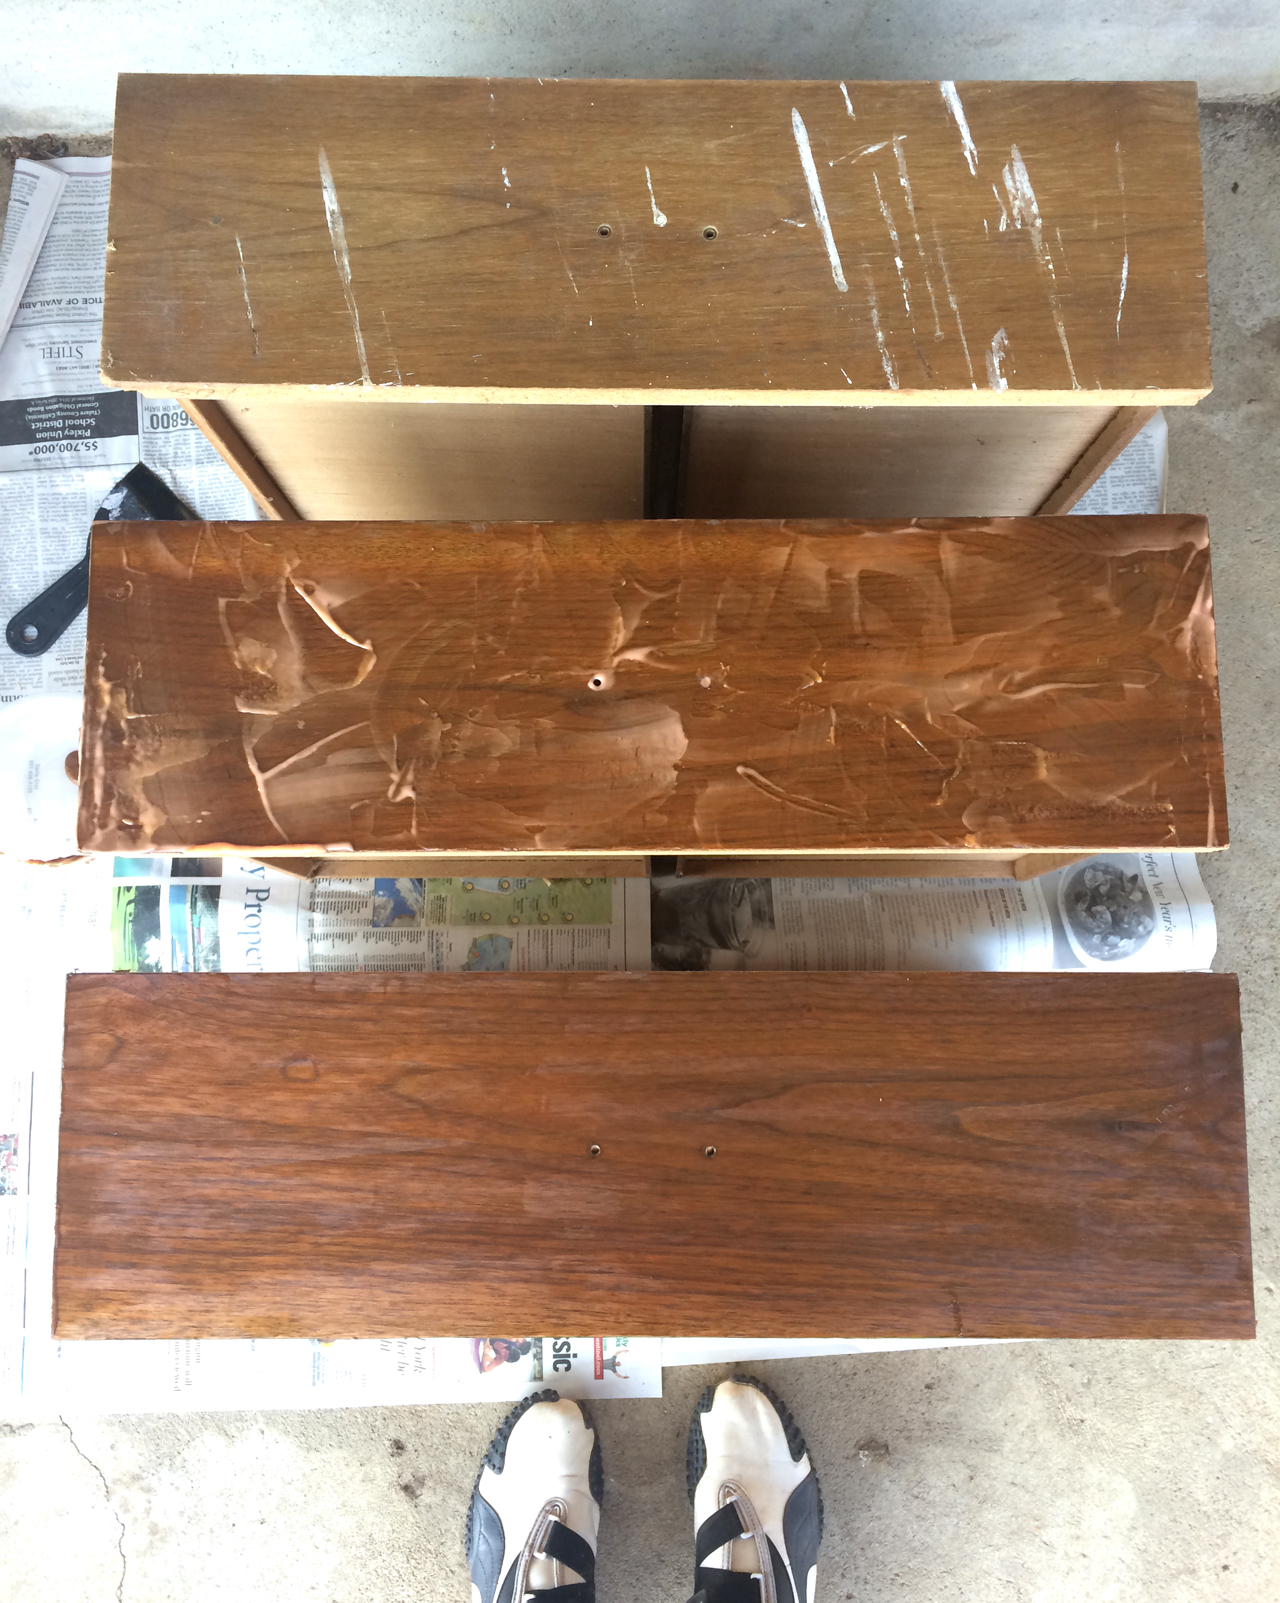
Drawers: I removed them, and the doors, from the unit and took off all of the hardware and set it aside in a bowl for later. I put a thick layer of Citri-Strip on the drawer fronts and doors with a disposable paint brush according to the directions, let it sit, and then scraped it off with a plastic scraper to remove the old finish. I repeated this two or three times to get all of the finish off and then wiped them down with a clean rag. I lucked out! The veneer on the drawers was still in good shape and had a nice grain after the finish and the old stain was removed. I wiped on the teak oil (I used the foam version) according to the directions and followed up with the Howard's Feed-N-Wax. 

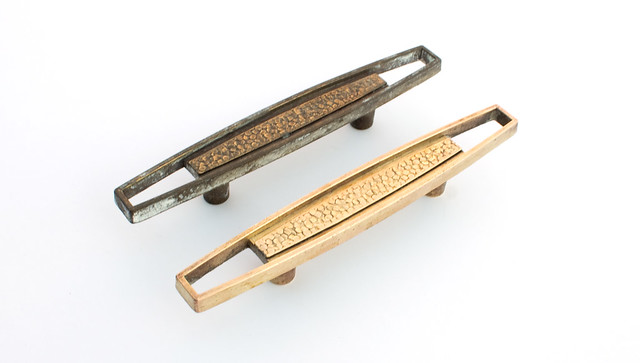
Hardware: I had no clue what these handles were made of, some sort of coated metal. They were tarnished and dirty, so I tried a couple different methods to clean them up. Soap and water didn't help at all, so I tried Bar Keepers Friend and it worked great! I just sprinkled it onto the damp hardware and held it in a gloved hand while I scrubbed with a toothbrush and then rinsed off. No need to paint the hardware when it cleans up this nicely!
Mid Century Dresser Makeover - After Mid Century Dresser Makeover - After
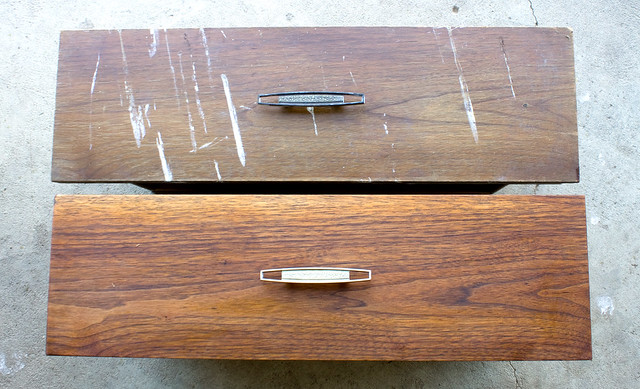
There's a before and after - Dingy, dirty (ieeu), and yellowed drawer with original hardware on the top. Cleaned, oiled, and waxed drawer with fresh hardware on the bottom. What a difference!
The Outside of the Dresser: I carefully sanded down the top and the sides with the orbital sander and 100 grit sandpaper, making sure not to sand through the veneer. The finish and the dark stain on the side came off surprisingly easily. The top was in pretty good shape, but there were a few large stains that couldn't be fixed. I decided to paint the outside of the piece to cover up the stains, so I went over the entire outside of the piece with 120 sandpaper to prep it for painting.

After doing some research, I decided oil-based enamel would be the way to go with this. It gives a hard, durable finish when it's cured which sounded great to me. I had never worked with oil-based paints before this, so it was a learning experience! They have fumes, so it's important to do the painting outside in a well-ventilated area. Also choose an area that doesn't have a lot of dust or bugs - this paint takes a while to cure and you don't want stuff sticking to the finish. I combined 1 quart of gloss white with 1 quart of flat white to get a semi-gloss finish and it was more than enough. Here are a few tips for working with oil-based paints:
  • Apply thin coats, starting on one side of the piece and working to the other side. 
  • Once you've put the paint down, leave it alone! Brush strokes will self-level as it dries. Going back to try to smooth out a mistake will only mess up the finish. You can always sand areas with fine sandpaper between coats to disguise bigger mistakes, but most will clear up on their own. 
  • Make sure not to use too much paint on vertical surfaces because it may sag and leave drips. Again, these can be fixed by sanding between coats.
  • Clean your brush with paint thinner
Overall, the outside of the dresser took 4 coats of paint (looking back I should have primed it beforehand, but I didn't have any oil-based primer so I skipped that step). I let each coat dry at least 24 hours before lightly sanding and recoating.

You can't see it in the photos, but I drilled an opening in the back of the piece for power cords to pass through, so I could use it as a tv stand later on. I just used a 1" hole saw in the back. All I would have to do is remove one of the drawers behind the center doors and use that area as a shelf for tv components, etc.

I put it all back together and I couldn't be happier with the finished piece! I love that it still has most of the warm wood tones, but the white exterior gives it a clean, modern look.

Mid Century Dresser Makeover - After Mid Century Dresser Makeover - After Mid Century Dresser Makeover - After
What about you - have you ever fixed up an old piece of furniture? Did you learn any good tricks along the way? I'd love to hear about them!

Have a great weekend! 

10

Bedroom Makeover: Mid-Century Dresser Makeover - Before

Tuesday, March 3, 2015

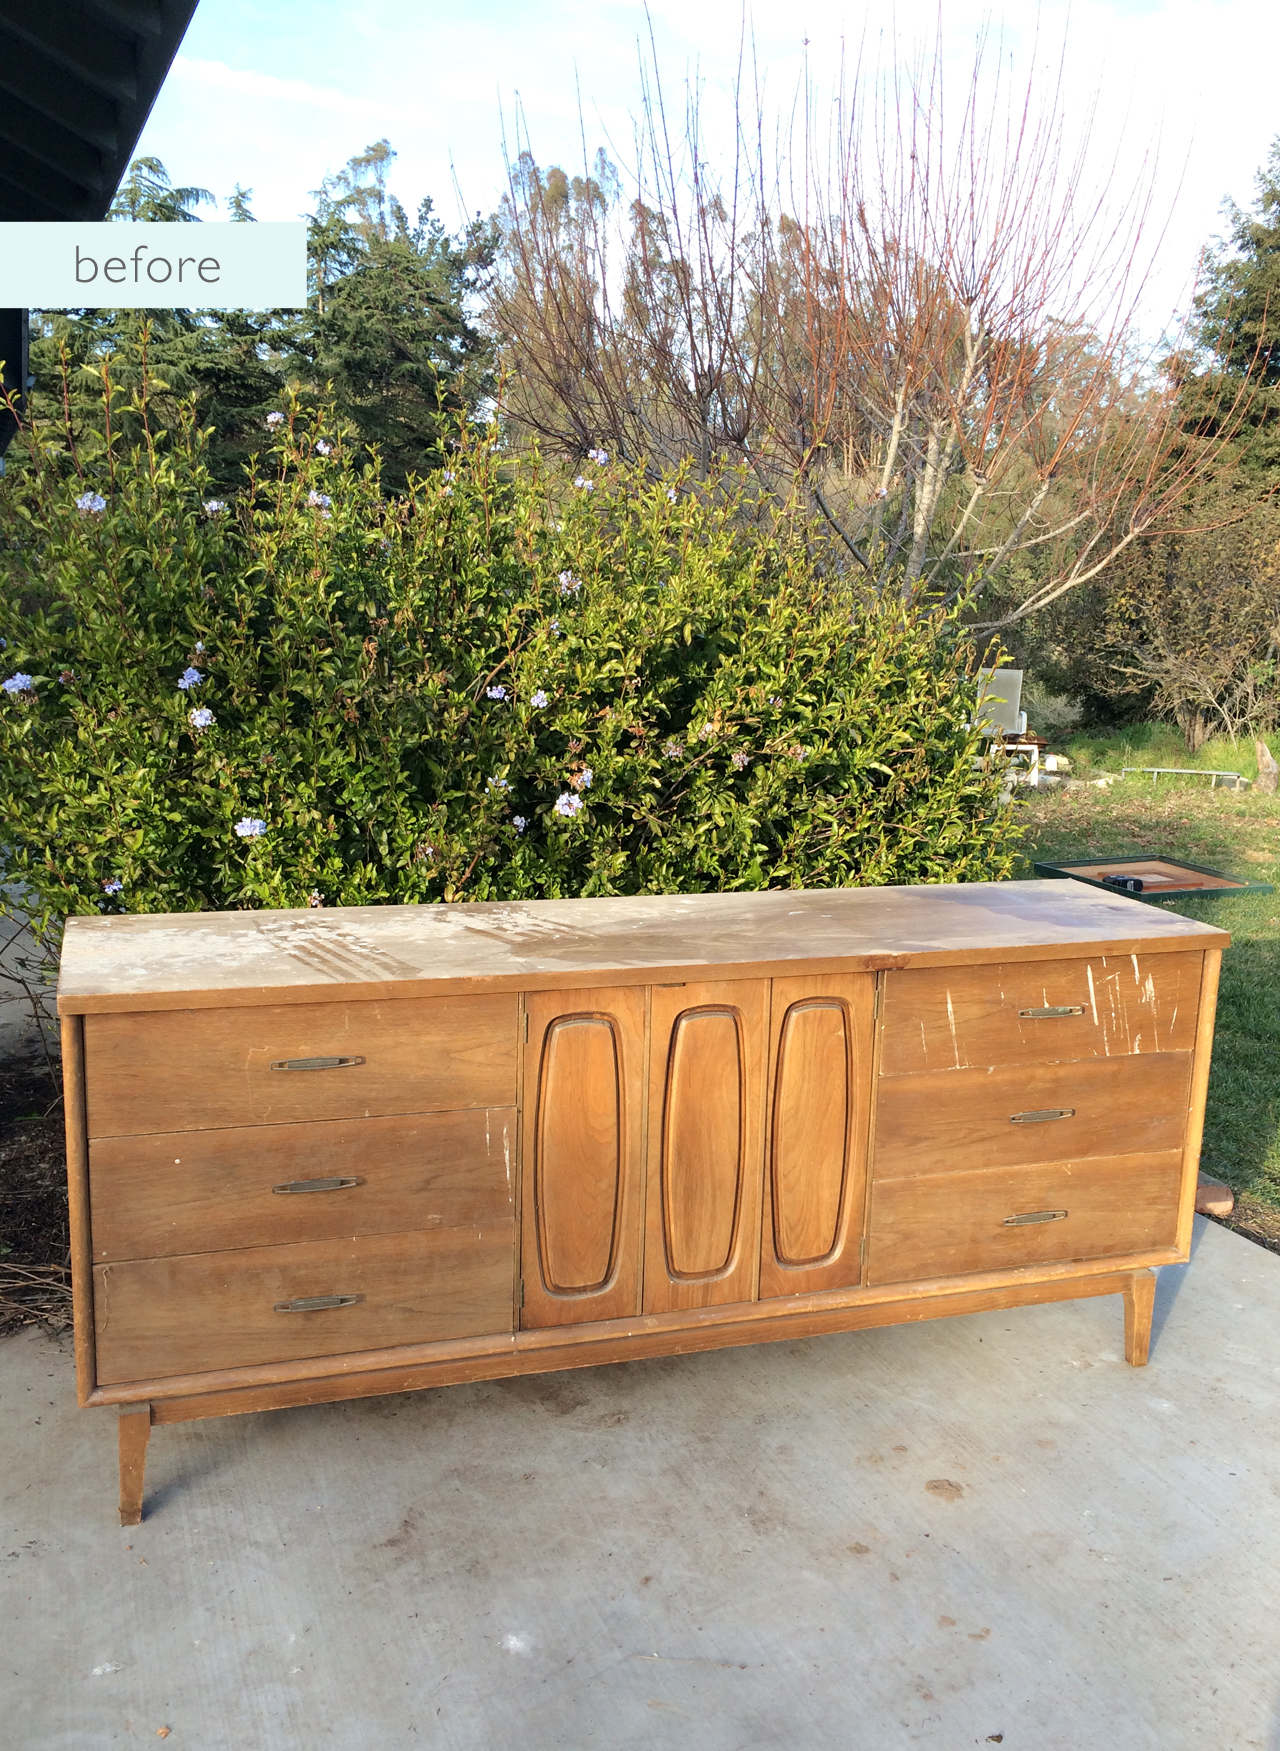
Mid Century Dresser Makeover - Before

It's killing me a little bit how long my bedroom makeover is taking, but that's real life, folks! I'm doing all of the work myself to help cut costs and delegating manual labor to the weekends so I can get my other work done during the week so progress is a little slow. Nonetheless, I'm nearing the finish line on one of my bigger projects for the bedroom and I'm so excited to share!

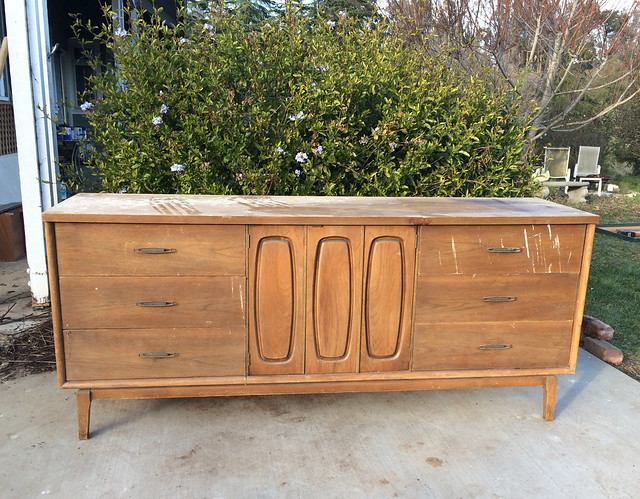
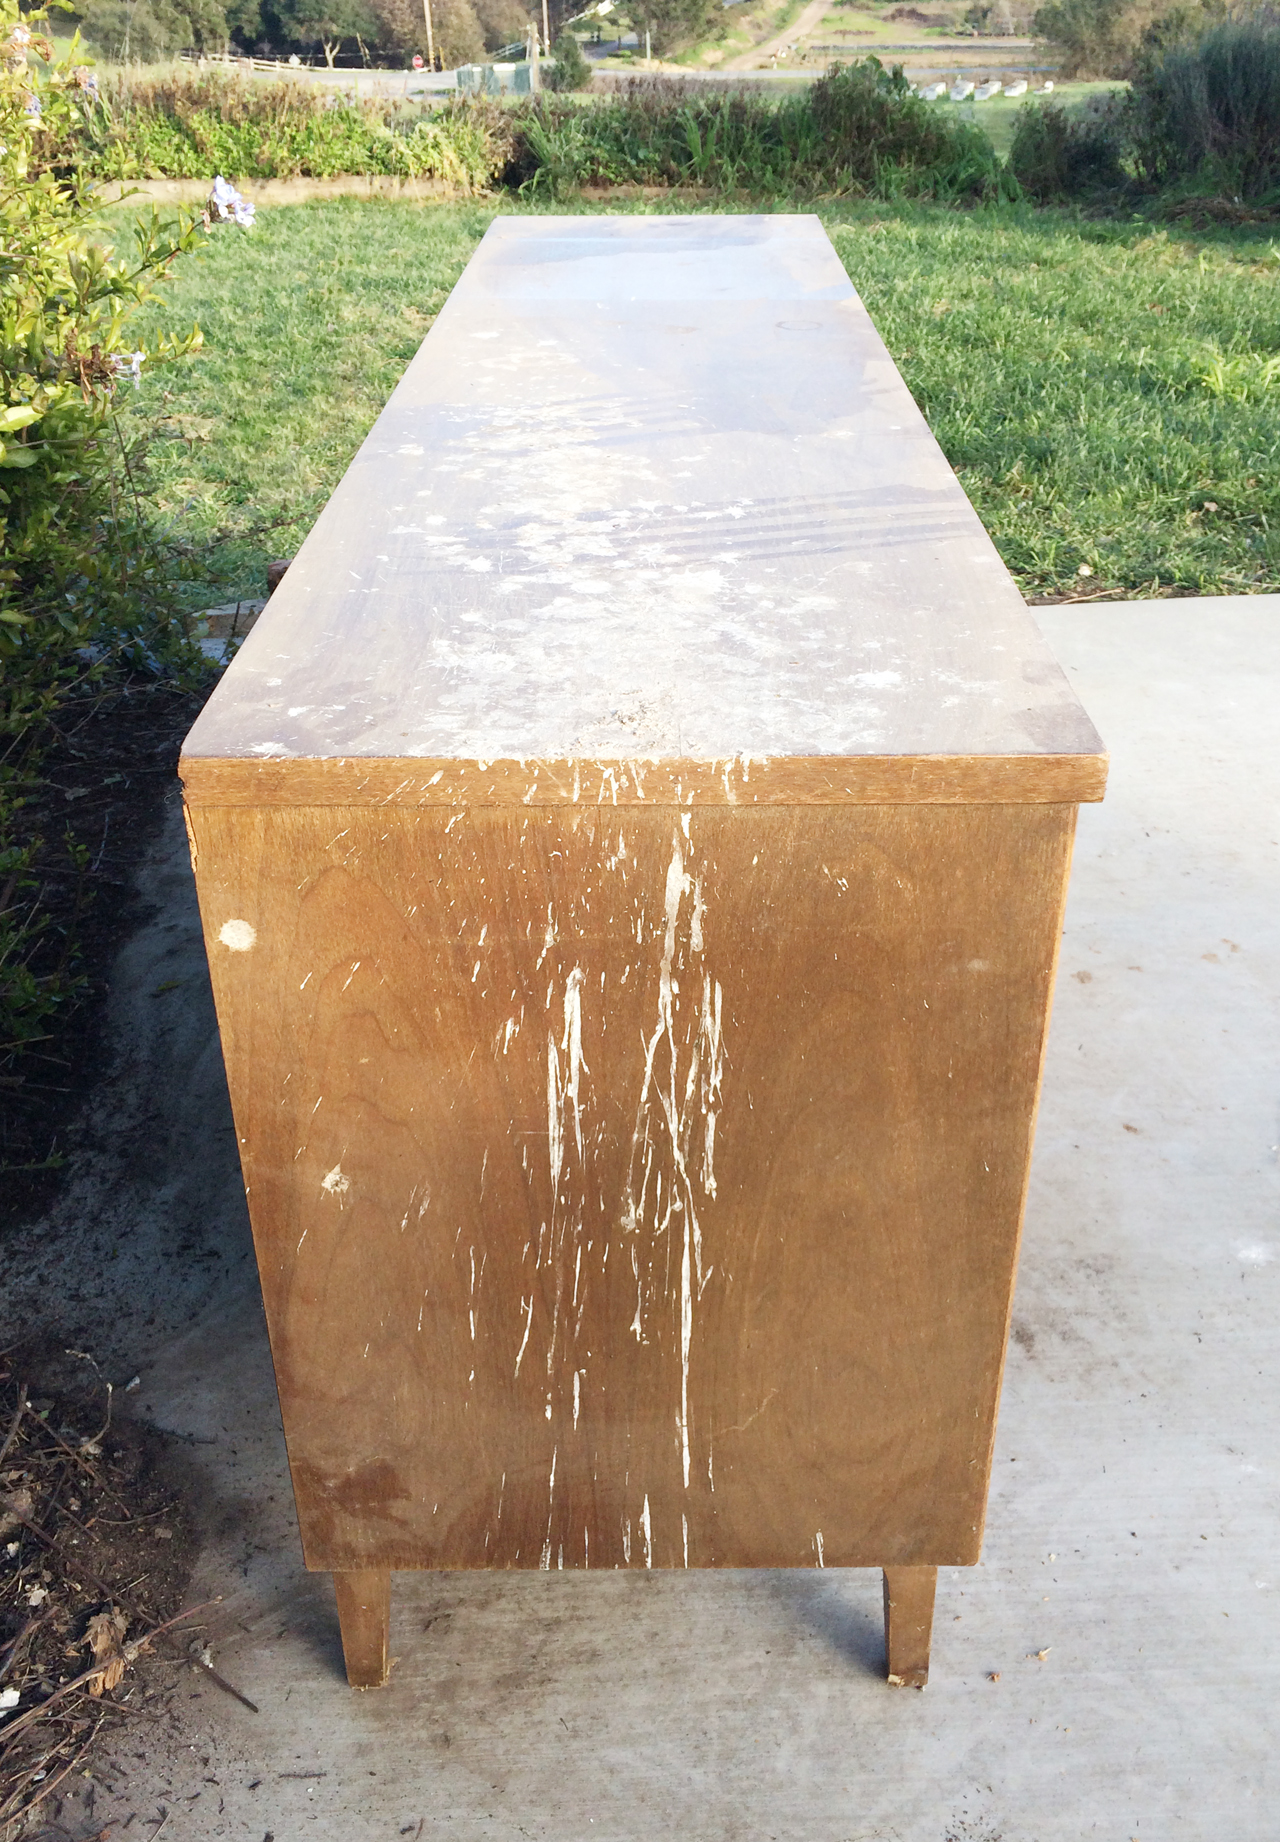
I stumbled across this mid-century dresser on the way to the grocery store one evening. It was on the side of the road, the only remnant from a church rummage sale earlier that day. I pulled a u-turn in the nearest driveway and handed over a $10 bill to the church lady for it. Sounds like a good deal, but I won't lie, a couple times I wondered if I paid too much. I seem to have a knack for wanting to save vintage things that are covered in bird poop...

Mid Century Dresser Makeover - Before Mid Century Dresser Makeover - Before

Enter screaming emoji here! Yeah, it was pretty nasty, but I was hoping with all my might that it could be salvaged, because how cool would it be to be able to say I paid $10 for a 6' long mid-century dresser with tons of storage?

The good:
  • The form is great - classic mid-century, low, long dresser/credenza
  • Pretty good condition - no sagging or broken pieces besides a drawer front that needed some glue
  • It's big! 9 total drawers (there are 3 behind the center doors) so it would be a useful storage piece
  • Cool hardware 
Mid Century Dresser Makeover - Before

The bad:
  • The finish (in addition to being under layers of dust and bird poo) was really dry and yellowed
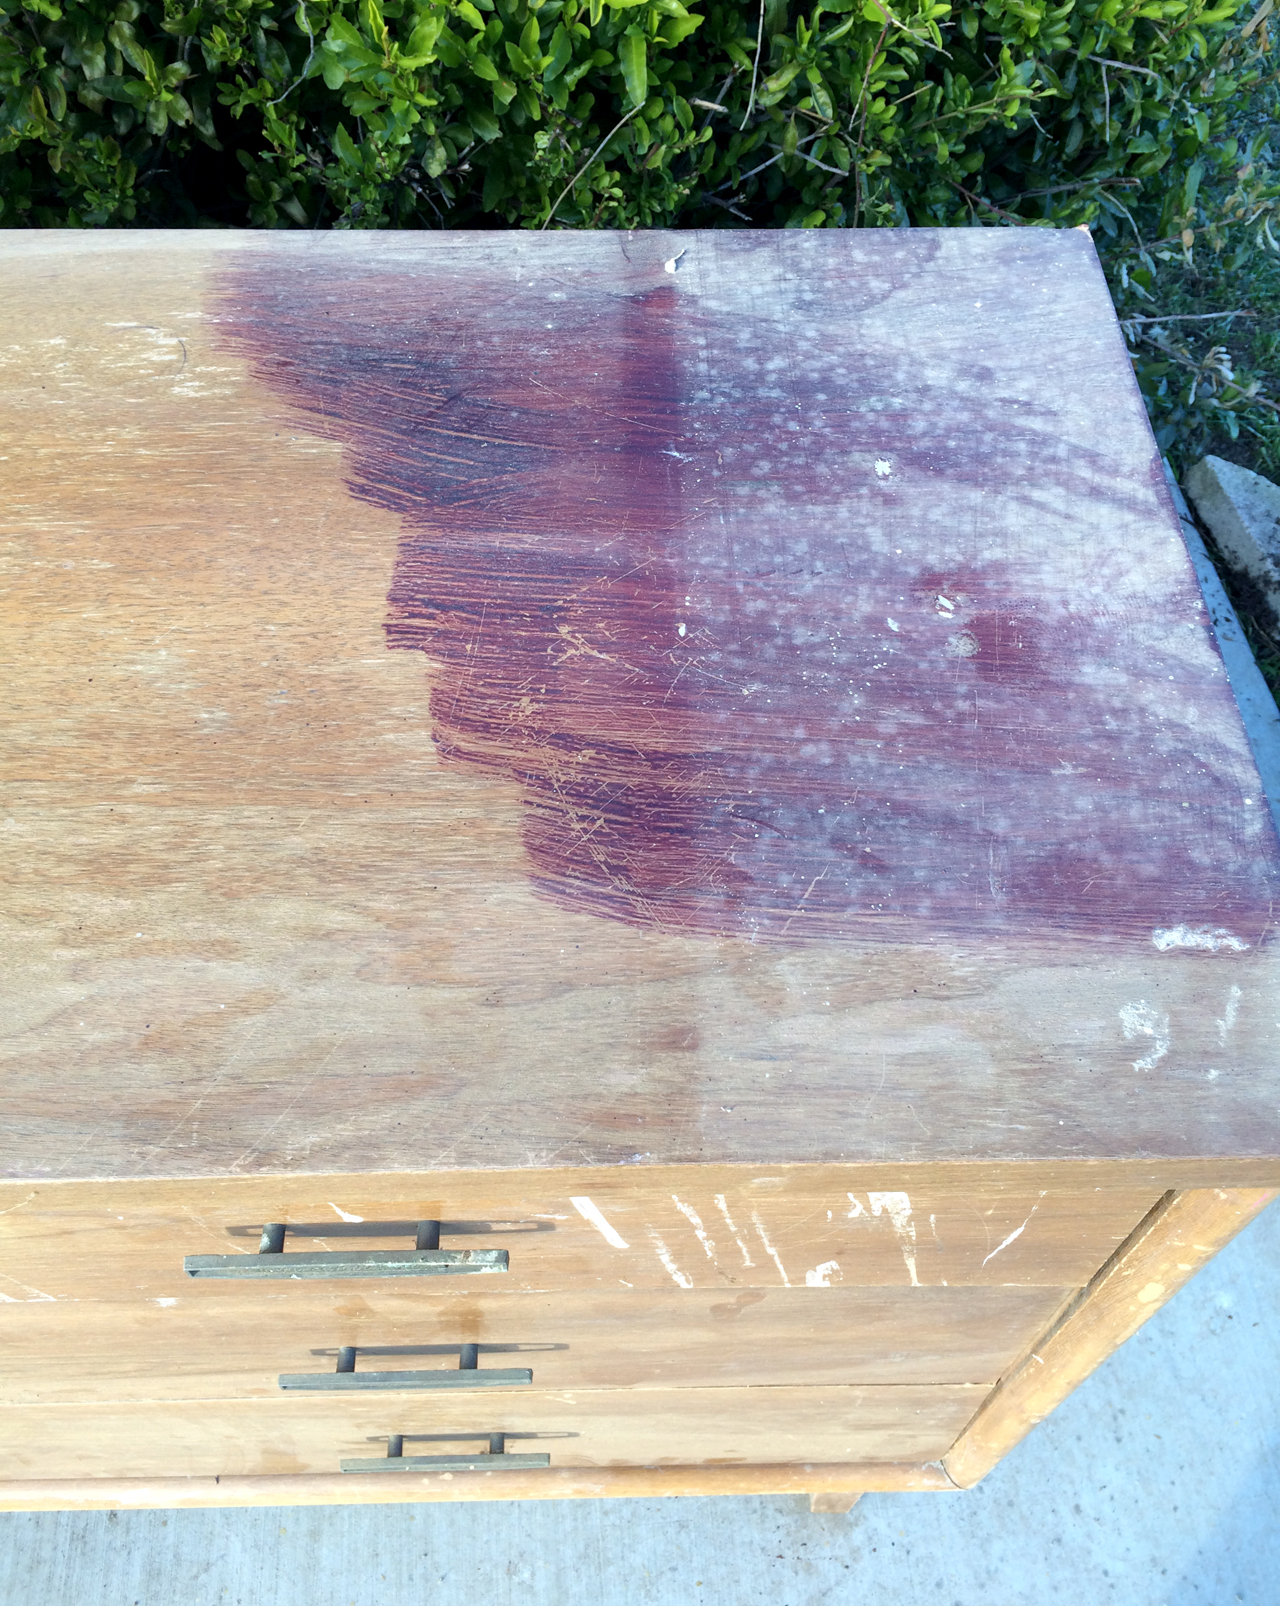
  • There was a patch of dark stain that someone hastily smeared over one side of the top before realizing that it was a bad idea
  • The veneer on the top was stained in a couple areas 
  • The hardware would need some elbow grease
The good and bad:
  • It's not solid wood and would never be an heirloom piece. While it can be tricky to restore veneer, there's some freedom in knowing that I could confidently fix it up to make it work for my space without screwing up something my future grand kids would want to take to Antiques Roadshow. I'm pretty sure they'd laugh at the particle board top...
Come back later this week when I reveal the finished piece and show you exactly how I did it! 


12

DIY Retro-Style Storage Makeover

Friday, August 1, 2014

Retro-Style Storage Makeover

I'm so excited to share this project that I did for Curbly this week!

Retro-Style Storage Makeover

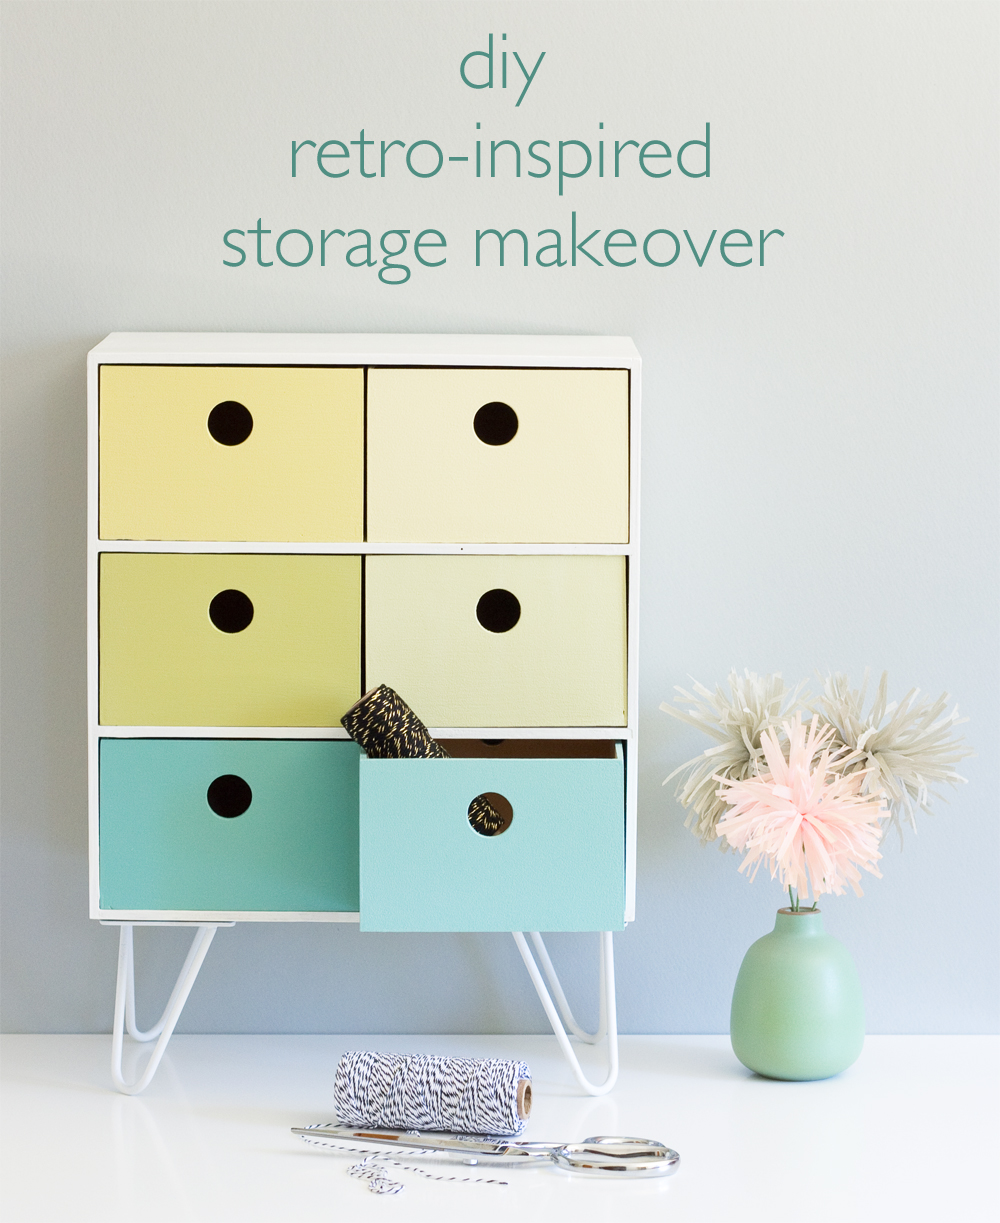
I found this Ikea Fira unit at the thrift store a while ago and boy did it need a makeover. Yikes!

Retro-Style Storage Makeover

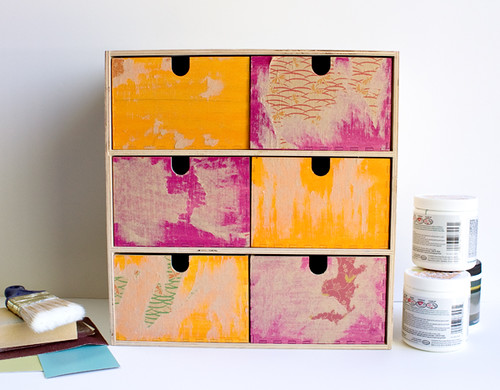
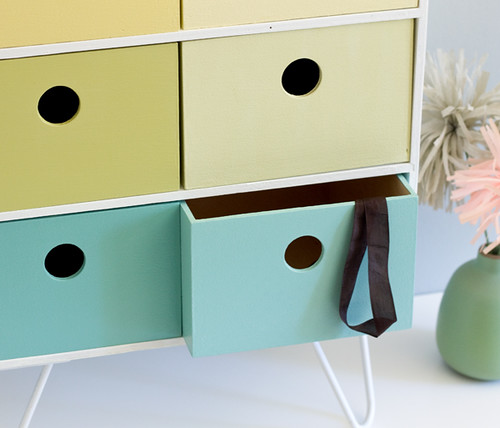
I gave it a colorful update with just a few inexpensive materials. The best part is, all of the paints came from a total of 4 test jars from the hardware store. It's a great way to bring some colorful style into your space without having to invest in a ton of paint. The mini hairpin legs and circular fingerpulls give it a more custom look. I just love how it came out! Click through for the full tutorial and keep your eye out for those ugly ducklings the next time you go thrifting!

6

Top Tips for Thrifting

Wednesday, March 19, 2014

Top Tips for Thrifting

I've been a thrift shopper my whole life. It started when I was a kid and I'd tag along with my mom or help her at church rummage sales. I inherited from her the thrill of the hunt and it's still one of my favorite activities. It's like modern treasure hunting. I think I've gotten fairly good at my thrifting and wanted to share some of my tips with you! Twelve to be precise!

When I go shopping I mainly look for housewares and furniture, but these tips can be applied to pretty much anything you can buy second hand!

Top Tips for Thrifting
I don't know if the sale was as impressive as the sign.
Be willing to stop in and take a look.
You never know when you'll come across a great store or yard sale.

Top Tips for Thrifting
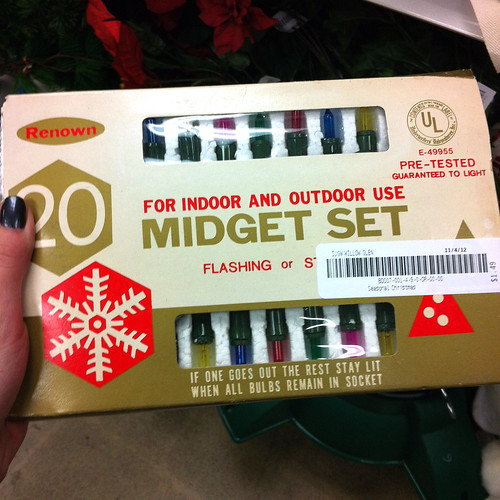
Sometimes the packaging is better than the product!
Go shopping alone, or with someone else who enjoys browsing, too.
It's no fun when you get to a great store and the person you're with wants you to hurry up and leave. Some people just aren't suited for thrift shopping. That's ok, just don't go with them! Find some other friends and family members who like the thrill of the hunt and go with them. I like shopping with my mom because she's great at recognizing potential in an item, or a unique style, or just something that may be valuable. Plus I got my love of junk shopping from her, so we think alike in those terms. I've also found some of my favorite pieces when I was shopping alone. Plus you don't have to worry about that awkward moment when you and your friend want the same killer Pyrex bowl.

Top Tips for Thrifting
Lane coffee table I snagged for $35
Look once, look twice, look again.
I can't tell you how many times I've discovered a really cool item that I originally missed the first time around the store. Sometimes it's hard to see the good stuff when it's surrounded by junk, so take your time and look again.

Top Tips for Thrifting
Locally made ceramic vase
Find a label or maker's mark.
The best way to identify a piece (and its potential value) is by finding a label or a maker's mark. If you were looking at a set of dishes with a couple missing pieces you may be able to locate those pieces online to complete your set. Look for a label and learn about what you're looking at.

Top Tips for Thrifting
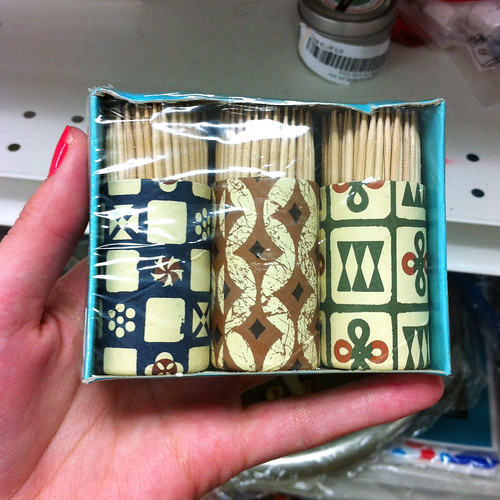
Cute set of toothpicks! Great for a party.
Take a smart phone for the on-the-fly research.
I recently purchased a cast iron enamel pan that had some stains in the bottom. When I was still in the store I did a quick search on my phone to see if the stains were bad damage or if I could live with them. I found out the stains were only cosmetic and picked up a new pan for $5! It's also fun to see what that item you're holding is currently going for on eBay. About $40 for that same pan!

Top Tips for Thrifting
Unique plate pattern.
Look for damage.
Is that beautiful glass beverage dispenser that you just put in your cart actually cracked and broken on one side? (Oops, that happened to me once! Thankfully the store accepted returns.) Take a really good look at the items your considering. Pass on it if the damage is beyond repair or makes it unusable.

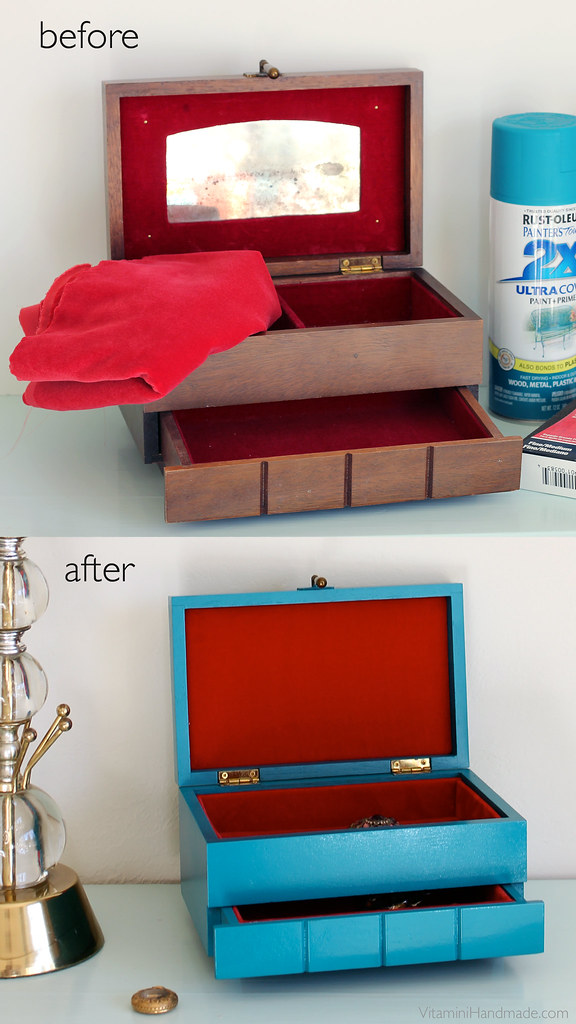
Update a jewelry box
The original finish on this jewelry box was drab and damaged. A little overhaul made it look brand new!
Look for potential.
Would it look 10 times better after a good cleaning? Could that chair's wobbily leg be fixed by just tightening a few screws? Can it use a fresh coat of spray paint? Take all of these things into consideration when looking around. Items tend to look worse than they really are under those harsh fluorescent lights.

Top Tips for Thrifting
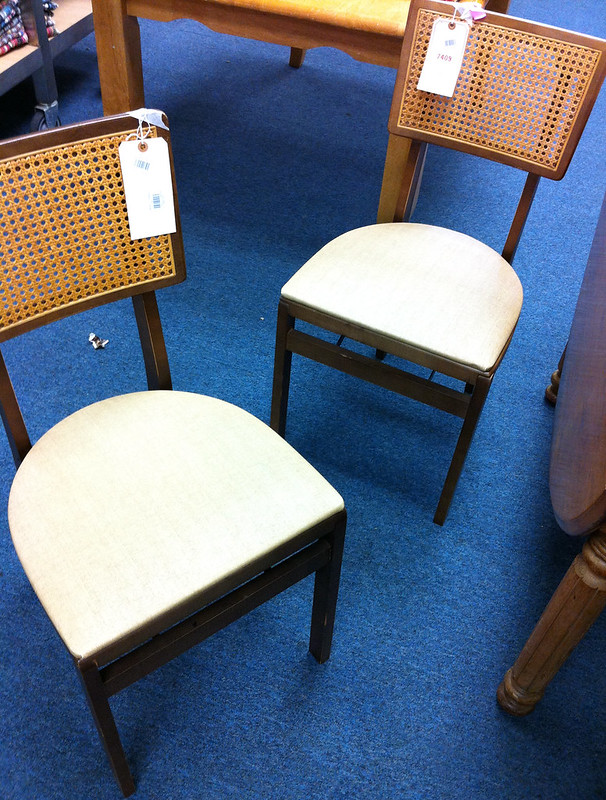
Vintage folding chairs in great shape.
Is it useful?
You can typically find lots of useful well-made items at the thrift store for less than what they'd cost brand new. Go ahead and spend a couple bucks on that Springform pan. You'd never find one new for that price.

Top Tips for Thrifting
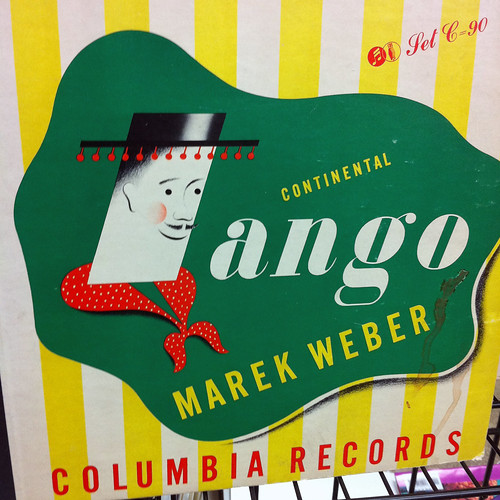
I love the graphics on vintage record covers. You can usually find these for just a couple bucks. Buy a few and frame them to make some unique wall art.

Do you love it?
If you love it, go for it. Life's too short to regret buying that wonderfully-terrible velvet painting or that insanely huge 70's lamp.

Top Tips for Thrifting
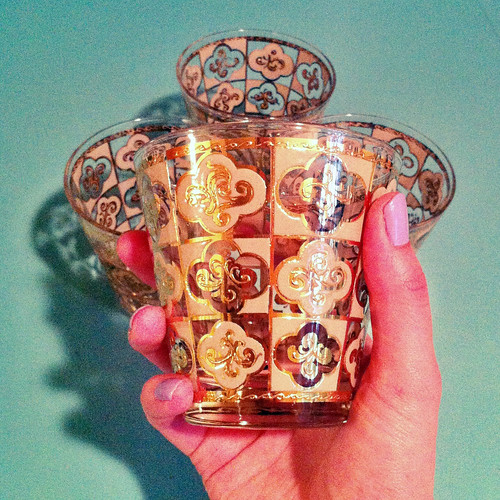
This set of gold cocktail glasses would be a great housewarming gift.

Would someone you know love it?
I've bought some great gifts at thrift stores over the years. Don't forget to think about the tastes of your friends and family while you're looking around. You may find that perfect, unique piece!

Top Tips for Thrifting
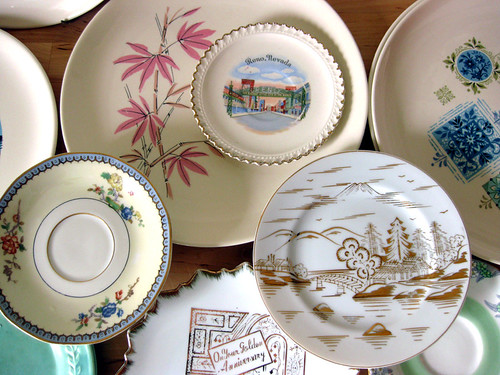
My entire collection of plates for my plate wall came from thrift shops.

Make friends with the sales people.
Sales people can give you the inside scoop on when new deliveries arrive, or when the next great sale is. Be nice to them. They may give you some useful insider info.
 
Top Tips for Thrifting
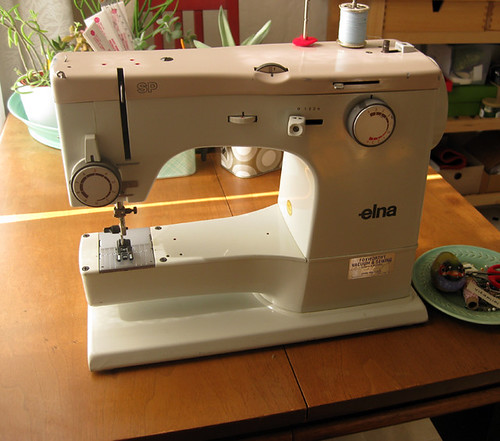
My $20 Elna works like a charm.

Keep your expectations low.
You really never know what you're going to find, so don't get your hopes up. I've left thrift stores empty handed many times. Sometimes there just isn't anything good. That's ok. Keep an open mind and stop in whenever you can. The more often you look, the better chances that you'll find a great deal.

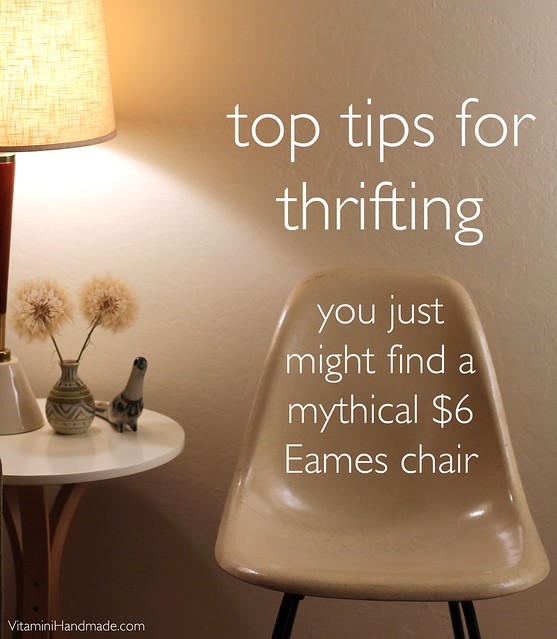
Which brings us to the first image. Yes, people, I did it! I found the mythical Eames chair (I actually found 2)! Priced for $6 each! If I can do it, so can you. Just keep at it. You're bound to come across that incredible find that you'll brag about for years.

Speaking of which, have you made any great thrift scores lately? I'd love to hear about it!

1

Recent Thrifty Finds

Wednesday, August 7, 2013

Thrifty finds
I've found some good things at the thrift shop on my last few trips! Here are some of my recent finds.

Thrifty finds

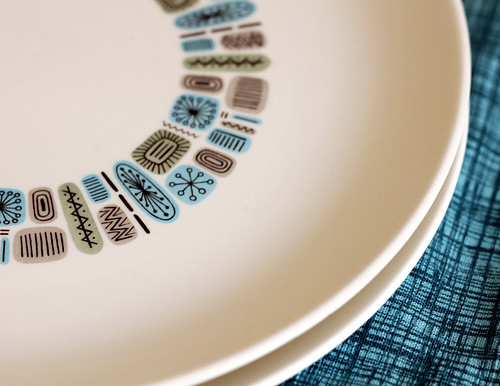
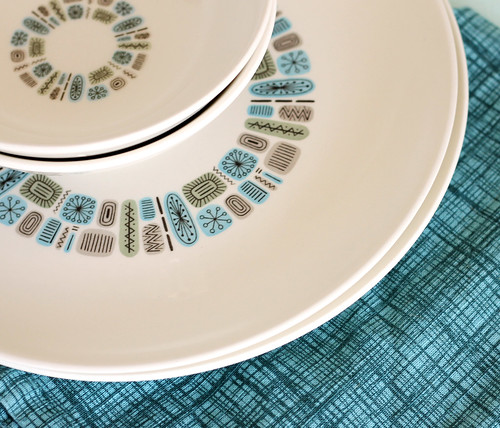
A set of two Temporama plates and bowls! Score! I've always loved this pattern. They are in near perfect condition and were around $1 each.

Thrifty finds

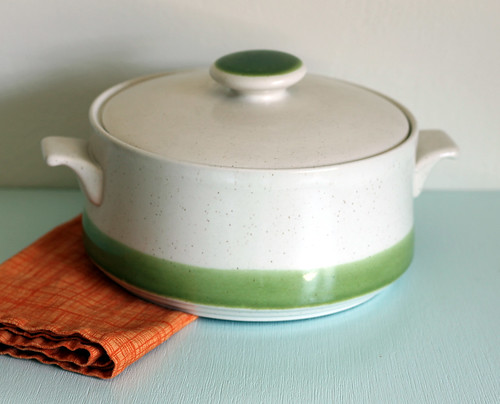
This great covered casserole dish was calling out to me! It's marked "Japan" on the bottom. It's a nice, functional piece that'll look good on the kitchen table. Now I just need to find that risotto recipe I brought back from Italy...

Thrifty finds

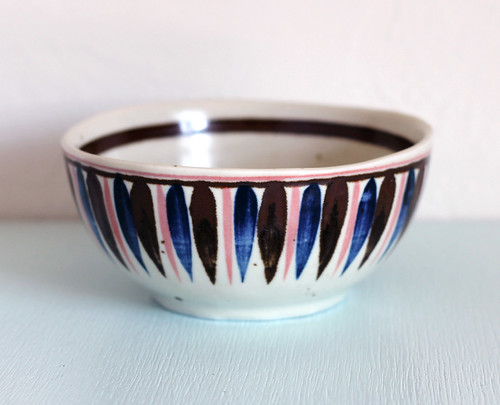
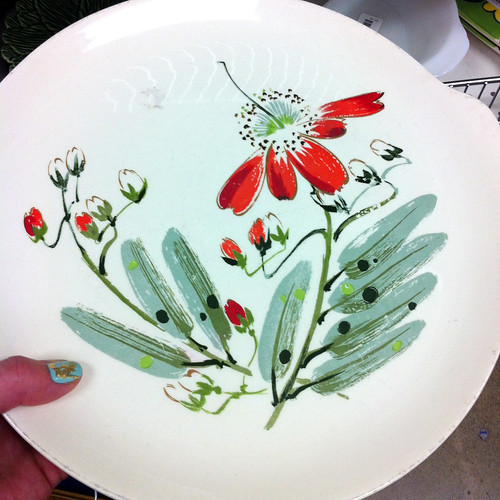
I couldn't resist this little bowl with its cool hand painted pattern. It was on sale for 70 cents. How could I pass it up?! I think I'll use it to catch loose change or earrings that I'm always taking off as soon as I walk through my front door.

Are you starting to see a trend here? Vintage ceramics are my main thrifting weakness. That and furniture, but those pieces are harder to find...

Thrifty finds Thrifty finds

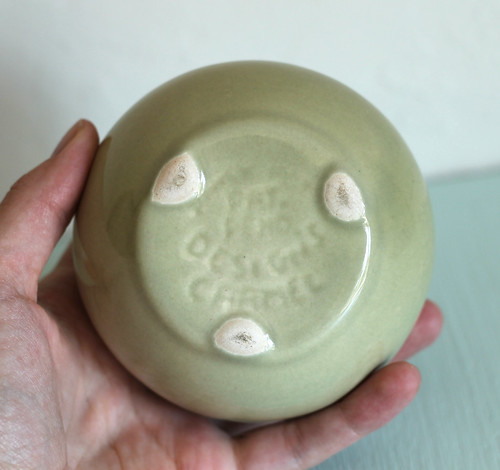
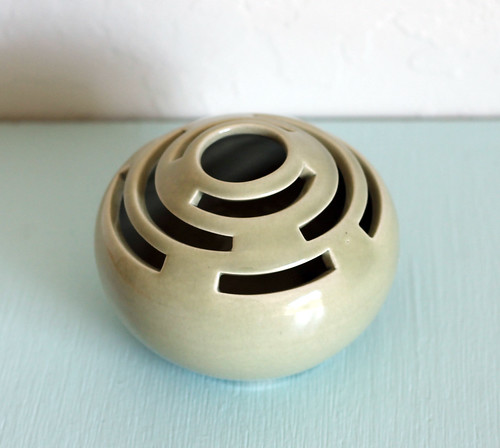
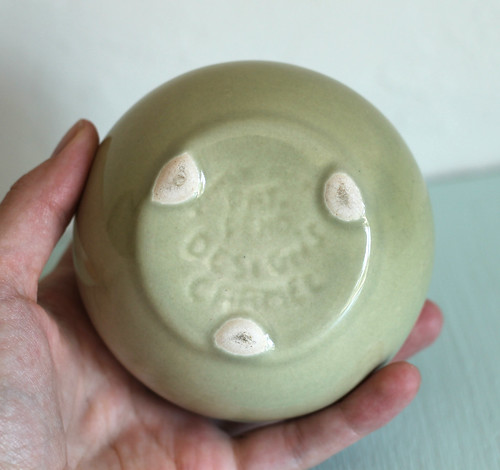
I also snagged the coolest little cut-out vase in a nice shade of green. I can't quite make out the maker's mark on the bottom, besides "PAT. PEND DESIGNS CARMEL". Bonus that it's a California-made piece. And I grew up around there, so, more points for that. I may have to do a little more research on this one.

Thrifty finds

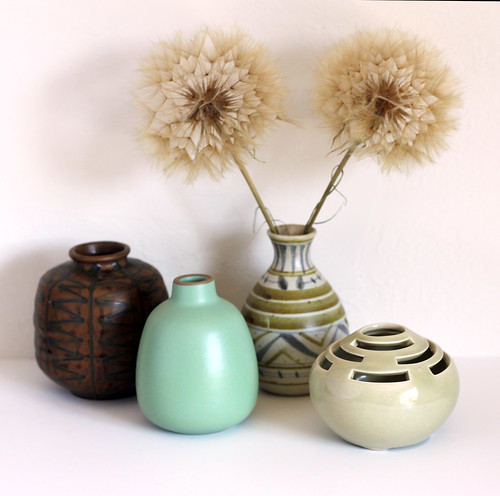
It looks nice with my collection of other thrifty find vases! I paid around $1 each for these, besides the Heath bud vase that I bought on my trip to the factory. I found and picked those giant dandelions over a year ago and they're holding up great! I love how they look on my bookshelf.

26

Handmade gifts.

Friday, December 21, 2012

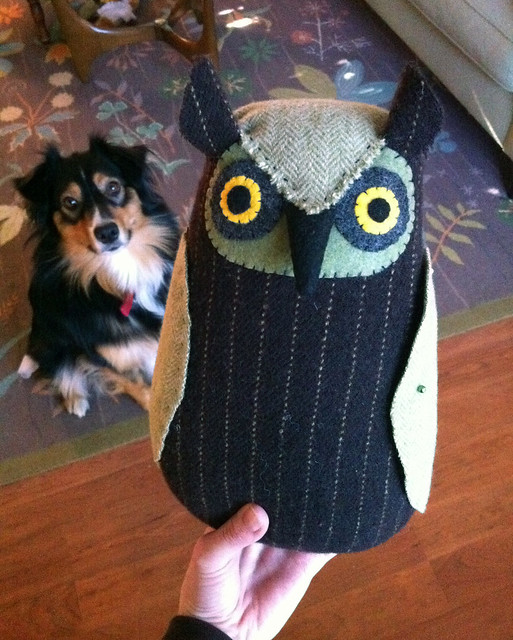
hand sewn wool owl doll
When the holidays roll around, I like to try to make handmade gifts to give to friends and family instead of buying mass-produced items. I say TRY because the holidays (thankfully!) get very busy for me as a handmade business owner with a full-time job, so there isn't much time leftover to craft all of those wonderful items in my to-make list. So far this year I haven't been able to start any of my projects, but I did pretty well last year! I didn't share these on my blog because I didn't want to spoil the surprise come Christmas morning.

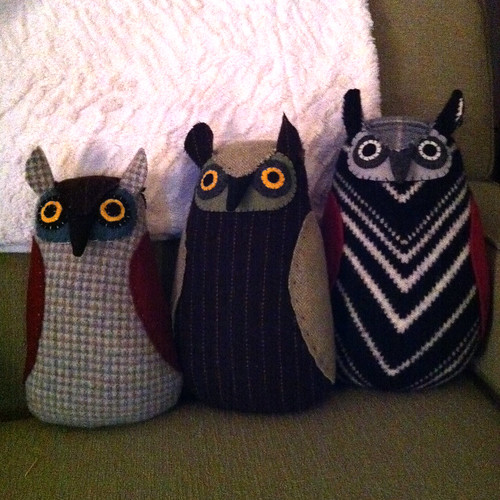
hand sewn stuffed wool owls
I sewed up a few of these great stuffed owls for my niece. She loved them! And now she's always drawing pictures of owls for me. I mixed it up a little bit with the sizes (so I could make a baby) and even started one for my self with a flat bottom filled with beans so it can stand up on its own. Maybe I'll finish that one this year! These were a lot of fun to make, because I made them out of thrifted wool clothing. The baby owl's body was a huge 80's sport coat, the middle owl was a skirt, and the black and white one was a sweater. I purchased the pattern on Etsy here. Warning: If you make these owls, dogs will want to eat them.

handmade honey badger tshirt from vitamini
I also made these funny Honey Badger shirts for my mom and sisters. I don't know about you, but that ridiculous video makes me laugh so hard! I drew out a scene of the honey badger pursuing a delicious snake in a hollow log with a swarm of bees and wrote out "Honey badger don't care". Then I made a screen with it, and printed the design on a few tshirts I bought at Target. Easy!

I also made a yarn-wrapped wreath and a few mini owl ornaments but I didn't get photos of those. Again, my late night crafting and immediate gift wrapping didn't leave me any room for photography. I've got a few project ideas this year and I'm excited to get started on them! Do you make any handmade gifts to give for the holidays?

37

Restoring a fiberglass lampshade. Part 1.

Thursday, July 26, 2012

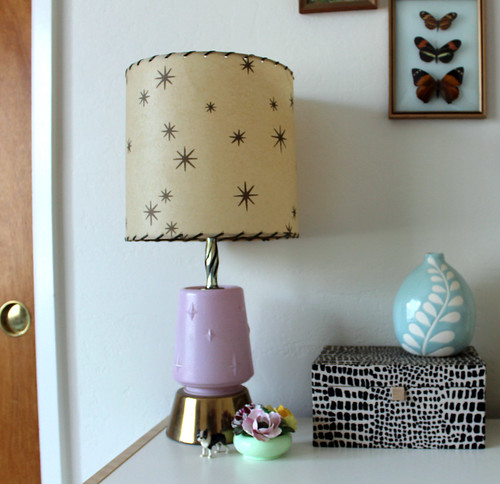
I'm a total freak for vintage lamps. I have a ton of them, and I love all of them deeply. I get even more excited when the lamp has a fiberglass shade! Fiberglass lamp shades were very common in the 50's and 60's. They came in a variety of colors, finishes, and patterns, and cast a nice glow since the fiberglass is semi-transparent. The were often laced with leather or plastic along the tops and bottoms in a contrasting color. Here are a few of the fiberglass shades I have around my place:

vintage lamp collection by vitaminihandmade
My mom gifted me this great lamp for my birthday a couple years ago. She knows me well!

vintage lamp collection by vitaminihandmade
I bought a pair of these great vintage lamps on Etsy a few years back. I love the starburst design on the shades! These lamps are especially nice, since there's also a light bulb inside the pink glass base!

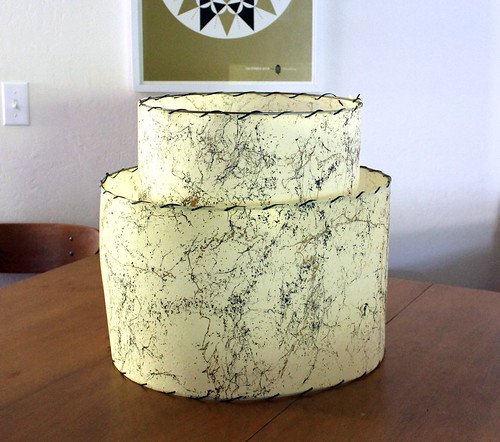
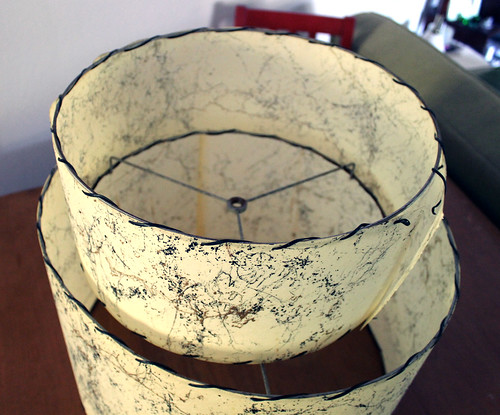
So my mom bought a floor lamp with this tiered fiberglass shade at a garage sale in Pacific Grove for $2! The lamp was beyond repair, but the shade had potential. She gave it to me, and I decided to fix it up. Here's what I was working with:

shade3 shade1

The good:
  • The paint splatter paint pattern is great, and I love the gold accents.
  • It's huge (almost 18" tall) and is just the right scale for a glass/brass fixture shade that I'd like to switch out.
  • It isn't an heirloom, so I don't feel like I'm going to wreck anything if I try to fix it. 
The bad:
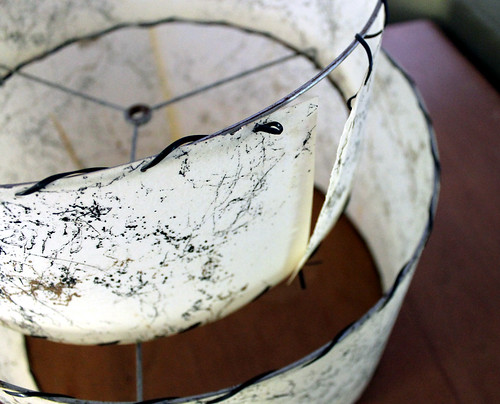
  • It's really wonky. I think the rings are bent.
  • The lacing was loose and/or broken in places and the seams were gaping open.
  • The rings and spider fitters were rusty.
  • It smelled like it had been stored in a shed underneath a pigeons nest. Yucko! 

broken fiberglass lampshade lacing by vitaminihandmade shade5

Let's get to work! I started by cutting off all of the lacing, since it was already damaged beyond repair (if your lacing is in good shape, you can still clean the shade with this method, but you'll be cleaning around the rings and will dry it upright). Most of the glue was long gone, but where it was still intact, I carefully pulled it off, taking care not to damage the fiberglass sheets. So I had the rings, and two sheets of fiberglass, ready to be cleaned.

shade6

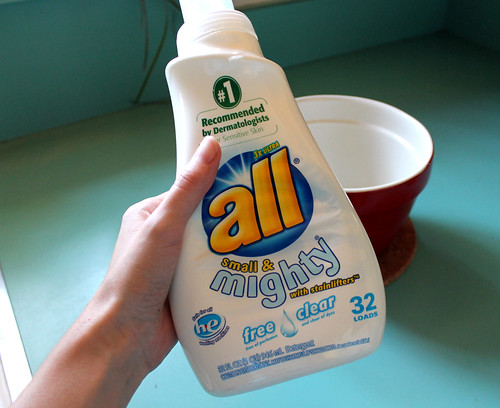
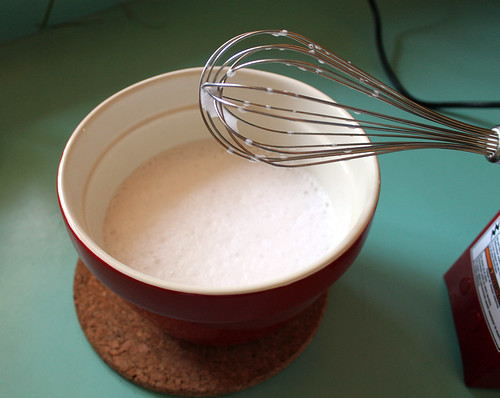
I found this recipe for whipped up detergent. I used All Small and Mighty, because it's what I had. Since it's super concentrated, I only used about two tablespoons to about a cup of water. I whipped it up with a whisk attachment.

shade7

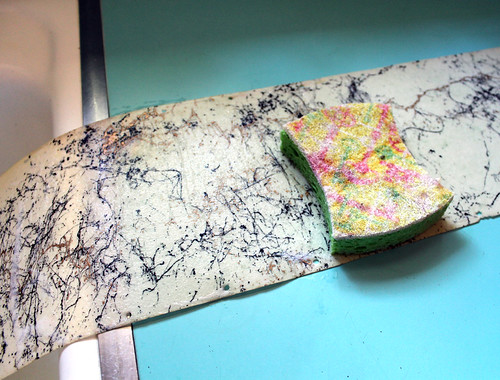
I'm not sure why the whipping is necessary, though. The bubbles immediately started disappearing when I stopped whipping, and eventually disappeared entirely. Either way, I scooped the foamy soap onto a sponge, and carefully wiped it across the fiberglass, making sure to go in the direction of the "grain".

cleaning a vintage fiberglass lampshade by vitaminihandmade

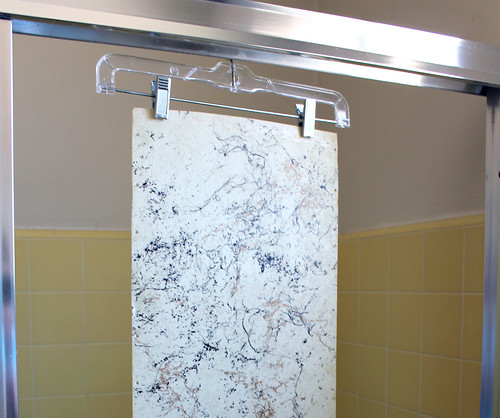
Fiberglass is composed of lots of tiny glass fibers, and rubbing in the wrong, or in multiple directions may rough up the surface. I rinsed the sheet with warm water, and then laid it out flat on a towel to dry. The larger sheet was a little more difficult, since it was so big, so I improvised and clipped it up with a skirt hanger and hung it up in the shower to dry.

drying fiberglass sheets

I *hope* to eventually be able to switch out this ugly glass shade in my work area with my freshly-restored shade.

shade4

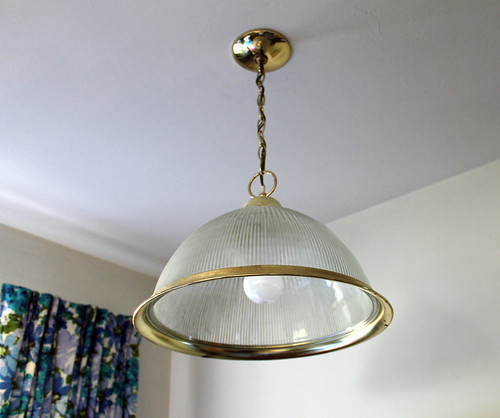
This glass and brass shade really doesn't add anything to the space, so a new shade would really spruce up the area. It'll look great hanging in front of my vintage floral curtains!  

I will be reassembling the shade in part 2 of this post, and will be retrofitting the shade onto the light fixture in part 3, so check back again!

Please note: These methods worked for me and my particular shade. If your shade is delicate, or valuable and you are concerned about potentially damaging it, consult with a professional.


vitamini handmade © All rights reserved · Theme by Blog Milk · Blogger