0

From my sketchbook.

Tuesday, July 31, 2012

Looking through my old sketchbooks and reliving some of my travels.

photo 1
A notable pigeon in Assisi, Italy

photo 3
Water scene at the Portland Japanese Garden
photo(36)
Castiglion Fiorentino, Tuscany. The tiny hill town where I lived for 3 months in college.

36

Restoring a fiberglass lampshade. Part 1.

Thursday, July 26, 2012

I'm a total freak for vintage lamps. I have a ton of them, and I love all of them deeply. I get even more excited when the lamp has a fiberglass shade! Fiberglass lamp shades were very common in the 50's and 60's. They came in a variety of colors, finishes, and patterns, and cast a nice glow since the fiberglass is semi-transparent. The were often laced with leather or plastic along the tops and bottoms in a contrasting color. Here are a few of the fiberglass shades I have around my place:

vintage lamp collection by vitaminihandmade
My mom gifted me this great lamp for my birthday a couple years ago. She knows me well!

vintage lamp collection by vitaminihandmade
I bought a pair of these great vintage lamps on Etsy a few years back. I love the starburst design on the shades! These lamps are especially nice, since there's also a light bulb inside the pink glass base!

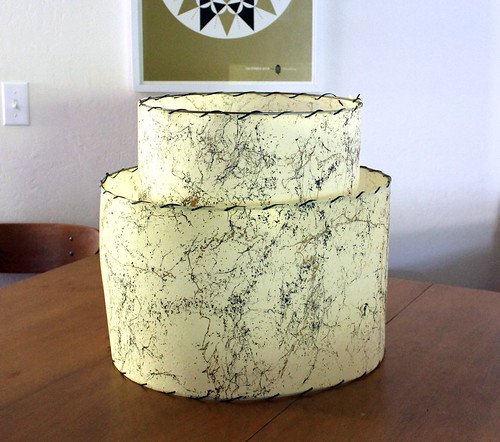
So my mom bought a floor lamp with this tiered fiberglass shade at a garage sale in Pacific Grove for $2! The lamp was beyond repair, but the shade had potential. She gave it to me, and I decided to fix it up. Here's what I was working with:

shade3 shade1

The good:
  • The paint splatter paint pattern is great, and I love the gold accents.
  • It's huge (almost 18" tall) and is just the right scale for a glass/brass fixture shade that I'd like to switch out.
  • It isn't an heirloom, so I don't feel like I'm going to wreck anything if I try to fix it. 
The bad:
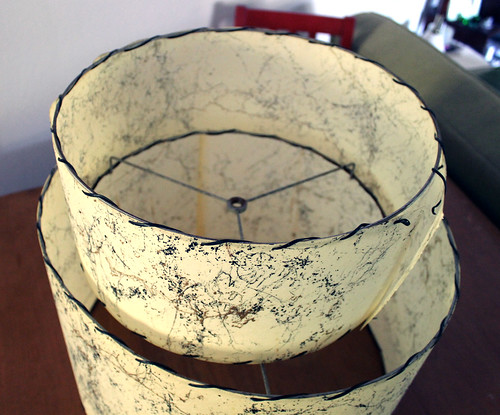
  • It's really wonky. I think the rings are bent.
  • The lacing was loose and/or broken in places and the seams were gaping open.
  • The rings and spider fitters were rusty.
  • It smelled like it had been stored in a shed underneath a pigeons nest. Yucko! 

broken fiberglass lampshade lacing by vitaminihandmade shade5

Let's get to work! I started by cutting off all of the lacing, since it was already damaged beyond repair (if your lacing is in good shape, you can still clean the shade with this method, but you'll be cleaning around the rings and will dry it upright). Most of the glue was long gone, but where it was still intact, I carefully pulled it off, taking care not to damage the fiberglass sheets. So I had the rings, and two sheets of fiberglass, ready to be cleaned.
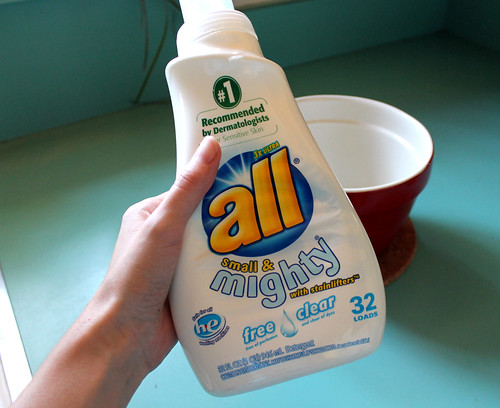
shade6

I found this recipe for whipped up detergent. I used All Small and Mighty, because it's what I had. Since it's super concentrated, I only used about two tablespoons to about a cup of water. I whipped it up with a whisk attachment.

shade7

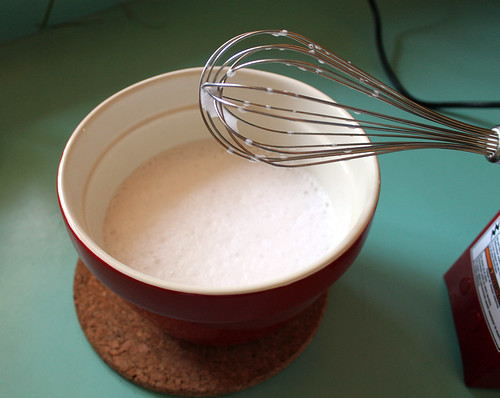
I'm not sure why the whipping is necessary, though. The bubbles immediately started disappearing when I stopped whipping, and eventually disappeared entirely. Either way, I scooped the foamy soap onto a sponge, and carefully wiped it across the fiberglass, making sure to go in the direction of the "grain".

cleaning a vintage fiberglass lampshade by vitaminihandmade

Fiberglass is composed of lots of tiny glass fibers, and rubbing in the wrong, or in multiple directions may rough up the surface. I rinsed the sheet with warm water, and then laid it out flat on a towel to dry. The larger sheet was a little more difficult, since it was so big, so I improvised and clipped it up with a skirt hanger and hung it up in the shower to dry.

drying fiberglass sheets

I *hope* to eventually be able to switch out this ugly glass shade in my work area with my freshly-restored shade.

shade4

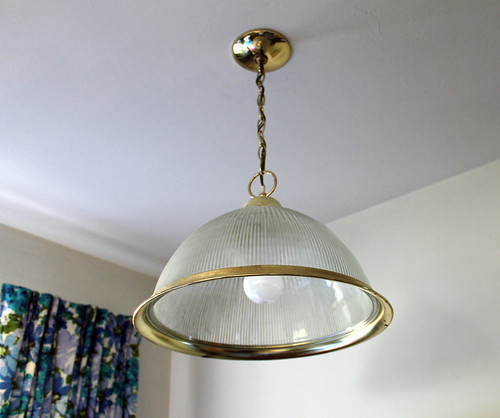
This glass and brass shade really doesn't add anything to the space, so a new shade would really spruce up the area. It'll look great hanging in front of my vintage floral curtains!  

I will be reassembling the shade in part 2 of this post, and will be retrofitting the shade onto the light fixture in part 3, so check back again!

Please note: These methods worked for me and my particular shade. If your shade is delicate, or valuable and you are concerned about potentially damaging it, consult with a professional.

1

New "hello" design!

Saturday, July 21, 2012

I've got a new MINI card design in the shop!

hello mini cooper card stationery vitamini
Available in pink, teal, orange, and yellow, and printed on white speckle and kraft brown card stock. This design features a hand-drawn MINI with a bit of exaggerated vertical scale, some loose coloring, and hand lettered script saying hello! I loved drawing this design, and am so happy with how the prints came out. I was literally laughing out loud while I was pulling the prints for these. They just made me happy! I hope you enjoy them, too. All colors are listed in the card section of my shop.

0

Friday finds. 7.20

Friday, July 20, 2012

I'm really feeling the yellow/orange/teal vibe lately. Here are a few of my favorites around the web this week:


weekendlinks_0720

1. Awesomely yellow Keurig Mini coffee maker. This would look great in a retro kitchen - especially one with a teal and yellow color scheme...
2. Teal pom pom fringe. I love this stuff. I'll be using pom pom fringe in a new project coming up soon!
3. "Second Homes for Leisure Living"  Great retro interior illustrations.
4. Great cacti and succulent pillow from SkinnyLaminx.
5. Felt barrette in the best colors.
*All photos via their respective sources.

Have a great weekend!

4

Tiny wings.

Monday, July 16, 2012

I set up a hummingbird feeder on my front porch a few weeks ago, and since then I've had the pleasure of watching a flurry of hummingbirds stop for a snack right in front of my living room windows. They seem to be out there all day, chasing each other around, zooming by, and boy, do they love that feeder!

photo(33)

This little guy loves to hang out in the tree outside my kitchen window. I was baking cookies this evening and he sat on that little branch the entire time, bobbing away in the breeze. Check out his bright red feathers!

hummingbird3
hummingbird1

hummingbird2

I'm lucky that he decided to sit still and model for me. I'm not allowed to have any pets here, but having these cute little birdies around all the time is almost just as good.

If you're curious about the feeder, I bought it at a local plant nursery, but you can find the same one on Amazon. I love the green, vintage style glass, and the birds don't seem to miss the garish red plastic! Here's the nectar recipe I use:

2 cups water
1/2 cup white sugar

Boil the water on high heat. Remove from burner and slowly stir in sugar, until dissolved. Let nectar cool until it reaches room temperature. Fill feeder with one cup of the mixture, using a funnel or measuring cup with a spout. Save the remaining nectar in the refrigerator, for a refill later in the week.

During the warm summer months, it is important to clean out and refill the feeder every few days to keep your birds happy and healthy. My neighborhood humming birds consume almost the entire cup of nectar every 3-4 days, so this ratio works great for me!


1

Love in the trees.

Friday, July 13, 2012

I spotted this article on Yahoo today about a farmer in South Gloucestershire, England who planted thousands of oak trees in his field (lined with a hedge) creating a striking void in the shape of a heart to honor his late wife. The heart points in the direction of her hometown. What a beautiful tribute.


All photos via swns.com

Here is a photo of the couple in the 1960's. Aww.
Happy friday, everyone! Have a great weekend.


2

Lucky 105!

Wednesday, July 11, 2012

105 copy

Hey, this is my 105th post! I meant to have a 100th post announcement, but it got away from me so let's celebrate 105 instead.

I've been sprucing a few things up around the blog. Have you noticed I have a new "About" page?  Check it out if you want to learn a little more about me and what I do. I've also been organizing my blog content and tags to make archived posts a little easier to navigate. I'm working on a few new tutorials and some exciting projects that I can't wait to share. Thanks so much for reading! Here's to the next 105!

2

What I've learned.

Monday, July 9, 2012

bloom
As I announced early last month, I participated in Holly Becker's Blogging Your Way 2.0 course. While the coursework has been wrapping up, I've had lots of time to reflect on everything I've learned. I'm motivated with a new-found enthusiasm for blogging and appreciation for all of those super-supportive fellow bloggers out there!

In addition to tons of practical tips and tricks that I know will be helpful in my blogging career, the one topic that really struck a chord with me was Holly's personal story. Hearing how she started out slowly, making her own way, following her heart and doing what she loved has (years later) blossomed into a creative career doing wonderful things like writing interior design books to traveling all over the world to teach. I think the main lesson I got from her story is that things take time, but it you slowly work at them, taking little steps in the right direction every day, that you can reach your dreams. And your dreams can take you other wonderful places that you could have never imagined. How could you not be inspired after hearing a story like that?!

I've also become more grateful for my blog and the positive influence it has in my life. To me, blogging helps keep me balanced and reminds me to do things I love. It's easy to get bogged down by the daily grind of commutes, office stresses, bill-paying, family matters, bla bla bla. At some point I realized that I needed to be creative to be happy and healthy, so keeping this blog is a wonderful way to stay motivated and organized with these activities. I love sharing, have always enjoyed writing, and I'm constantly working on creative projects (or just dreaming them up). I also love connecting with my readers.

So there you have it. What I've learned and why I love blogging. If you were thinking about taking one of Holly's courses, I highly recommend it! I've learned lots and made a few new friends along the way.

*Shout out to the lovely ladies I met last weekend at our Nor-Cal Bloggers Meet-Up: Sharon from A Fanciful Life, Starlet from Can You Come Home, Rebecca from Design R, and Carol from A Laughing Gate.

0

Happy Birthday, America!

Wednesday, July 4, 2012

It's the 4th of July! I hope you have a fun-filled  day with friends and family and appreciate how great our country really is! I'll be enjoying the local 4th celebration downtown, so I'm excited to put on my sun hat, eat a little bbq, and listen to some banjo music. Afterwards, maybe I'll take a cruise in my red and white station wagon.

Image from Plan59

 (I wish.)


vitamini handmade © All rights reserved · Theme by Blog Milk · Blogger