14

Merry, Merry!

Monday, December 24, 2012

It's Christmas Eve! I want to wish everyone a wonderful Christmas and thank everyone for coming around and reading the blog. I hope you get to spend some quality time with friends and family, have some laughs, and eat some great food.


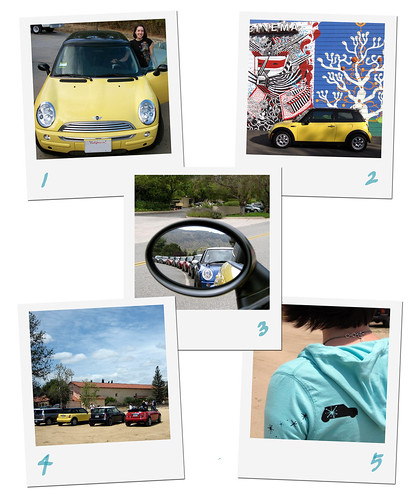
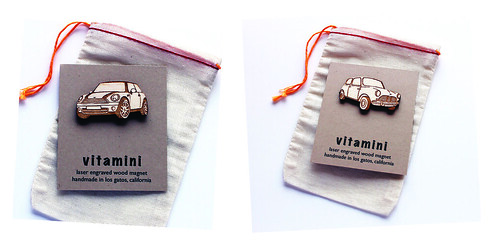
And I want to say a big "thank you!" to everyone who made a purchase in my Etsy shops this holiday season. It was the best holiday for me, yet! I hope your friends and loved ones love their MINI gifts!

Image from Blogto.com

20

Handmade gifts.

Friday, December 21, 2012

hand sewn wool owl doll
When the holidays roll around, I like to try to make handmade gifts to give to friends and family instead of buying mass-produced items. I say TRY because the holidays (thankfully!) get very busy for me as a handmade business owner with a full-time job, so there isn't much time leftover to craft all of those wonderful items in my to-make list. So far this year I haven't been able to start any of my projects, but I did pretty well last year! I didn't share these on my blog because I didn't want to spoil the surprise come Christmas morning.

hand sewn stuffed wool owls
I sewed up a few of these great stuffed owls for my niece. She loved them! And now she's always drawing pictures of owls for me. I mixed it up a little bit with the sizes (so I could make a baby) and even started one for my self with a flat bottom filled with beans so it can stand up on its own. Maybe I'll finish that one this year! These were a lot of fun to make, because I made them out of thrifted wool clothing. The baby owl's body was a huge 80's sport coat, the middle owl was a skirt, and the black and white one was a sweater. I purchased the pattern on Etsy here. Warning: If you make these owls, dogs will want to eat them.

handmade honey badger tshirt from vitamini
I also made these funny Honey Badger shirts for my mom and sisters. I don't know about you, but that ridiculous video makes me laugh so hard! I drew out a scene of the honey badger pursuing a delicious snake in a hollow log with a swarm of bees and wrote out "Honey badger don't care". Then I made a screen with it, and printed the design on a few tshirts I bought at Target. Easy!

I also made a yarn-wrapped wreath and a few mini owl ornaments but I didn't get photos of those. Again, my late night crafting and immediate gift wrapping didn't leave me any room for photography. I've got a few project ideas this year and I'm excited to get started on them! Do you make any handmade gifts to give for the holidays?

10

Festive holiday corsage tutorial

Sunday, December 16, 2012

Festive holiday corsage tutorial

It seems like all of our grandmothers had a few of them; holiday corsages made of mini glass ornaments, metallic foil leaves, ribbon, garland, and other embellishments. I saw this pin from Martha Stewart and decided to make my own version! If you'd like to make a few as well, here's what you will need:

Festive holiday corsage tutorial

Felt in various colors. I used light blue, pink, and white.
Needle
Embroidery thread. I used metallic silver.
Ribbon
Assorted embellishments. I got these mini gifts and ornaments at Michael's.
Pin (not pictured)

Cut out holly leaf shapes from the felt. My leaves ranged in size from about 3 to 2.5 inches tall. Using a single strand of the embroidery floss, thread the needle and stitch the edge of the leaves with a back stitch. Stitch the veins if you'd like, or just the edges. Mix it up!

Festive holiday corsage tutorial

Tie a bow with coordinating ribbon. Try a traditional bow or a looped bow like the one I used. Add a few stitches in the center to secure the ribbon.

Festive holiday corsage tutorial

Choose the embellishments and decide on a layout. Stitch everything together or use a hot glue gun. Stitch or glue the pin to the back.

Festive holiday corsage tutorial

These would make great little handmade gifts. Add one to the top of a present, or make a few to give to dinner guests at your next holiday party!

Festive holiday corsage tutorial

Festive holiday corsage tutorial

Try making a few in different colors! I'm going to make a green one next.

13

Shop handmade this holiday!

Wednesday, December 5, 2012

Retro Style Holiday Cheer Card

Ever since I opened up my Etsy shop back in 2008 my concept of holiday shopping has changed. When I started receiving my first holiday gift orders, I started thinking about all of the people who would be getting something that I made with my own two hands, how I worked out the design in my head, drew it with a pen and paper, and finally screen printed it with a screen I stretched and exposed myself. I thought about how much more meaningful a handmade gift is, opposed to something mass-produced off the shelf at a big box store. Ever since that first holiday season, I decided to shop handmade for the holidays. There are so many wonderful small businesses out there and it feels great to feel like I'm supporting them and their work, instead of adding to the wallet of a big corporation.


Door Sixteen compiled a huge list of handmade businesses on this blog post. Many have coupon codes attached, too! It's not too late to do your online holiday shopping, so get on it!

*photo above of my Holiday Cheer hand screen printed card available in my Vitamodern shop.

13

Vintage-style glittered ornaments

Thursday, November 29, 2012

ornaments_complete1

I'm extra excited to set up my holiday decorations this year because I bought a vintage aluminum tree a few months ago! I've wanted one for precisely forever, and found it on Etsy a few months ago. In keeping with the theme, I'd like to decorate it with vintage glass ornaments. I have a small collection of real ones but I decided to fill in with a few handmade, simple mini ornaments. They were really easy to make and I think will add a little extra sparkle to the tree and will catch the light of the color wheel. (Yep, got one of those, too!)

Retro Style Glass Glittered Ornaments

Materials:
  • Plain glass mini ornaments. The ones I used are a little irridescent, but you could use clear glass or plain frosted ornaments.
  • Fine glitter in various colors. I bought this Martha Stewart variety pack that had Verdalite, Turquoise, and Garnet and also used another Martha Stewart glitter called Smoky Quartz
  • Glue. I used Mod Podge since I wanted a glue that was thin and easy to brush on.
  • Small brushes

Retro Style Glass Glittered Ornaments
Dip the brush into the Mod Podge and paint the design directly onto the ornament. I used simple dots and stripes. For the dots, I dipped the back end of the paint brush into the Mod Podge and dotted it on that way.
Retro Style Glass Glittered Ornaments

Over a loose sheet of paper on top of your work surface, sprinkle the glitter over your painted design. Tap it to remove the excess and to ensure that the glitter adheres to the glue. When your painted design is covered, prop it up and let it dry.

Retro Style Glass Glittered Ornaments

Lift the loose sheet of paper with the leftover glitter, gently fold it in half, and funnel the glitter back into its container.

After the ornaments have dried, there will probably be glitter all over, not just on the glue design. Here's a tip I used to remove the excess glitter after the design had dried: lightly spray it with a canned air duster, the kind you use on your computer keyboard. If there is still loose glitter around, gently brush it off with a dry, clean paintbrush. Do your best to not get it everywhere, but you'll probably walk around with sparkles on your face for a while.

Retro Style Glittered Glass Ornaments Retro Style Glass Glittered Ornaments

I love the way they came out! Try combining different colors and shapes, or try using a small glue applicator for fine linework. Make a set or two and give them to your friends as gifts!

5

Dashing through the snow...

Tuesday, November 27, 2012

I've been having so much fun creating MINI Cooper fabric designs to sell in my Etsy shop. Spoonflower, based in North Carolina (yay, for US made!) does all of the digital printing for me, giving me flexibility beyond what I'd be able to screen print in my little studio myself. I was excited to create a winter-themed design, so I started with my Let it Snow card design and created a large repeat. Here it is!

mini cooper winter christmas fabric

This fabric would make nice little sachets, pillows, or even MINI Christmas stockings! Available in fat quarter pieces here. And browse my other MINI Cooper fabrics here.

I hope you're getting into the holiday spirit! And if you've got the shopping bug, my holiday sale is is still going strong in both of my Etsy shops. Take 10% your entire purchase through today! See the Vitamini and Vitamodern shops (or the previous blog post) for coupon codes.

6

Holiday sale!

Friday, November 23, 2012

If your looking for unique gifts for your favorite MINI Cooper lovers, take advantage of the special holiday sale in my Etsy shop!

Holiday sale - handmade mini cooper gifts and stationery

Now through Tuesday, November 27th, enter the code MINIHOLIDAY12 in the coupon code box and get 10% off your entire purchase!

And if you're into the retro thang, my Vitamodern shop is also on sale!

handmade retro gifts and stationery holiday sale

You know the drill - type in the code and get 10% off! I've got a few different style of hand screen printed holiday cards available, as well as coasters, art prints, and other home decor items.

5

Happy Thanksgiving!

Wednesday, November 21, 2012

I hope you have a great one with great food, friends, and family! This will be me tomorrow morning:

Vintage kitchen and bathroom advertisements

And afterwards, I'll do this:

Vintage kitchen and bathroom advertisements

Hehe, ok, maybe not! Have a good one and don't forget to think about a few of the things you're thankful for.

Images from Plan59, my favorite resource for vintage advertisements.

5

Favorites: No Barcode Blog

Friday, November 16, 2012

I thought it would be fun to share some of my favorites here every now and then. If you're a regular reader of my blog, chances are we have similar taste, so maybe you'll enjoy these products/websites/projects/blogs as much as I do!

I don't recall how I stumbled upon this blog, but I'm so glad I did! No Barcode by Javier Garcia keeps a visual library of vintage packaging, showing off their colors, fonts, and graphics. It's hard not to get inspired by these great little examples of graphic design. Here are just a few:

Starting with Sterling circa 1959 Inked Ribbon Packaging circa 1960's Dining Out In the Country NYC c1954 Van Rex Bouquet Garni Packaging c1950's 
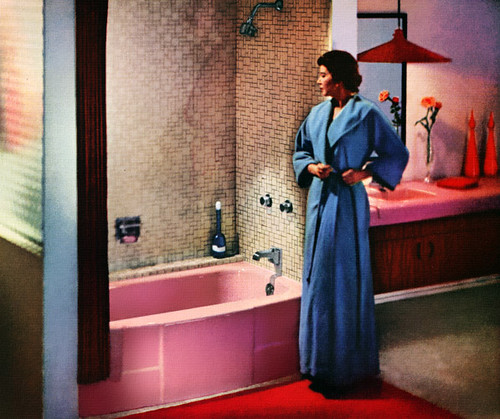
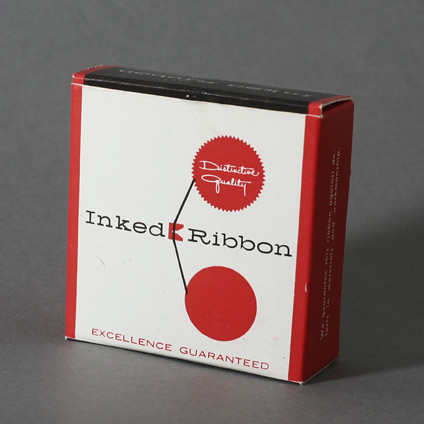
So click around to see some fun examples of vintage graphic design. The clean, simple photography really makes the graphics pop, don't you think? All images from No Barcode. You can also find samples of Javier's own graphic design work on Flickr. Happy Friday, friends! Enjoy this last weekend before the holiday madness really hits. I'll be working on a few screen printing projects and thinking up some winter crafts to share here on the blog. Have a good one!

4

Evolution of a design.

Thursday, November 8, 2012

Hand screen printed retro holiday cards
Things have been a little quiet around here lately as I've been busy readying my shops for the holiday season. Can you believe we're already one week into November? I've created a new holiday card design for each of my Etsy shops, and I wanted to share the design evolution with you - from pencil sketch, to papercut, to screen printed design. My first sketch of this design is dated from last November! Sometimes you just need to sit with an idea for a while before you can really work it out and get it right. :) Here are some views into my sketchbook.

Evolution of a design 
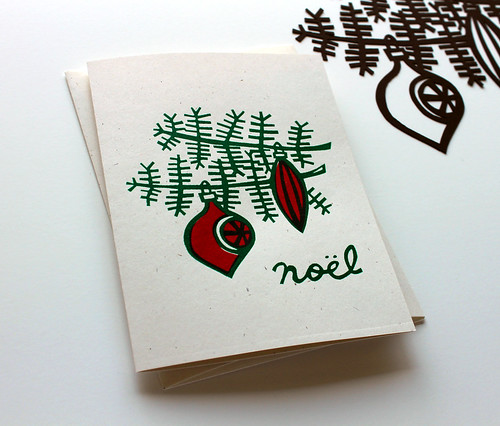
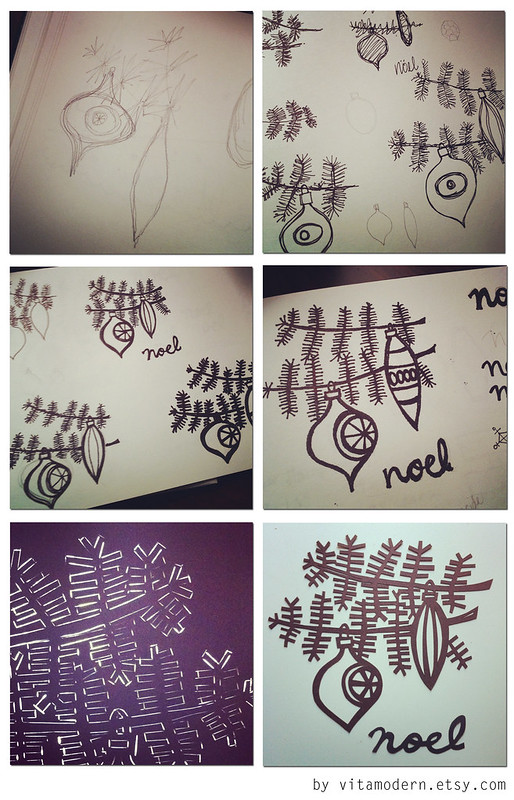
After I had my papercut, I scanned, resized, and exposed a silkscreen with the design. I printed it in a two-color process (deep red and forest green) onto cardstock. Here are my finished pieces.

Hand screen printed retro holiday cards Hand screen printed retro holiday cards
Printed on French Paper Speckletone in Kraft and Natural white. Both are available in my Vitamodern Etsy shop.

I really like their retro, earthy vibe. I'm also getting really into working out my designs with papercuts. At first I was intimidated by the complex needles of the pine, but I couldn't resist trying to cut it out of paper. I'm glad I decided to go for it.

0

Dia de los Muertos Mini Shrine

Friday, November 2, 2012

handmade dia de los muertos shrine skull and butterfly by vitamini

Every now and then, I like to do craft projects that are just for me, just for fun. A few weeks ago, I saw a small Dia de los Muertos shrine in a vintage wooden box online. First, I thought, "That's really cool."Second, I thought, "I could make that!" So I headed over to Michael's to get some supplies. At first, I was looking for a standard looking wood box, but I found this one with a wire mesh lid and thought it would be even better than a solid lid. And it was only $2! I also bought a few new colors of Martha Stewart craft paint, some floral wire, and a brick of FIMO Soft clay in white. For less than $10, and some tools I already had at home, I had everything I needed!

It took a couple of days to decide on a theme, but I went with the skull/butterfly combo with roses. I took snapshots with my phone of the process (no fancy photos here!) and I thought they might be fun to share. Here's what I did!

handmade dia de los muertos shrine process photos by vitamini
It's finished and I'm so happy with the result! It was quite a fun project, too, and helped me practice all sorts of techniques like painting, sculpting, and wood burning. I hope you like it!

handpainted dia de los muertos wooden box shrine skull butterfly dia de los muertos mini shrine handmade
And Feliz Dia de los Muertos! I hope you take some time today to remember those you have lost. Have a great weekend!
(And if you're looking for another Dia de los Muertos project, check out my felt skull hairpiece from last year)

2

Have a spooky one.

Wednesday, October 31, 2012

"Whooo went the wind, and out went the lights, and away ran the jackolanterns, Halloween night!"

Happy Halloween!

Some of the words from the song "5 Little Jackolanterns", at least how I remember them from grade school. :) I hope you get lots of treats this Halloween! 

*photo of Halloween Jeannie from Kitschy Living.

4

6 years.

Tuesday, October 30, 2012

Six years ago I brought my MINI home, and what a ride it's been!!

MINI collage

1. Day one. At this point, I still didn't know how to drive a stick-shift (eek!).  I had to make a 2 hour solo drive back to my place that night, so I learned pretty quick!
2. Taking in the art scene in San Jose.
3. MINIs all in a row for a Club run through Carmel Valley.
4. Another club run to Big Sur, Hunter Liggett, and the Mission.
5. I had just opened my Etsy shop (early 2008) and printed this hoodie to wear for the event. A logo is born. :)

To celebrate, I think a set of new wiper blades are in order. Thanks for inspiration, Max! Here's to many more years of fun to come!

2

Hooked.

Thursday, October 25, 2012

With the cooler fall temps starting to roll in, I'm finding my dining table and chairs covered with various jackets, cardigans, and scarves that I wear during the week and shed when I walk in the door. While this jumble keeps all of my favorites handy and nearby as I head out in the morning, it doesn't look so great. I need some hooks! So last week when I was in the Container Store I snagged this  cool one from Umbra.

Umbra Sticks wall hooks

It's called Sticks and I love it! It looks great when things are hanging, and when it's not in use, you can flip up the hooks and it looks like a piece of wall art. Here are some other cool hooks/racks that I found around the web that would be great for holding all of those fall scarves and coats.
Modern coat hooks
1. Whirled Metal Hook Rack, 2. Retro Coat Hook, 3. Soda Fountain Hook, 4. Wooden Coat Rack, 5. Eames Hang-It-All (I'll get one someday!)

(photos via their respective sources)

4

Today, in 1989.

Wednesday, October 17, 2012

October 17th is an important day in Bay Area history.

Loma Prieta Earthquake 1989
Today, 27 years ago, the San Andreas fault shifted and created the 7.1 magnitude Loma Prieta Earthquake that changed my life (and thousands of others') forever. My hometown of Watsonville was hit very hard. Most of the historic downtown buildings were destroyed. In fact, I was in the bakery shown in the bottom photo just 20 minutes before it hit. That entire building was later demolished due to major structural problems. The department store, Ford's was also damaged beyond repair.

Thankfully, besides a big mess and lots of broken dishes my family was ok. My dad was stranded in Santa Cruz and had to hitch a ride home in the back of a pick-up truck! We didn't have power for a few days and spent the evening of the 17th camping out in the backyard with neighbors and our grandparents. Needless to say, October 17th conjures lots of memories.

Photo sources: 1, 2, 3, 4, 5

1

New products in the shop!

Tuesday, October 16, 2012

I've been working hard creating a few new exciting products for the Vitamini shop!

Baby it's cold outside. MINI Cooper HOliday Card Mini Cooper Snowglobe Cards screenprint vitamini
New holiday card for 2012! Baby it's Cold Outside featuring a MINI in a snowglobe featuring snowflakes and a snowman! I've had this design in the works for a while and I'm so pleased with the way it came out. Hand screenprinted on white flecked and kraft brown French Paper, these cards would be a stylish way to send out your holiday greetings. I think the black and white color combo is my favorite. Classic Mini Cooper Stamp from vitamini mini cooper union jack rubber stamps vitamini
Rubber stamps! Available in both a Classic and New MINI design, and mini heart and Union Jack designs. They're made in America and designed by me! Check out the new stamp section in my shop.
Mini Cooper pins and magnets MiniCooper Lasercut pins and magnets
Lasercut wood pins and magnets in in Classic and New MINI designs. These would make a really nice little gift!

MINI Cooper holiday gift tags red and green
And new gift tags in festive shades of red and green, in time for the holidays! I hope you enjoy these new pieces as much as I have had creating them. Everything is available in my Etsy shop.

2

Three-ohhh

Thursday, October 11, 2012

Happy birthday to me! And yes, it's a big one....

Happy 7th birthday to me! :)
Well, I was only turning 7 in this photo, but the family dynamic is just about the same today as it was then. It looks like I just barely got to blow out my own candles that year!

I'm taking the day off to do a little shopping and enjoy the day. Wishing you a happy Friday and a great weekend!
 

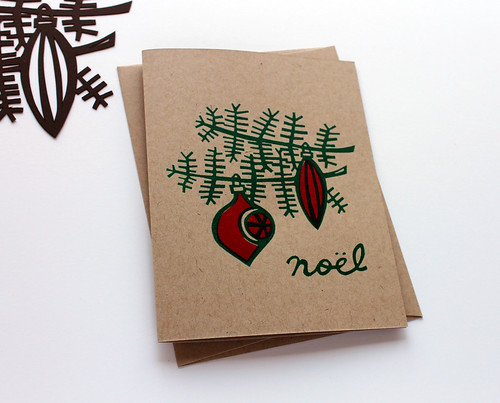
vitamini handmade © All rights reserved · Theme by Blog Milk · Blogger