5

Tiny Paper Worlds by Anastassia Elias

Wednesday, February 25, 2015

I came across these incredible paper tube sculptures by Anastassia Elias on Pinterest and thought they were too good not to share.

Tiny papercut figures create miniature worlds inside the tubes that really come alive when backlit. I think I could stare at them for hours!


Check out Anastassia's portfolio for more paper tube sculptures and other paper art. She also has a Society 6 shop where you can purchase photographs of these pieces and prints of her other works.

*All images via Anastassia Elias' website or Society 6 site.

4

Friday finds

Friday, February 20, 2015

Bonjour! hand screen printed illustrated card by Vitamini
Hello and happy Friday to you! How was your week? Mine was full of new work and new projects! I just started teaching a new Etsy Craft Entrepreneurship Program session in Santa Cruz this week. From what I saw in class everyone makes really cool/beautiful/unique things so I'm looking forward to seeing their progress as they get their work listed for sale online!

This week I released a new series of retro themed travel cards. So far I have France, England, and Italy, countries that are all near and dear to my heart. I'm looking forward to adding to the collection!

Here are some other cool things from around the web:
  • @hotdudesreading. It's a thing and it's hilarious.
  • I just finished The Paris Wife (loved it) and now I'm researching everything and anything about Hemingway. That's one thing I love about historical fiction, it inspires you to learn about real life stuff!
  • Too much cuteness!
  • I love this Kilim-inspired painted basket project
  • This time capsule pink 1950's kitchen article by Retro Renovation has been making the rounds this week. It's especially dear to my heart because it features the same oven and range as my sweet retro apartment kitchen.
  • Help me choose some art for my bedroom makeover!
  • Craftcation workshop signups just opened up! Make sure to sign up for one of my Simple Screen Printing workshops. I'd love to meet you and teach you my favorite and most addictive printing method. :)
Have a creative weekend! 

6

Bedroom Makeover: Art from Minted

Monday, February 16, 2015

The walls are freshly painted but I still have a couple larger projects to complete before I can finish my bedroom makeover project. Even so, I can't help but get excited about adding some new art to the space! I have a few pieces already that I'd like to incorporate, but I'd love to add a new piece or two of framed art.

Minted is a great online resource for art. There are so many lovely, limited edition prints to choose from. Even better, each print is available in multiple sizes and with different frame options so it's really easy to find the perfect piece. I think an abstract print would look great in my new bedroom, but I'm torn between graphic and high contrast or soft and painterly. Here are a few of my favorites of each.

Bedroom Makeover: Art from Minted
1. July Study 5 by Amelia Allen
2. Dash by Katie Craig
3. Waiting by Amelia Allen
4. Inked by Deborah Velasquez
5. Peonies in Vase by Kelli Hall
6. Out to Sea by Carolyn MacClaren
7. Mist Rises Over the Water by Renee Anne
8. Below Ravello by Kelli Hall

What do you think? Which one should I choose?

Disclosure: This post was sponsored by Minted. All opinions expressed are my own. Thanks for supporting the brands that keep Vitamini Handmade going!

12

DIY Paper Carnation Valentine

Thursday, February 12, 2015

DIY Paper Carnation Valentine

I couldn't let Valentine's Day season pass by without coming up with some sort of paper flower project! Enter the sweet, reliable carnation. You can always find bunches of them in the grocery store in every shade, they're super inexpensive, and they last forever. Carrie Bradshaw did say that carnations were making a comeback! (Nevermind that she said that like 15 years ago...)

I love the look of this paper carnation since it has more dimension than single ply tissue flowers. The crinkly petals almost look real and they're easy and inexpensive to make. All pluses in my book! Add a sturdy stem and a sweet love note and you've got a unique valentine flower for your loved ones.

Here's what you'll need:

DIY Paper Carnation Valentine
  • Tissue paper. One 10" square per flower
  • Green cardstock
  • Green crepe or tissue paper
  • Green floral tape
  • Floral wire, about 6" lengths
  • Pliers
  • Scissors
  • Paper glue

DIY Paper Carnation Valentine

This is the folded carnation design that I've adapted for this project. I've outlined the steps here with words and photos for clarity, but feel free to refer to the original for more info.

Fold the tissue square in half diagonally, and then again, and again. These steps create fan-like folds from the center of the tissue paper square. Continue folding in half until the paper is a narrow blade-like shape. Unfold. Gather the paper by the center and and crease downwards. Open the paper up and repeat multiple times. This step is creating very small vertical pleats in the paper. The more you open and re-crease the paper like this the more realistic folds the petals will have. Holding the paper horizontally with your right hand, pinch about 3/4" of the end and hold with your left hand. Flip the remaining paper back over your left hand, and crease around the fold you just made. Continue pinching about 1" of the paper and folding backwards until you have three rows of petals.

DIY Paper Carnation Valentine

Twist the base and cut off the excess paper. Wrap with floral tape around the wire and the leaves.

DIY Paper Carnation Valentine DIY Paper Carnation Valentine

Here's the fun part! Starting with the outside petal, carefully spread out the creases in the paper. Gather the flower in your hand as you go to fold the petals towards the center of the flower. Continue with the other two rows of petals.

DIY Paper Carnation Valentine

Cut a narrow strip of cardstock and write a "pick me, valentine" on the right side. Add some paper glue to the left side and fold over the stem and secure.

DIY Paper Carnation Valentine DIY Paper Carnation Valentine
So cute! I hope you give these sweet little flowery valentines a try! What do you think - are carnations still making a comeback?

8

Bedroom Makeover: Paint and Stenciling

Monday, February 9, 2015

DIY Wall Stenciling - Before and After

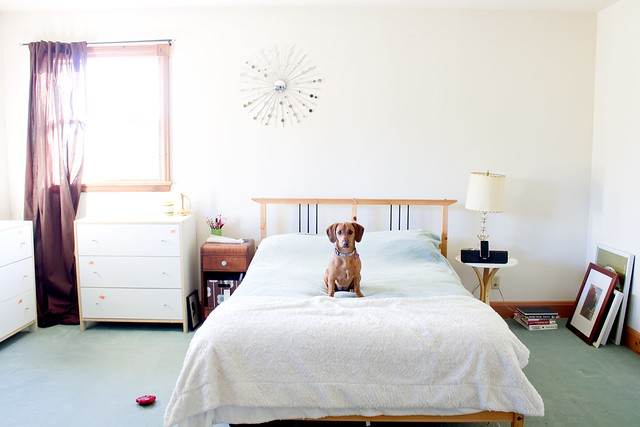
I'm so happy to share the first phase of the bedroom transformation - the walls!

Choosing the colors
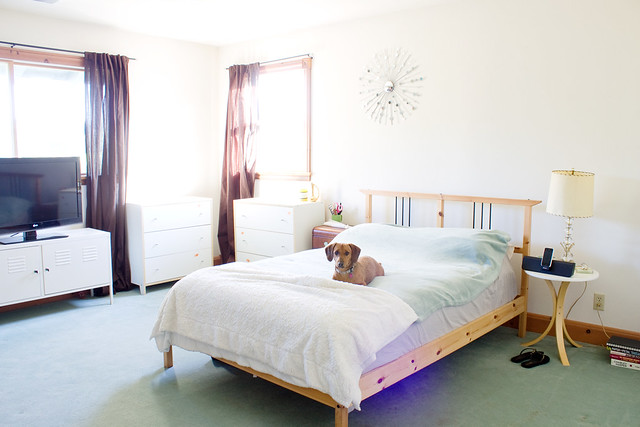
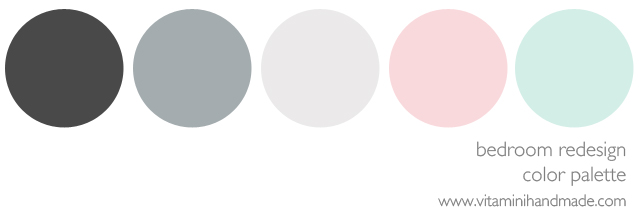
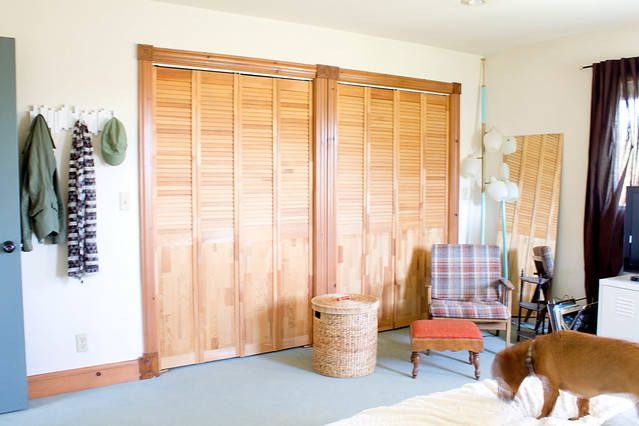
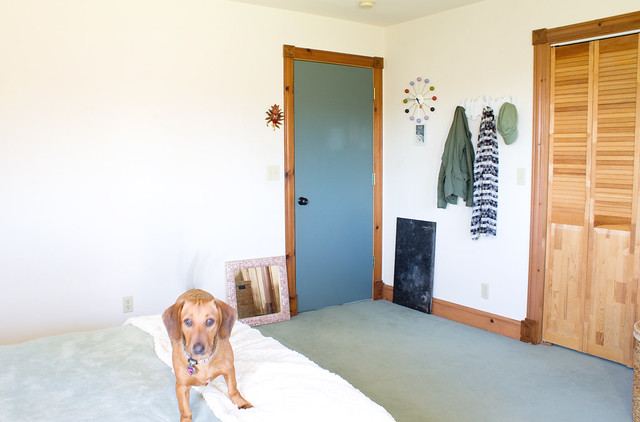
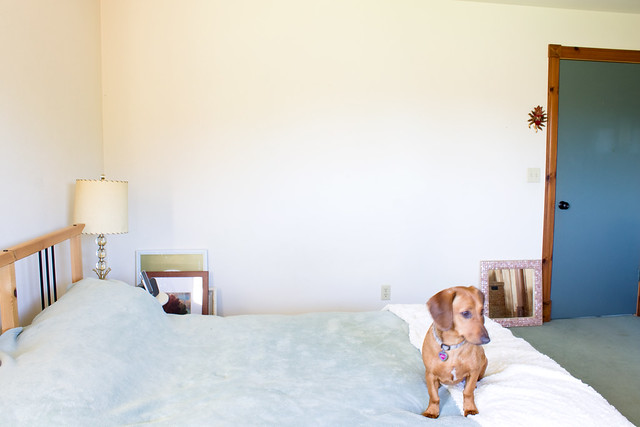
I had a few constraints to consider with this room: First, I wanted to keep it somewhat light/neutral. I take most of my product photos in this room so I didn't want the new paint to cast weird light/shadow/reflections on my shooting setup. Second, the colors had to work with the existing wood trim and the teal carpeting. Cool tones would work best in here. I had an idea to do a two toned effect - two walls in the darker shade and two walls in the lighter shade with a stenciled accent wall. I chose Behr Marquee Distant Star and Cameo White in an eggshell finish. Distant Star is a pretty bluish medium gray and Cameo White is a nice clean white. I was pleased with the quality of the paint - it went on thick and saturated and didn't leave any brush/roller marks behind.

Bedroom Makeover: Paint and Stenciling

Choosing the pattern
I really wanted a patterned accent wall and of course my mind went immediately to wallpaper. There are so many great options out there right now! But as I started thinking about it more, I got really excited about painting a stenciled pattern instead. Stenciling would allow me to choose my own color combinations instead of being stuck with what wallpapers were available. I could really make it my own with painting technique and finishes.

After a bit of googling, I came across Royal Design Studio. They have tons of great stencil patterns/designs to choose from and they kindly offered to send me one to try out for this project! After much deliberation, I chose the African Wave. It's graphic and has a modern simplicity that I really liked that would look great with mid-century style furniture.

Bedroom Makeover: Paint and Stenciling
Nothing like a hard day's work! Notice Baci not helping at all.
Stenciling
The folks at Royal Design Studio send detailed instructions with the stencils so there's really no guesswork involved. There are registration marks on the stencil to help you line up the pattern as you go (so helpful). I had brushes similar to this set of brushes (mine had 6 instead of 3) and found the medium sized ones worked the best. I also used spray adhesive on the back of the stencil, but it didn't help that much with my wall texture. Blue painter's tape was perfect for holding it in place while I painted.

Technique
I wanted a subtle fade to the pattern - more saturated on the top and lighter on the bottom. To achieve this look, I made sure the top two rows were very solid. From there I gradually used less and less paint until I got about two thirds of the way down. Then I mixed a bit of the gray in with the white and did two more rows. Then added a bit more gray and worked with a very dry brush for the last two rows.

Bedroom Makeover: Paint and Stenciling

This wall was about one day's work (I took a lot of breaks). I touched up the corners and any small areas the next day. All in all, a relatively quick project for the big impact that it gives to the room. I'm so happy with how it turned out!

Bedroom Makeover: Paint and Stenciling

Stay tuned for more bedroom makeover projects as I work towards the big reveal!

Disclosure: Behr provided the paint and Royal Design Studio provided a stencil to review for this project. All opinions are my own. Thanks for supporting the brands who keep this blog going!

2

6 Valentine's Day DIYs to Try

Friday, February 6, 2015

6 Valentine's Day DIYs to Try | www.vitaminihandmade.com

I love doing Valentine's Day crafts! It's right up there next to Halloween...and Christmas...and Easter. Ok, nevermind. I love any holiday-related craft, but Valentine's Day projects are special in that you can enjoy them all year! There's nothing wrong with pink, red, and hearts, if you ask me! Here are a few of my favorites spotted around the web.

1. Paper Heart Garland from Sweet Paul
2. The cutest Valentine's Day Pretzels from Leanne Bakes
3. Sweet Pom Pom Treat Bags from PB Teen
4. Cut Heart Gift Wrap from The House That Lars Built
5. Paper Fringe Heart from Julep
6. Gold Heart Stamped Vase from Hello Natural

Have a crafty weekend! 

*All photos via their respective sources

7

Bedroom Makeover: Before

Tuesday, February 3, 2015

Bedroom Makeover Before

When I moved a few months ago I had big plans for fixing up my new bedroom. But by the time I actually moved everything owned I was totally exhausted and couldn't stand to pick up another box or move another dresser. Things in the bedroom just got parked in their "temporary" locations while I dealt with more important to-do items like getting my workspace in order. Months passed and I was still living with a weird hodgepodge of furniture and decor. I'm all about getting things done in 2015, so I recently got to work fixing up the bedroom. A makeover isn't a makeover without the "before" pictures, so here we go! (Thank you to my puppy Baci for modeling for me. She chose all of her own poses.)

Bedroom Makeover Before
View from the doorway. There was a nail already in the wall where the mirror is hanging. I didn't choose that spot!

The room is a pretty good size (for once!), so finding room for everything won't be an issue. The two main challenges will be working with the aqua carpeting and the pinkish wood trim since those two things won't be changing. The challenge will be to add my retro/modern style to the otherwise traditional room. I'd like a calm, clean space with unique, handmade details.
A few of my big goals for the design of the room:
  • Find a better furniture arrangement that takes better advantage of the space
  • Add some options for storage and replace a couple of the IKEA pieces
  • Incorporate the new color palette into some of the existing furniture (vintage lounge chair and pole lamp)
  • Add some new, functional window treatments  
Bedroom Redesign Color Palette
How I'll accomplish it:
  • First and foremost, paint! I want to add some color and interest to the walls. I've chosen an overall color palette of black, white, and gray for the neutrals with accents of pink and aqua. Some of these color will be paint, others will be in the furnishings and accents.
  • Experiment with new furniture layouts
  • Incorporate more vintage pieces into the space
  • Paint the closet doors or replace with curtains
  • Add a rug to break up the carpeting
  • Hang art
  • Hang the large mirror on the back of the door
  • Re-wire the pole lamp. (When I moved I noticed some of the wires inside didn't look up to code at all. I'll be fixing that up before I plug it in again!)
  • Make/buy new decor items to pull the look together
Bedroom Makeover Before
Wall to the right of the doorway
Bedroom Makeover Before
Wall to the left of the doorway. Closets with raw wood louvered doors.
Bedroom Makeover Before Bedroom Makeover Before

I'll be sharing projects as I go, so make sure to check back to see how things are coming along! In the meantime, check out my Bedroom Inspiration Pinterest board to see a collection of ideas and influences for the design.
 

vitamini handmade © All rights reserved · Theme by Blog Milk · Blogger