7

Kitchen Plate Wall

Tuesday, September 21, 2010

I've been planning for a while to put up a plate collection on my big blank kitchen wall. The problem was I didn't have a plate collection. I had a few cool plates that I picked up here and there, but nothing worth hanging up.  So I decided to really buckle-down (and by buckle-down I mean go to thrift stores as frequently as possible in the search of cool plates worthy of my wall). All of this laborious hard work paid off and now I have a pretty decent bunch. 
 I went with mostly a green/blue color scheme with some gold mixed in. One I found a couple of weeks ago says “Carmel By The Sea, Monterey, California.” I grew up in Monterey County, so I had to have that one. The little gold one is Japanese and has a cool landscape scene with Mt. Fuji in the background. There’s a tiny souvenir plate from Reno, a little Limoges saucer that I got for $1, a sweet starburst plate with a big, gold “50” that says “on your golden anniversary.” Here's the wall:
Wow. When I see it like this I wonder why it took me an entire year to put something on it. I think I just got distracted by the rest of the apartment. Yeah...that's what happened...
I started out by laying all of the plates out on the floor in different arrangements. I took pictures of each of them, so I could keep track of all the different combinations I had tried. It also made for a good reference when I was starting to hang the plates up - I could just check my camera and make sure they were all going in the right spot. I ended up choosing the bottom left arrangement. It is balanced, but not totally symmetrical, and is almost mirrored from one side to the other. I measured and marked the centerpoint of the wall with tape, and marked the top and bottom limits as well.  
I started with the dancing coffee plate in the middle and worked my way outwards. I used plate hangers on the large plates and 3M removable picture hangers for the rest, since they are pretty lightweight. Here's the finished product! I'm really happy with the way it came out. Maybe it will keep me from sticking emergency pieces of tape there while I'm screen printing.

3

A little thrill.

Monday, June 11, 2012

It's probably a no-brainer, but I'm a huge fan of the Retro Renovation blog. Do you follow it? It's all about retro homes, their unique features, and preservation and re-creation of the style (from 50's mid-century modest to funky 70's) I'm not a homeowner yet, but someday I dream of a ranch of my own with lots of glass, a courtyard, some built-in planters, and a pink bathroom. Maybe if I put it out there in the universe it'll come true...

Image from Plan59

Over the weekend, Pam at RR opened up her site for readers to upload photos of their favorite thrifty finds. I joined in on the fun and added a few of my own. I was so excited to see that Pam had featured my photo of the Aztec fireplace in my (previous) backyard on the Retro Renovation facebook page! With close to 20 K followers on FB, I felt like it was a brush with celebrity!


I realized that I never shared that on my own blog, shame on me! I also shared some photos of my other finds: some glass ware, lamps, my coffee table, and my ceramic plate collection (that I have shared here on the blog, if that's redeeming in any way). The fireplace and my plate collection pics were added into Pam's next post called "What to collect" all about thrifting ideas. So cool!


(Top two photos via Retro Renovation. Last photo by me, Casey)

I LOVE the blue and green rug in the top pic, and that Broyhill bedroom set? So nice. And there are my plates. Love them! I found a bunch more great ones at Goodwill this weekend.

If you haven't perused the site and have a few hours to kill, head on over. You won't regret it and you'll be in the company of lots of other retro enthusiasts who will share your excitement over starburst cabinet hardware and other cool home details and products.

4

Kitchen plate wall. Part 2

Wednesday, August 10, 2011

It’s hard to believe my boyfriend and I are in in our 5th month of living in our new place! For the most part, we’ve got things set up the way we want them, but there are still adjustments being made and pieces being switched in and out. Our bedroom still needs to be painted (there’s WAY too much brown going on in this place – the entire living space, hall, and bedroom) and we are planning on switching out my 60’s wood table in the kitchen for my grandmother’s (also 60’s) laminate table once we get the table leg fixed. My boyfriend is welding us a side table for the living room to replace a little IKEA one that I’ve had forever. My studio is still a work in progress, but it gets better every week. One of the first things, however, that went up was my plate collection. I only had a couple of months to enjoy it in my old space, so I was sure I wanted to put it back up in the new kitchen. We had a perfect spot, too: right above the buffet behind the kitchen table. 


I put it up in the same arrangement and used my trusty 3M hooks and picture hangers that I used before. It was a little easier hanging them on this wall since the texturing wasn’t nearly as pronounced as it was on my old plaster walls. Just like before, I measured the center point of the space, decided on a height and put the large plate in the center. I worked outwards after that, mostly just eye-balling the spacing of the other plates. I didn't have to use any of the traditional plate hangers here, so they all appear to float on the wall! I think the blues and greens in the plates look really nice against the gray wall. 

There's an added bonus about this new set-up: I don't have to worry about the 4 washers and dryers above my apartment shaking the bejebus out of the walls and working the plates loose! I don't miss apartment living at all!

7

Plate of Mystery

Thursday, September 16, 2010

Over the past few years, I have been amassing a small collection of decorative plates. I always had the intention of hanging them on my big, blank, white kitchen wall, but didn't have a real focal piece to go with the rest of the bunch. Enter this bad boy:

It's a hand-painted wooden plate that my grandmother brought back from Sweden for my great aunt a long time ago.  She had it hanging on her brick fireplace for as long as I could remember.  It's about 16 inches in diameter and is going to look great in my kitchen.  So, I brought it home and, for the first time ever, I started wondering what the phrase meant. Here's a close-up.
I was REALLY hoping it wasn't some dated phrase about holy matrimony or "the woman must do the dishes at the end of every meal" sort of thing.  So, nervously, I turned to the internet. I typed in a few words, but didn't really find anything helpful.  The painted letters are pretty hard to figure out, too.  I looked around for a little bit and almost gave up. Then I figured out the first big letter is a K and that really helped. Turns out, it's a line from an old Swedish song and means "Coffee the best of all earthly potions is." Wha?! It's saying coffee is awesome?! Cool! I don't know why these people are frolicking around in a circle, but ok.

I guess coffee makes me want to dance sometimes. Why is this girl the only one facing forward? I guess I'll never know. This weekend I will be attempting to hang this plate and 11 others on my wall. And I will document the process for your entertainment. On an entirely unrelated subject, I got these sweet shoes last weekend.

Yay for Pumas!

23

My Whiteboard Calendar.

Tuesday, September 17, 2013

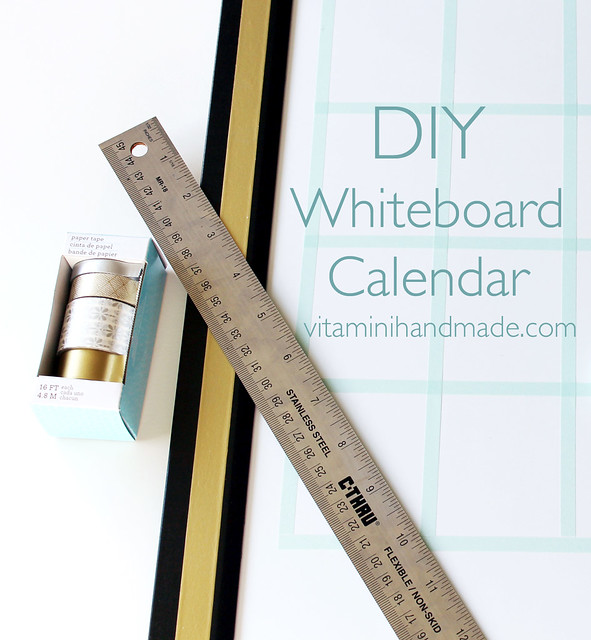
DIY Whiteboard Calendar

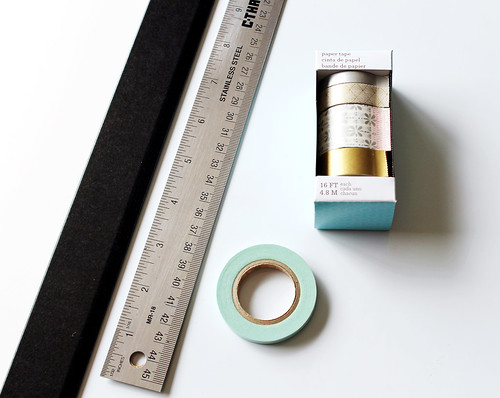
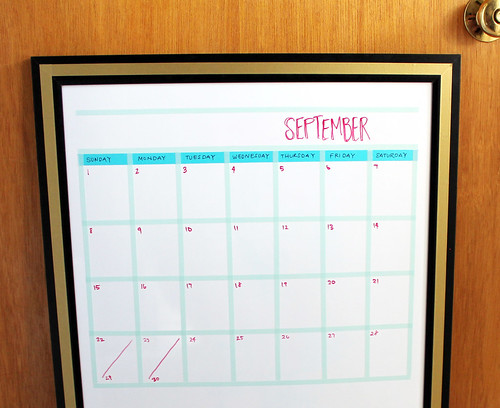
I had whiteboard calendars on the brain a couple weeks ago, so I made my own! Here's what I used:

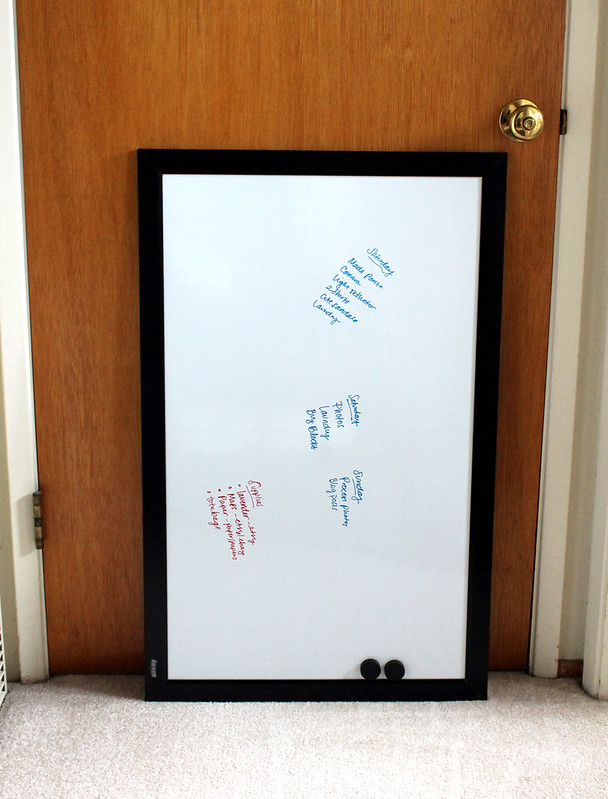
White board, this is a 22" x 34" that I got at Michael's for about $22. It's magnetic, too!
Washi and paper tapes in various colors and widths
Dry Erase pens
3M Picture Hanger strips (the velcro-like kind)
Ruler
DIY Whiteboard Calendar

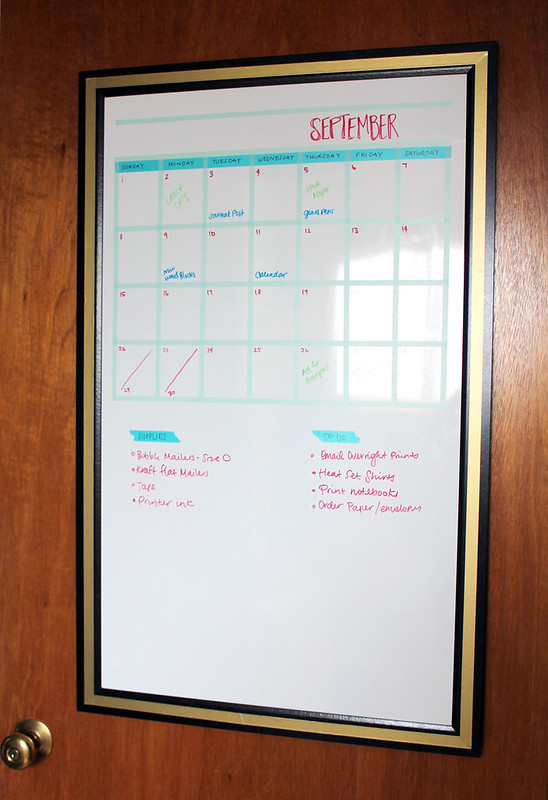
I live and work out of my small apartment so I've learned to get creative with my storage solutions. I have a hall closet where I keep all of my shipping supplies and extra inventory and the inside of this closet door is the perfect spot for this calendar. That way I can open up the door and add all my to-do items, and then just close the door when I'm done!

DIY Whiteboard Calendar
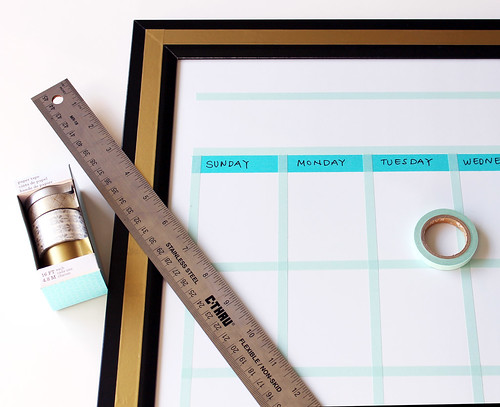
First, I wanted to enhance the frame part of the board. There are lot's of different ways to do this. I thought about spray paint or acrylic paints, but I settled on adding a simple strip of gold paper tape down the middle of each side of the frame. I just eye-balled the spacing.

For the calendar portion, I measured out the width of the board in a vertical orientation (the way that will fit on my closet door), added in about 1" for the side margins, then divided that remaining space by 7 for the vertical columns for each day of the week. Then I taped out 4 horizontal rows for each week of the month. My day rectangles ended up being about 2.25" wide x 2.75" tall.
DIY Whiteboard Calendar

I added an extra strip of tape across the top so I could label the days. I left some extra space at the very top for the Month. Then I filled in the days of the week, and added some tape strips underneath the calendar for a To Do list and To Order list for supplies for my handmade business.

DIY Whiteboard Calendar DIY Whiteboard Calendar
I didn't want to make any holes in the door, so I used my favorite 3M picture strips! So easy and totally removable. I use them to hang lots of things, including my plate collection at my last two apartments.

DIY Whiteboard Calendar
I'm hoping my new calendar will help me organized, especially with the busy holiday season coming up so quickly!

6

Thrift Store Score

Monday, September 13, 2010

Last week I decided to stop by the Salvation Army on the way home from work.  I try not to expect or hope to find anything in particular because a lot of the time I come home with nothing, but it's the thrill of the hunt that makes it fun!  Anyway, after a particularly difficult time trying to find a parking space in the 400 square foot parking lot and encouragement from one of the donation collectors to squeeze my mini into a rather unorthodox spot, I walked in thinking I'd BETTER find something good.  Well, sure enough, the first thing I laid my eyes on was this little beauty:

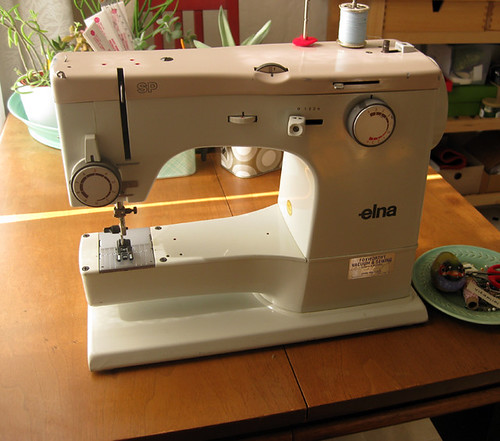
Well, it didn't exactly look like this.  It had a bit of 20 year old masking tape on it and had a good layer of dust, but as soon as I saw it I recognized it as the almost exact replica of my mom's machine - the one I learned how to sew on.  There were a couple of recent scuffs in the paint, but other than that, seems practically brand new. It works great, just needed some oil and a good cleaning.  I recently started making these little bags with my own screen-printed fabric.

I've been using my mom's machine for all of my sewing so it's going to be really nice to have one of my own, and I already know exactly how it works! Here are a couple more shots of my workspace in the kitchen.


Here's my little set-up, or, as they say on Cribs, "this is where the magic happens!" I do all of my screen-printing on the the buffet table.  All of my inks, supplies, and papers are stored below and I do my layout work on the table.  See that big blank wall?  Stay tuned, that will be my next project post! I'll be hanging up my little plate collection.

0

Vintage Plates.

Monday, August 8, 2011

My mom knows that I'm always on the hunt for cool vintage plates with retro patterns, especially since I amassed my collection for my plate wall. She discovered these in a thrift shop and grabbed them for me. I love the diamond pattern and blue, teal, and green are totally my colors.


The patterns is Carousel by Salem. I looked around on Etsy and Ebay and couldn't find any other pieces in this pattern, so it seems like it's pretty rare. I'll be on the lookout for other pieces to grow my new collection. Thanks, mom!


0

Plants, paint, and projects.

Wednesday, August 31, 2011

Looking over this post I realize it is a collection of seemingly un-related topics. Ok, fine, these topics don't relate to eachother at all. But they all start with the letter P! How's that for random?

I spent last sunday at a local small town fair. It's kind of a craft show / farmers market / fair / yard sale event and is always lots of fun. I've been going every year for a few years now and have always nabbed something cool from one of the countless yard sales. Last year it was a retro plaid lounge chair (that I'm sitting in right now!), a cool plate to add to my collection, and a pair of retro bookcases that now live in my studio. This year, however, the yard sales were really lacking. I went back to the house that had the garage filled with amazing retro furniture, but alas, their yard was empty and the garage was closed. Bummer! I did manage to find a vendor specializing in succulents and brought this one home.

The leaves have pretty red edges.

The ecentric man at the booth told me all about the species (even explaining that its rarest form is black) but I promptly forgot the name as soon as I walked away. I liked it for its unique tree-like structure. I've never seen anything like it. I happened to have this cool gray pot at my parent's house, and it fit inside just perfectly.

And in completely different news: my bedroom has been painted! It was a painstaking process, but after 2 (!) coats of primer and 2 coats of paint, the brown is gone. Here are a couple of iphone photos I snapped, since I was too exhausted to walk the extra 10 feet to grab my real camera.

One coat of primer and the brown still haunted me!

Can't believe it's the same room!

I ended up going with our original paint choice, Morning Fog and I'm so glad I did! It's a beautiful color and really opens up the room. Sometimes it looks more blue, sometimes more green, and in the bright sun it actually looks white. I'm really liking it so far. Now I just have to get my artwork back up on the walls and choose some curtains. I am very tempted to screenprint some with my own design, but another project is the last thing I need. Speaking of projects...

I've been keeping myself busy with products for my new Etsy shop! Depending on how much photo editing I can blast through tonight, the shop may be stocked with a few items by tomorrow morning. I'm so excited to share my new projects with everyone! Here's a little sneak peek.

Recognize this design???

Oh, and a little reminder: today is the last day to take advantage of my end of summer sale! Head on over to my shop and enter VITAMINISUMMER2011 at check-out to get 10% off your entire order!

6

Top Tips for Thrifting

Wednesday, March 19, 2014

Top Tips for Thrifting

I've been a thrift shopper my whole life. It started when I was a kid and I'd tag along with my mom or help her at church rummage sales. I inherited from her the thrill of the hunt and it's still one of my favorite activities. It's like modern treasure hunting. I think I've gotten fairly good at my thrifting and wanted to share some of my tips with you! Twelve to be precise!

When I go shopping I mainly look for housewares and furniture, but these tips can be applied to pretty much anything you can buy second hand!

Top Tips for Thrifting
I don't know if the sale was as impressive as the sign.
Be willing to stop in and take a look.
You never know when you'll come across a great store or yard sale.
Top Tips for Thrifting
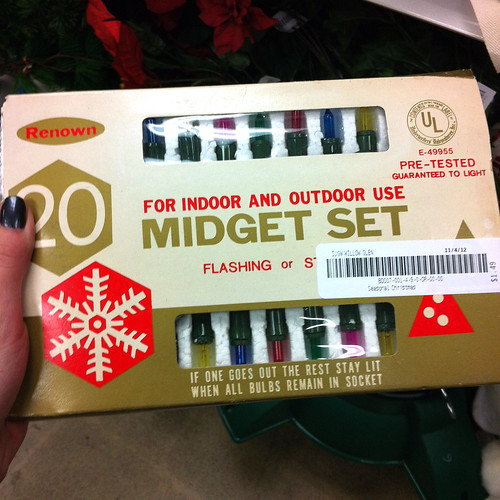
Sometimes the packaging is better than the product!
Go shopping alone, or with someone else who enjoys browsing, too.
It's no fun when you get to a great store and the person you're with wants you to hurry up and leave. Some people just aren't suited for thrift shopping. That's ok, just don't go with them! Find some other friends and family members who like the thrill of the hunt and go with them. I like shopping with my mom because she's great at recognizing potential in an item, or a unique style, or just something that may be valuable. Plus I got my love of junk shopping from her, so we think alike in those terms. I've also found some of my favorite pieces when I was shopping alone. Plus you don't have to worry about that awkward moment when you and your friend want the same killer Pyrex bowl.

Top Tips for Thrifting
Lane coffee table I snagged for $35
Look once, look twice, look again.
I can't tell you how many times I've discovered a really cool item that I originally missed the first time around the store. Sometimes it's hard to see the good stuff when it's surrounded by junk, so take your time and look again.
Top Tips for Thrifting
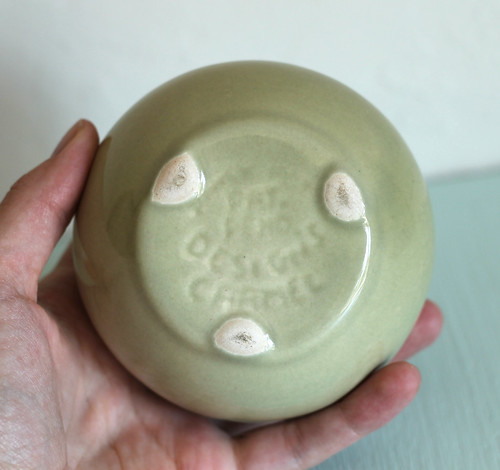
Locally made ceramic vase
Find a label or maker's mark.
The best way to identify a piece (and its potential value) is by finding a label or a maker's mark. If you were looking at a set of dishes with a couple missing pieces you may be able to locate those pieces online to complete your set. Look for a label and learn about what you're looking at.
Top Tips for Thrifting
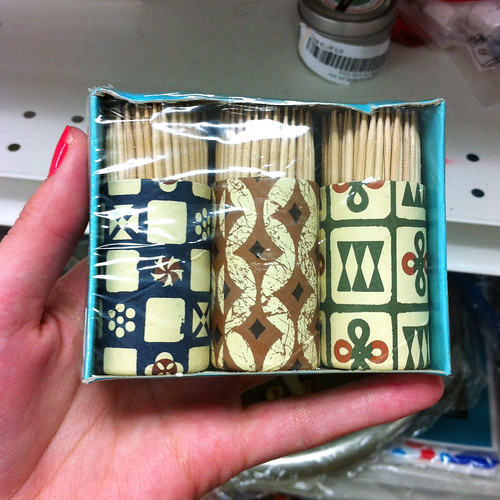
Cute set of toothpicks! Great for a party.
Take a smart phone for the on-the-fly research.
I recently purchased a cast iron enamel pan that had some stains in the bottom. When I was still in the store I did a quick search on my phone to see if the stains were bad damage or if I could live with them. I found out the stains were only cosmetic and picked up a new pan for $5! It's also fun to see what that item you're holding is currently going for on eBay. About $40 for that same pan!
Top Tips for Thrifting
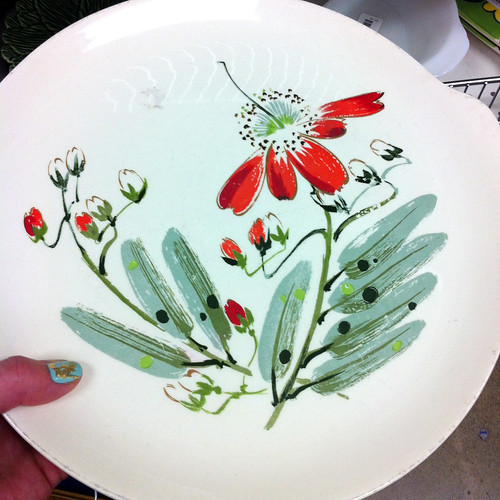
Unique plate pattern.
Look for damage.
Is that beautiful glass beverage dispenser that you just put in your cart actually cracked and broken on one side? (Oops, that happened to me once! Thankfully the store accepted returns.) Take a really good look at the items your considering. Pass on it if the damage is beyond repair or makes it unusable.
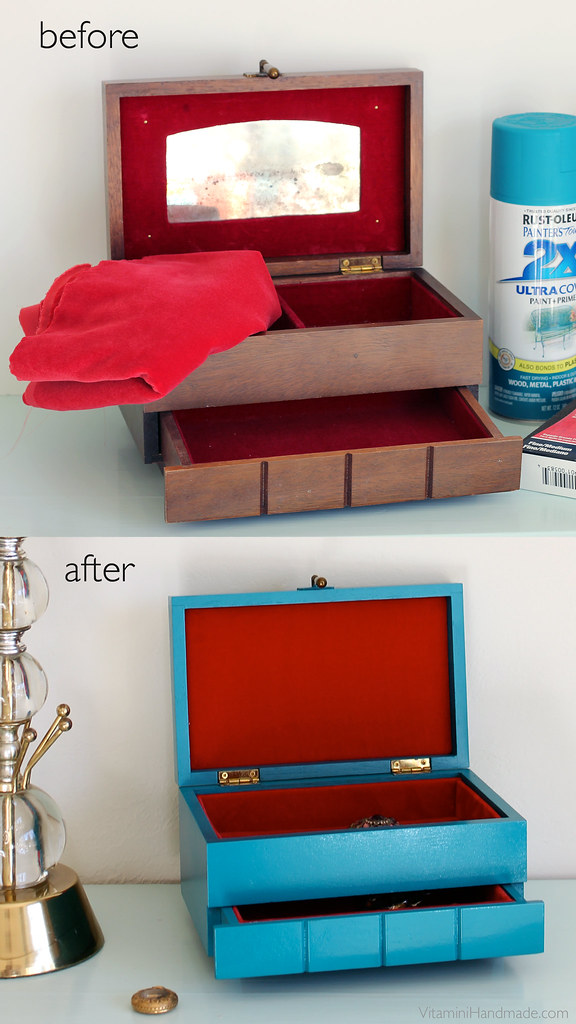
Update a jewelry box
The original finish on this jewelry box was drab and damaged. A little overhaul made it look brand new!
Look for potential.
Would it look 10 times better after a good cleaning? Could that chair's wobbily leg be fixed by just tightening a few screws? Can it use a fresh coat of spray paint? Take all of these things into consideration when looking around. Items tend to look worse than they really are under those harsh fluorescent lights.
Top Tips for Thrifting
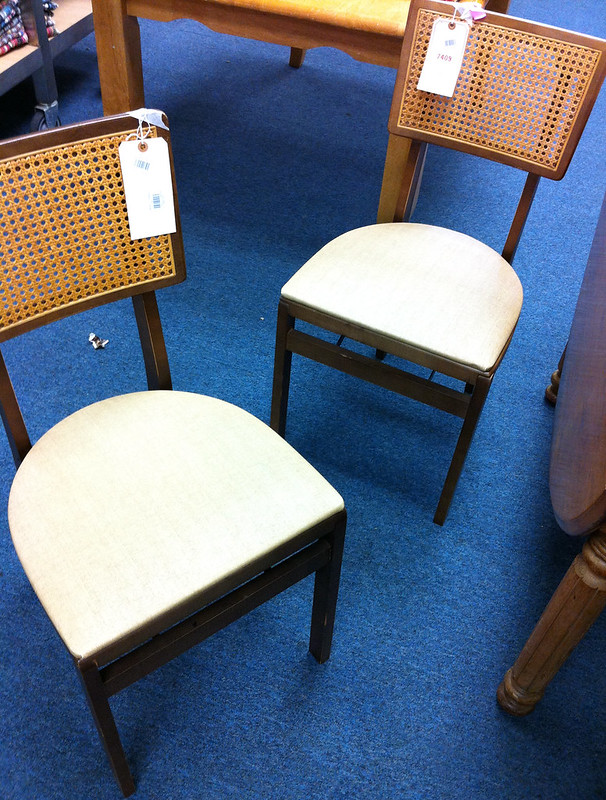
Vintage folding chairs in great shape.
Is it useful?
You can typically find lots of useful well-made items at the thrift store for less than what they'd cost brand new. Go ahead and spend a couple bucks on that Springform pan. You'd never find one new for that price.
Top Tips for Thrifting
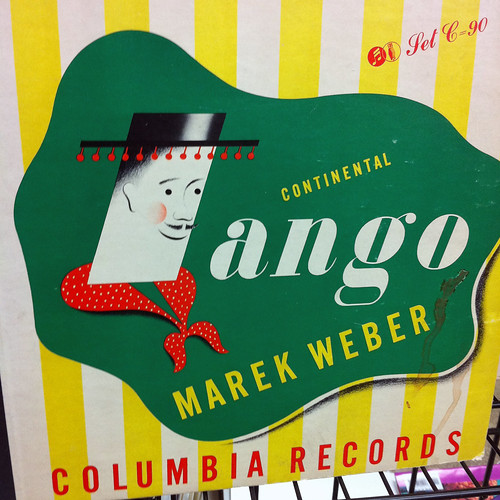
I love the graphics on vintage record covers. You can usually find these for just a couple bucks. Buy a few and frame them to make some unique wall art.

Do you love it?
If you love it, go for it. Life's too short to regret buying that wonderfully-terrible velvet painting or that insanely huge 70's lamp.
Top Tips for Thrifting
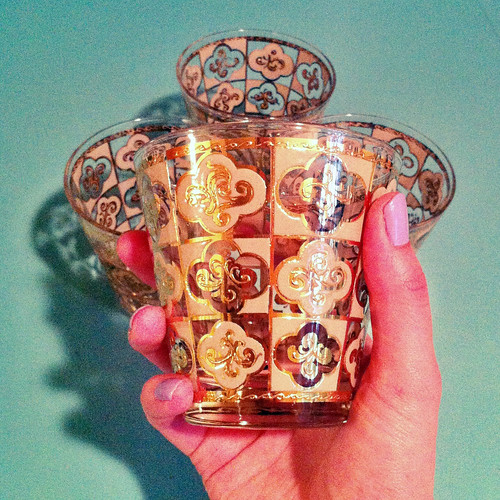
This set of gold cocktail glasses would be a great housewarming gift.

Would someone you know love it?
I've bought some great gifts at thrift stores over the years. Don't forget to think about the tastes of your friends and family while you're looking around. You may find that perfect, unique piece!
Top Tips for Thrifting
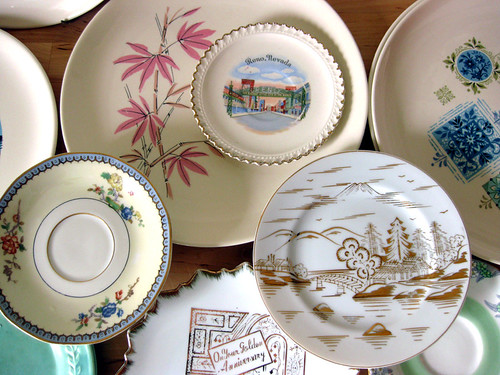
My entire collection of plates for my plate wall came from thrift shops.

Make friends with the sales people.
Sales people can give you the inside scoop on when new deliveries arrive, or when the next great sale is. Be nice to them. They may give you some useful insider info.
 
Top Tips for Thrifting
My $20 Elna works like a charm.

Keep your expectations low.
You really never know what you're going to find, so don't get your hopes up. I've left thrift stores empty handed many times. Sometimes there just isn't anything good. That's ok. Keep an open mind and stop in whenever you can. The more often you look, the better chances that you'll find a great deal.

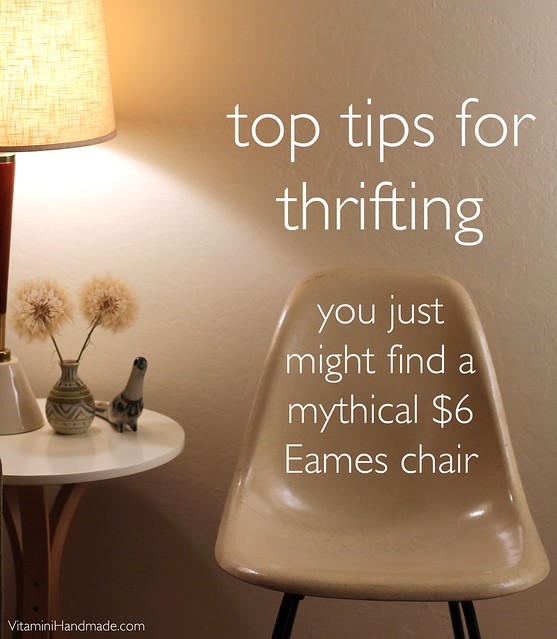
Which brings us to the first image. Yes, people, I did it! I found the mythical Eames chair (I actually found 2)! Priced for $6 each! If I can do it, so can you. Just keep at it. You're bound to come across that incredible find that you'll brag about for years.

Speaking of which, have you made any great thrift scores lately? I'd love to hear about it!
 

vitamini handmade © All rights reserved · Theme by Blog Milk · Blogger