2

Around the studio

Friday, June 6, 2014

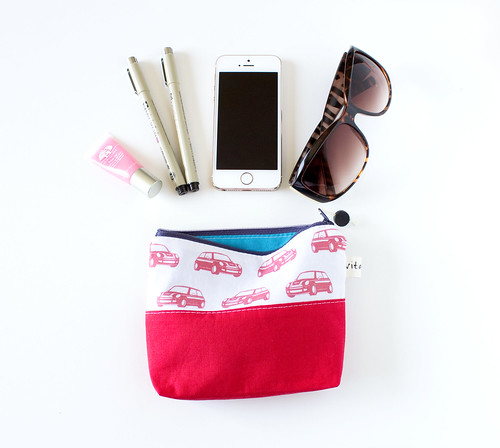
Zippy bags original Vitamini fabric prints
I made these fun zippy bags for Patchwork and Maker Faire and wanted to share them here. These aren't a standard item that I stock and I only have a couple left, so if you're interested, head over to my Etsy to snag one while you can! Mini bags are available in red and yellow.

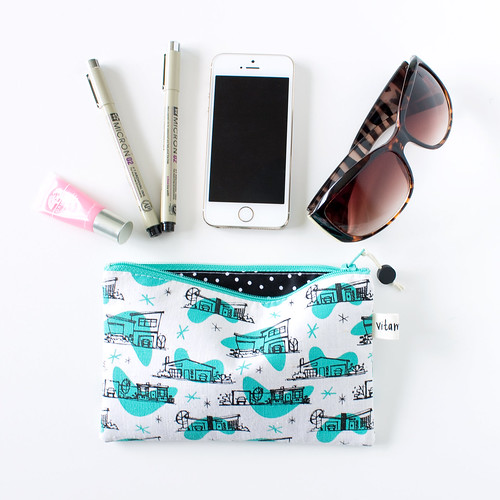
Zippy bags original Vitamini fabric prints

These bags featuring my Retro Ranch print are extra special because I screen printed the fabric myself! Available in a bright coral and teal.

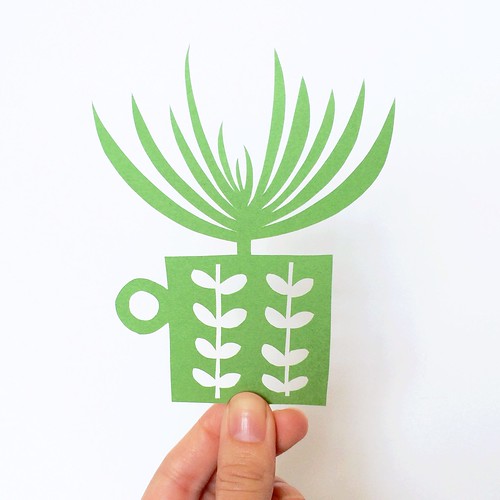
Original papercut by Vitamini

I've also been working on a few new designs.  Here's a sneak peek at one: a new papercut based on my own succulent collection.

Happy Friday to you! As if that wasn't enough of a reason to celebrate, today is National Donut Day! Treat yo'self.

7

New Fabric Print: Vintage Trailer Caravan

Friday, March 21, 2014

Retro Fabric Prints

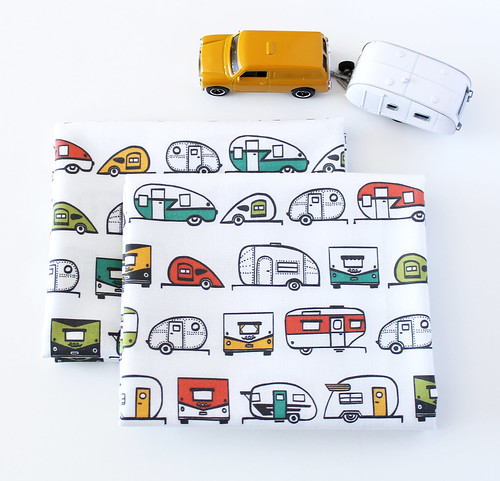
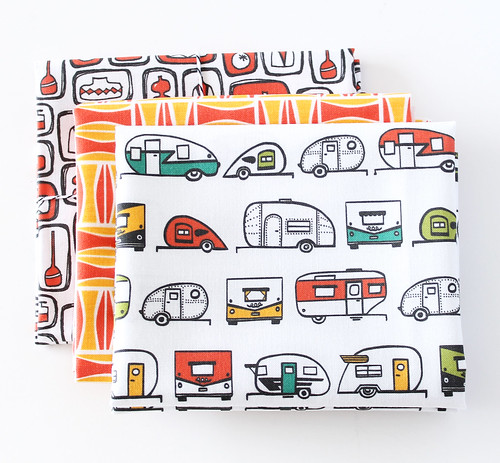
Happy first Friday of Spring! The weather is heating up and I'm finding myself spending more and more time outside, dreaming up trips to the beach, hikes, and camp-outs. I was thinking about warm-weather getaways in kitschy vintage campers when I created this new fabric print. Here it is: Vintage Trailer Caravan!

Retro Fabric Prints Retro Fabric Prints
It's available in a multi-color option and black and white on Kona cotton. Both coordinate really well with my other retro-themed fabric prints.
Retro Fabric Prints

I can't wait to dive into these and sew up some cute stuff!

Retro Fabric Prints

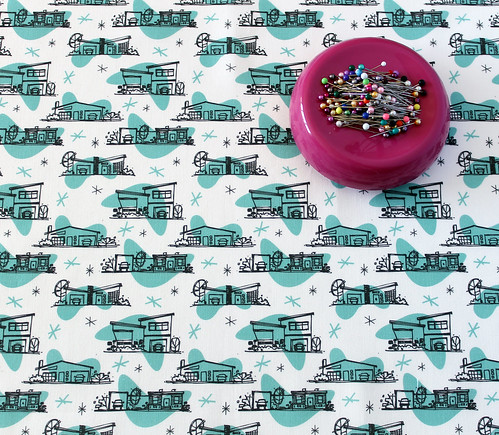
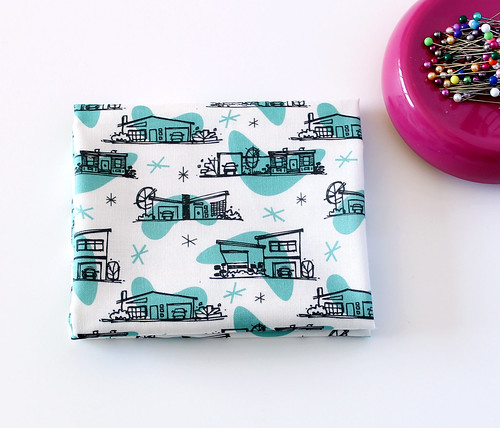
Remember the Retro Ranch print I used for my Cafe Curtains? I listed this one for sale, too!

Retro Fabric Prints Retro Fabric Prints
These retro-themed prints are all listed for sale in my Etsy shop.

9

Architecture of The Incredibles.

Wednesday, January 15, 2014

Image from Babble
Like many others, I'm a big fan of Pixar movies. My all-time favorite is The Incredibles. I love the stylized architecture and the Bond-esque themes. Both harkening back to that era of Americana that I love: the 1950's. I came across this article, Architecture of The Incredibles on The Architizer last week and have had the tab open on my browser ever since. I think that means I should share it!

Image from Mid Century Modernist
Did you get a load of the Parr's house (above)? Can I live there, please? Asymmetrical fireplace, Floor lamp/side table combo, shelf wall divider, fish wall hanging! So good! Edna Mode's mansion on the hill is also fun architecture eye-candy.

Image from Sofia Rodriguez
The evil lair on the cliffs is another one of my favorites. I love the dramatic back-lit arches. I like how the shadows repeat the forms.

Image from Mid Century Modernist
The code-compliance dweeb in me took one look at that railing and knew it was DEFINITELY not up to code, but oh how its simplistic form plays off the ceiling beams.

Image from Sofia Rodriguez
I've had this book, The Art of The Incredibles, in my Amazon wish list for a while. Some of the negative reviews say the book focuses more on the architecture and less of the character development. That sounds like a positive to me! Click through to the article above to read a real in-depth analysis of the architecture, urban planning, and eras represented in the film.

I don't know about you, but I'm still crossing my fingers for a sequel!

35

Retro kitchen café curtains.

Thursday, September 27, 2012

Retro Kitchen Cafe Curtains
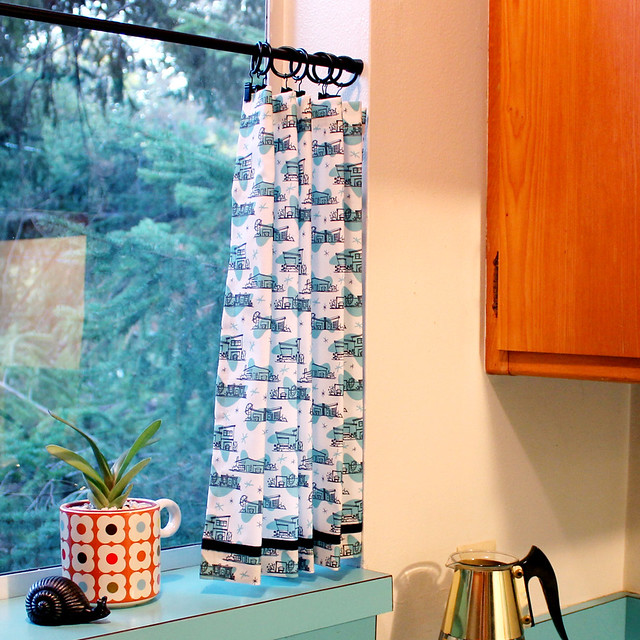
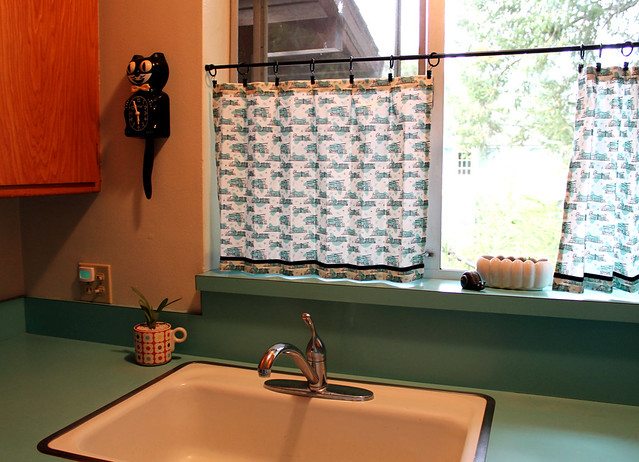
I recently made new café curtains for my kitchen window and wanted to share. I used my own "Retro Ranch" fabric. I even matched the color to my countertops! Cool, right?

Retro Kitchen Cafe Curtains

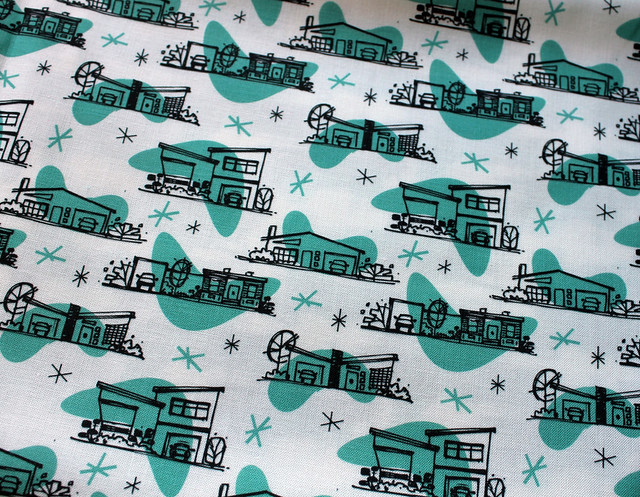
This was my original screen print of my repeat that I made a couple of years ago. Since the idea of printing a large amount of continuous yardage myself was a little daunting, I decided to have Spoonflower do it for me. I ordered one of their color maps, and chose the shade of teal that most closely matched my countertops. I uploaded the design and a little more than a week later I had my fabric!

I didn't take any photos of the sewing since I started the project at about 10 at night (I get crazy on the weekends, people!) and the lighting would have been terrible, but here's a write-up of how I did it.

What I used:
  • Tension rod that fit the width of my window
  • Curtain rings and clips in the same color as the rod. I used 14 of each.
  • 2 yards of fabric. Since my print was directional and my window was wide, I had to start out with a larger piece of fabric. I had a bit leftover. 
  • 1 1/2 yards of 3/8" grosgrain ribbon
What I did:
  • I put up the tension rod where I wanted it in the window with the rings and the clips. I measured from the bottom of the clips down to the window sill. This is how tall my completed panels would be.
  • Then I measured the overall width of the window and added 2". This is how wide the two panels would be, combined. The 2" allows for a little overlap at the center. Divide that number by 2,  to get the width of each panel. This is how wide each panel will be.
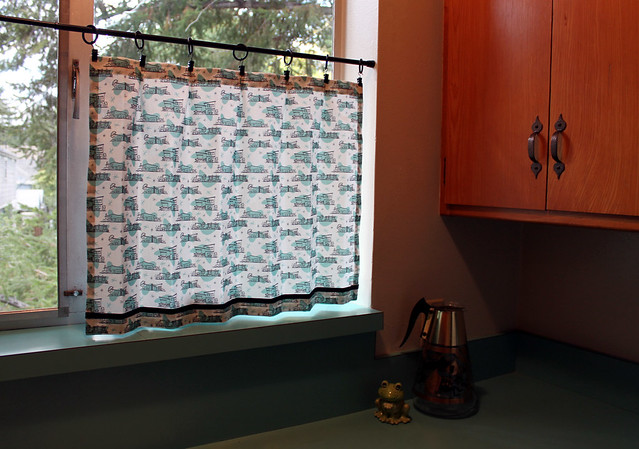
  • After I had the finished dimensions, I started to add in the hems and pleats. I added 2" in width to each panel for the side hems (1" on each side for a small double hem), and 2" for each inverted pleat (my panels had 5 each). For the height, I added 2" for the top hem, and 3" for the bottom hem.  Once I had my dimensions ready, I measured and pressed the hems, pinned, and did the simple straight sewing. When all the edge hems were completed, I measured out the pleat locations, sewed them, and pressed them flat. I added a black grosgrain ribbon along the bottom hem to the give them some visual balance. After that, I just clipped them onto the rings, and they're done! 

Retro Kitchen Cafe Curtains

Here's a little tip that I used from my mom who used to have a drapery business: When the panels are first clipped up and gathered to the side they will hang rather stiffly and may not give you the pleating you were hoping for. To get them to relax and hang the way you want, fold the pleats where you want them, like folding a fan. Using a long narrow strip of scrap of fabric, loosely tie the panel together at the bottom. Give it a fine spray of water on both sides from a spray bottle and let them sit like this for a day or two. As they dry, the fabric will remember the folds and will give you a nice pleated effect when you release them.

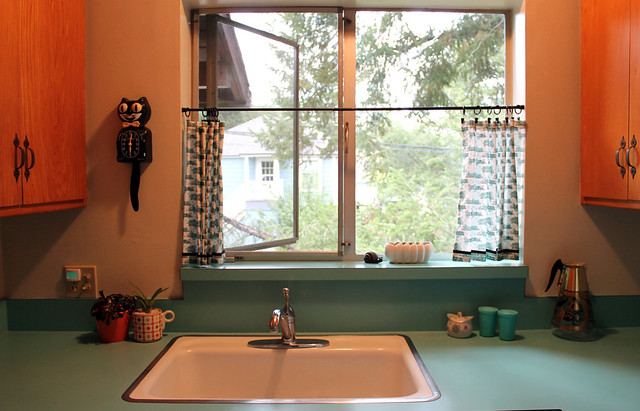
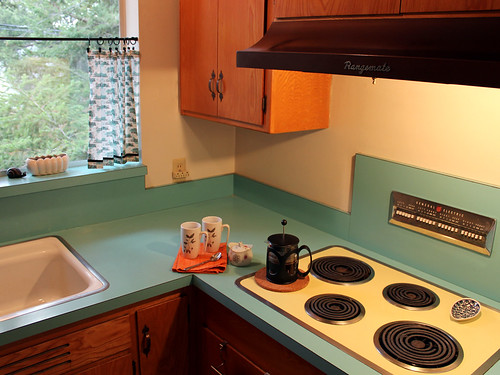
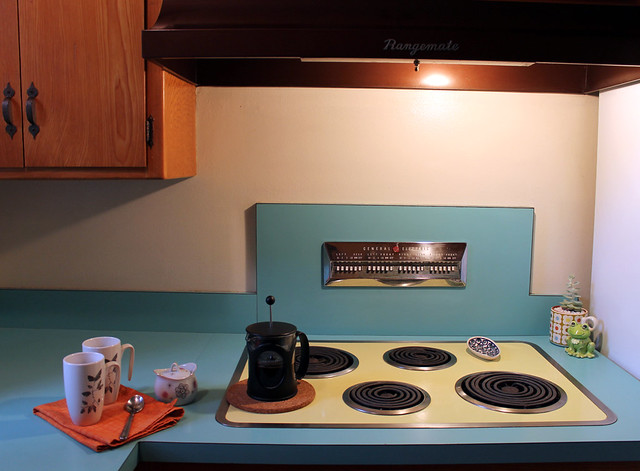
Retro Kitchen Cafe Curtains Retro Kitchen Cafe Curtains Here are few more photos of my 1950's kitchen. My great aunt gave me that KitKat clock for my 11th birthday. I think I was born loving retro...

Retro Kitchen Cafe Curtains Retro Kitchen Cafe Curtains

Though it's tiny, it's by far my favorite space in my apartment. They just don't make them like they used to!

UPDATE: This fabric print is now available for sale in my shop. Listed in this teal and a sweet light pink colorway.  :)

0

Plants, paint, and projects.

Wednesday, August 31, 2011

Looking over this post I realize it is a collection of seemingly un-related topics. Ok, fine, these topics don't relate to eachother at all. But they all start with the letter P! How's that for random?

I spent last sunday at a local small town fair. It's kind of a craft show / farmers market / fair / yard sale event and is always lots of fun. I've been going every year for a few years now and have always nabbed something cool from one of the countless yard sales. Last year it was a retro plaid lounge chair (that I'm sitting in right now!), a cool plate to add to my collection, and a pair of retro bookcases that now live in my studio. This year, however, the yard sales were really lacking. I went back to the house that had the garage filled with amazing retro furniture, but alas, their yard was empty and the garage was closed. Bummer! I did manage to find a vendor specializing in succulents and brought this one home.

The leaves have pretty red edges.

The ecentric man at the booth told me all about the species (even explaining that its rarest form is black) but I promptly forgot the name as soon as I walked away. I liked it for its unique tree-like structure. I've never seen anything like it. I happened to have this cool gray pot at my parent's house, and it fit inside just perfectly.

And in completely different news: my bedroom has been painted! It was a painstaking process, but after 2 (!) coats of primer and 2 coats of paint, the brown is gone. Here are a couple of iphone photos I snapped, since I was too exhausted to walk the extra 10 feet to grab my real camera.

One coat of primer and the brown still haunted me!

Can't believe it's the same room!

I ended up going with our original paint choice, Morning Fog and I'm so glad I did! It's a beautiful color and really opens up the room. Sometimes it looks more blue, sometimes more green, and in the bright sun it actually looks white. I'm really liking it so far. Now I just have to get my artwork back up on the walls and choose some curtains. I am very tempted to screenprint some with my own design, but another project is the last thing I need. Speaking of projects...

I've been keeping myself busy with products for my new Etsy shop! Depending on how much photo editing I can blast through tonight, the shop may be stocked with a few items by tomorrow morning. I'm so excited to share my new projects with everyone! Here's a little sneak peek.

Recognize this design???

Oh, and a little reminder: today is the last day to take advantage of my end of summer sale! Head on over to my shop and enter VITAMINISUMMER2011 at check-out to get 10% off your entire order!

82

Papercut how-to. From a beginner.

Wednesday, July 27, 2011

And when I say beginner, I mean I've never done this before.

I’ve been seeing beautiful papercuts all over the internet and wanted to try my hand at making my own. I’m drawn to this technique because of the strong contrast of the finished piece. The lines are there and the background isn’t. There is no gray area, no inbetween space, just like the designs that I create for my screen prints. Here is my process, I hope it inspires you to try one on your own! 

All I needed for this project was a piece of tracing paper, a piece of black card stock, an xacto knife with a fresh blade, a little bit of tape, a drawing or sketch to base my papercut on, and a cutting mat to protect my work surface. I started with one of my retro house designs (fabric print to show up soon in my new Etsy shop: vitamodern). I chose this design because it was mostly made up of straight lines (easier to cut!). I drew it out on the trace at about 10” wide with a fat felt-tip pen. I would be cutting out and removing the white space, so I made sure to keep the black lines on the thicker side to help prevent small accidental cuts. 


I also made sure that the black lines connected to other black lines in multiple areas to keep the papercut sturdy. I didn’t want a key piece of the design dangling by a thread so to speak! Once I was done with the sketch, I taped it to the card stock and started cutting! At this point, I was really only tracing the design onto the cardstock with the knife. Most of the cuts didn’t go all the way through the paper. 


After the design was completely transferred, I removed the trace, and got to really cutting out the areas. This took lots of time and patience. I took a few breaks to let my fingers rest. 


Be careful not to cut through small areas. The curved lines were a little tougher to cut – I just took my time with those and cut them in sections. 


Here’s my completed papercut! It’s a retro house with a landscaped breezeway and a detached garage. There are a couple of clouds, trees and shrubs included, too. The shrubs and trees were my favorite part to cut out, but I’m a landscape architect, so that probably isn’t surprising. 


There are areas that could use a little refining and I think I’ll add headlights to the car, but other than that it’s complete. I’m thinking of creating a screen from this papercut and printing the design on tea towels for my vitamodern shop. Maybe I’ll create a tutorial for that process as well!


Overall this was a fun project and I’m already thinking about the next design I want to cut into paper.

3

New House Projects.

Thursday, March 10, 2011

So, in addition to my usual MINI-related screen printed items, I've also been working on a few new fabric pattern designs lately. I'm excited to get them all photographed and listed, but I'd like to have a good collection of work together, first. In the meantime, here's a little sneak-peak of what I've been up to!


 This is the background for my new fabric design. I did a few test prints in teal and pink.


After the second run of color: my little retro house sketches!


I needed to do something with my new fabric, so I made a little zippy bag, complete with black and white polka dot lining! These little bags are so addictive and so fun to make. This little guy resides in my purse and keeps my iphone earphones and charger orderly. I love how the fabric came out and I can't wait to do some more printing and make a few more things with my new design.

The other house project I've been working on lately is my own house. I'm moving! The rental market in Silicon Valley is absolutely crazy right now and things move FAST. I still haven't found my new home yet, but I have 22 days left to figure it out. Yikes! I know I would move into one of those little retro houses on my new design in a second! Wish me luck!
 

vitamini handmade © All rights reserved · Theme by Blog Milk · Blogger