




10

Aether Cone: Music To Your Ears (& Eyes)

Wednesday, January 14, 2015

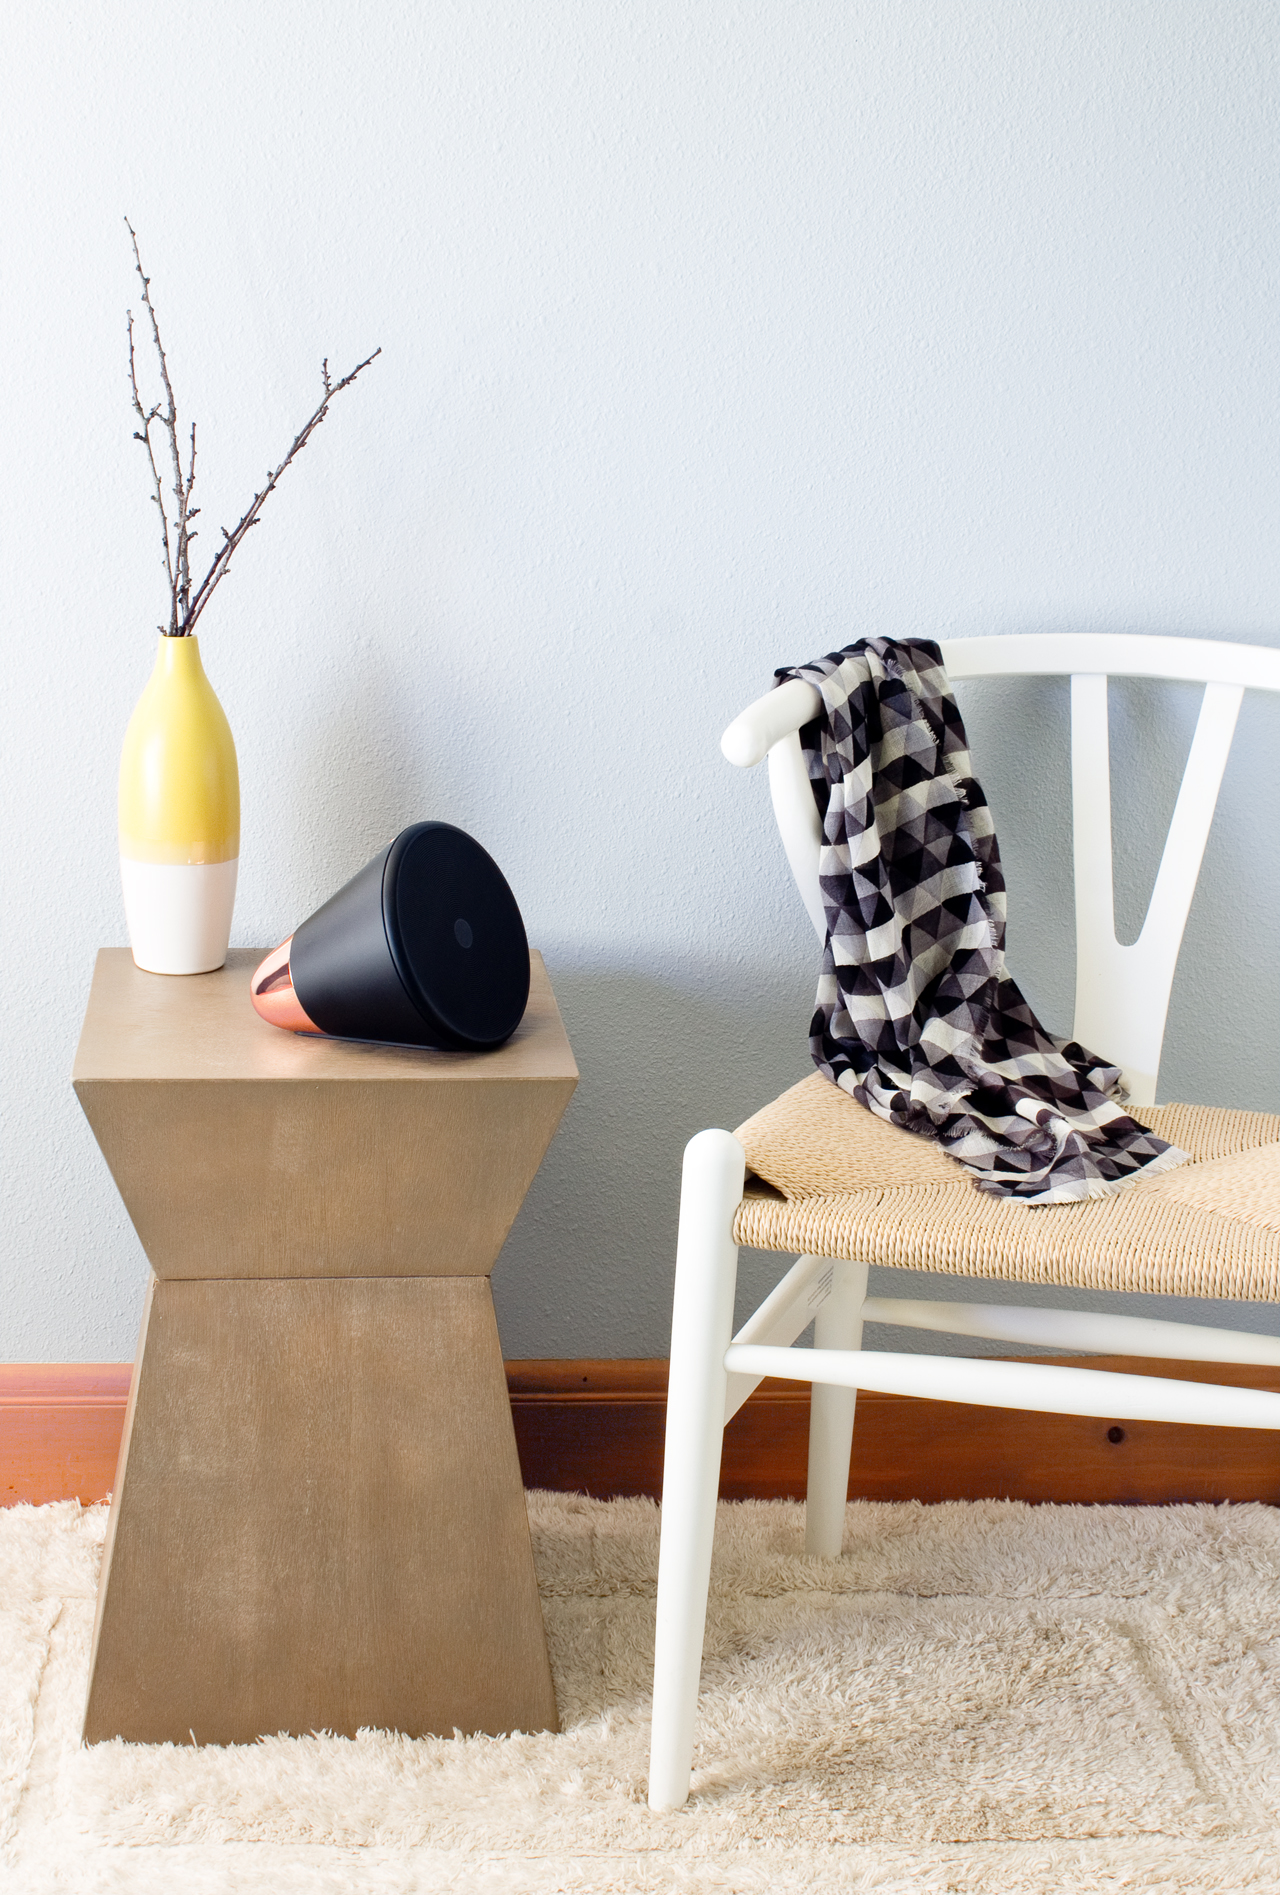
As a creative professional who works from home there are a few things in my studio that I rely on to help me to stay focused as I work through my daily to-do lists. Right after coffee, music is a saving grace. Scoring, folding, and packaging a big stack of greeting cards can get monotonous, but not when I’m singing along with the Beach Boys. So when the people from Aether reached out to see if I’d be interested in trying out their new innovative music player I responded with a big fat, “um, YES!”

Aether Cone

First off, it’s beautiful. It comes in black + copper or white + silver and honestly looks great just sitting on a table. Second, it’s a really cool interface. It works with Rdio, so there’s a ton of programing to choose from: music, radio shows, podcasts. You can talk to it to make a request, control it from an app on your phone, or simply spin the dial and let it select something similar or different, based on your previous listening history. It does the thinking for you! Everything works wirelessly, so you can take it anywhere as long as it’s charged up and connected to a wireless network. Neat, right? It’s a long way from my iphone-on-a-speaker-dock that I was rocking before. I actually had to walk up to it to change the song. Psh.
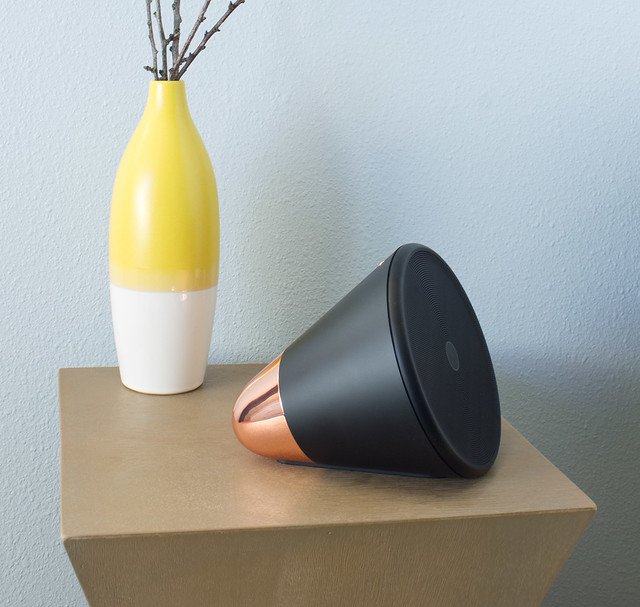
Aether Cone

I’m really enjoying the Aether Cone as a new fixture in my studio. The sound quality is very good, song choice is right at my fingertips, and it looks like a million bucks. You can read more about it on their website.

Disclosure: Aether sent me a cone for review. All opinions, words, and images are my own. Thanks for supporting the brands that keep Vitamini Handmade going!
17

Whiteboard Calendar Accessories

Friday, October 11, 2013

Whiteboard Calendar Accessories
I've been using my Whiteboard calendar for a few weeks now and I love it! Instead of trying to memorize dates, and to-do items, I just open the hall closet door, scribble them out, then close the door. Of course, when I'm in work mode, I keep that door open, but when I'm trying to chilax I can just close the door an no-ones the wiser. After using it for a while, though, I realized I needed a few more things to make it really work for me. The first thing that hit me: where the heck are my dry erase pens? Those need to be handy. The second thing: my sleeves are going to get gross, quick. I need an eraser. Third: What do I do when I need to take my supply order list to my computer and actually order the stuff? Hmmm...


Whiteboard Calendar Accessories

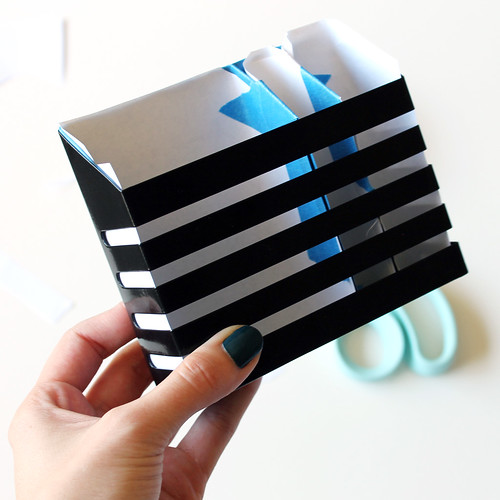
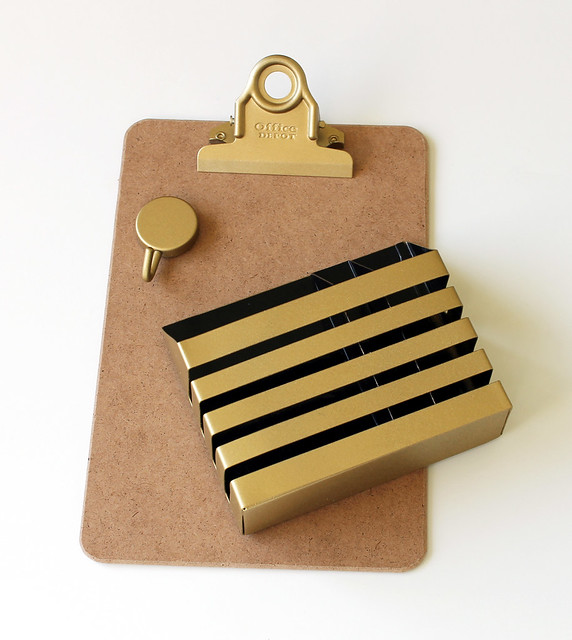
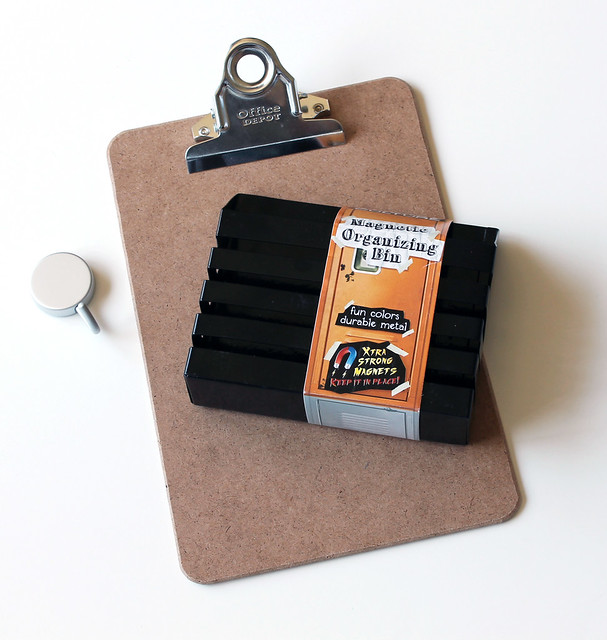
I remembered that Office Depot was carrying locker organizey stuff, so I headed over there. I found this cute metal pen holder and a simple little clipboard. I happened to buy this set of magnetic hooks from MUJI a few weeks back for the kitchen, and had one to spare.

Whiteboard Calendar Accessories
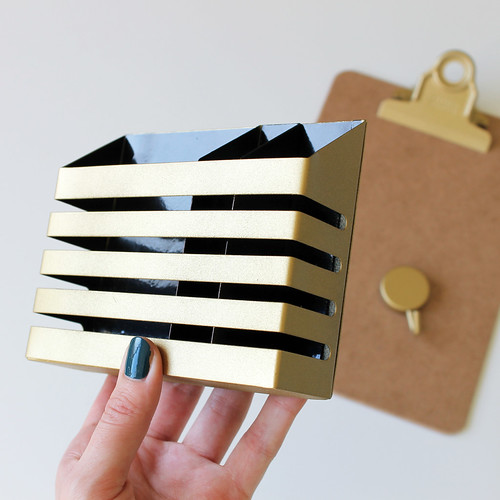
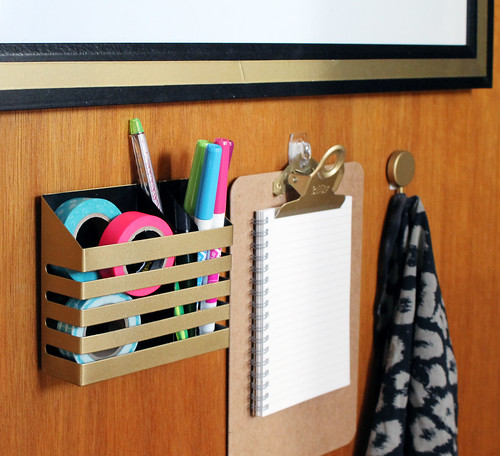
I wanted to unify these things and make them match the calendar, so all I needed was some masking tape and some gold spray paint. The gold ended up matching the gold tape really well. And horray for happy accidents - the gold stripes on the black pen holder match the whiteboard frame perfectly!

Whiteboard Calendar Accessories Whiteboard Calendar Accessories
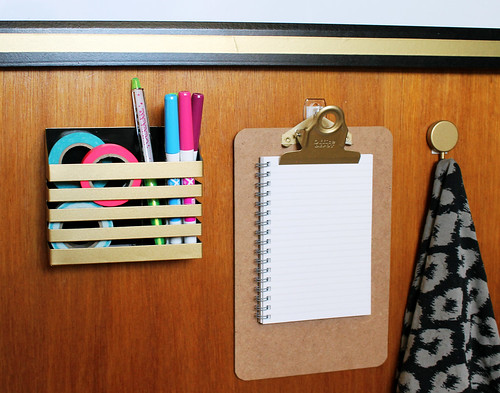
I filled up the pen holder with my washi tape rolls, dry-erase pens, and a ball point pen and attached the whole thing with the same 3M velcro strips that I used on the board. I added a pad of paper to the clip board and hung it on a clear 3M removable hook. That way I can take it on and off as needed. I stuck the hook on with a sticky strip, too, and added a t-shirt rag made from one of my worn out shirts.

Whiteboard Calendar Accessories
Now my calendar closet door is functional and organized. It looks pretty cute, too!

23

My Whiteboard Calendar.

Tuesday, September 17, 2013

DIY Whiteboard Calendar

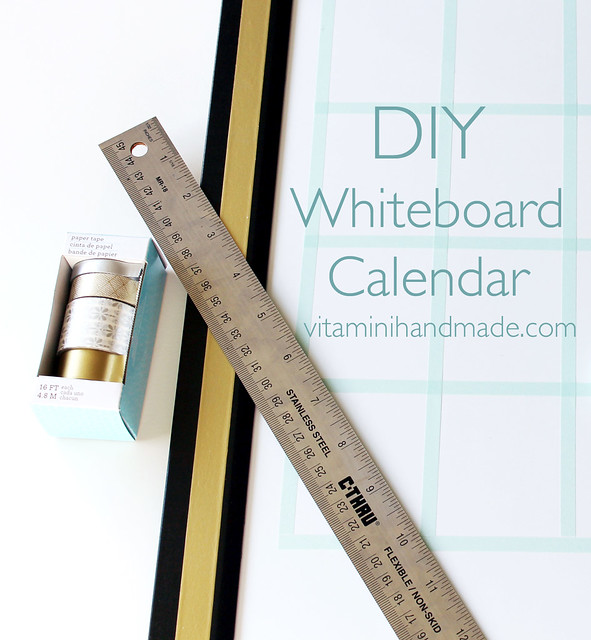
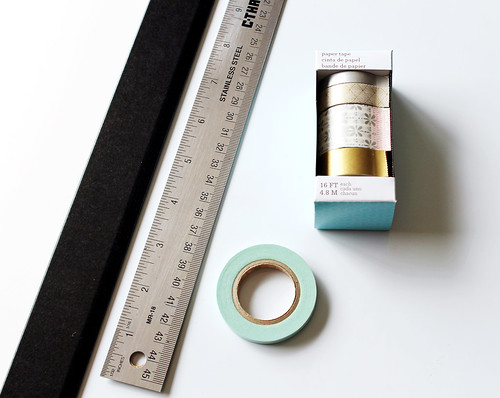
I had whiteboard calendars on the brain a couple weeks ago, so I made my own! Here's what I used:

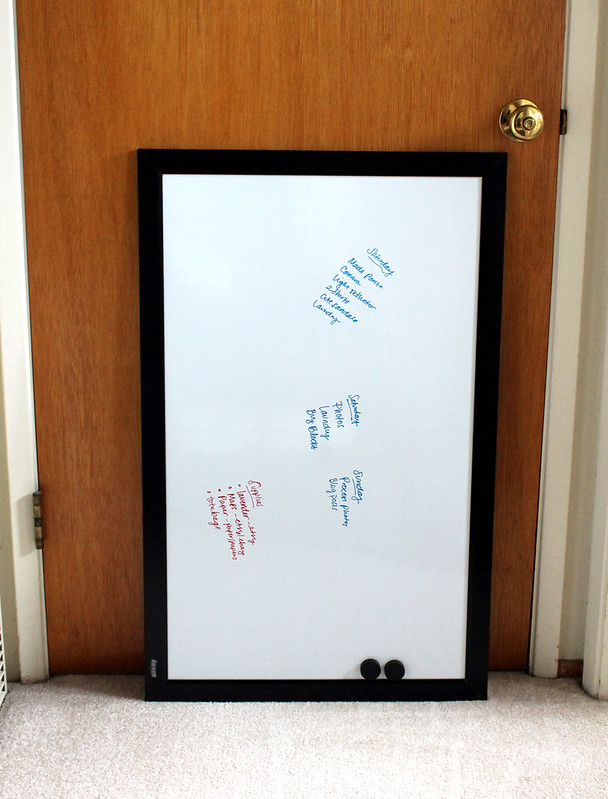
White board, this is a 22" x 34" that I got at Michael's for about $22. It's magnetic, too!
Washi and paper tapes in various colors and widths
Dry Erase pens
3M Picture Hanger strips (the velcro-like kind)
Ruler
DIY Whiteboard Calendar

I live and work out of my small apartment so I've learned to get creative with my storage solutions. I have a hall closet where I keep all of my shipping supplies and extra inventory and the inside of this closet door is the perfect spot for this calendar. That way I can open up the door and add all my to-do items, and then just close the door when I'm done!

DIY Whiteboard Calendar
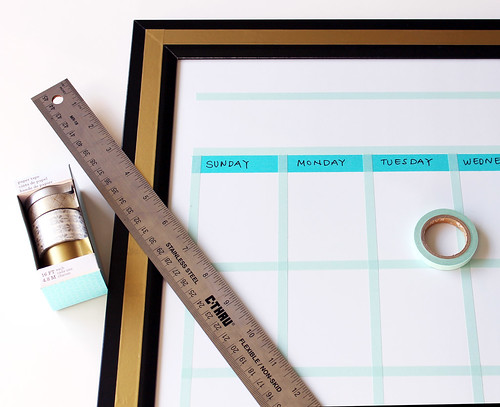
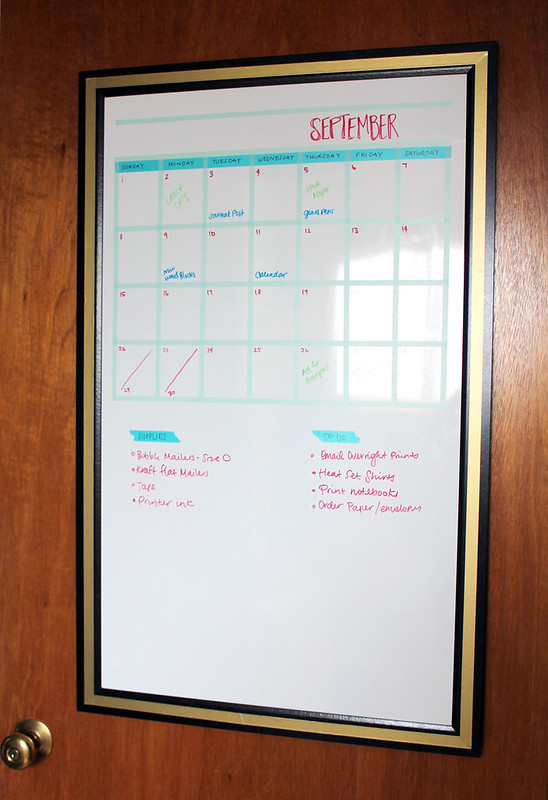
First, I wanted to enhance the frame part of the board. There are lot's of different ways to do this. I thought about spray paint or acrylic paints, but I settled on adding a simple strip of gold paper tape down the middle of each side of the frame. I just eye-balled the spacing.

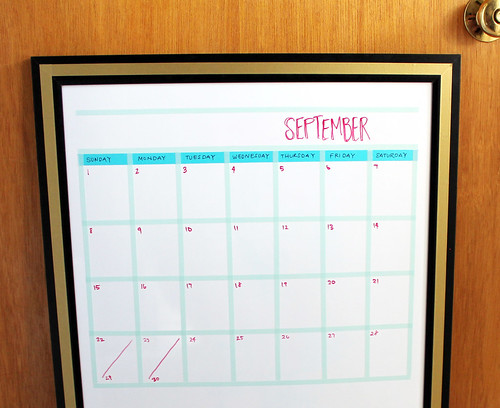
For the calendar portion, I measured out the width of the board in a vertical orientation (the way that will fit on my closet door), added in about 1" for the side margins, then divided that remaining space by 7 for the vertical columns for each day of the week. Then I taped out 4 horizontal rows for each week of the month. My day rectangles ended up being about 2.25" wide x 2.75" tall.
DIY Whiteboard Calendar

I added an extra strip of tape across the top so I could label the days. I left some extra space at the very top for the Month. Then I filled in the days of the week, and added some tape strips underneath the calendar for a To Do list and To Order list for supplies for my handmade business.

DIY Whiteboard Calendar DIY Whiteboard Calendar
I didn't want to make any holes in the door, so I used my favorite 3M picture strips! So easy and totally removable. I use them to hang lots of things, including my plate collection at my last two apartments.

DIY Whiteboard Calendar
I'm hoping my new calendar will help me organized, especially with the busy holiday season coming up so quickly!

4

DIY Whiteboard Calendars

Tuesday, August 20, 2013


It's back to school time! I always enjoyed school as a kid and the loved excitement of a starting a brand new school year with new school supplies and a new calendar. I'm not in school anymore, but I still try to get a fresh start in my workspace at home by getting organized. Lately I've been feeling a little overwhelmed with my to-do lists, supplies I need to remember to order, suppliers that I have to call. The lists that I jot down on paper aren't doing the trick any more. What good is a list when you tuck it away in a purse or a notebook and then find it 2 weeks later?

I stopped on my way home from work last week and bought a big white board to help organize my calendar and task items. I'm thinking I'll do something along the lines of these projects:

This DIY from SFGirlByBay (top image and below image) uses colorful washi tape to divide up the spaces and color-code task items. I like that you don't have to commit to anything on the board - it's all removable!


This project from Little Green Notebook (one of my favorite home project blogs) uses wood trim to make the board feel like a piece of art instead of office decor. Simple and pretty.


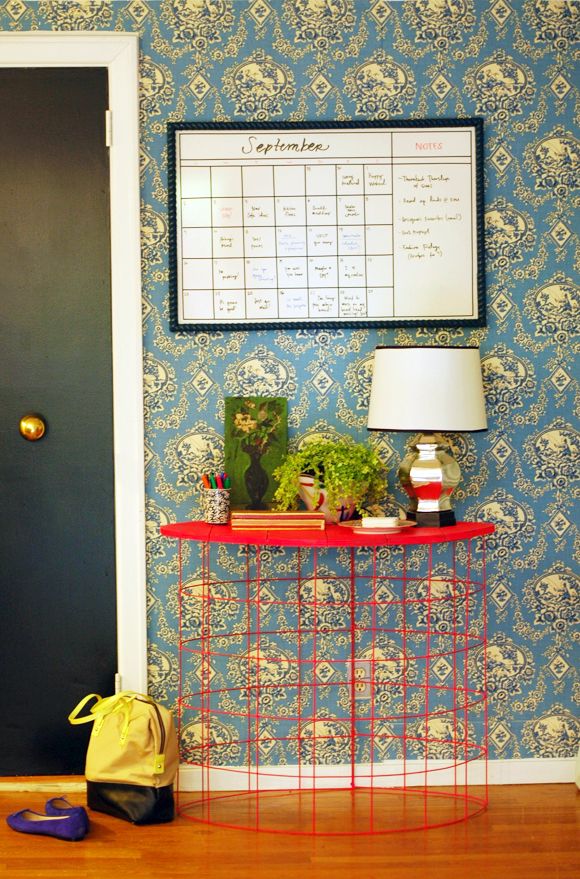
If I had a whole wall to devote to a calendar, I'd totally set myself up like this one at Design Files.


I'm excited to start mapping out my own calendar. I'll show you how it turns out!

15

DIY Neon Wrapped Lamp Cord

Tuesday, March 5, 2013

DIY Neon Wrapped Lamp Cord

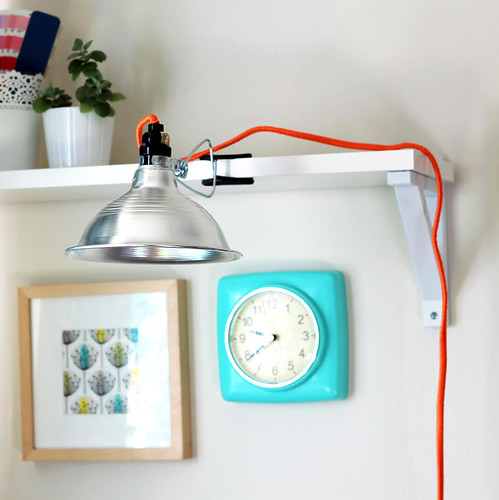
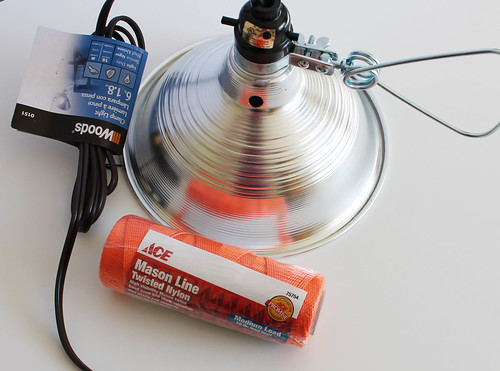
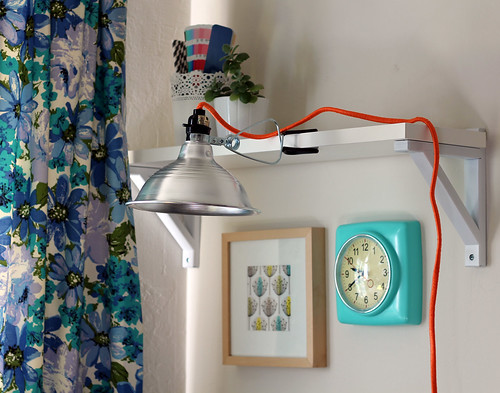
I ordered a simple clip lamp from Amazon to help illuminate my work area. I loved its industrial look, but wasn't thrilled with the ugly brown cord. And since I planned on clipping it to a shelf, I knew the cord would be visible at all times. I decided on a simple fix. A wrap! Here's all you'll need to do it yourself:

DIY Neon Wrapped Lamp Cord

  • Clip Lamp. Also available at most hardware stores
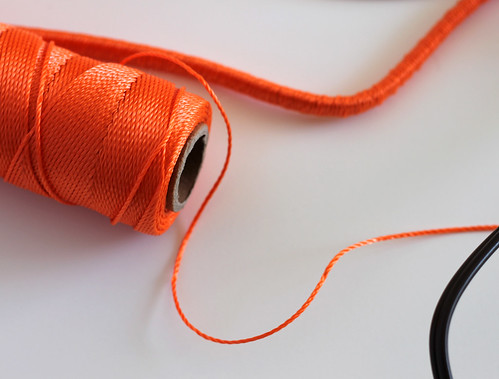
  • Nylon twine in your color of choice, I used this great orange
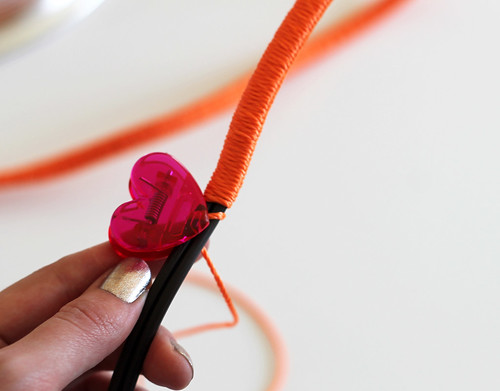
  • A clothespin or other clip, to hold the string when you need to take a break

DIY Neon Wrapped Lamp Cord

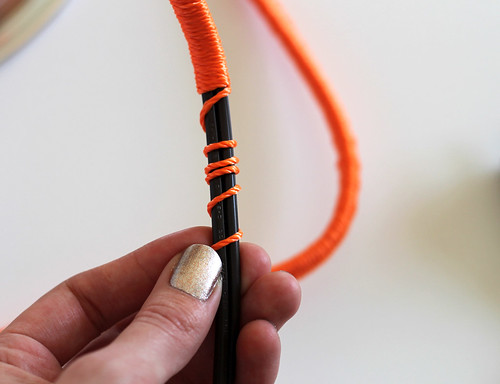
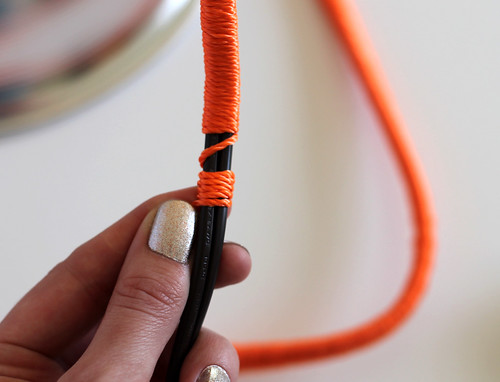
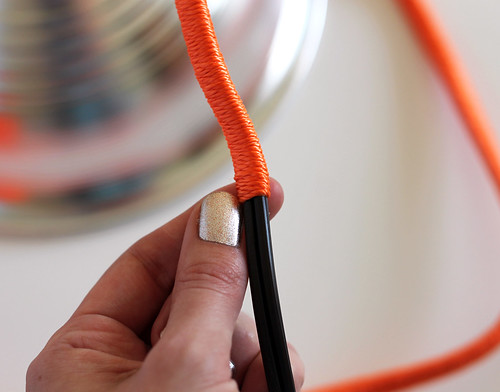
To begin, tie a square knot at the top of the cord near the fixture leaving a tail of a couple of inches. Keep the rest of the cord bundled up in a twist-tie to make it easier to work with, and begin wrapping towards the plug end of the cord, over the string tail that you left from the knot. Here's the wrapping method that worked best for me:

DIY Neon Wrapped Lamp Cord DIY Neon Wrapped Lamp Cord DIY Neon Wrapped Lamp Cord

Wrap the string around the cord 5 or 6 times somewhat loosely. Holding the string tight with one hand, scoot the loops up, tightening the string until the wrap is tight and continuous. Push the string up to make sure that it's tight and doesn't have any gaps revealing the cord underneath. That's it!

DIY Neon Wrapped Lamp Cord

The wrapping takes a while: I did mine over the course of a week or so in the evenings while I watched movies or caught up on tv shows. When you need to take a break, just clip the cord and string to keep your spot and prevent unraveling. When you get to the very end, tie a few knots. Add a dab of glue to the knot if you need to. Trim the end of the string, and enjoy your snazzy new clip lamp!
 DIY Neon Wrapped Lamp Cord

2

The Great Move of 2011.

Wednesday, April 6, 2011

Well, it wasn't that great, but the fact that it's over is! I've been living in my new place for a week now, and had the final walk through at the old place just last Thursday. I think it took me the entire weekend to recover from the stress and hard work. Of course the 31st (and my cleaning day) had to be 90 degrees out, and probably 100 degrees in my 3rd floor apartment...that was fun. Even though I was so excited about the new place, I was still sad to leave the place that was my home for a year and a half.


I will miss my old place for so many reasons - the sunsets from my 3rd story window were so beautiful, the high ceilings and vintage character made the place feel special. I won't miss how the place felt like a microwave in the afternoon and the weird vibrations from the laundry room right above my bedroom. Now I have my own office/studio/workroom AND a backyard. So there. 

I'm just getting started working on my new workspace. It's going to be so great to be able to start a sewing project and just leave it out when it's time for dinner instead of packing up and putting everything away to clear the kitchen table. I've got a few decorating projects planned for my new room, but first things first, it needs paint!


Excuse the grainy photo, but I don't think these walls would look any better in focus anyway. It's a decent-sized room, but with only one window it can look a little dark in there. Especially with the dark wall color.
I need something simple and neutral on the walls since I'll be taking product photography in there. I was looking for something in the warm gray family and I've settled on this color:


Whetstone Gray from Martha Stewart. I think it'll look nice next to the white trim and will help make the room look light and bright. It will be a huge improvement from what's on the walls right now. I've got my work cut out for me and lots of other projects on my to-do list (including painting the master bedroom which is currently a very ugly brown). But for now, it's really nice having only one set of house keys on my keyring.

8

Kitchen Plate Wall

Tuesday, September 21, 2010

I've been planning for a while to put up a plate collection on my big blank kitchen wall. The problem was I didn't have a plate collection. I had a few cool plates that I picked up here and there, but nothing worth hanging up.  So I decided to really buckle-down (and by buckle-down I mean go to thrift stores as frequently as possible in the search of cool plates worthy of my wall). All of this laborious hard work paid off and now I have a pretty decent bunch. 
 I went with mostly a green/blue color scheme with some gold mixed in. One I found a couple of weeks ago says “Carmel By The Sea, Monterey, California.” I grew up in Monterey County, so I had to have that one. The little gold one is Japanese and has a cool landscape scene with Mt. Fuji in the background. There’s a tiny souvenir plate from Reno, a little Limoges saucer that I got for $1, a sweet starburst plate with a big, gold “50” that says “on your golden anniversary.” Here's the wall:
Wow. When I see it like this I wonder why it took me an entire year to put something on it. I think I just got distracted by the rest of the apartment. Yeah...that's what happened...
I started out by laying all of the plates out on the floor in different arrangements. I took pictures of each of them, so I could keep track of all the different combinations I had tried. It also made for a good reference when I was starting to hang the plates up - I could just check my camera and make sure they were all going in the right spot. I ended up choosing the bottom left arrangement. It is balanced, but not totally symmetrical, and is almost mirrored from one side to the other. I measured and marked the centerpoint of the wall with tape, and marked the top and bottom limits as well.  
I started with the dancing coffee plate in the middle and worked my way outwards. I used plate hangers on the large plates and 3M removable picture hangers for the rest, since they are pretty lightweight. Here's the finished product! I'm really happy with the way it came out. Maybe it will keep me from sticking emergency pieces of tape there while I'm screen printing.

6

Thrift Store Score

Monday, September 13, 2010

Last week I decided to stop by the Salvation Army on the way home from work.  I try not to expect or hope to find anything in particular because a lot of the time I come home with nothing, but it's the thrill of the hunt that makes it fun!  Anyway, after a particularly difficult time trying to find a parking space in the 400 square foot parking lot and encouragement from one of the donation collectors to squeeze my mini into a rather unorthodox spot, I walked in thinking I'd BETTER find something good.  Well, sure enough, the first thing I laid my eyes on was this little beauty:

Well, it didn't exactly look like this.  It had a bit of 20 year old masking tape on it and had a good layer of dust, but as soon as I saw it I recognized it as the almost exact replica of my mom's machine - the one I learned how to sew on.  There were a couple of recent scuffs in the paint, but other than that, seems practically brand new. It works great, just needed some oil and a good cleaning.  I recently started making these little bags with my own screen-printed fabric.

I've been using my mom's machine for all of my sewing so it's going to be really nice to have one of my own, and I already know exactly how it works! Here are a couple more shots of my workspace in the kitchen.


Here's my little set-up, or, as they say on Cribs, "this is where the magic happens!" I do all of my screen-printing on the the buffet table.  All of my inks, supplies, and papers are stored below and I do my layout work on the table.  See that big blank wall?  Stay tuned, that will be my next project post! I'll be hanging up my little plate collection.
 

vitamini handmade © All rights reserved · Theme by Blog Milk · Blogger