294

New Home! New Projects!

Monday, August 1, 2016


Guys. I've been so busy over these past few months: running my biz in addition to spending a few days a week doing landscape architecture work and then everything else. Even though this space has been a ghost town, I have been doing lots of diy projects behind the scenes, but for some reason haven't felt compelled to share. I think I got overwhelmed with the internet in general - everything moves so quickly and I got tired of feeling dissatisfied if a project I totally loved didn't take off on pinterest or something? And I realize that sounds really stupid... But either way! A break felt like the right thing to do at the time and I figured I'd come back to sharing more regularly when it felt right again. And guess what?!

I'm just about to move into a new apartment (yeah, in that friggin adorable Victorian above) and I'm SO excited to get in there and do it up, and share the process here, too. I have a few project ideas milling around in my head and have already started drawing up multiple floor plans with potential furniture arrangements. I haven't measured any of the rooms, yet, so my plans are not to scale. We'll see if my pieces fit according to my estimates... Wish me luck!

Check back again, soon! I'll be sharing a bunch of stuff over the next few months. ;)


252

New Vitamini Prints Coming Soon!

Monday, May 16, 2016

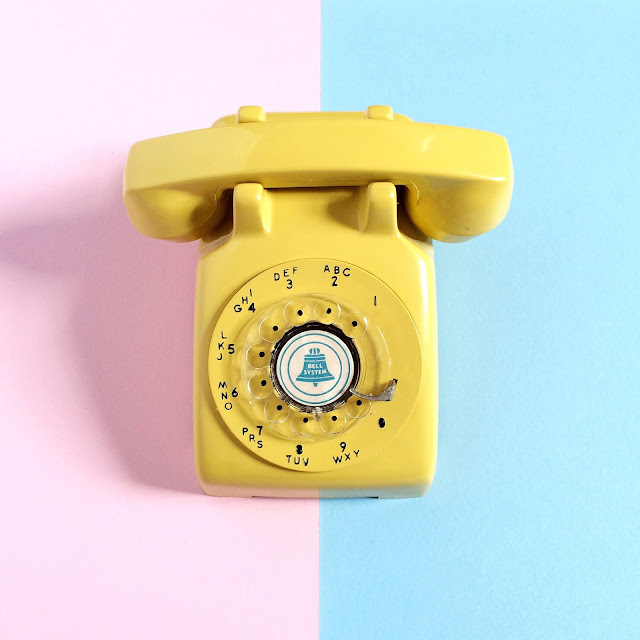
Vintage Yellow Phone by Vitamini

I'm working on a bunch of new products for Vitamini that I'm so excited to share! Have you signed up for my email newsletter? I'll be announcing some new work this week, in addition to a special deal. Hint, hint!

160

Vintage Inspired Stuff at Target!

Monday, April 25, 2016


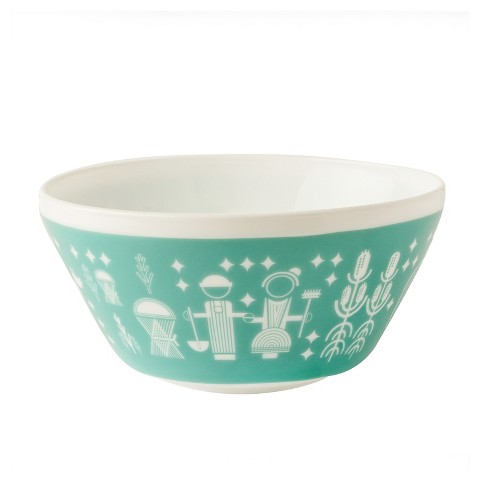
I woke up bright and early last Sunday to head to my local Target to check out the Marimekko for Target collection. That's typically not my style at all but I'm a huge Marimekko fan and wanted to see everything in person and get first dibs if I decided to buy anything. My store actually didn't have all of it - only the multi-colored prints and black and white prints in the clothing section (none of the blue print that I saw online). It did have the entire home collection, so I managed to get a couple sets of dish towels and that adorable black and white throw. I was pretty much the only person scoping out the collection so that was nice! The store was totally empty so early on a Sunday so I decided to take a stroll around and rack up steps on my new fitbit (I got the new Alta and love it, btw) and check out the other departments. I spotted these Pyrex bowls and in the kitchen section thought they were too cool not to share! If you're a retro enthusiast odds are you have at least a couple vintage Pyrex pieces in your kitchen. I've managed to score a few at local thrift shops, but the prices on these vintage pieces are definitely going up. Good news: Pyrex released their Vintage Charm collection at Target featuring modern interpretations of their best-selling vintage patterns. My fave is "Rise n Shine" inspired by my favorite aqua and white Butterprint pattern.

Cute, right? They also have a dot print set that's really fun and would look totally at home in my future Eichler kitchen. ;)

Functional + affordable and you won't be too devastated if one breaks! Perfect!
*This isn't a sponsored post at all, just thought you might like these!

230

What to sew with cute fabric prints

Tuesday, April 12, 2016

Patio Party Retro Mid Century Chair Fabric print by Vitamini

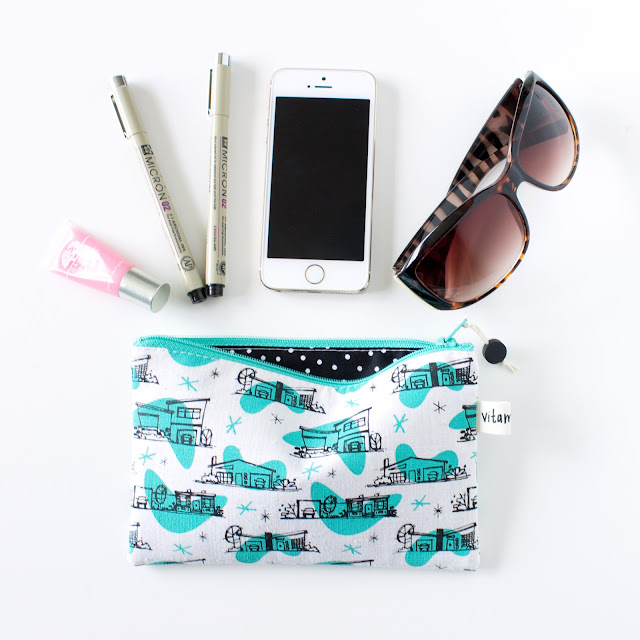
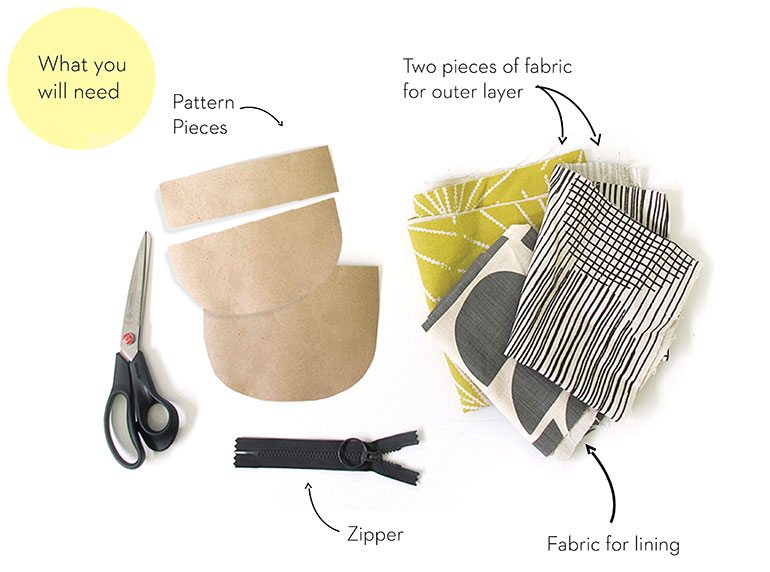
"I love this fabric! But what should I make with it...?" I hear that question all the time at craft fairs when I'm selling my fabric prints! My absolute favorite project to make with fun prints is zipper bags! They're so useful and they're a really fun way to use fabric pieces that are leftover from other projects. Or you can make a bunch and have them on hand for gift giving! Just add a gift card or a cute pair of earrings and bam! An adorable and practical handmade gift!

Retro Ranch Mid Century House Fabric print by Vitamini

Once you get the hang of sewing these little pouches, you can customize the size and shape however you want. Mix up the fabric combinations, add quilting, embroidery, or top stitching to make it extra special.

The lovely folks at Skinny laMinx posted this great tutorial (with pdf pattern!) for a zipper pouch with two fabric prints. Too good not to share!

photo from SkinnylaMinx purse tutorial

Speaking of fabric prints - I'm working on some new ones for the shop! I also just released the Dachshund Love print in soft gray, in addition to the classic black and white and coral pink! My available stock of fabrics is constantly changing, so if you have your eye on something or if you're looking for a larger size, just shoot me an email (casey(at)vitaminimodern.com) and I'll let you know what I have ready to ship!

125

New products for Doxie Lovers

Monday, April 4, 2016


Hey, happy April! I have to catch you up on all the current events around here: If you follow me on social media you probably already know my pup, Baci. She'll be 2 in June and we just finished her second round of obedience training classes. About 7 months ago I noticed she had an occasional limp in her back right leg. It slowly got worse and before long she was limping on both back legs. I had the vet take a look and it was worse than I thought - severe luxating patellas in both legs. Surgery was recommended sooner than later to prevent any additional damage. And they wanted to operate on both legs at once. OMG! Everything moved super quickly and before I knew it her surgery had been scheduled for 3 days away.


So you must be wondering - what does this have to do with new doxie products? In an effort to raise money to help pay the unanticipated large vet bills I set up a donation page and designed a few new doxie-centric products for the shop! Cause, seriously, who doesn't love a wiener dog?!


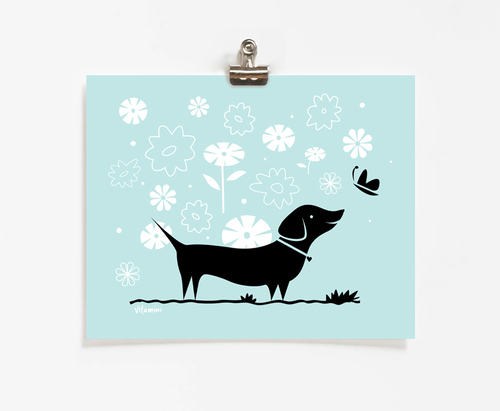
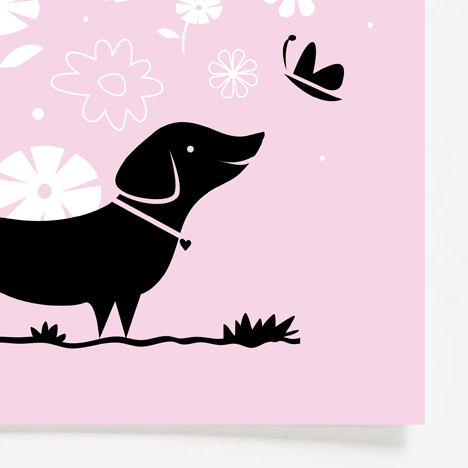
First up is the Life is Better With a Dog print. It comes in 3 colors: pink, light aqua, and light gray. It would look great in kids rooms or adult spaces alike. I usually don't hang my own work but I couldn't resist framing one of the gray prints for my studio. :)


Next up: the Doxie Love Stamp Set featuring a joyful dachshund and a little heart stamp. Add a little happiness to your paper products by stamping up your own custom patterns.


There are two ways to get your hands on this fun new stuff: you can purchase from the Art or Stamp sections in the shop, or you can check out the Help Baci page and get them as a gift with donation. 100% of the proceeds from these sales and donations will go directly to help pay for Baci's medical expenses. Anything you can give, even $1, will be much appreciated. <3 Thanks so much for reading!

122

Finding Vivian Maier

Saturday, March 5, 2016

source


Well, hello! I'm back from my unplanned blog hiatus! I don't have any elaborate excuses to provide to explain my absence, other than the fact that life got busy and something had to give, at least for a while. Anyhoo, I'm hoping to get back to a more regular schedule of posting: sharing random things I like, some of my work for Vitamini, and craft projects as I come up with them. Getting back to my bloggy roots, yo.

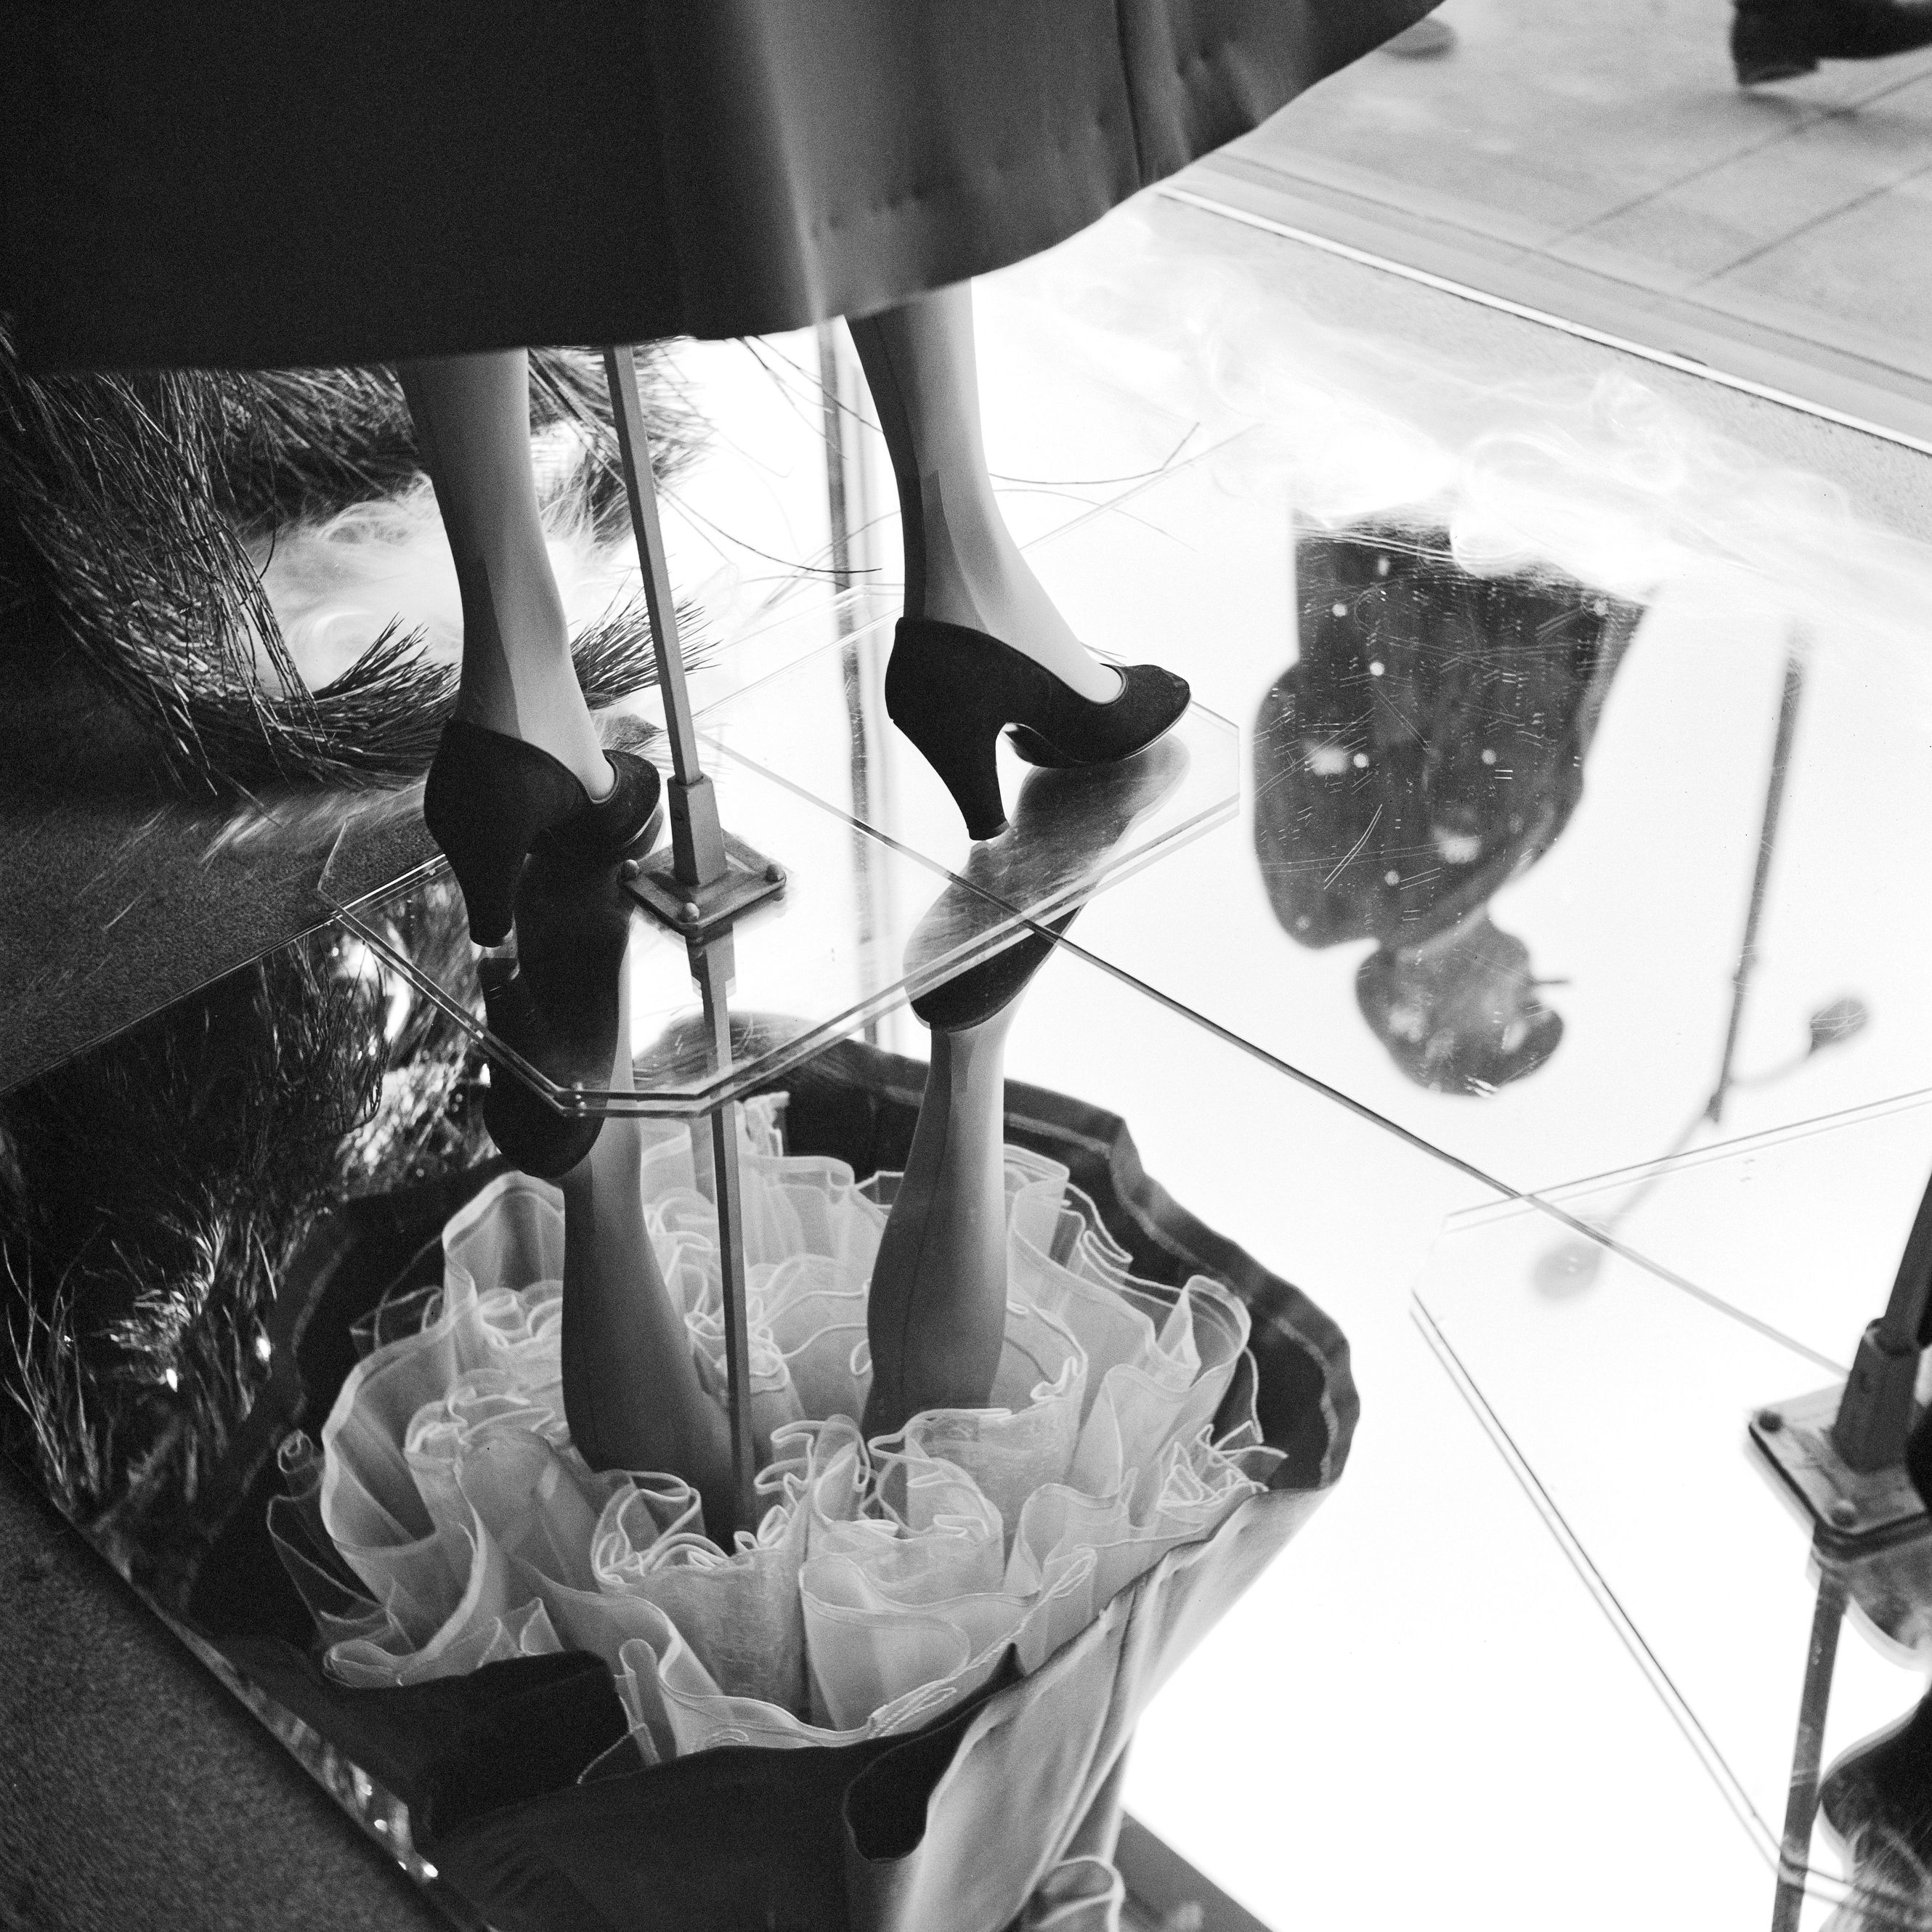
Speaking of random things I like - I just watched the documentary Finding Vivian Maier last night and loved it! College kid and amateur historian John Maloof buys a box of photographic negatives at an auction and discovers hundreds of beautifully shot photos of urban life in the 50's and 60's. With nothing more than a name and a Chicago suburb address, he dives into research to figure out who this mysterious photographer was. A really intriguing story - I recommend it! Find it on Netflix. Check out more of her work and learn about upcoming exhibitions on the Vivian Maier website.

source
source

216

DIY Ombre Sequin Ornaments

Wednesday, December 9, 2015

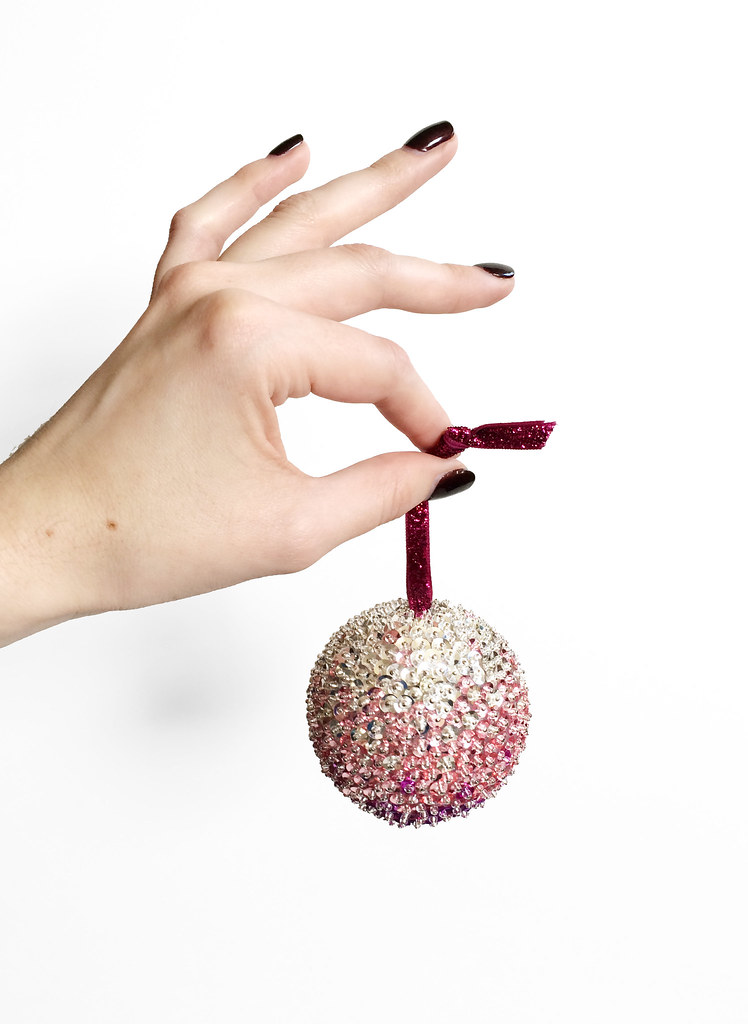
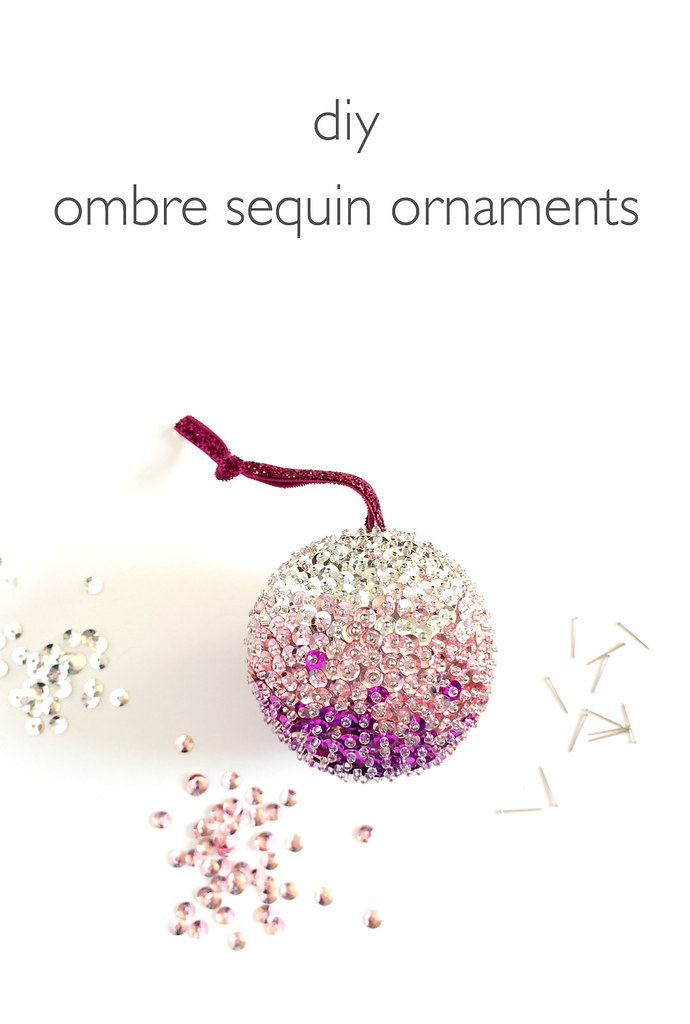
DIY Ombre Sequin Oraments Beaded, sequin-covered ornaments were a popular craft in the 60's and I have distinct memories of admiring them on my grandma's Christmas tree every year as a kid. If it was sparkly, I was all over it and those ornaments were the shiniest things around! I've been meaning to try making my own modern interpretation for years so I finally made the time and came up with these ombre sequined ornaments. I'm so excited with how they turned out! While the materials are really inexpensive and the technique is simple, it takes a while to do. It's not a quick craft by any means! I made mine over a couple evenings, sitting down in front of Netflix (Broadchurch, watch it!) whenever I had the time. This is the sort of craft that will become an heirloom so take your time and don't rush it. It's actually a pretty relaxing activity once you get going and the results are absolutely stunning. No one will believe you made it yourself!

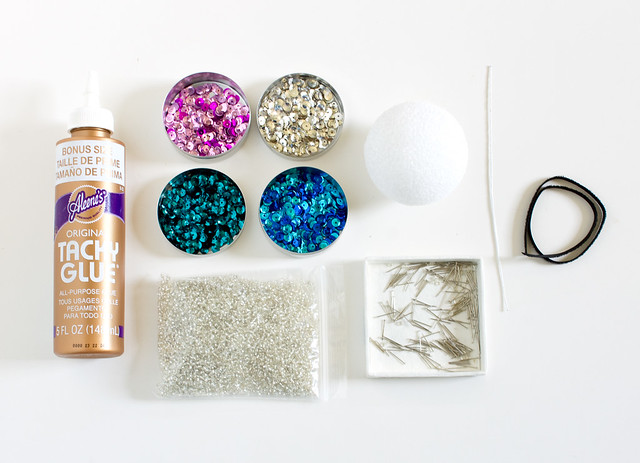
Here's what you'll need:
DIY Ombre Sequin Oraments
  • Sequin pins. These are shorter than regular pins and they come in silver or gold
  • Sequins. You'll need at least three different shades to get an ombre affect
  • Seed beads in the color of your choice. I chose clear with silver lining
  • Tacky glue
  • 2 1/2" Styrofoam balls
  • Ribbon
  • Short length of wire. Any gauge will work
  • A tray or shoebox lid to work on
  • Small containers

DIY Ombre Sequin Oraments

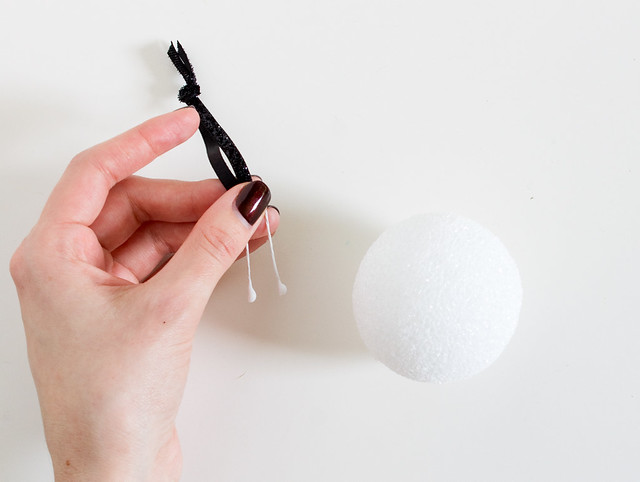
Separate the sequin colors into containers. Pour some of the beads into a shallow container. Cut a length of ribbon about 8" and tie the ends. Make a U shape with the wire, hook the end around the ribbon loop, and add some tacky glue to the ends. Push the wire into the top of a styrofoam ball until ribbon is flush with the top of the ball. Let dry. Draw a line around the center of the ball with a permanent marker, to help guide the ombre design.
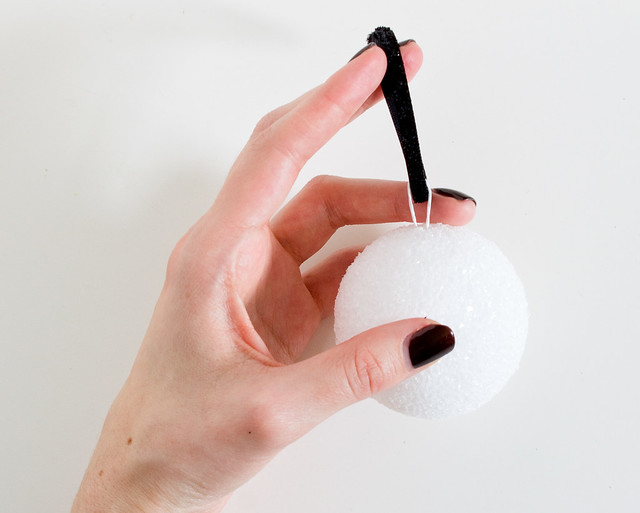
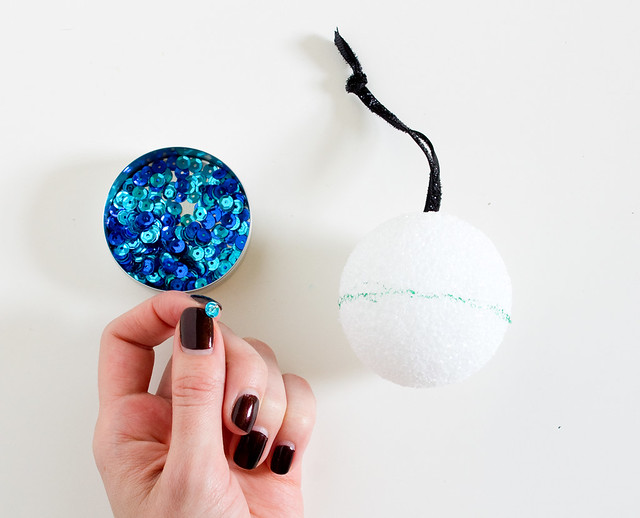
DIY Ombre Sequin Oraments DIY Ombre Sequin Oraments

Thread a bead onto a pin, followed by a sequin in your lightest color. Make sure it's right side up - u shape instead of n shape for maximum sparkle! Dip the end of the pin in some tacky glue, and push the pin into the top of the ball right next to the ribbon. Continue adding beads and sequins all the way around the ribbon, slightly overlapping each so the styrofoam doesn't show through.
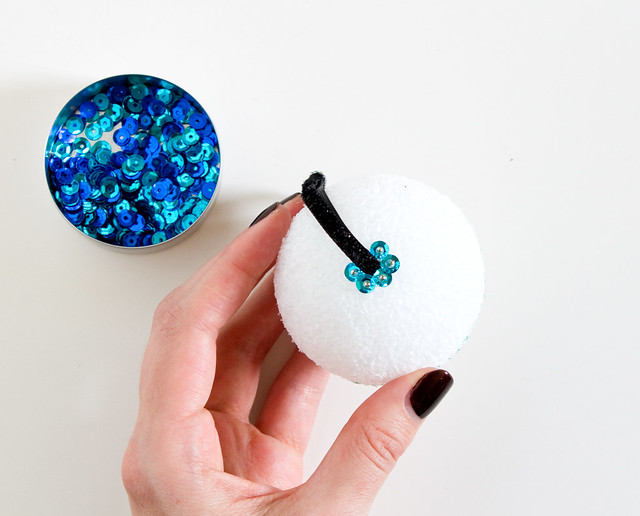
DIY Ombre Sequin Oraments

Keep going!! When you get about a third of the way down, start transitioning to the middle color sequins, and then to the last color about 2/3 of the way down. I mixed in a few sequins of the next color here and there to make the color transition more gradual.
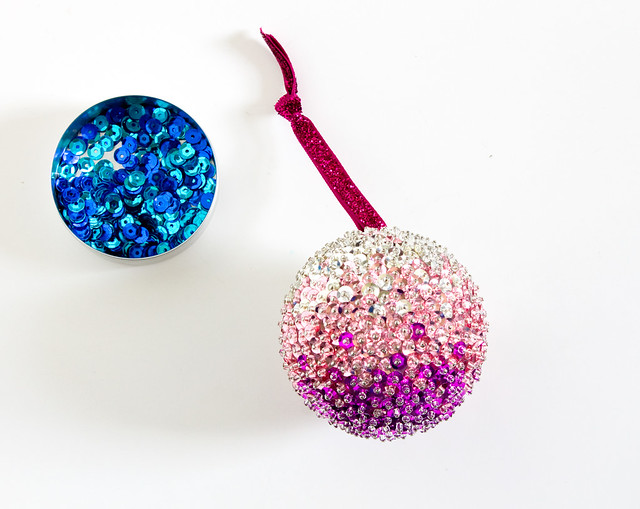
DIY Ombre Sequin Oraments

tips
  • Instead of trying to thread each tiny bead onto the pin, just slide the pin through the container of beads. You'll pick one or a few up every time.
  • Squirt out some glue onto a scrap of cardboard and dip the pin ends into into that. Make sure to use glue - you don't want the pins falling out when you're finished! 
  • Set up all of your little containers and glue inside a tray or shoebox lid. This will help keep sequins, beads, and pins from going all over the place if it gets bumped, and makes it easier to put aside when you want to take a break.
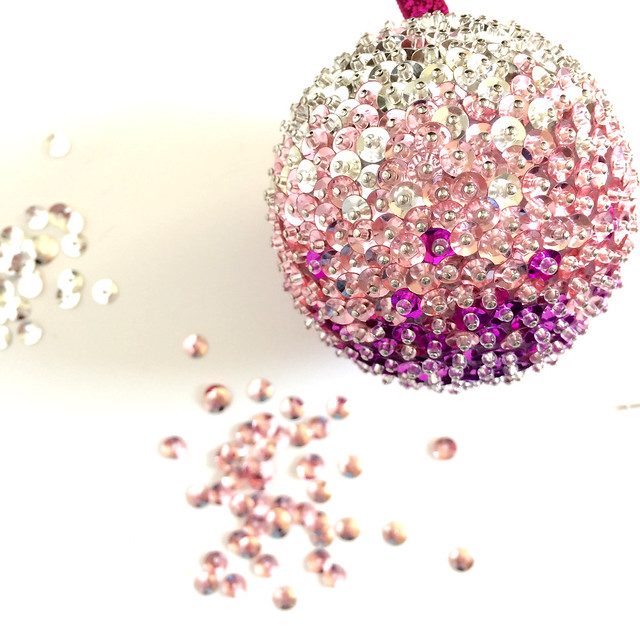
DIY Ombre Sequin Oraments DIY Ombre Sequin Oraments

These ornaments are so pretty - even better in person! I love the ombre look, but you can try other designs and patterns, too. Stripes, swirls, polka dots. When I bought my supplies I also got a styrofoam cone that would make the prettiest Christmas tree. We'll see if I have enough time to tackle that! I'm not even done with the aqua/teal/blue one yet! :) I hope you'll try making some yourself!
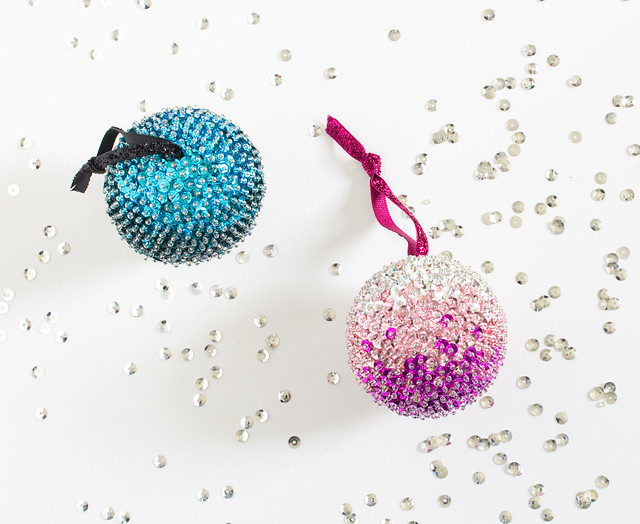
DIY Ombre Sequin Oraments
P.S. Check out lots of projects from holidays past in the DIY Gallery!

*this post contains affiliate links

261

Cyber Week Sale

Tuesday, December 1, 2015

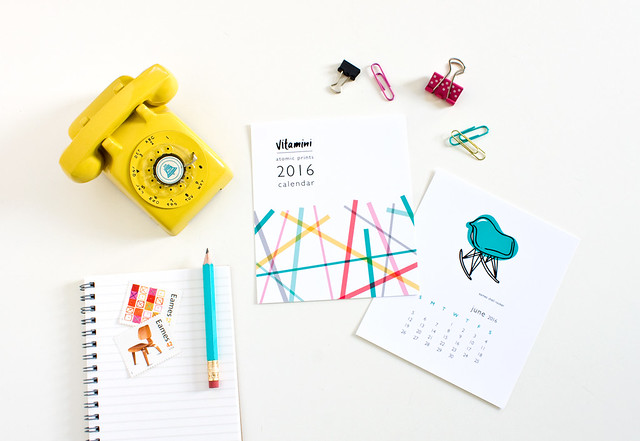
2016 Desk Calendars by Vitamini

Just popping in to let you know that my "cyber monday week" sale is still going strong! Use the code Merry15 to get 15% off your entire order through Friday, 12/4! Can't beat that! I have so many new products that have been a big hit on and offline - gift wrap, desk calendars (above), pillows, and holiday cards. Of course all the classics are there, too: fabrics, tote bags, coasters. I only have sales once or twice a year, so if there's something you've had your eye on, now's the time to pounce! :)

*I'm restocking a few items that sold out this past weekend. If you have any specific questions about lead times feel free to email me! casey(at)vitaminihandmade.com*

97

Thankful

Thursday, November 26, 2015

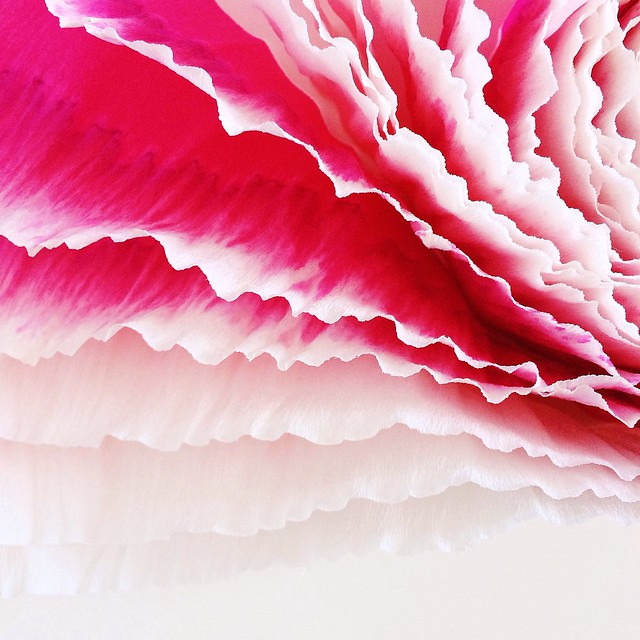
Crepe paper ombré

Happy Thanksgiving, everyone! I'm reflecting a little on all of the things I'm thankful for, and you, the readers of my blog came to mind immediately. 2015 has been quite a year for me, both professionally and personally. While the changes and adjustments haven't always been easy, I think they've prepared me for lots of awesome things to come! Thank you for stopping by to read a post, craft a new diy, or leave a comment, even when the posts have been few and far between. I'm looking forward to sharing lots of new content in the coming months.

Have a great day, eat lots of delicious food, and let your loved ones know how thankful you are to have them in your life.

*I'm also super-thankful for craft supplies. Photo above of some hand dyed crepe paper, via my Instagram

92

DIY Halloween Flower Vases

Wednesday, October 7, 2015

DIY Halloween Flower Vase | click through for the full tutorial!

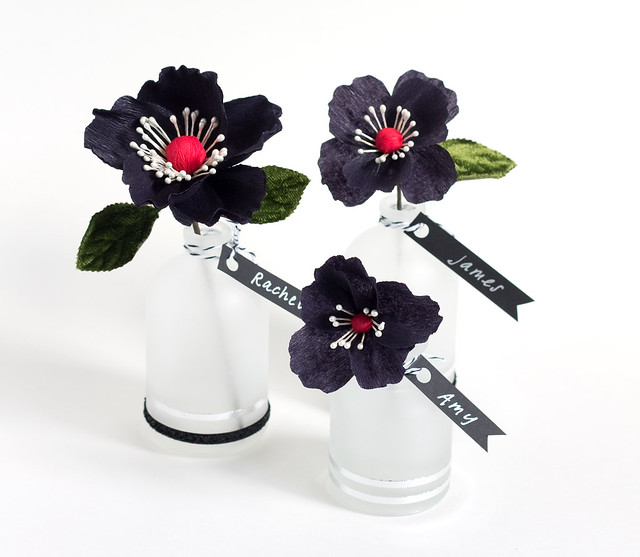
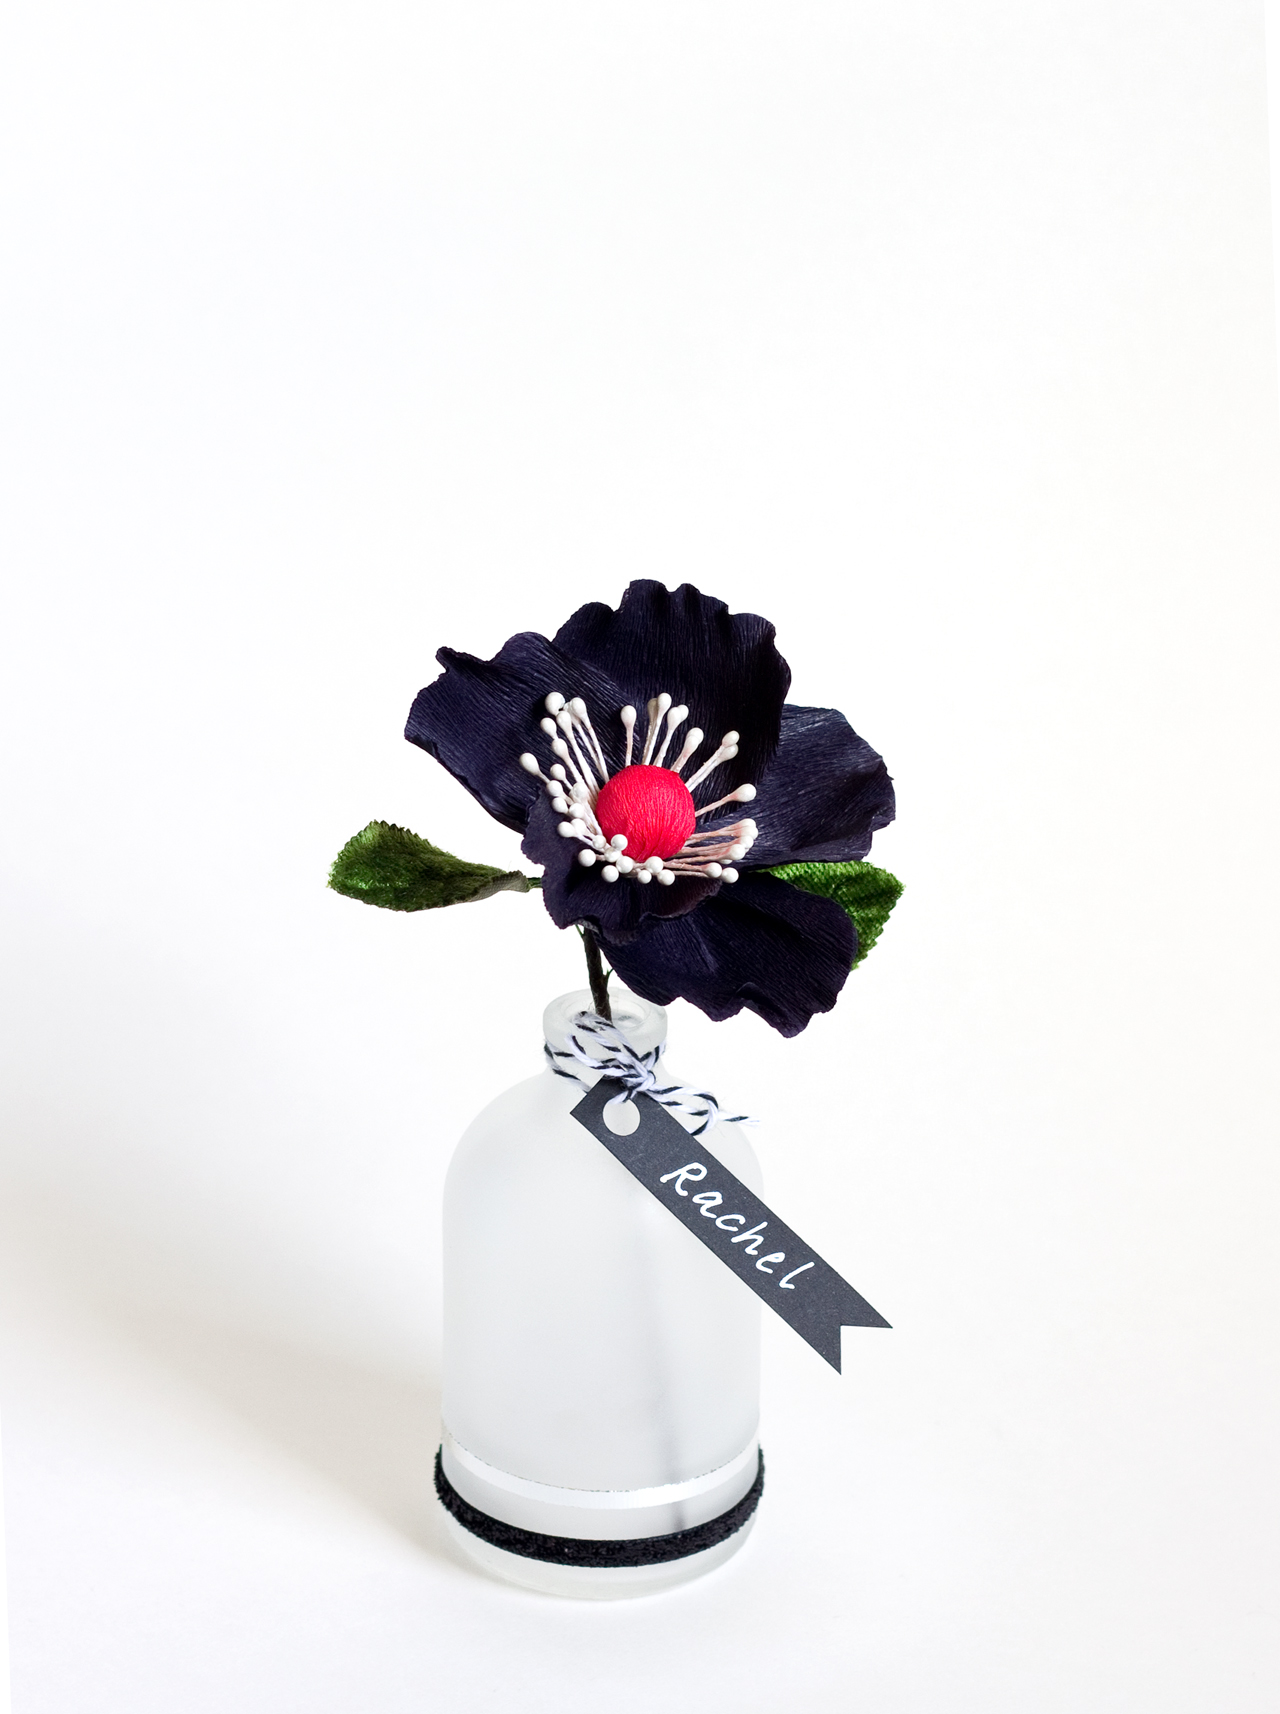
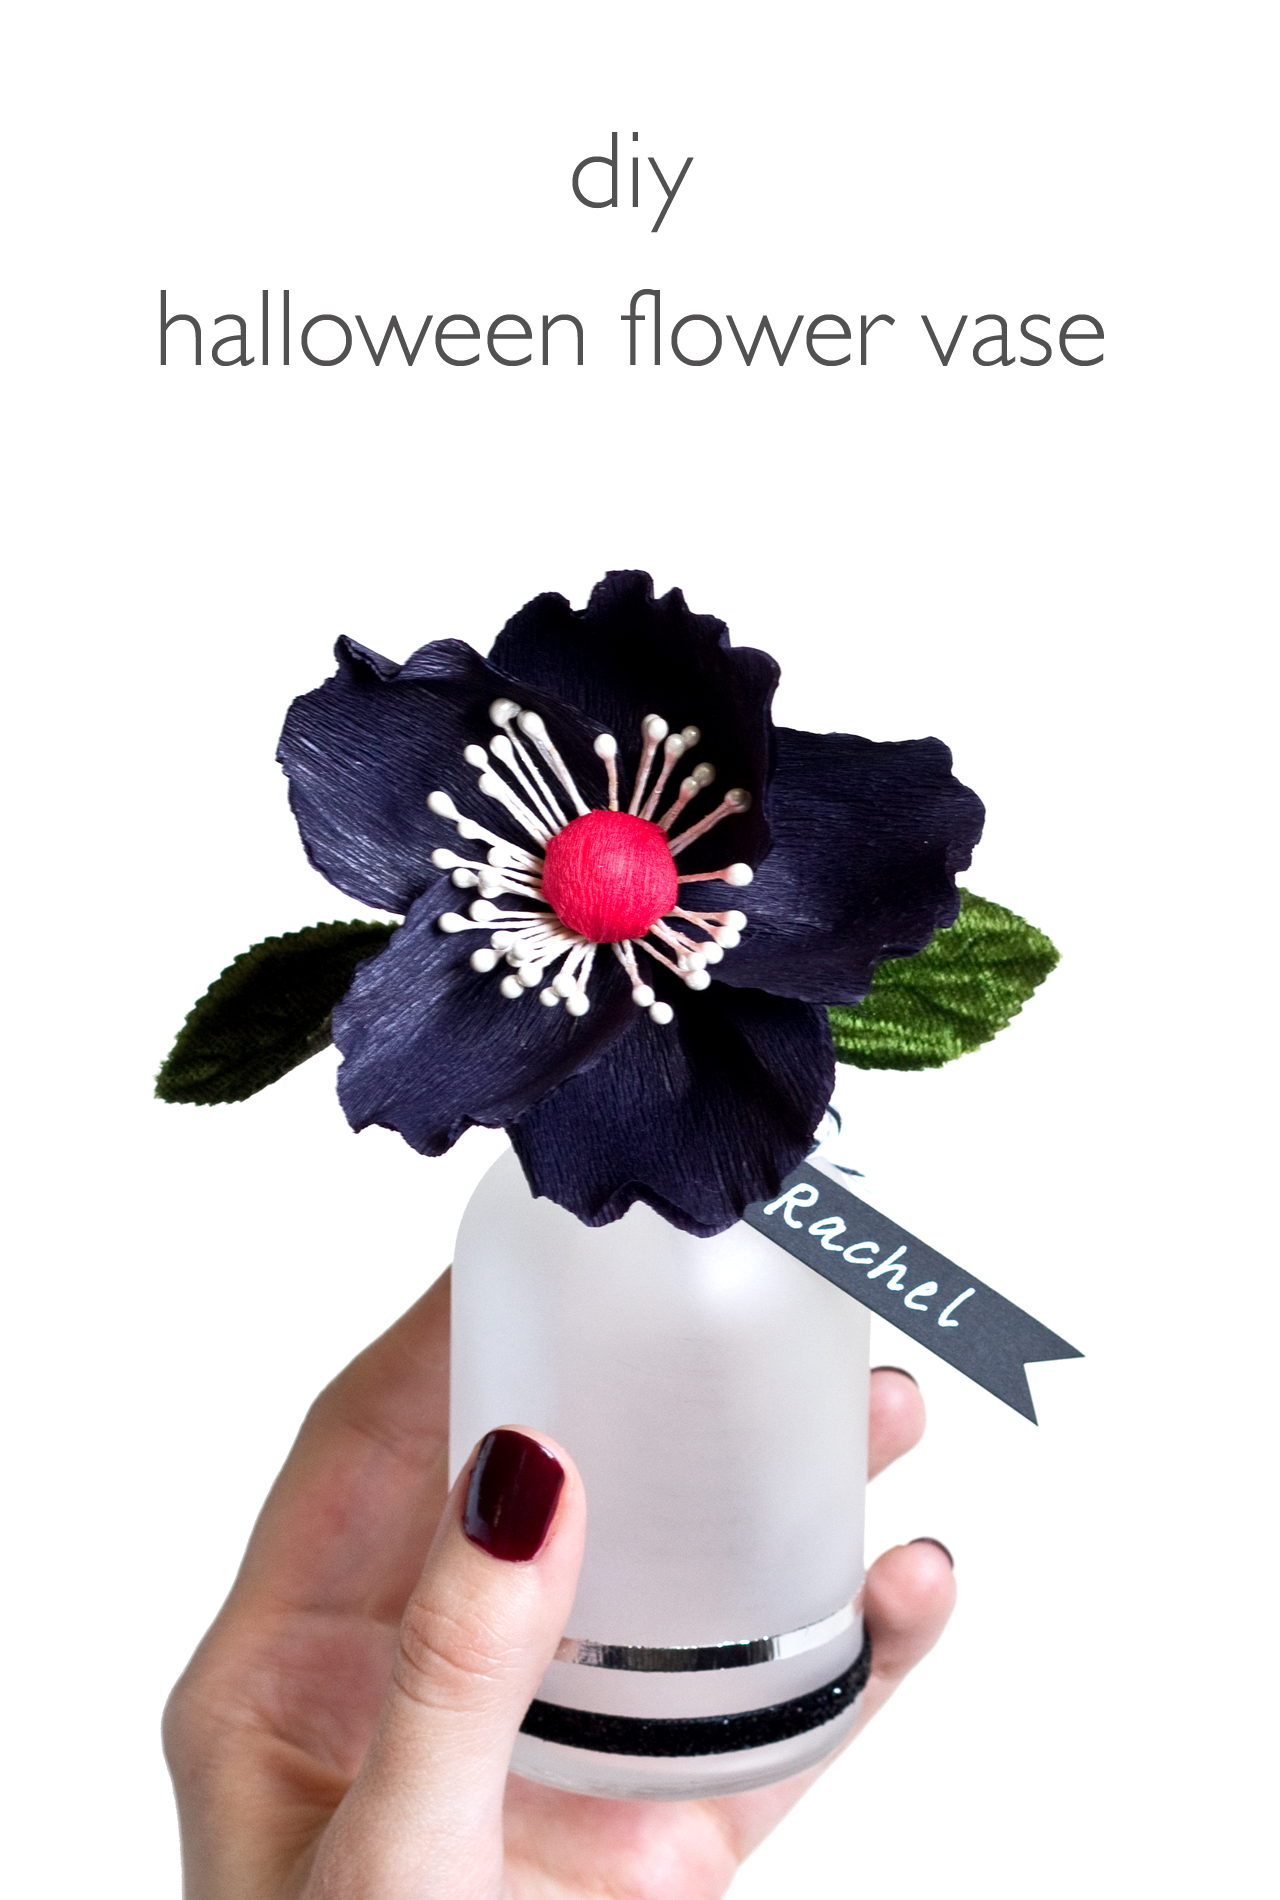
Halloween season, how I love thee! I spotted these adorable little frosted vases at Michael's a few weeks ago, and as per my usual style, bought them with no idea what I'd do with them. I thought they'd be perfect for Halloween, though. They look like little apothecary bottles, don't you think? It wasn't until after I started playing around with paper flowers again that I realized they'd make perfect little flower vases, but they'd need a little bit of embellishing. You can use lots of different materials for this project - ribbons, foils, faux flowers, real, or paper ones like I did.
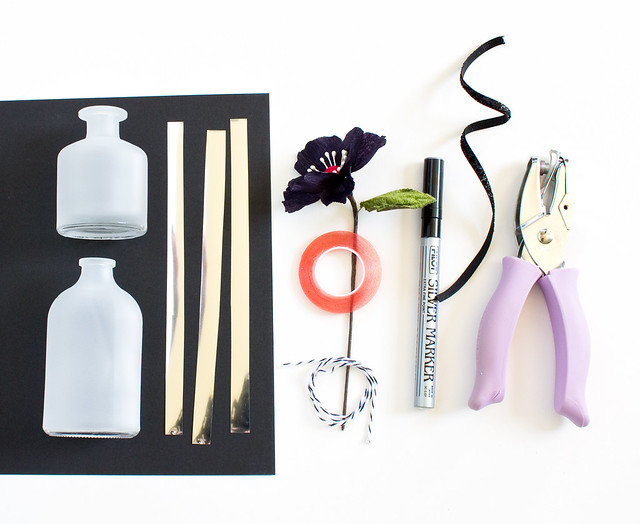
Here's what you'll need:
DIY Halloween Flower Vase | click through for the full tutorial!
  • Mini frosted vases. These came in packages of 2 at Michaels for something super cheap like $3
  • Double-sided scrapbooking tape. This stuff is super strong and comes in all sorts of widths. I used 1/8"
  • Transfer foil (This was the same brand I used but mine came in silver, gold, and copper colors)
  • Ribbon, baker's twine
  • Black paper
  • Silver or white pen
  • Hole punch
  • Flowers. Faux, real, paper, whatever you'd like. I made these black paper flowers myself. Craft stores carry Halloween themed silk flowers or you could use grocery store mums.

DIY Halloween Flower Vase | click through for the full tutorial! DIY Halloween Flower Vase | click through for the full tutorial!

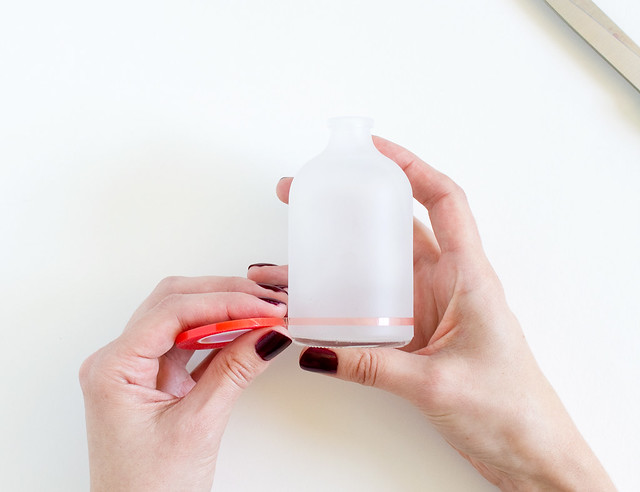
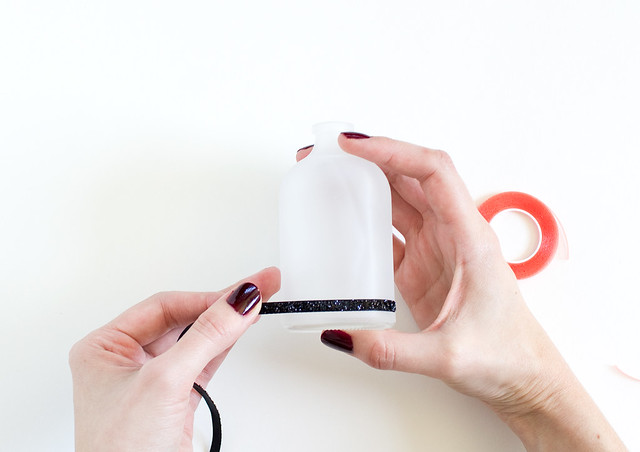
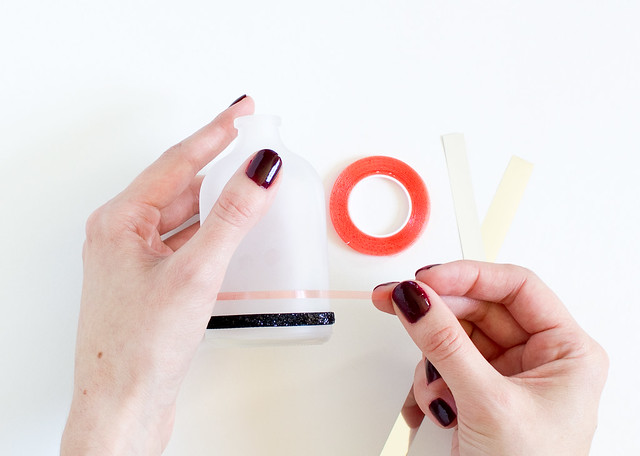
Unroll a bit of the tape and stick it onto the bottom of the vase. Continue all the way around till the ends meet, and trim. Pull up the orange plastic to expose the other sticky side, and stick on the ribbon, match the ends and trim. So easy!
DIY Halloween Flower Vase | click through for the full tutorial! DIY Halloween Flower Vase | click through for the full tutorial! DIY Halloween Flower Vase | click through for the full tutorial! DIY Halloween Flower Vase | click through for the full tutorial!

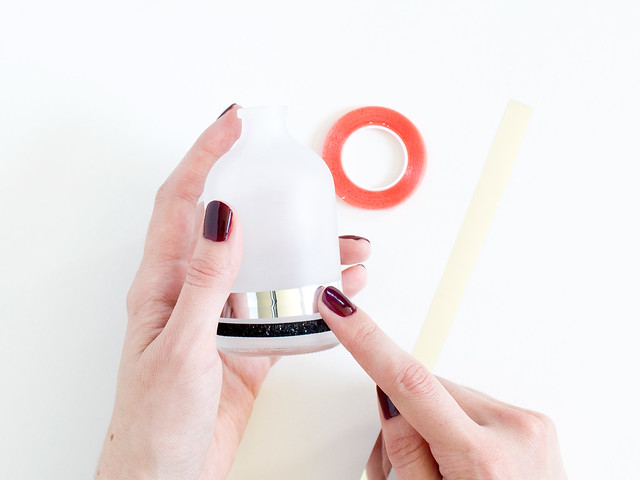
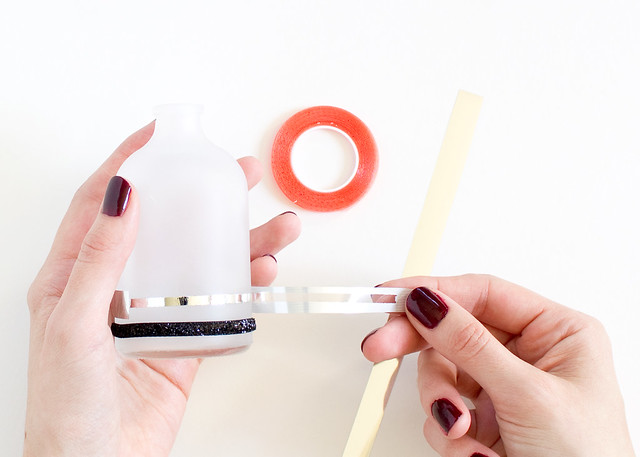
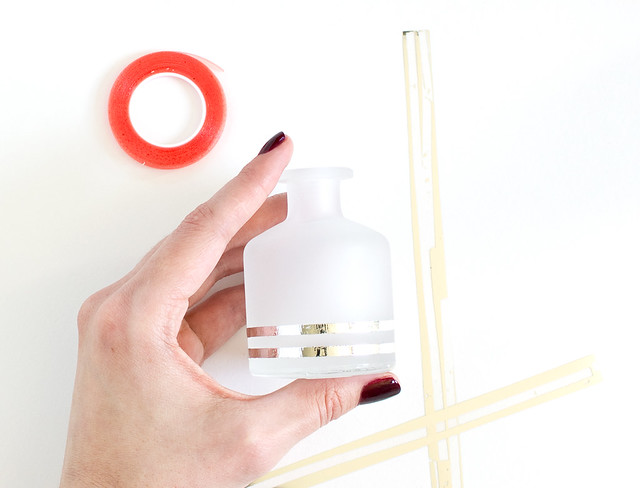
You could easily just make a bunch of ribbon stripes, but I thought a metallic touch would be nice, so I repeated the steps with this foil transfer in silver. Once you expose the sticky tape again, just apply the silver strips with the shiny side up. Rub the strip down with your finger and then pull up. You're left with a super-crisp silver stripe!

DIY Halloween Flower Vase | click through for the full tutorial!

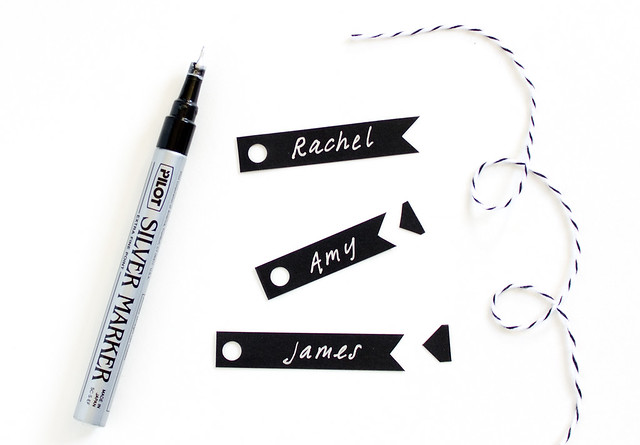
Cut a strip of black paper, notch one end and hole punch the other end. Write our your party guest's names and tie with ribbon or baker's twine. Add your Halloween flower and that's it!

DIY Halloween Flower Vase | click through for the full tutorial! DIY Halloween Flower Vase | click through for the full tutorial!

These would make adorable place cards at an October dinner or cute little party favors. They're so easy to make and customize. Plus the tape is fully removable so you can switch it up later if you decide. I like these so much I think I'll keep a few around all year. I hope you like them, too!

P.S. Check out my DIY Gallery page to see lots of diys from Halloween's past!

32

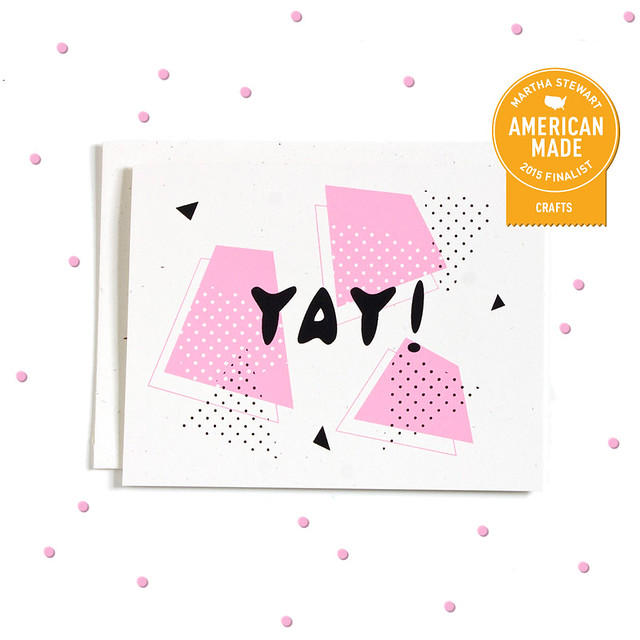
Martha Stewart American Made Awards Finalist!

Tuesday, September 29, 2015

Vitamini is a Martha Stewart American Made Awards Finalist! Just popping in to share some exciting news - Vitamini is a finalist in the Martha Stewart American Made Awards! Voting just opened up last week and it would mean the world to me if you'd click a vote or two (or 6!) my way. Click here to read a bit about my story and cast your votes!
*Yay! card from the shop.

70

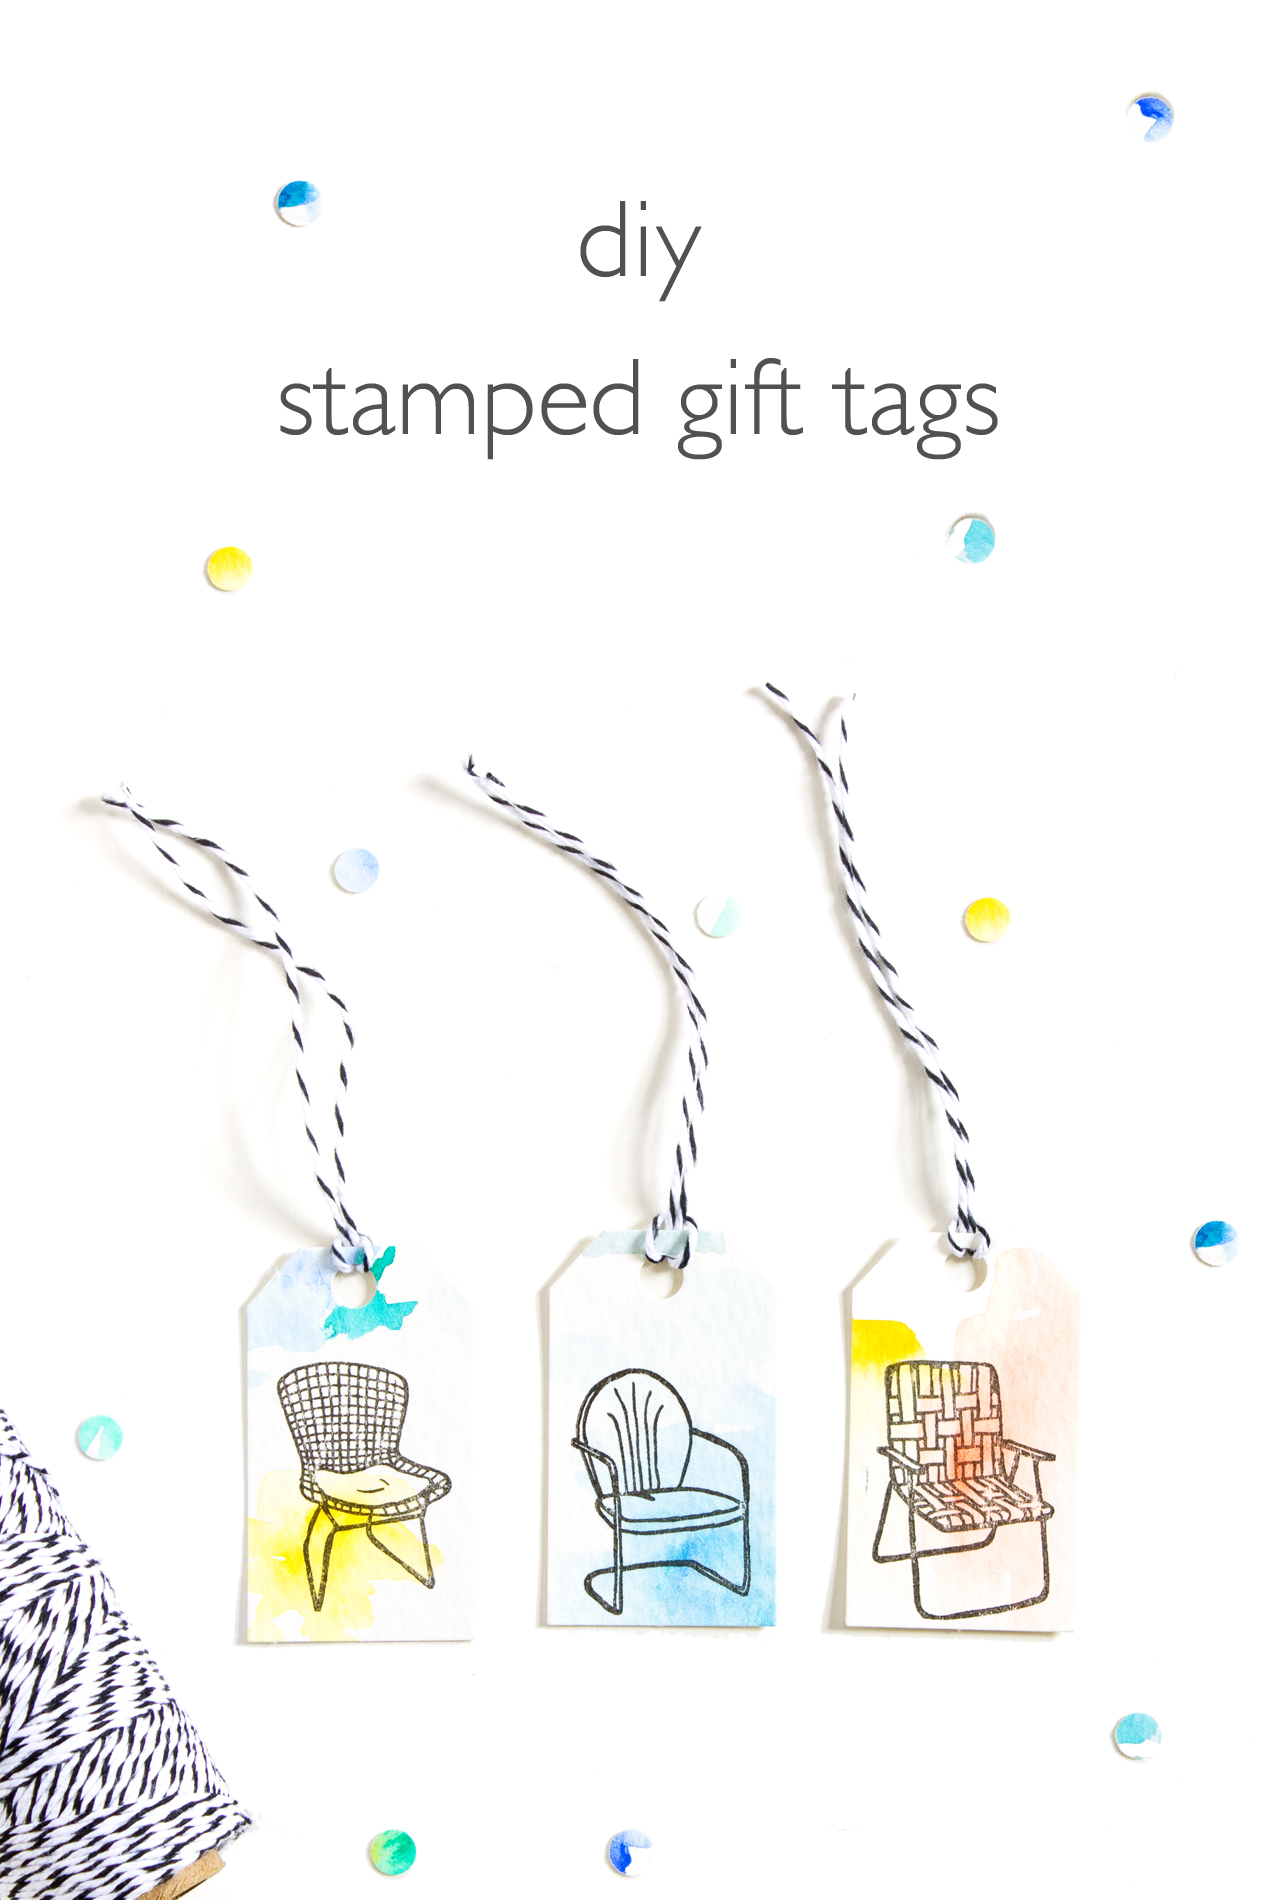
DIY Stamped Gift Tags

Thursday, September 17, 2015

DIY Stamped Gift Tags | click through for the tutorial!
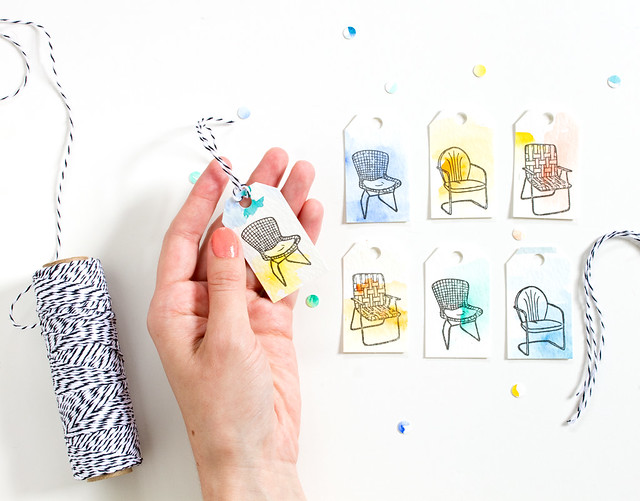
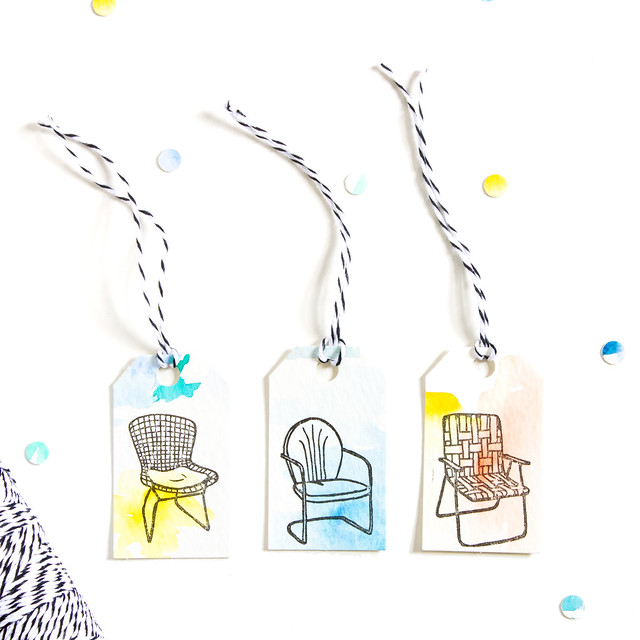
I'm excited to share this project for two reasons: first, it's really simple and the results are adorable! Second, I get to debut a few brand new products in the shop.

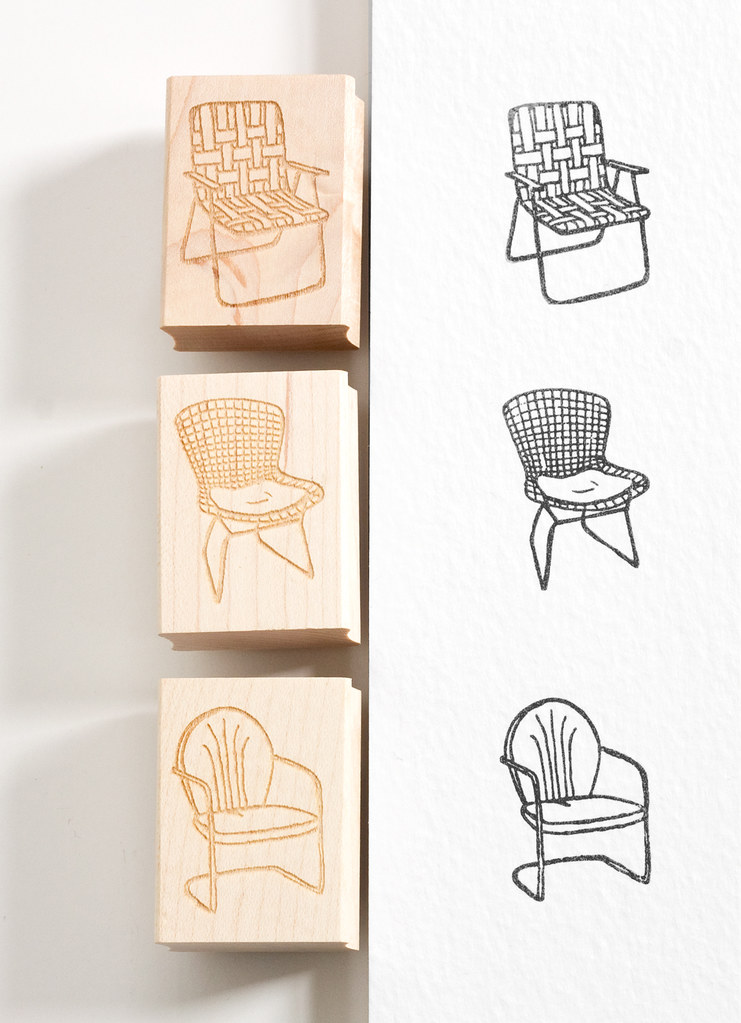
Retro Lawn Chair Rubber Stamps by Vitamini

New retro lawn chair rubber stamps from my Patio Party collection! I have three different designs available - they're the perfect way to jazz up greeting card envelopes, letters, and all sorts of other paper products, like handmade gift tags!

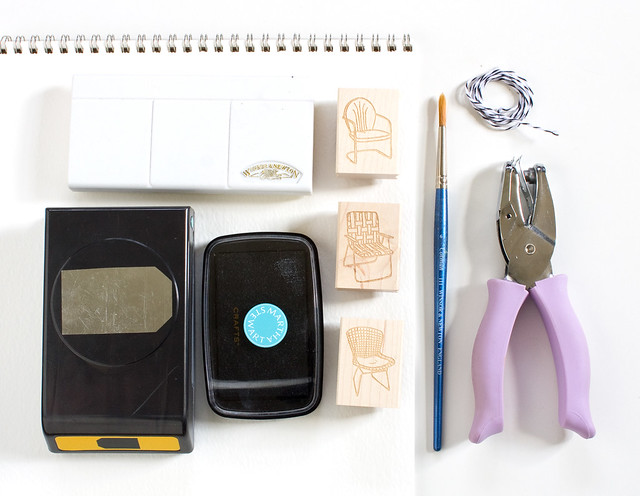
Here's what you'll need:
DIY Stamped Gift Tags | click through for the tutorial!
  • Rubber Stamps - you can find these three in my shop!
  • Pigment ink pad
  • Watercolor paper
  • Watercolors. I've had this Windsor Newton set since college and I love it
  • Paint brush
  • Tag punch
  • Hole punc
  • Baker's twine, embroidery thread, or yarn
DIY Stamped Gift Tags | click through for the tutorial!
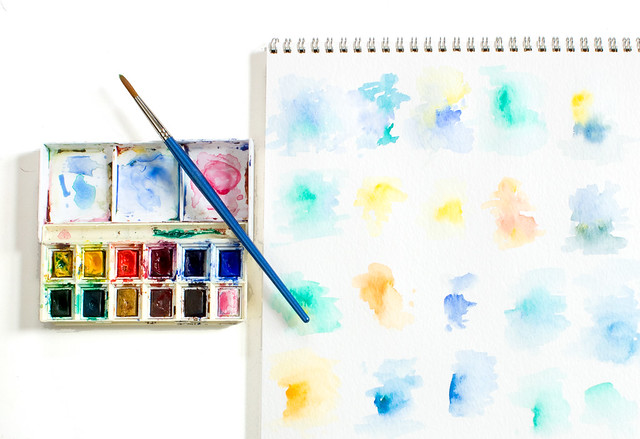
Start with the watercolors. Dip the brush in water and pick up some paint. Dab it onto the paper and then try blending the edges with more water. Experiment mixing and blending colors together. Small areas of color are all you need, so have fun with it! Let dry.

DIY Stamped Gift Tags | click through for the tutorial!

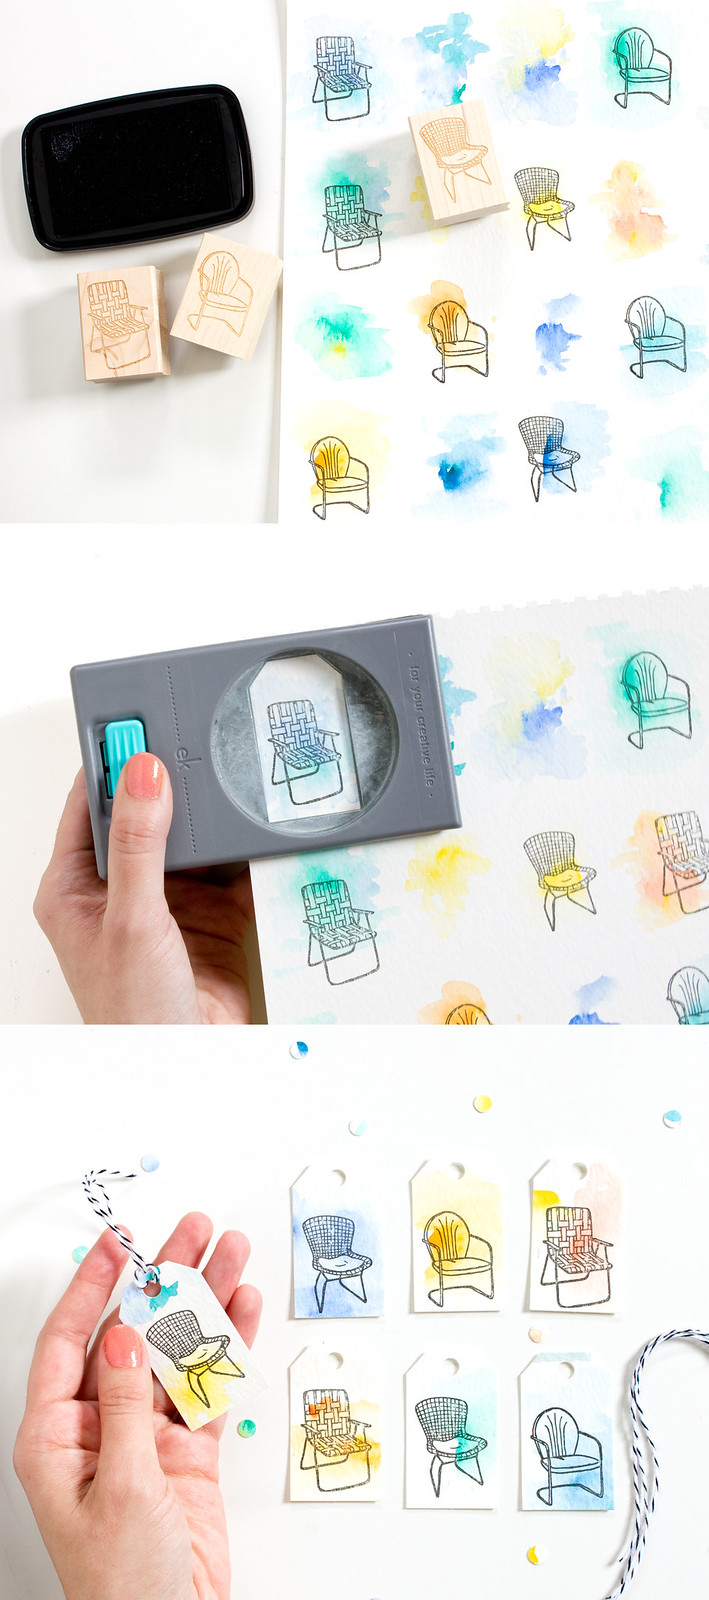
Time for stamping! Place the stamp rubber side up on the table and tap the ink pad over it. When the design is saturated, stamp on the watercolor paper. Stamp up the whole sheet of paper - experiment with placement and see what you like best. My favorites had some white space underneath the image. Let dry. (If you'd like to try a more precise option, try stamping the designs first and then adding color to the open areas afterwards.)

Center the stamped design (save some space for the hole at the top) and punch! Punch 'em all out. Add the holes to the top, and tie up with twine.

DIY Stamped Gift Tags | click through for the tutorial!

How cute! I love the mix of colors. I used blues, greens, and yellows, but these could easily be customized in any color to match your favorite gift wrap. Make a bunch and give sets as gifts.
DIY Stamped Gift Tags | click through for the tutorial!

27

Hello, September!

Wednesday, September 9, 2015

Vintage Pink Swings Carnival Ride by Vitamini

Ok, seriously, how is it September already? The summer just flew by and I don't think I made nearly enough trips to the beach! I think it's ok, though - we're still rocking the triple digit temps so it'll probably feel like summer for a while longer. I just got home from a trip to Portland for a dear friend's wedding and had so much fun. It was the perfect time to take a little break, (mostly) unplug from the computer, and relax. I stayed in a cute little AirBnB studio in the Irvington neighborhood of Portland. Have you been? Talk about beautiful homes! I spent lots of time taking walks looking at the pretty houses, taking pictures, and drinking too much coffee (Saint Simon Coffee Co. on NE Broadway FTW). I'm back, feeling refreshed and ready to tackle all of the items on my to-do list! I'm also excited to get back into blogging after my little, unofficial summer break.

In other news, I got the best surprise while I was away - Vitamini has been chosen as a finalist for the 2015 Martha Stewart American Made Awards! Grinning face emoji times 100!! Check out my nomination page to read more about the story of my business. Voting opens up later this month.

Photo above from my Instagram of my favorite swing ride at the Monterey County Fair every year. Isn't it pretty? Love the pink. Have a great rest of the week!


vitamini handmade © All rights reserved · Theme by Blog Milk · Blogger