221

What to sew with cute fabric prints

Tuesday, April 12, 2016

Patio Party Retro Mid Century Chair Fabric print by Vitamini

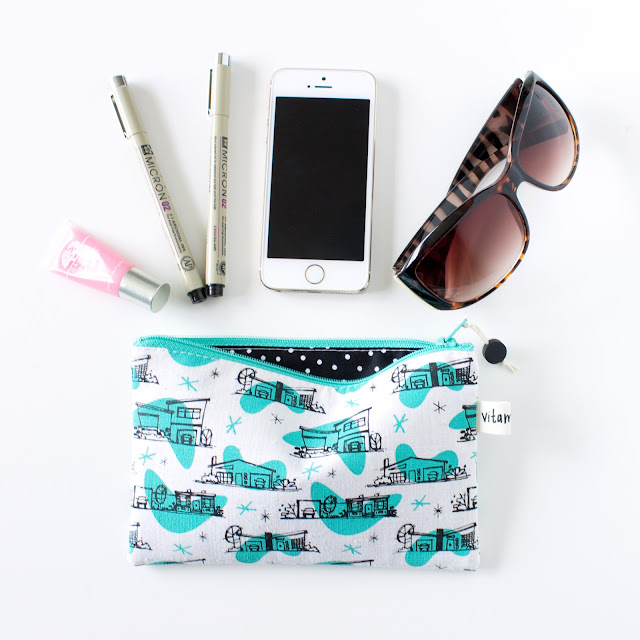
"I love this fabric! But what should I make with it...?" I hear that question all the time at craft fairs when I'm selling my fabric prints! My absolute favorite project to make with fun prints is zipper bags! They're so useful and they're a really fun way to use fabric pieces that are leftover from other projects. Or you can make a bunch and have them on hand for gift giving! Just add a gift card or a cute pair of earrings and bam! An adorable and practical handmade gift!

Retro Ranch Mid Century House Fabric print by Vitamini

Once you get the hang of sewing these little pouches, you can customize the size and shape however you want. Mix up the fabric combinations, add quilting, embroidery, or top stitching to make it extra special.

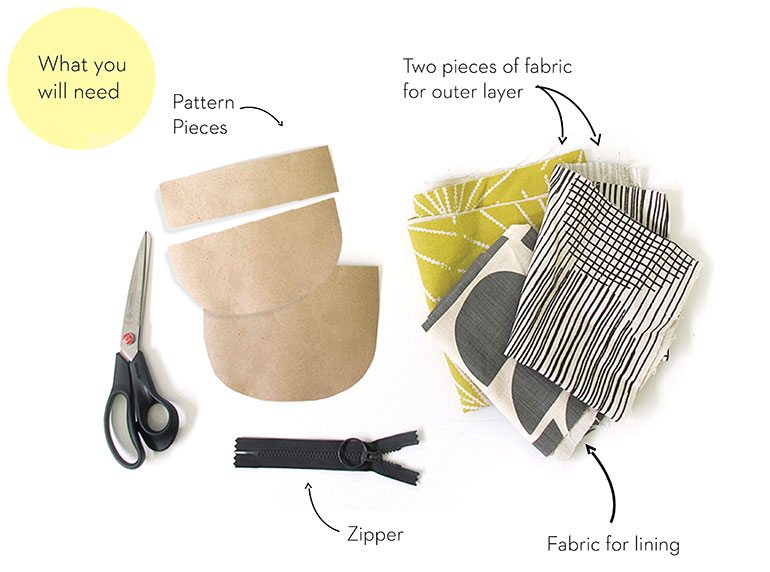
The lovely folks at Skinny laMinx posted this great tutorial (with pdf pattern!) for a zipper pouch with two fabric prints. Too good not to share!

photo from SkinnylaMinx purse tutorial

Speaking of fabric prints - I'm working on some new ones for the shop! I also just released the Dachshund Love print in soft gray, in addition to the classic black and white and coral pink! My available stock of fabrics is constantly changing, so if you have your eye on something or if you're looking for a larger size, just shoot me an email (casey(at)vitaminimodern.com) and I'll let you know what I have ready to ship!

73

DIY Halloween Flower Vases

Wednesday, October 7, 2015

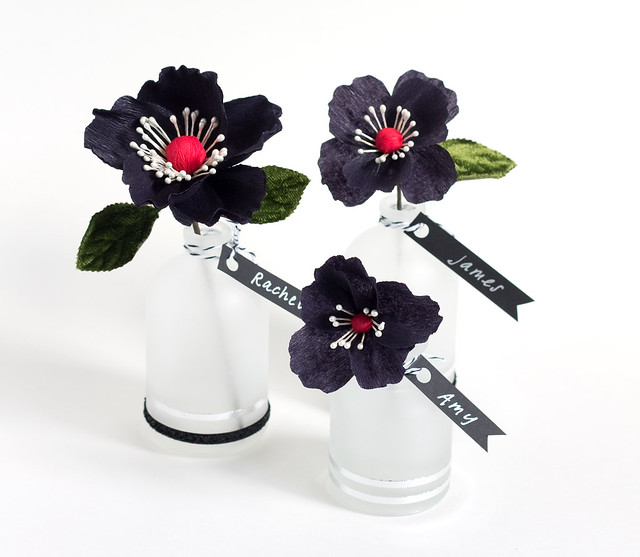
DIY Halloween Flower Vase | click through for the full tutorial!

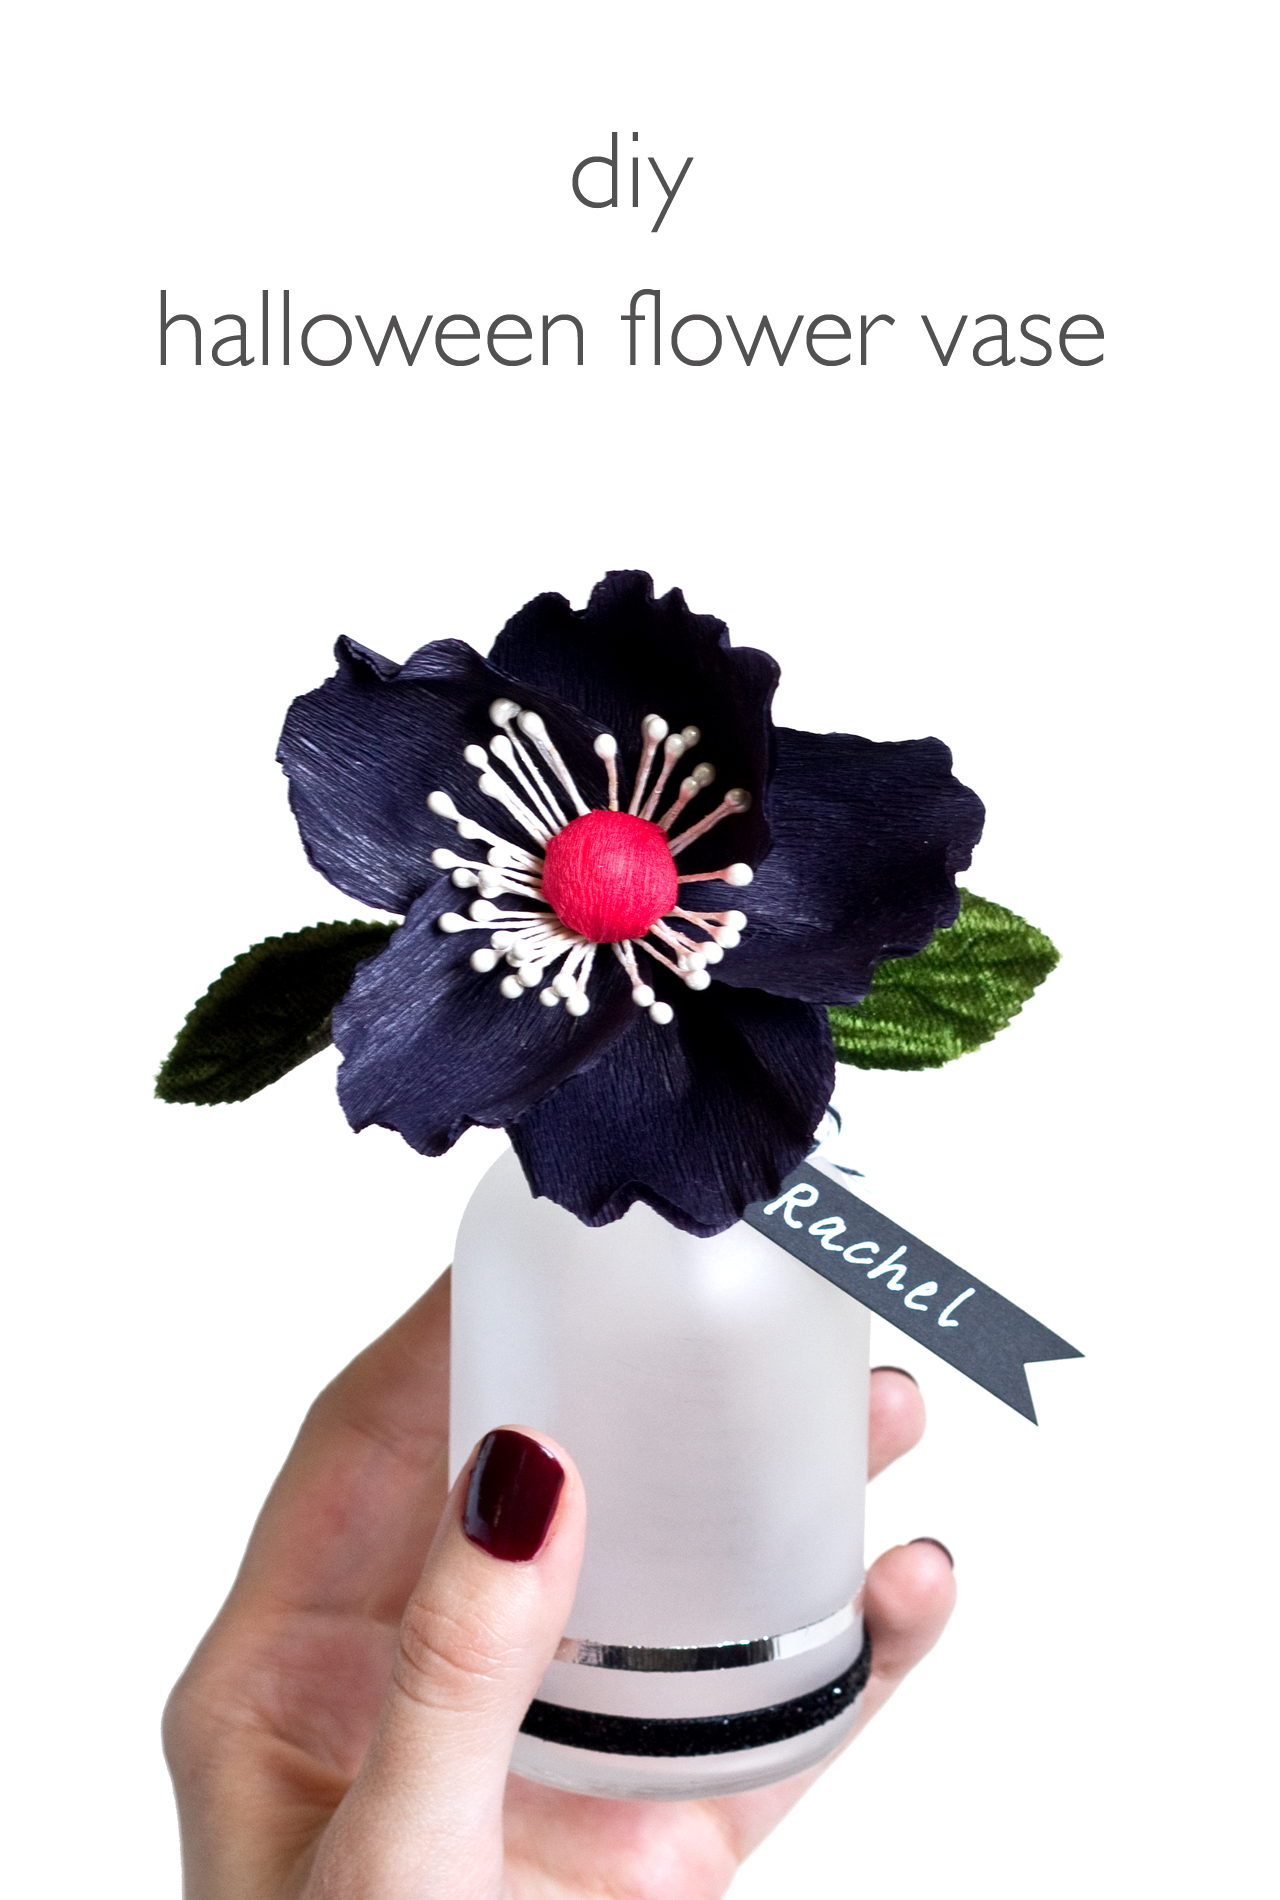
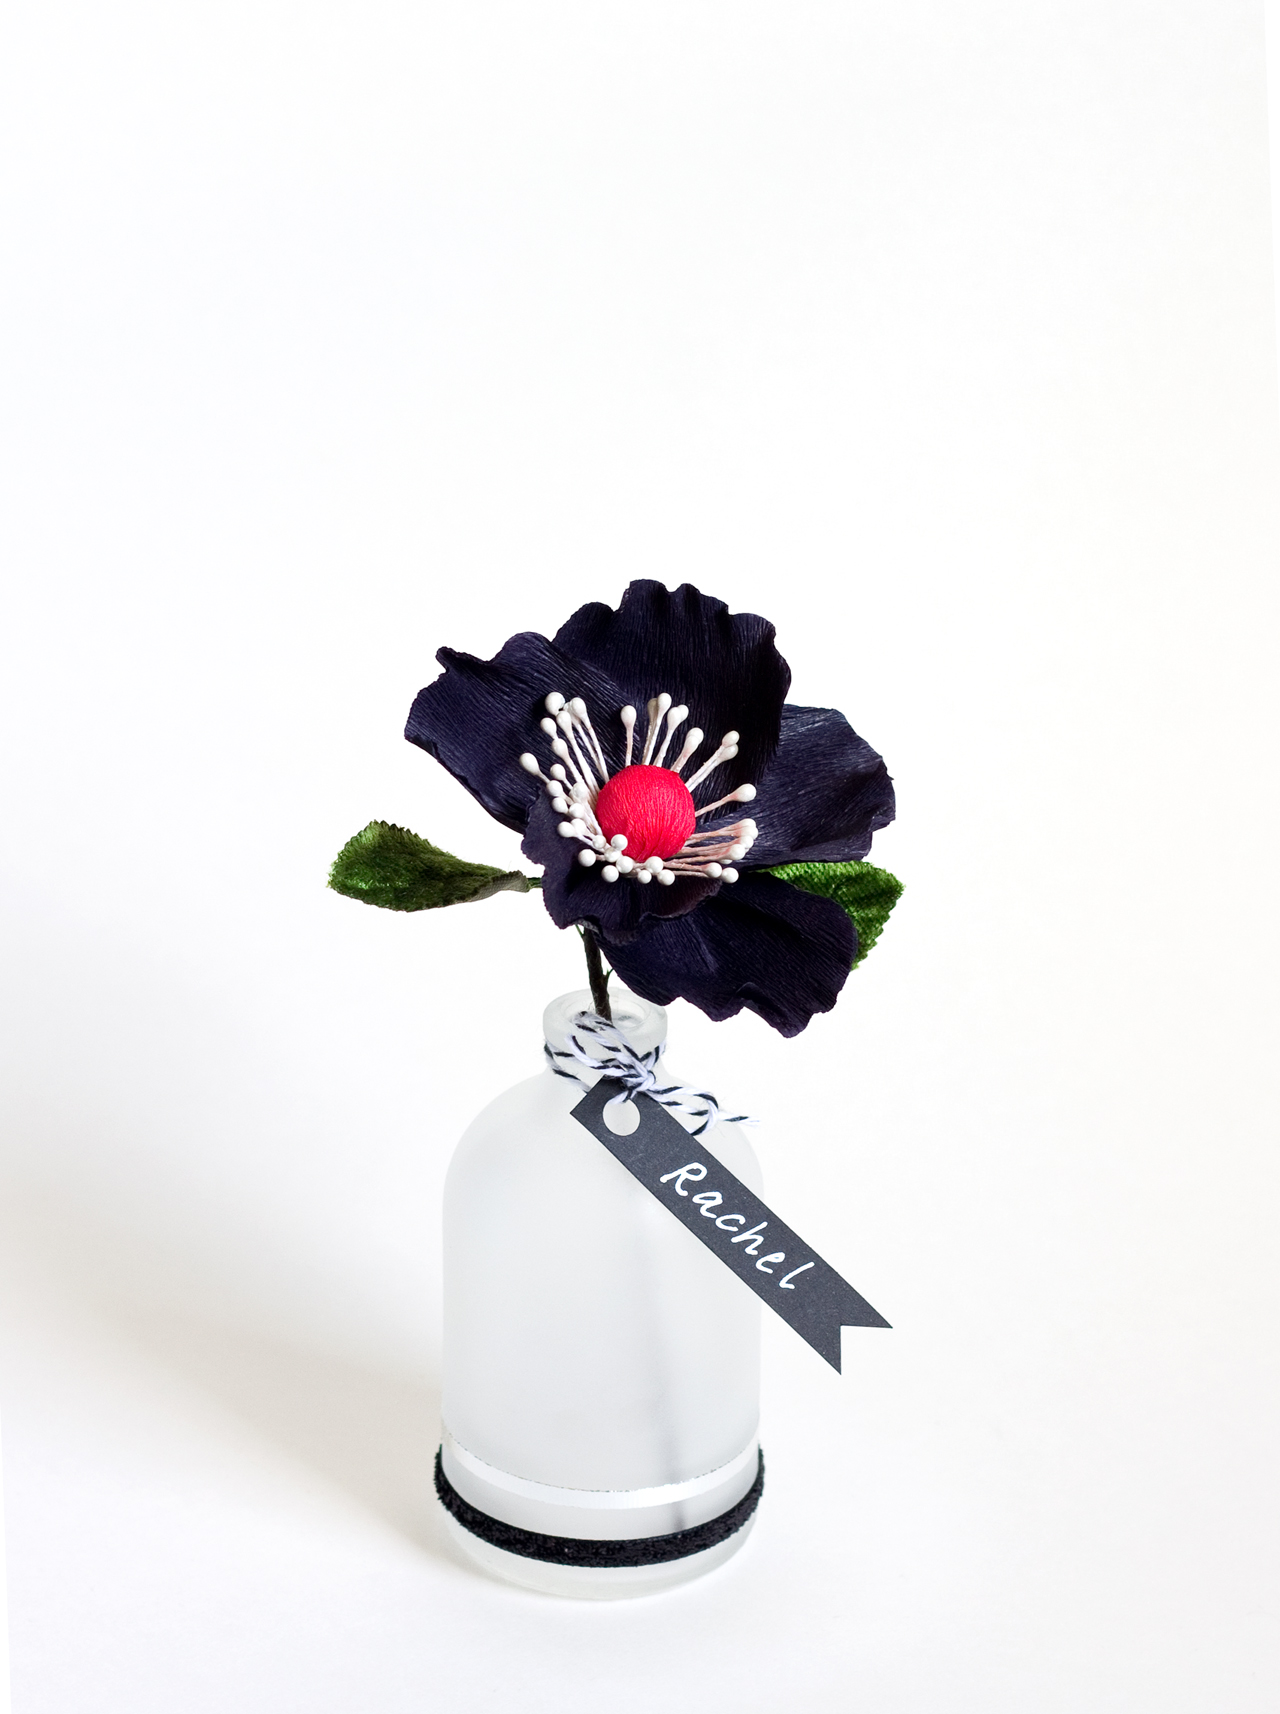
Halloween season, how I love thee! I spotted these adorable little frosted vases at Michael's a few weeks ago, and as per my usual style, bought them with no idea what I'd do with them. I thought they'd be perfect for Halloween, though. They look like little apothecary bottles, don't you think? It wasn't until after I started playing around with paper flowers again that I realized they'd make perfect little flower vases, but they'd need a little bit of embellishing. You can use lots of different materials for this project - ribbons, foils, faux flowers, real, or paper ones like I did.

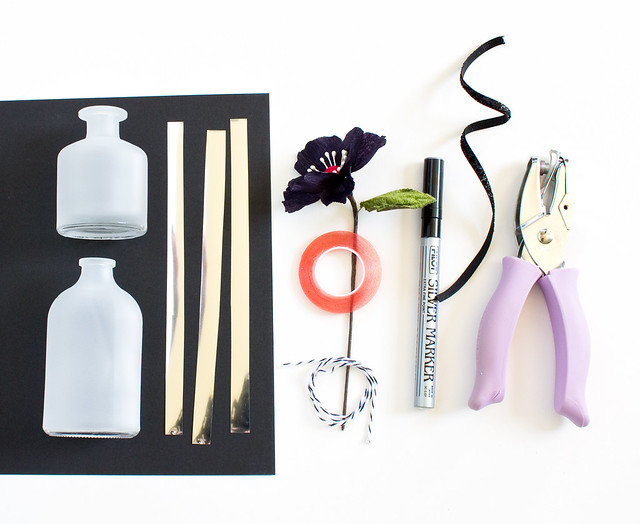
Here's what you'll need:
DIY Halloween Flower Vase | click through for the full tutorial!
  • Mini frosted vases. These came in packages of 2 at Michaels for something super cheap like $3
  • Double-sided scrapbooking tape. This stuff is super strong and comes in all sorts of widths. I used 1/8"
  • Transfer foil (This was the same brand I used but mine came in silver, gold, and copper colors)
  • Ribbon, baker's twine
  • Black paper
  • Silver or white pen
  • Hole punch
  • Flowers. Faux, real, paper, whatever you'd like. I made these black paper flowers myself. Craft stores carry Halloween themed silk flowers or you could use grocery store mums.

DIY Halloween Flower Vase | click through for the full tutorial! DIY Halloween Flower Vase | click through for the full tutorial!

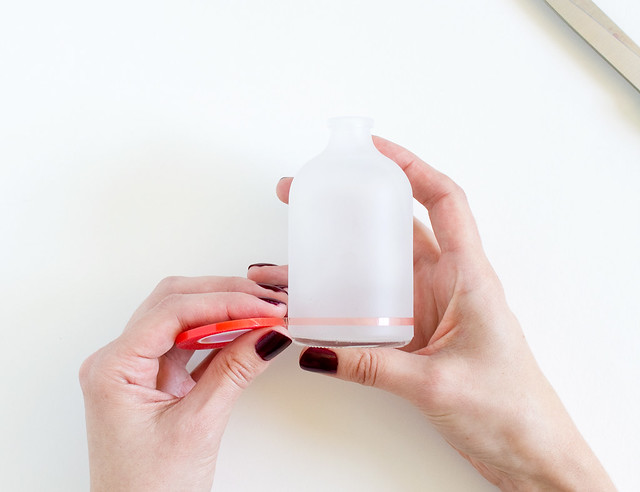
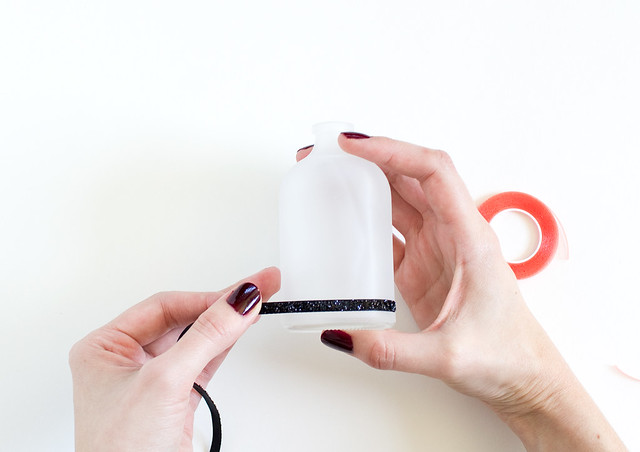
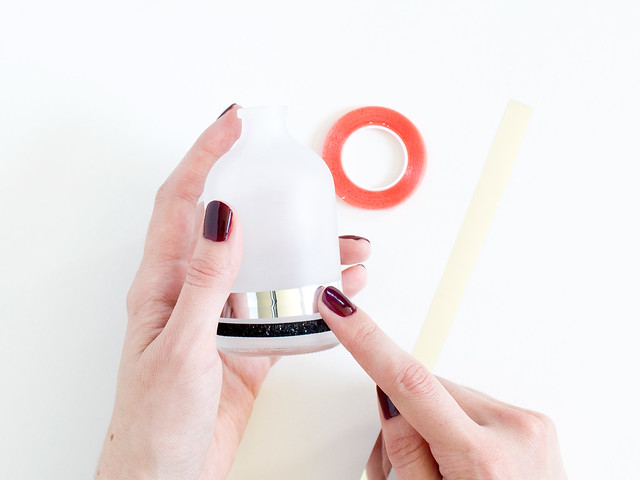
Unroll a bit of the tape and stick it onto the bottom of the vase. Continue all the way around till the ends meet, and trim. Pull up the orange plastic to expose the other sticky side, and stick on the ribbon, match the ends and trim. So easy!
DIY Halloween Flower Vase | click through for the full tutorial! DIY Halloween Flower Vase | click through for the full tutorial! DIY Halloween Flower Vase | click through for the full tutorial! DIY Halloween Flower Vase | click through for the full tutorial!

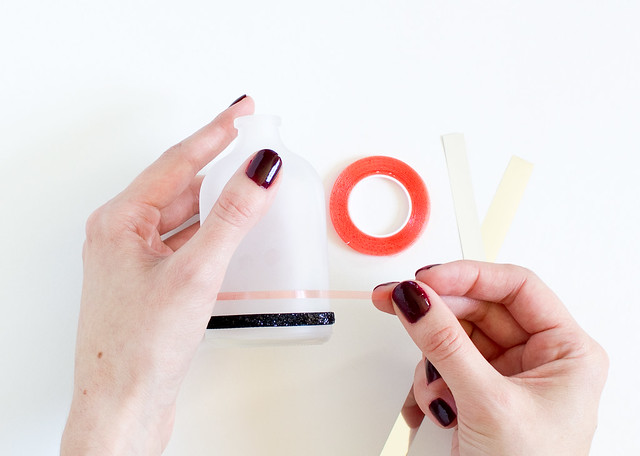
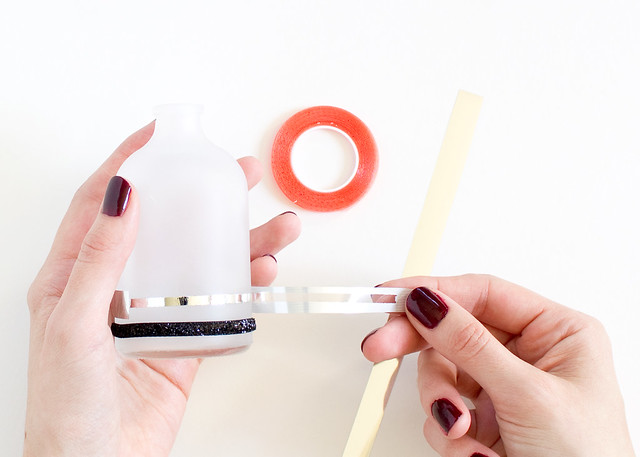
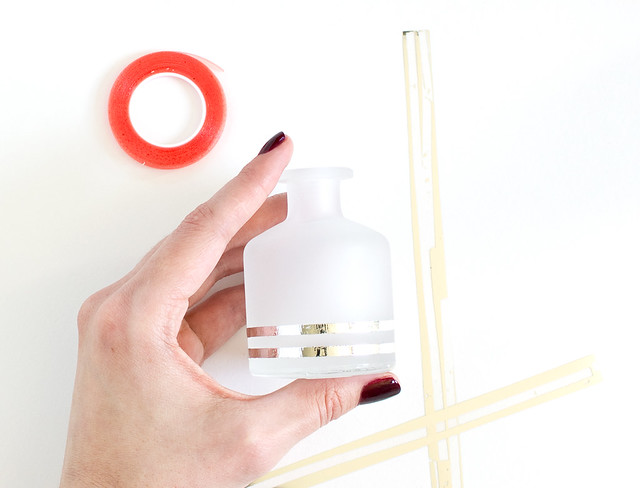
You could easily just make a bunch of ribbon stripes, but I thought a metallic touch would be nice, so I repeated the steps with this foil transfer in silver. Once you expose the sticky tape again, just apply the silver strips with the shiny side up. Rub the strip down with your finger and then pull up. You're left with a super-crisp silver stripe!

DIY Halloween Flower Vase | click through for the full tutorial!

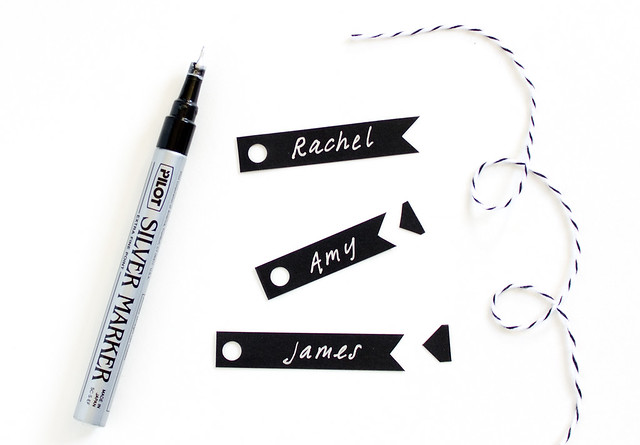
Cut a strip of black paper, notch one end and hole punch the other end. Write our your party guest's names and tie with ribbon or baker's twine. Add your Halloween flower and that's it!

DIY Halloween Flower Vase | click through for the full tutorial! DIY Halloween Flower Vase | click through for the full tutorial!

These would make adorable place cards at an October dinner or cute little party favors. They're so easy to make and customize. Plus the tape is fully removable so you can switch it up later if you decide. I like these so much I think I'll keep a few around all year. I hope you like them, too!

P.S. Check out my DIY Gallery page to see lots of diys from Halloween's past!

215

DIY Modern Staghorn Fern

Monday, June 22, 2015

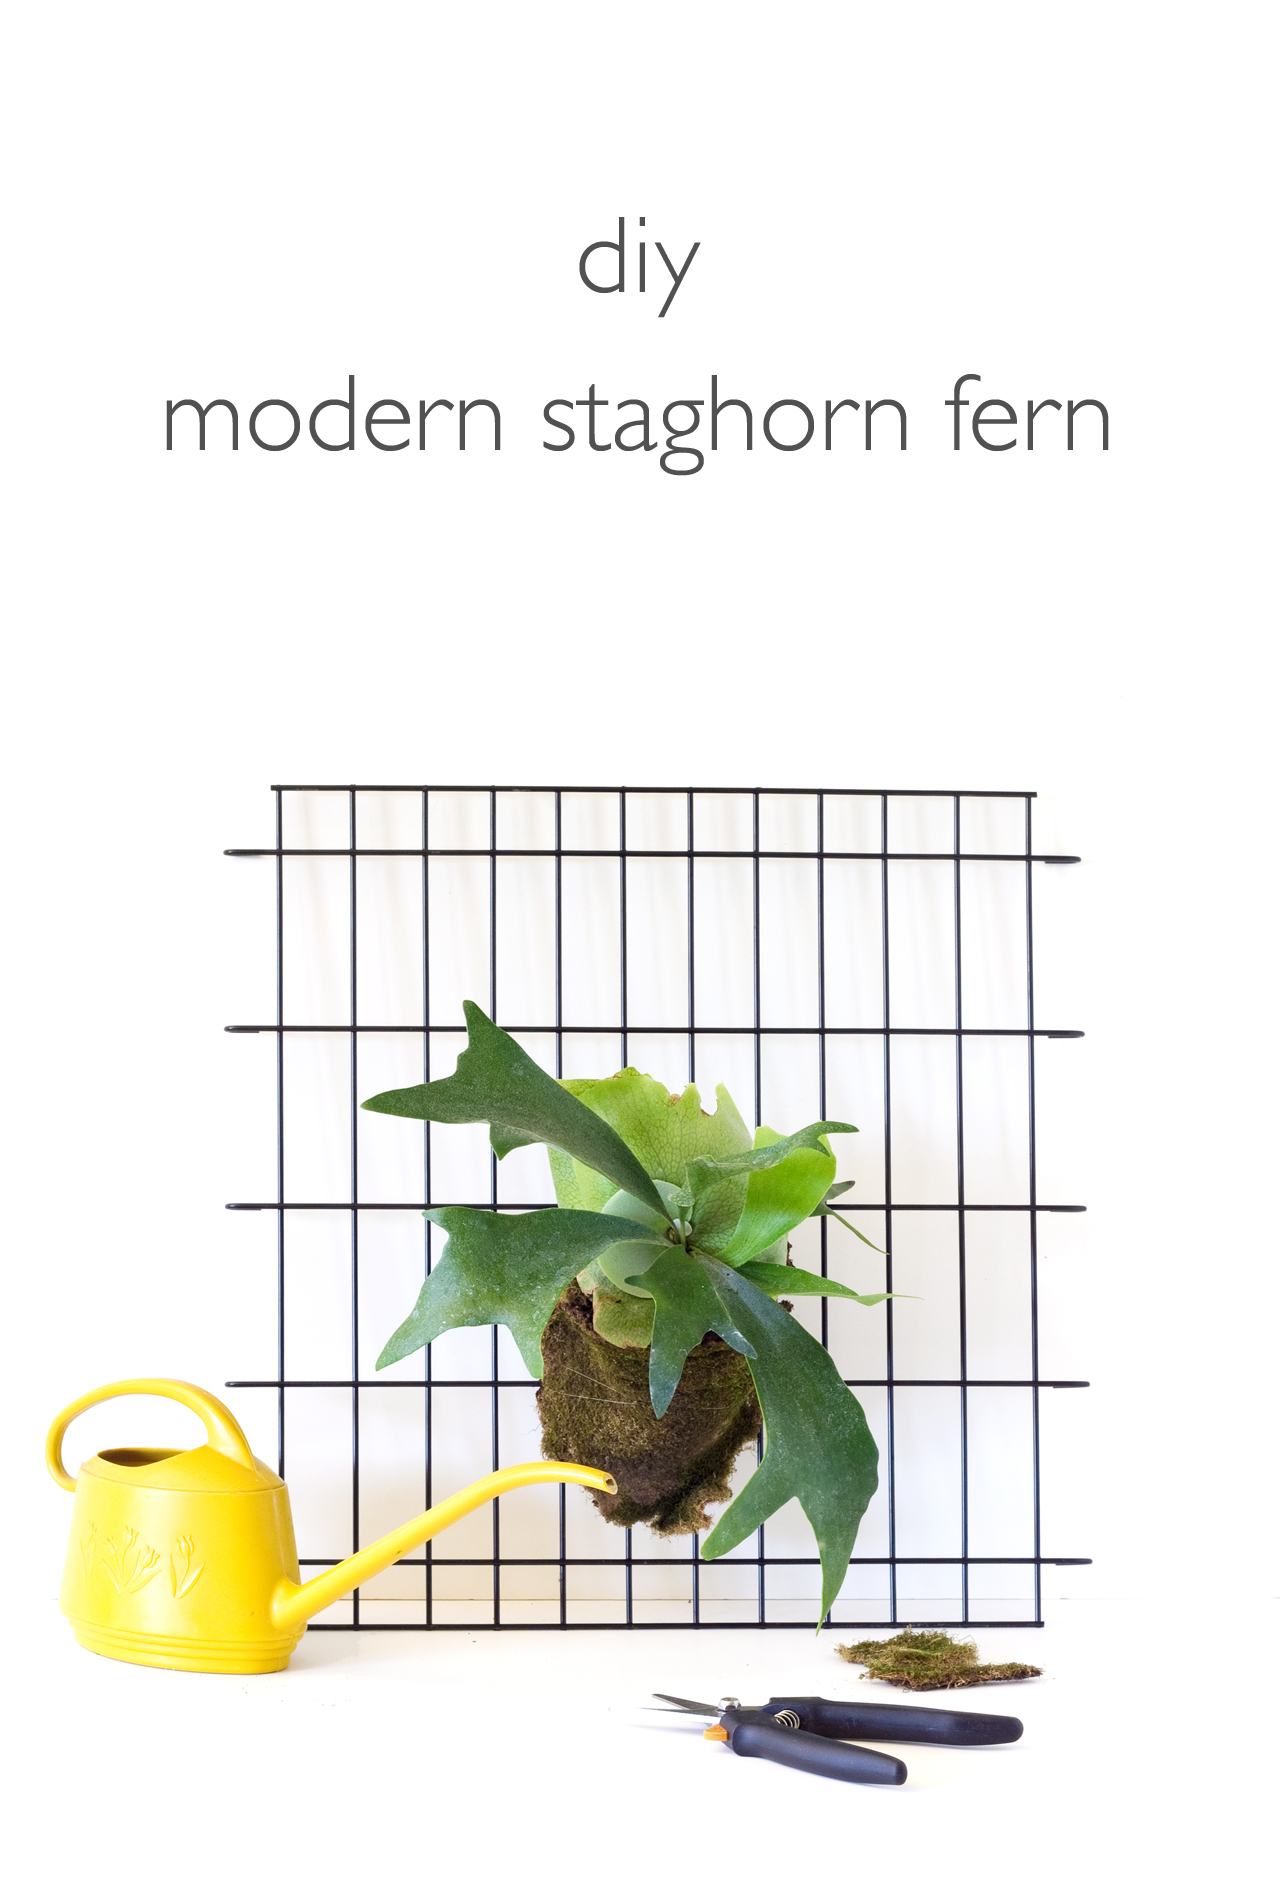
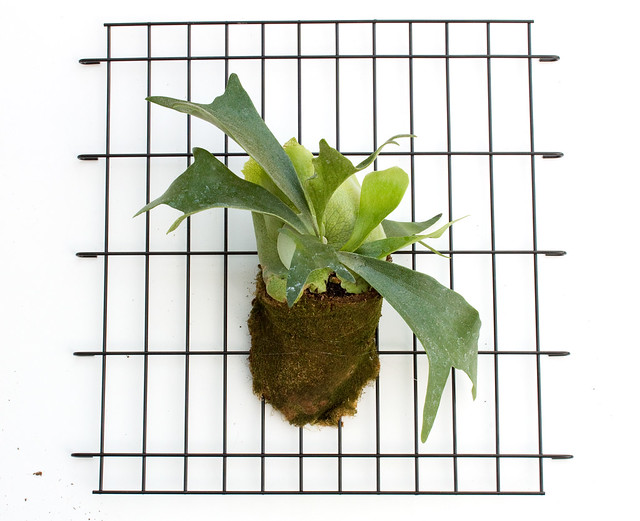
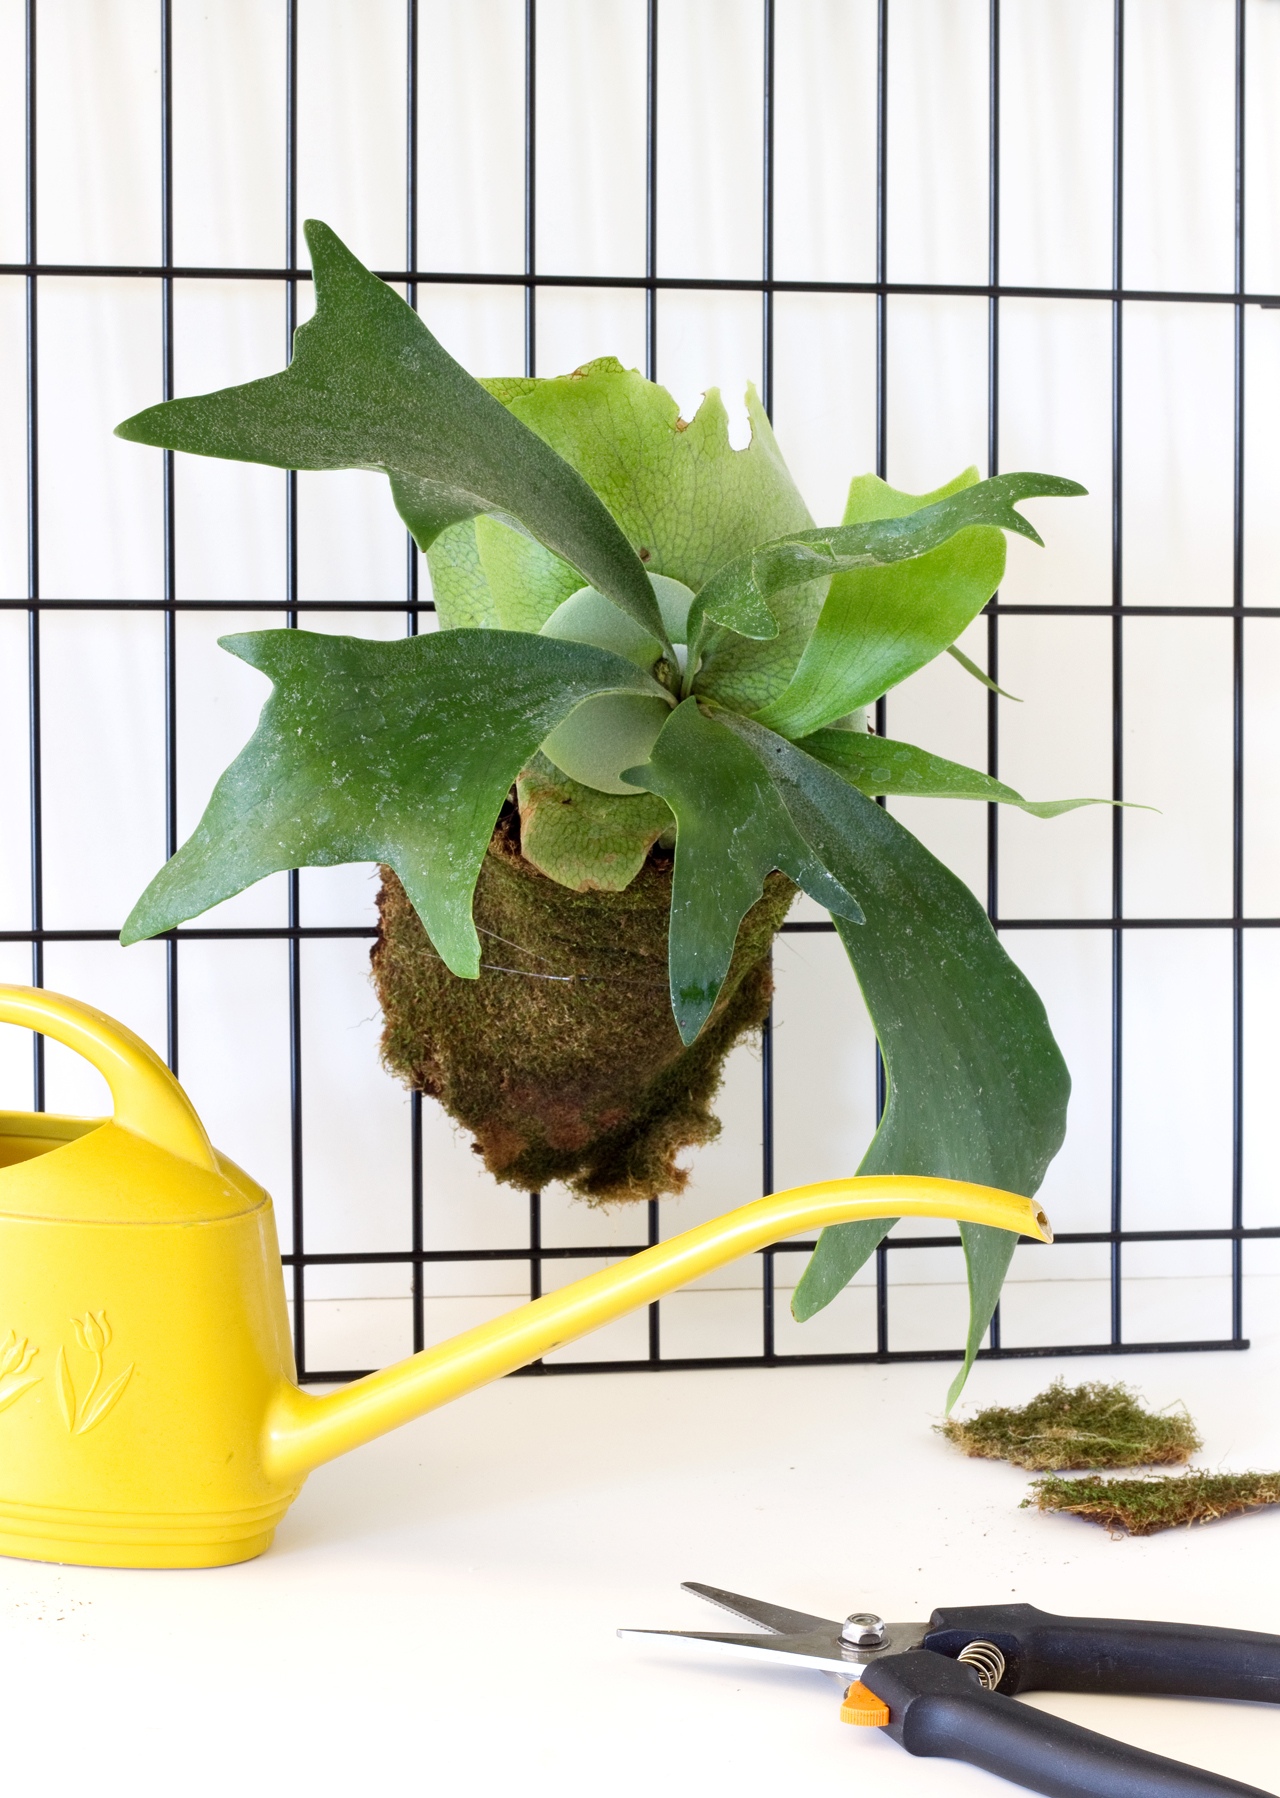
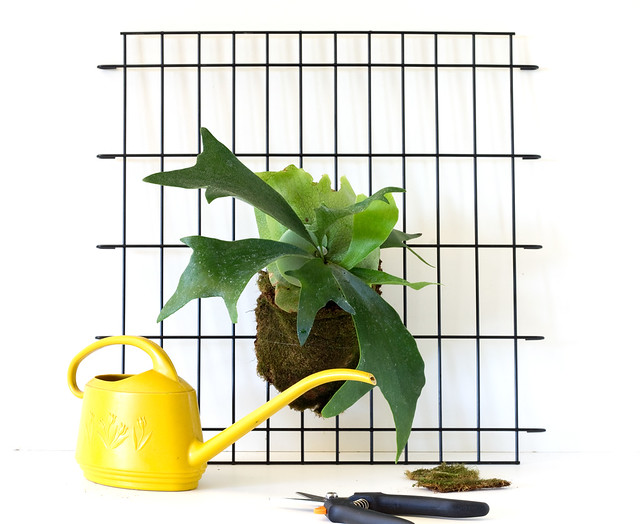
DIY Modern Staghorn Fern | click through for the tutorial and care tips! Hey, did I tell you guys I love plants? I've been on the hunt (ha!) for a staghorn fern for a few years, so I was thrilled when I came across some for sale at a orchid show I attended a couple weeks ago. Staghorn ferns are named for their resemblance to, well, the horns of a stag. They're epiphytes, which means they naturally attach themselves and grow on the trunks and branches of other trees and shrubs. They can also be attached to other vertical surfaces and hung on the wall. They're really cool plants! When I originally picked mine up I planned to mount it to a slab of weathered wood, but I changed my mind and decided instead to attach it to a piece of wire metal mesh. The clean lines of the metal combined with the leafy, organic form of the fern really gives it a modern look. It would look great hanging inside or outside!

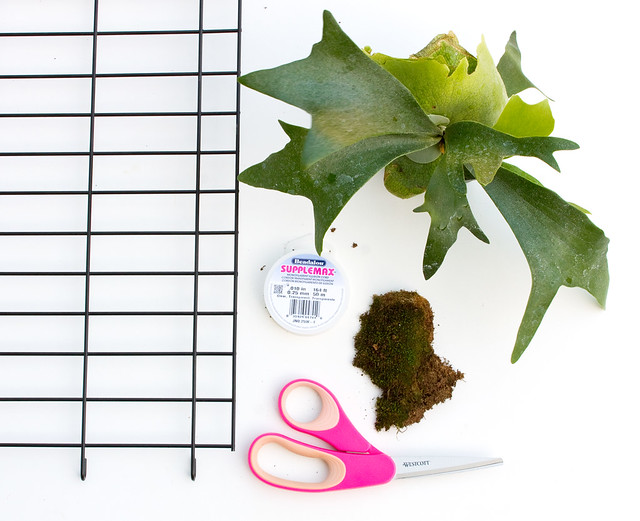
Here's what you'll need to make a modern hanging staghorn fern of your own:
DIY Modern Staghorn Fern | click through for the tutorial and care tips!
  • Staghorn Fern. I bought mine at a local orchid show, but you can find them online and in specialty nurseries.
  • Sheet Moss
  • Monofilament or fishing line (I used clear beading line from my mobile project)
  • Hooks and/or spacers for hanging on the wall. My wire panel has loops on the sides that would prevent it from hanging flush against the wall - that is good! If your panel is flat it would be best to hang it 1/2" or so away from the wall so the moisture doesn't affect it. Try using pegboard spacers for the installation.
  • Metal grid. Repurposed (I always see these at the thrift shop) or you can buy and paint a piece of wire mesh from the hardware store. Mine was a divider for my puppy's crate!  
  • Scissors

DIY Modern Staghorn Fern | click through for the tutorial and care tips!

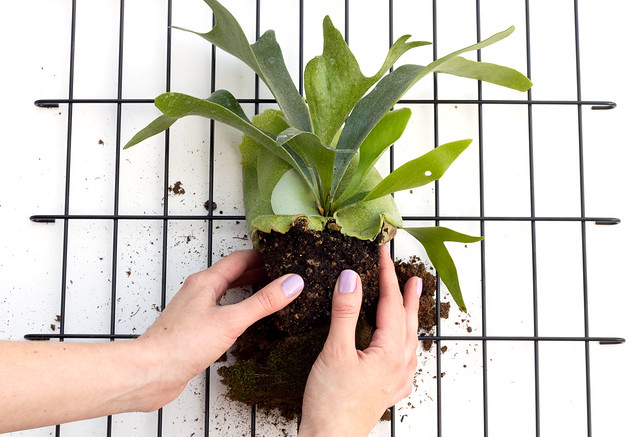
Cut a few pieces of moss and dampen in a bowl of water. Lay the metal panel on your work surface and create a little "nest" shape where you want the fern to go. Make it thicker on the side that will become the bottom when it's standing up. Remove the pot from the fern, remove any loose soil, and loosen the root ball. Don't be afraid to use a little muscle loosening the roots. Set the fern in the moss nest.

DIY Modern Staghorn Fern | click through for the tutorial and care tips!

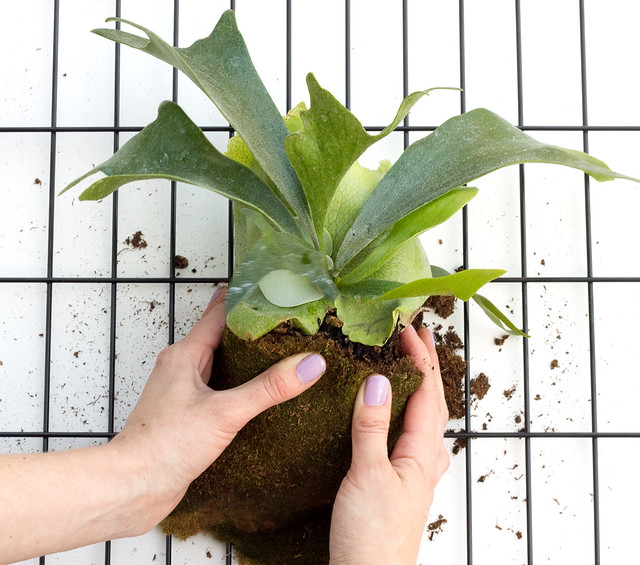
Cut another piece of moss to go over all of the exposed soil. I was able to do this with one piece, but use more if you need to fill in any open areas. Bundle the moss around the roots, covering up any exposed soil.

DIY Modern Staghorn Fern | click through for the tutorial and care tips!

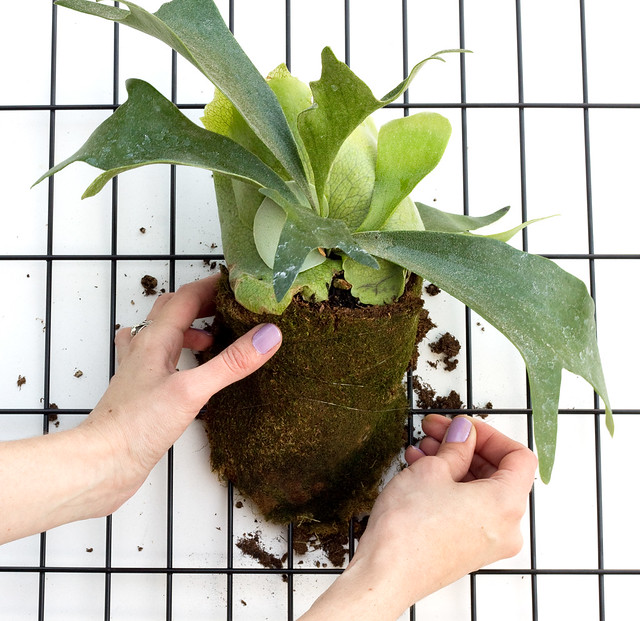
Cut a length of the monofilament, about 3' long. Tie the end to the wire mesh next to the edge of the plant. Pull the line directly across the plant, making sure to go under all of the leaves (so it only makes contact with the moss) and loop on the other side. Repeat, looping back and forth until the entire base of the fern is securely attached to the wire grid. Tie off the end. Tuck additional bits of moss around any visible monofilment if you'd like, to help conceal it.

DIY Modern Staghorn Fern | click through for the tutorial and care tips!

Screw in a two hooks on the wall and hang, or just lean it against a wall. If placing it outside, it will do best in a bright area with no direct sunlight. Morning sun is ok, but it will burn in direct afternoon sun. Bring inside during the colder months to avoid frost. It also likes humidity so place it near a water source like a pond, or hang it in the bathroom when you shower. Give it a soak once a week or when the soil and moss feel dry.

DIY Modern Staghorn Fern | click through for the tutorial and care tips! DIY Modern Staghorn Fern | click through for the tutorial and care tips!

I can't wait for this guy to grow! Do you have any experience with staghorn ferns? Aren't they cool?

16

DIY Raffia Embroidered Tote

Monday, April 27, 2015


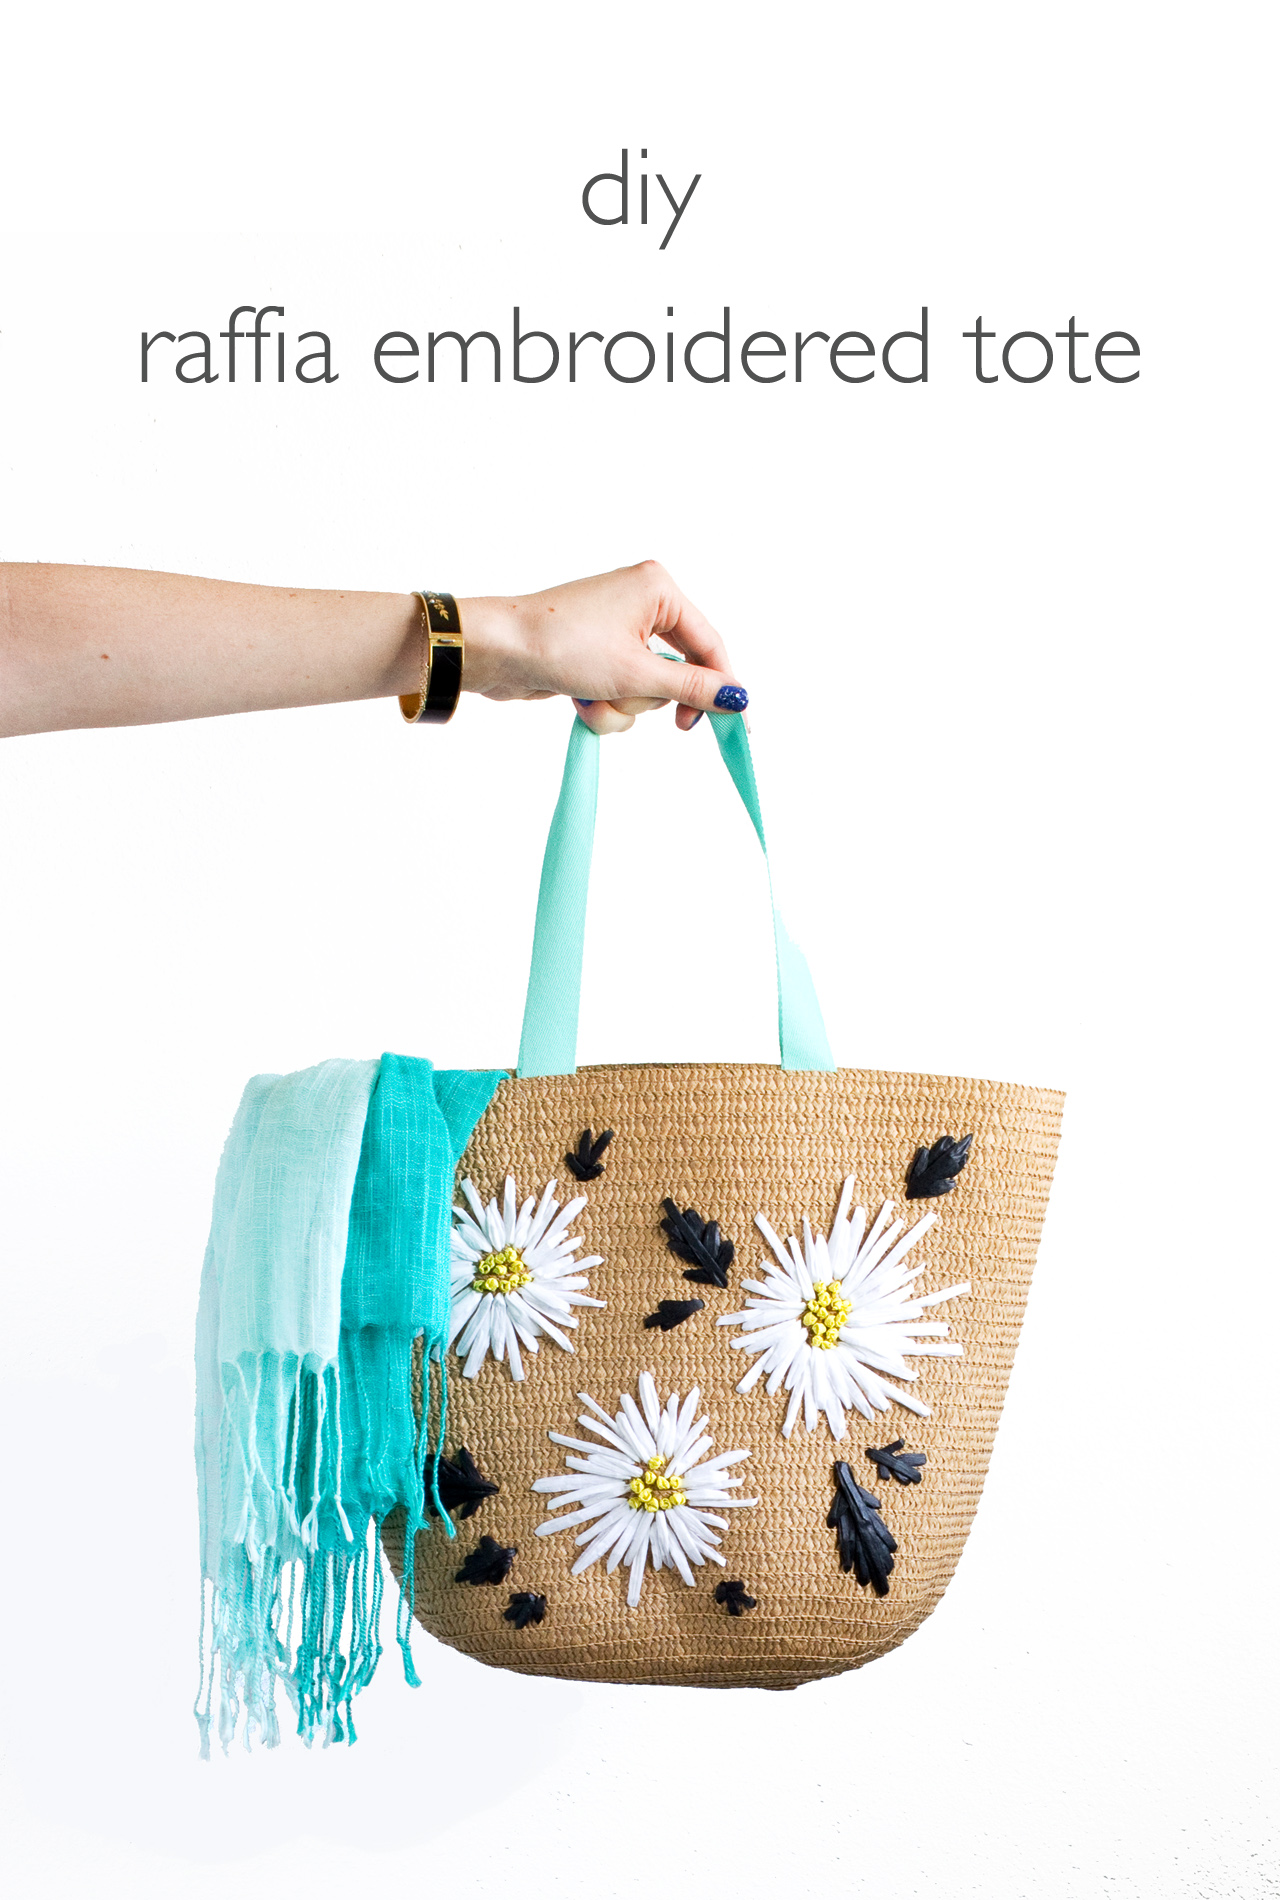
DIY Raffia Embroidered Tote | click through for the full tutorial!

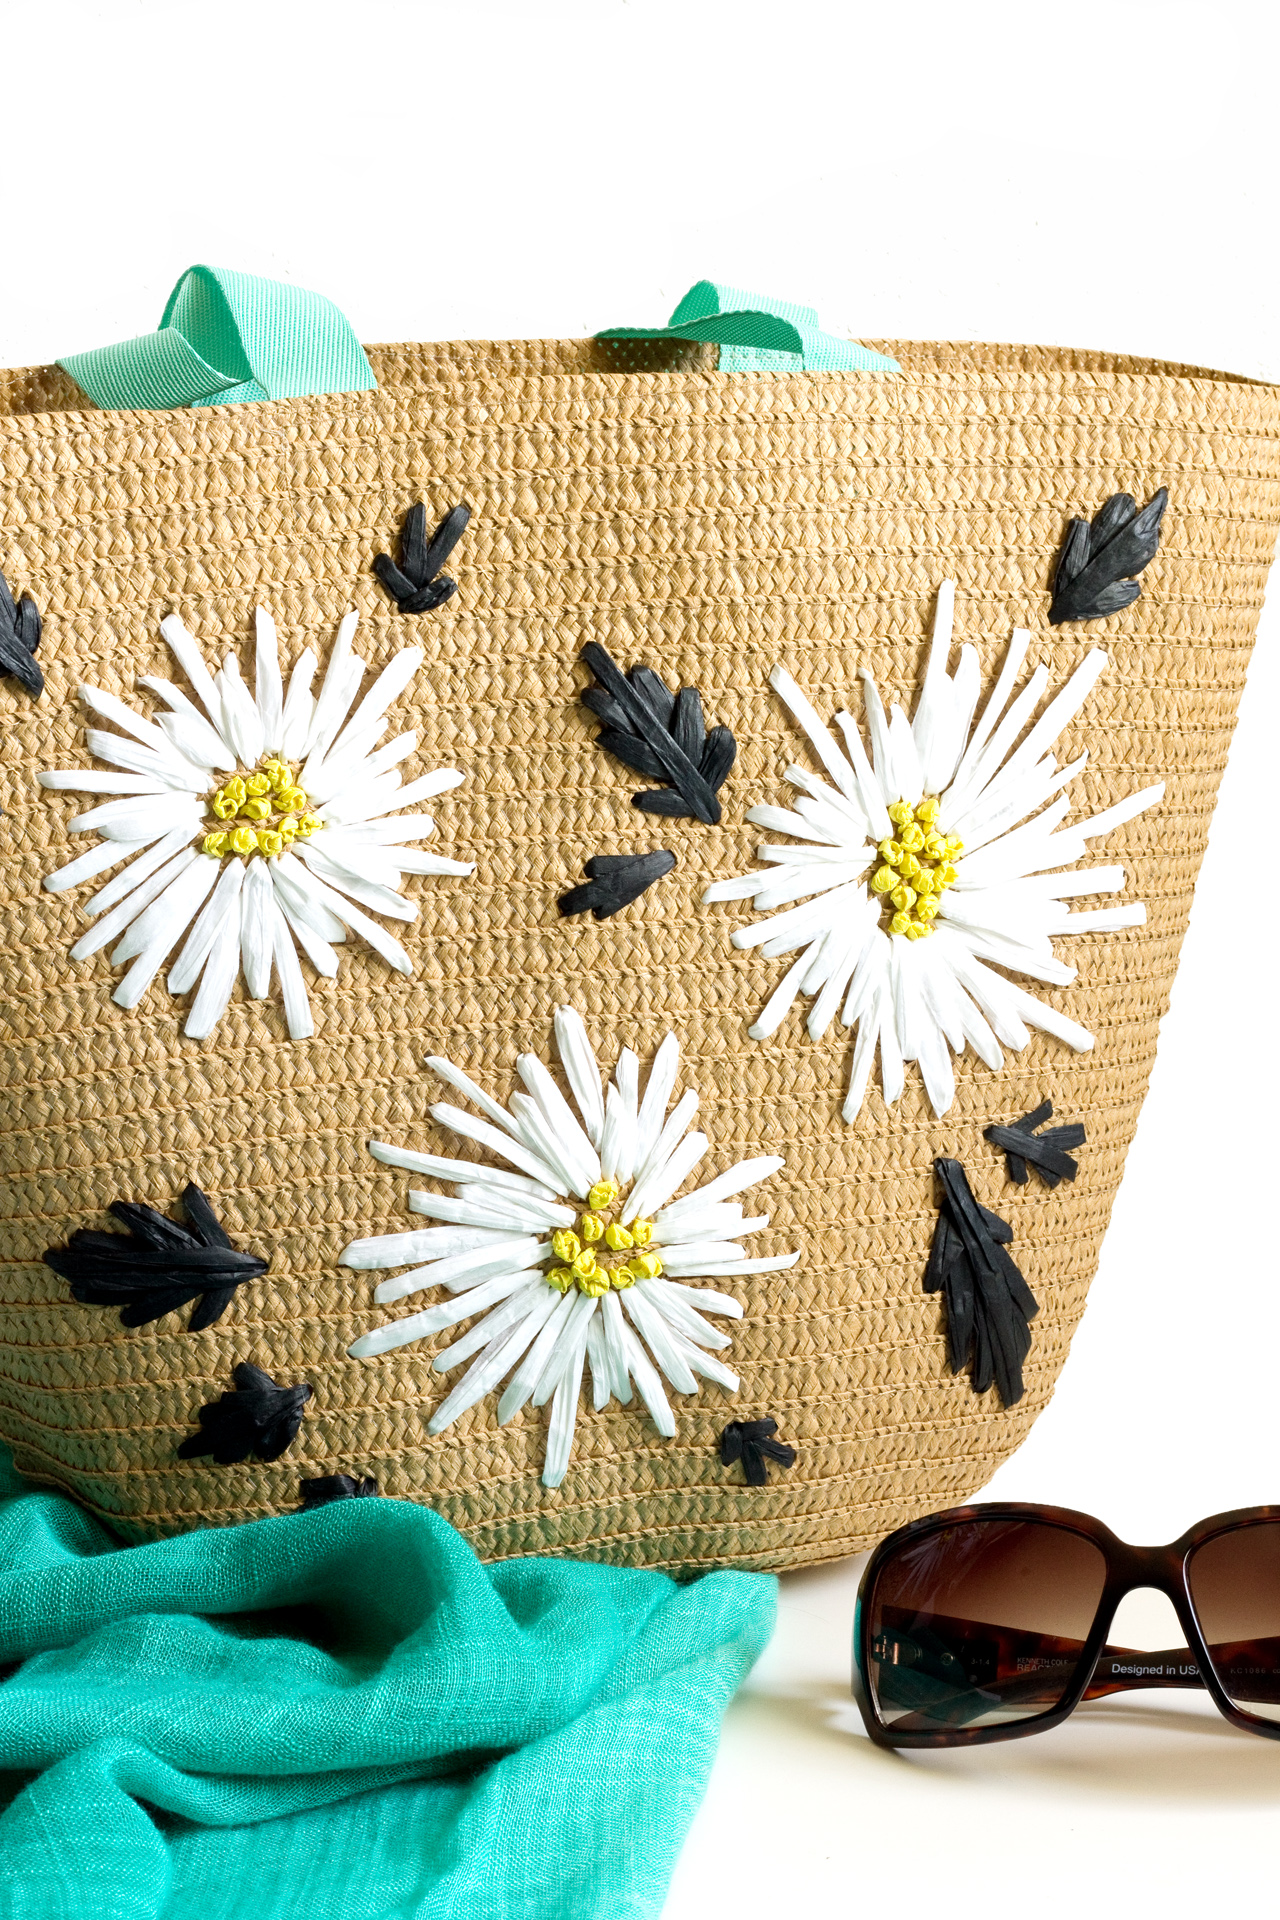
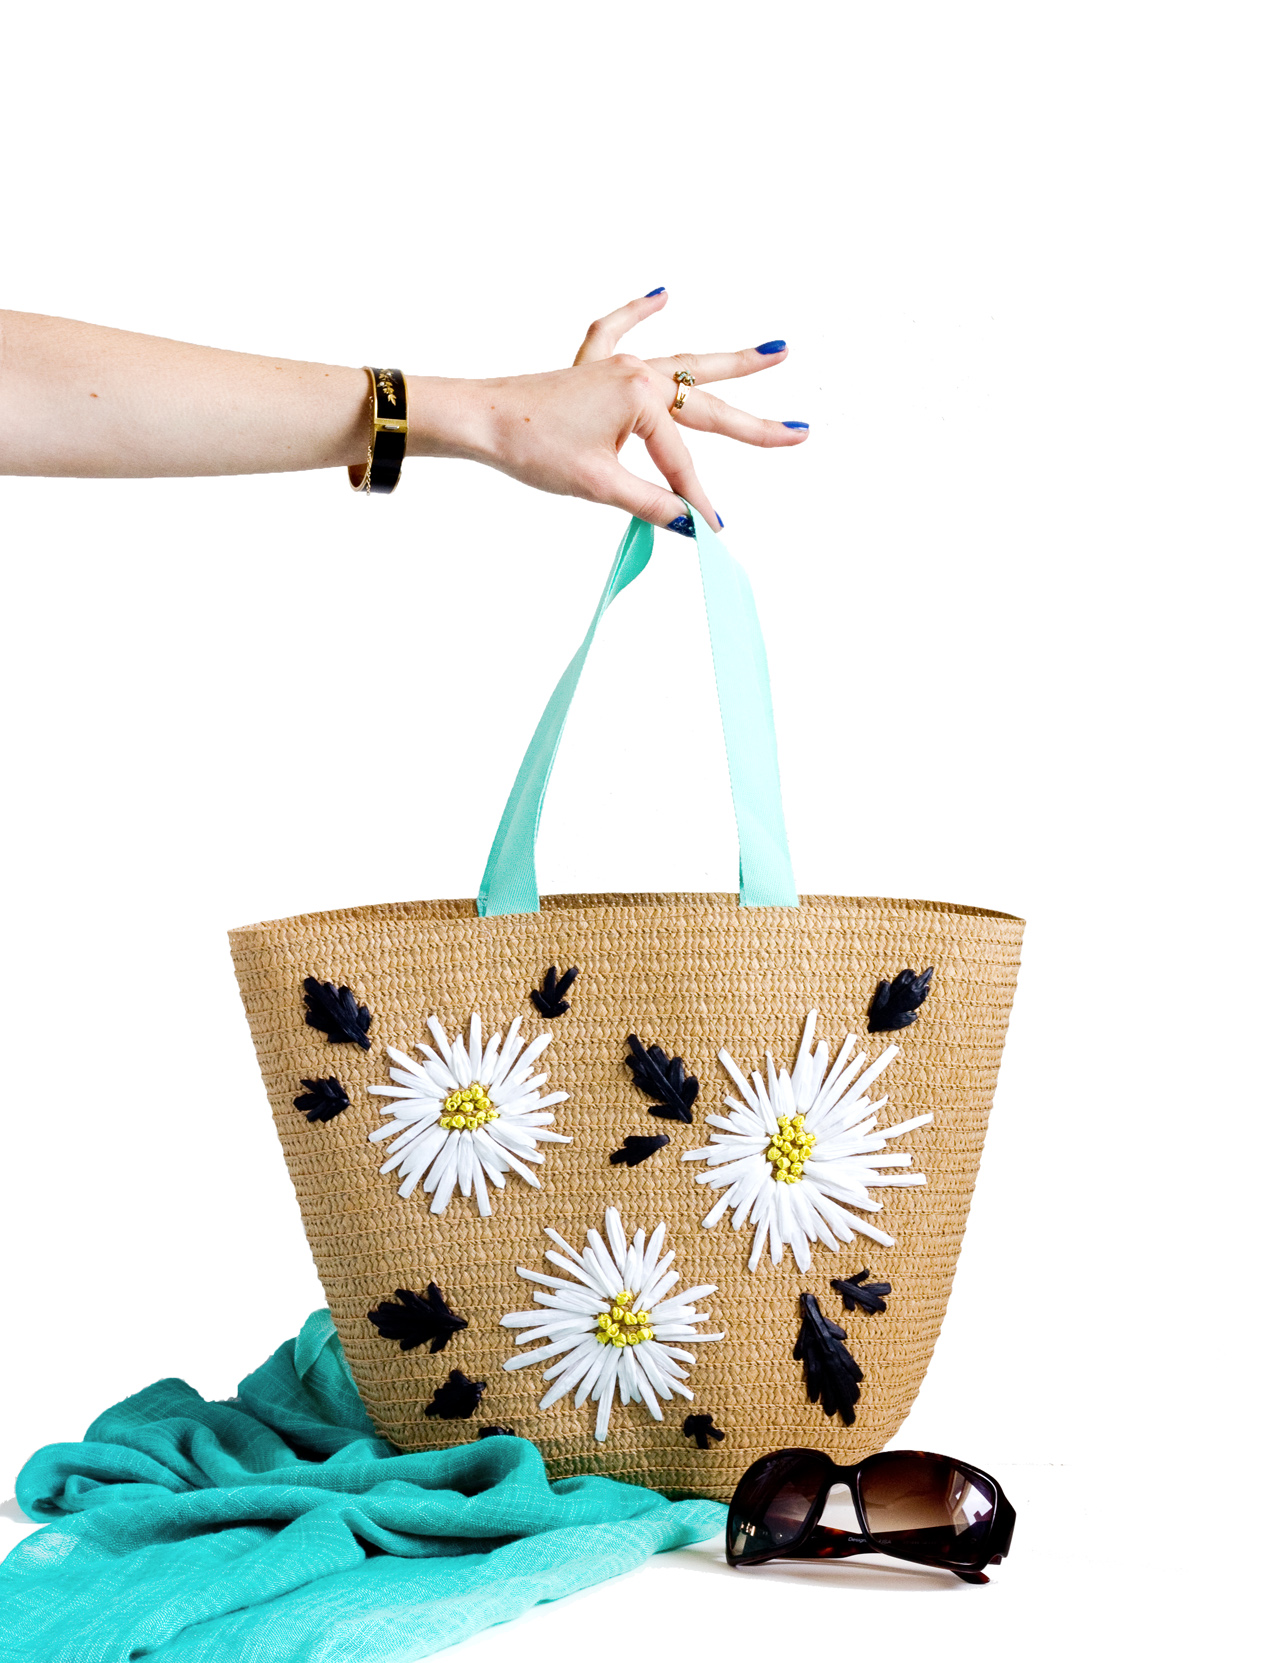
Whenever I go thrift shopping I always check the purse section to see if there are any of those awesomely retro raffia embroidered bags. You know the ones, they're usually made with a natural woven fiber, big enough to carry to the beach or farmer's market, and the embroidered designs were either simple or totally over the top. I spotted these plain straw tote bags in the Target Dollar Spot (only $3 each!) and knew immediately that I wanted to recreate the retro floral vibe that you see on those vintage straw bags. Good news: it's easy and you don't have be an embroidery whiz to recreate the look!

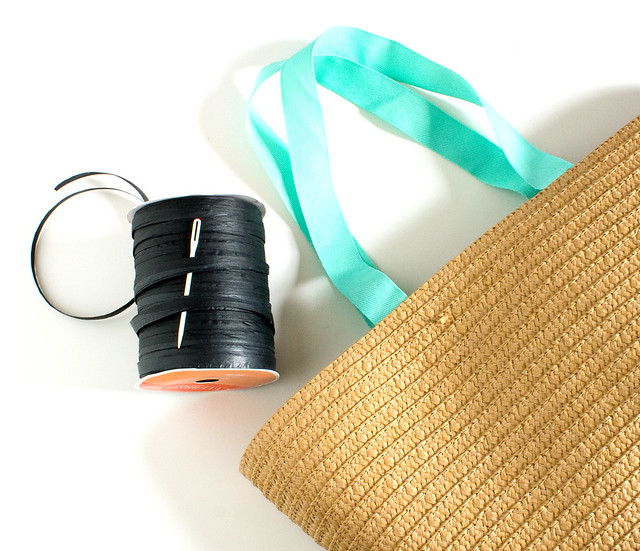
Here's what you'll need to make your own raffia embroidered tote:
DIY Raffia Embroidered Tote | click through for the full tutorial!
  • Plain straw tote bag. I got mine at Target, but Amazon also has a few similar styles. This one is adorable! Note: if the bag is lined you'll have to open it up to get to the inside of the bag.
  • Raffia Ribbon. I kept it simple and used black, yellow, and white
  • Yarn needle
  • Other stuff: scissors, round items to trace, pencil
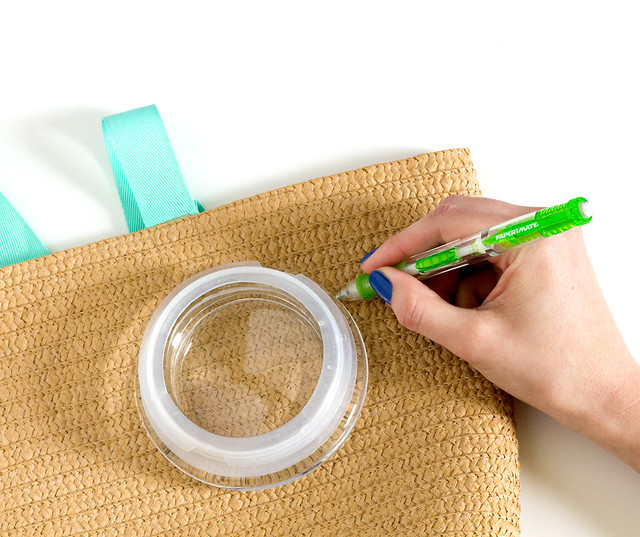
Start by deciding on an arrangement for the flowers. Odd numbers look the best! Choose the placement of the first flower, trace something round like a bowl or plate with a pencil. Trace something smaller like a roll of tape for the center. (It's hard to see the pencil marks, but they're there! The pencil marks also blend in well and can be erased a bit when you're done.)
DIY Raffia Embroidered Tote | click through for the full tutorial!
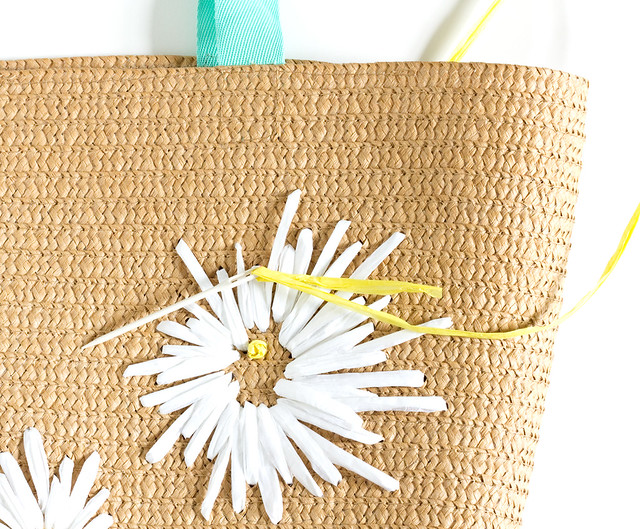
Cut a length of the raffia and tie a knot at one end. Thread the needle and start by stitching simple, large stitches that go from the center circle to the outer circle, with space in between each.
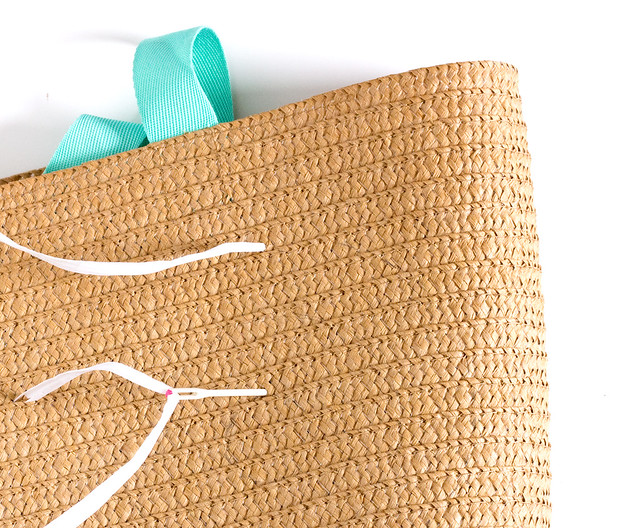
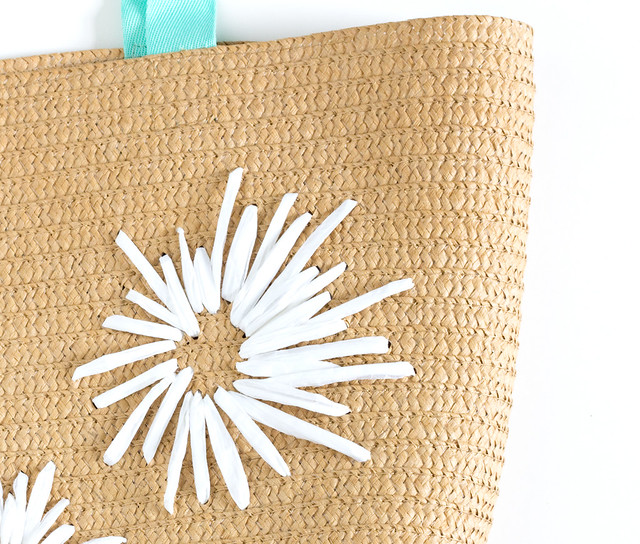
DIY Raffia Embroidered Tote | click through for the full tutorial! DIY Raffia Embroidered Tote | click through for the full tutorial! Fill in between each stitch with slightly shorter stitches, and repeat again with shorter stitches, filling in all of the gaps. It doesn't have to be perfect! I found that a more relaxed arrangement of stitches actually looked more natural than perfectly exact ones.
DIY Raffia Embroidered Tote | click through for the full tutorial!

Tips
  • Don't pull the raffia too tight. The goal is for the stitches and the bag to lie flat.
  • Untwist the raffia as you go.
  • Finish each length of raffia with a knot inside the bag, as close as possible to the bag.
  • Make sure to pull the raffia all the way through when you're stitching.
Add some french knots to the center of each flower. Cut a length of yellow raffia and unfold it. Cut in in half along the length and refold.
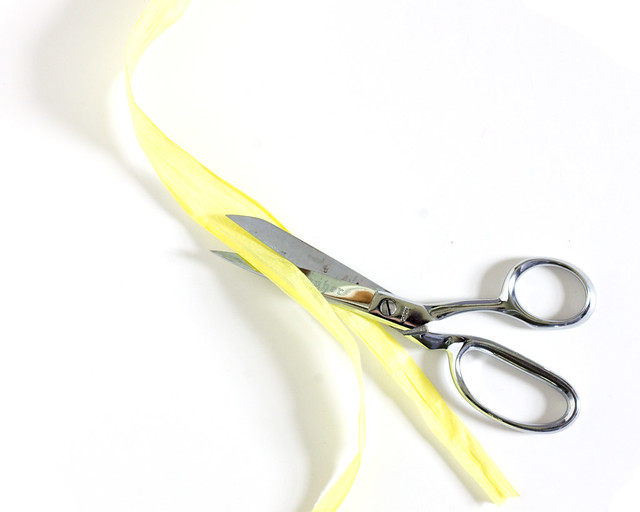
DIY Raffia Embroidered Tote | click through for the full tutorial!
Tie a knot on one end and thread onto the needle. Come up in the center of a flower, twist the raffia twice around the needle, and push the needle down into the bag, just next to where the needle came up. Pull tight.
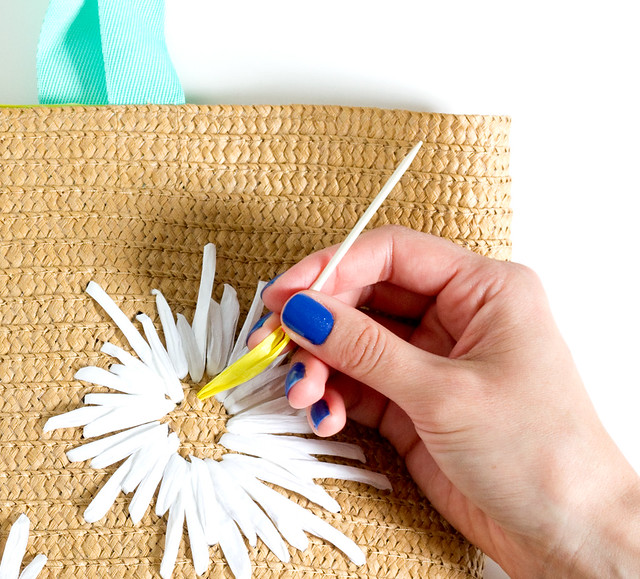
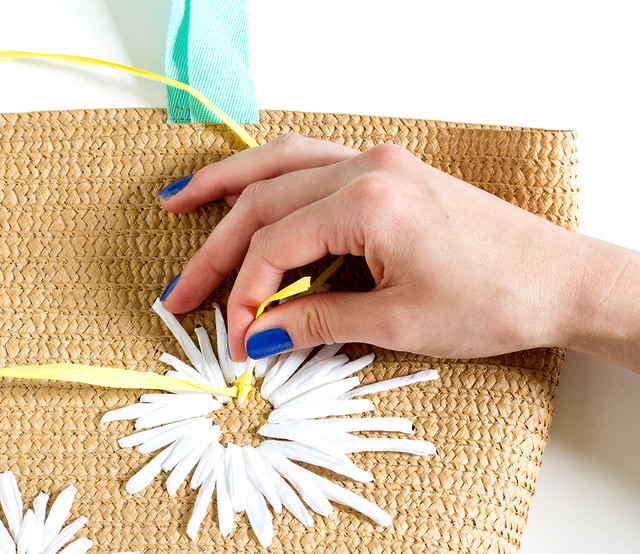
DIY Raffia Embroidered Tote | click through for the full tutorial! DIY Raffia Embroidered Tote | click through for the full tutorial! DIY Raffia Embroidered Tote | click through for the full tutorial! If you need a little extra help this french knot tutorial has a great explanation. Fill in the center with a bunch of french knots!
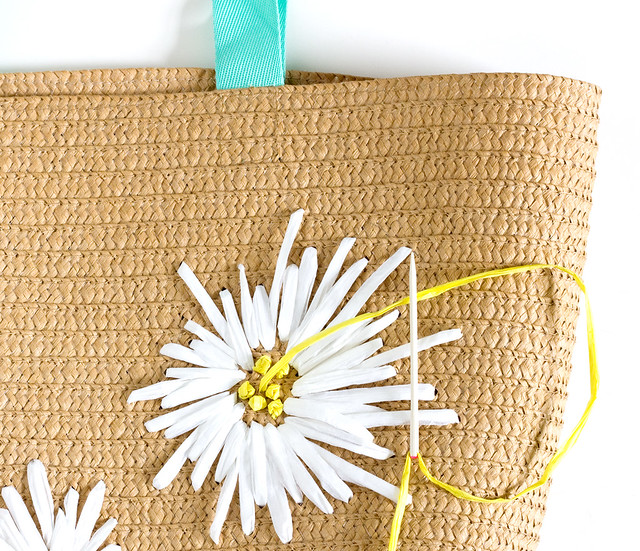
DIY Raffia Embroidered Tote | click through for the full tutorial!
Stitch some leaves around the bag in varying sizes. I stitched simple V-shapes and then added a long stitch through the center.
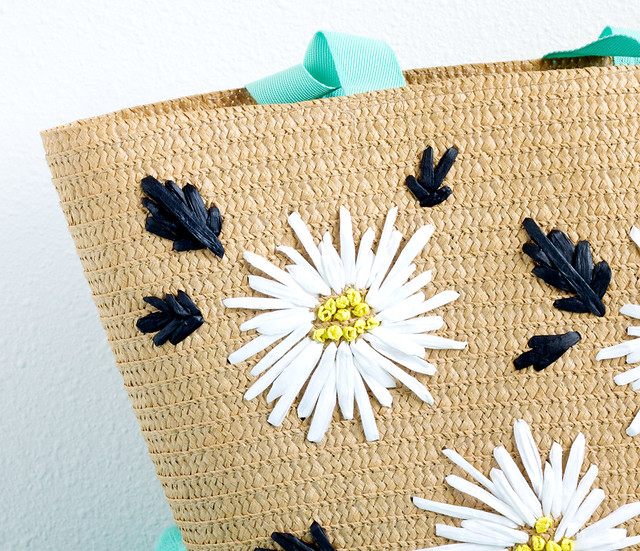
DIY Raffia Embroidered Tote | click through for the full tutorial!
That's it! Can you believe how easy that was? I'm so excited to take my new, retro bag out and about. DIY Raffia Embroidered Tote | click through for the full tutorial! DIY Raffia Embroidered Tote | click through for the full tutorial! Keep an eye out for those simple straw bags that are just asking for a vintage-inspired makeover so you can try this technique out yourself!
30

DIY Leather Business Card Wallet

Tuesday, March 17, 2015

DIY Leather Business Card Wallet
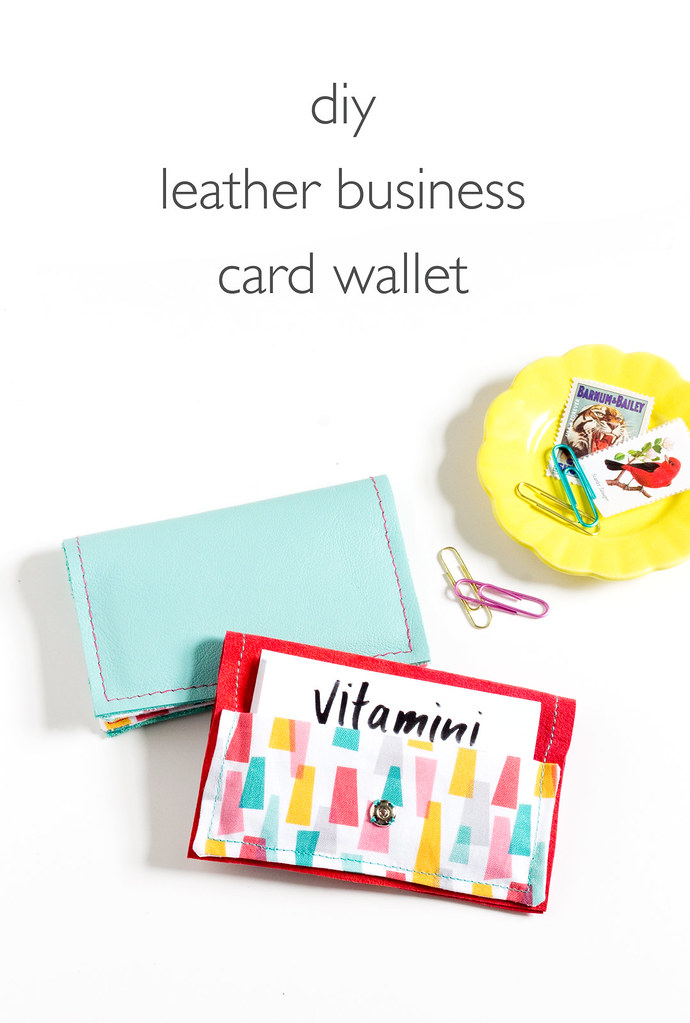
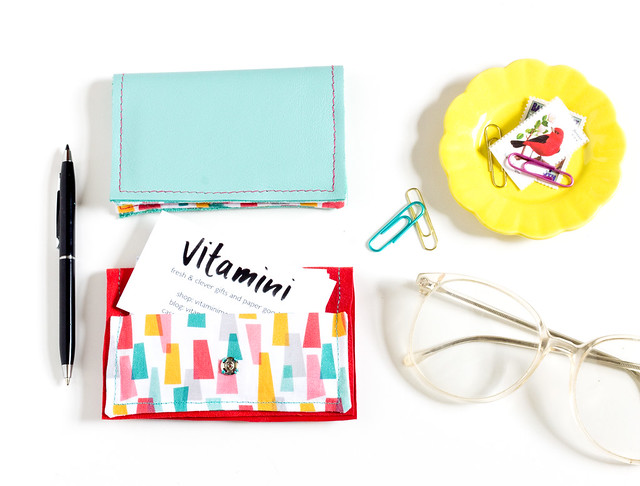
I'm getting ready for Craftcation (can't wait!) and decided to make a new business card holder so I can keep my shiny new business cards at the ready. I made these leather business card wallets with just a small piece of leather, two small pieces of fabric, and a snap - supplies you probably already have on hand! You could easily switch out the leather for vinyl and use up those small scraps of fabric you have lying around for the pockets. They're so easy to make, you'll probably want to make a few!
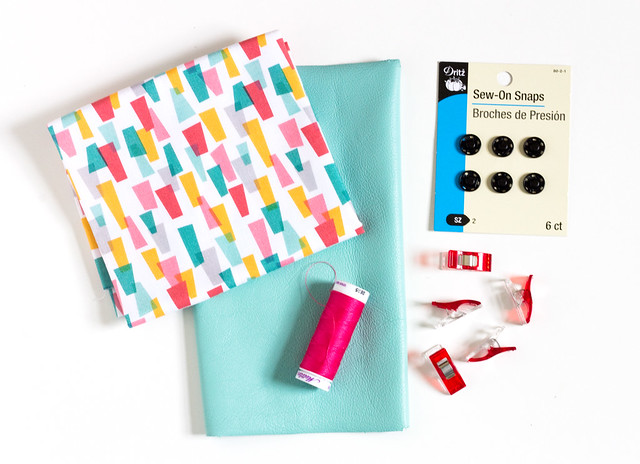
Here's what you'll need:
DIY Leather Business Card Wallet
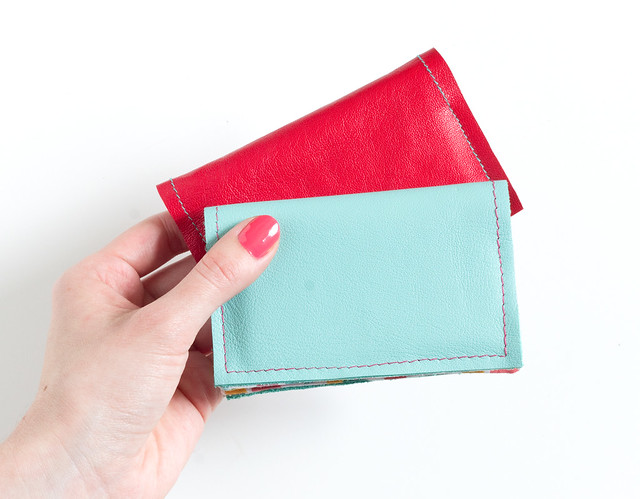
  • 4.25" x 5.5" piece of leather
  • 2, 4" x 4.75" pieces of fabric. I used my jazzy print
  • Sew-on snaps. I used the size 2 snaps (shown) on the thicker leather, and size 1 snaps for the thinner red leather.
  • Needle and thread
  • Wonder Clips - They're perfect for holding layers together without making pinholes. I rarely use pins anymore!
  • Sewing machine with matching or contrasting thread and a needle intended for leather.
DIY Leather Business Card Wallet
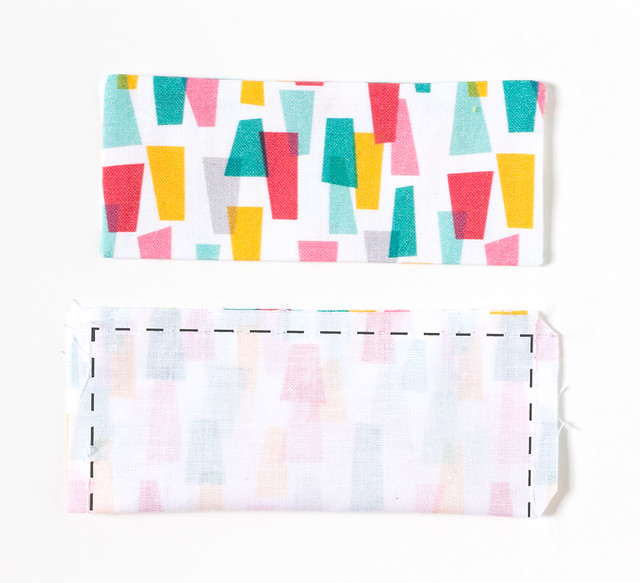
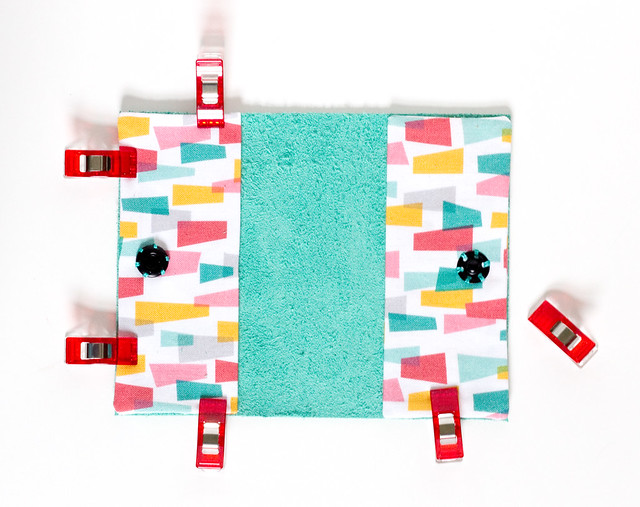
Fold the two pieces of fabric in half with the right sides touching, so they're 2" x 4.75" each. Sew around the three edges with a 1/4" seam allowance, leaving a small opening on one side. Turn right side out. Use a chopstick to help turn crisp corners. Press flat.
DIY Leather Business Card Wallet
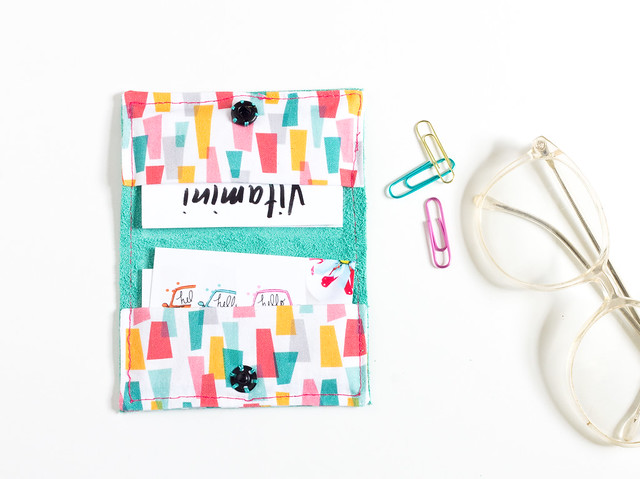
Mark a point in the center of each pocket, about 3/4" from the bottom edge. Hand sew the snaps on. Make sure to sew through both layers of fabric. Clip the pockets to each side of the leather, with the folded edge to the inside. Stitch around the perimeter with a 1/8" seam allowance, overlapping a few stitches at the end.

Trim any loose threads. Fill with business cards and enjoy! 
DIY Leather Business Card Wallet DIY Leather Business Card Wallet DIY Leather Business Card Wallet
I really love how they turned out. The pop of color and pattern on the inside is fun, too. I plan to keep one in each of my bags so I'm guaranteed to always have some cards on hand. One of these would make a nice handmade gift for a friend with a new job, don't you think? :)

49

DIY Mod Light-Up Trees

Monday, December 22, 2014

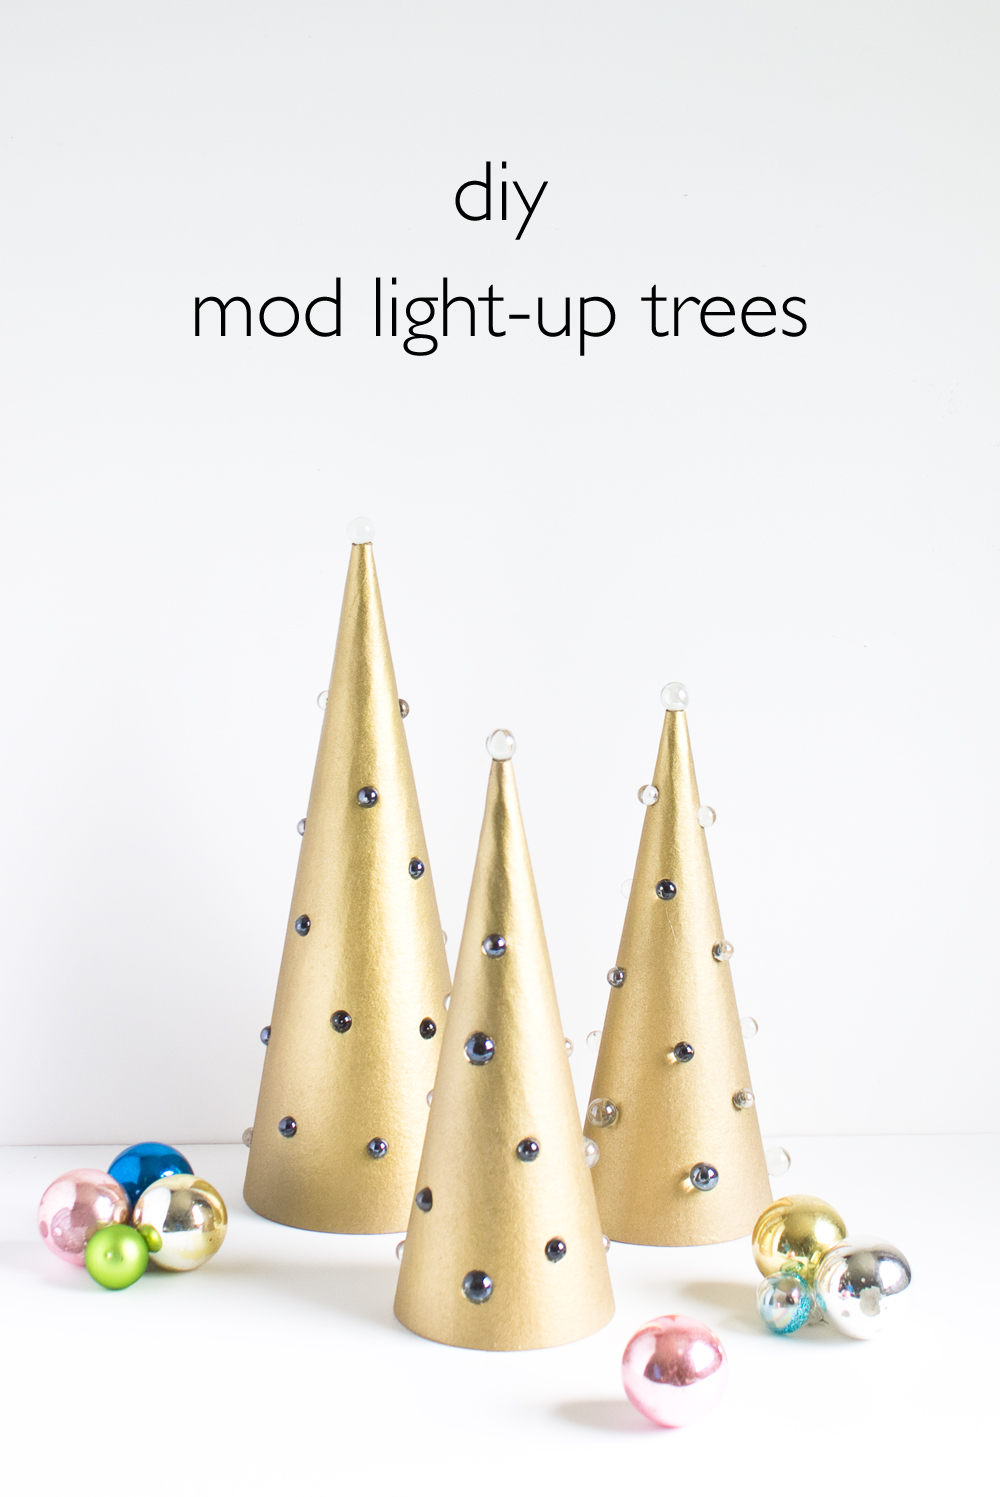
DIY Mod Light-Up Trees. Click through for the full tutorial! | www.vitaminihandmade.com
Christmas is just days away but I still have a bunch of crafts projects on my to-do list! In hopes that you're still feeling the crafty spirit, here's one more diy for you to try, and my last of the year!

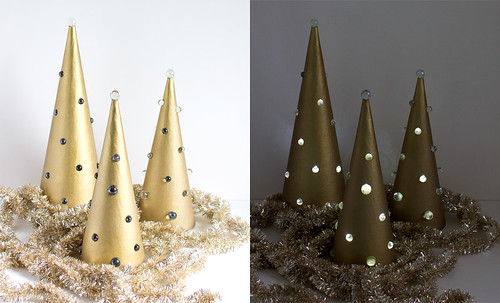
You know those tabletop ceramic trees that practically all of our grandmothers had? They were green or white and had little multi-colored plastic beads that would light up when you turned them on? These mod light-up trees were inspired by those ceramic trees. I made them in hopes that they would be just as pretty, and turns out they are! They're sleek and simple, a modern take on the classic original. They'd look great in a mid-century home, on a minimalist tablescape, or a modern mantel.

Here's what you'll need:
DIY Mod Light-Up Trees. Click through for the full tutorial! | www.vitaminihandmade.com
  • Paper mache cones
  • Gold spray paint
  • Permanent marker
  • E6000 glue
  • X-acto knife with new blades, Z Series are my favorites
  • Clear marbles, I used two sizes
  • Battery operated lights, I used these
DIY Mod Light-Up Trees. Click through for the full tutorial! | www.vitaminihandmade.com

Spray paint the cones with a few coats of gold spray paint and let dry. Mark out randomly placed dots on the cones for each marble. I tried a couple different methods for cutting the openings in the cones and this way worked the best: carefully cut into the cone around the dot marking in a rough circle. Slowly widen the circle with the knife, cutting back and forth, testing the size with the marble. Cut the opening big enough for the marble to rest halfway through. Cut the top off of the cone.

DIY Mod Light-Up Trees. Click through for the full tutorial! | www.vitaminihandmade.com

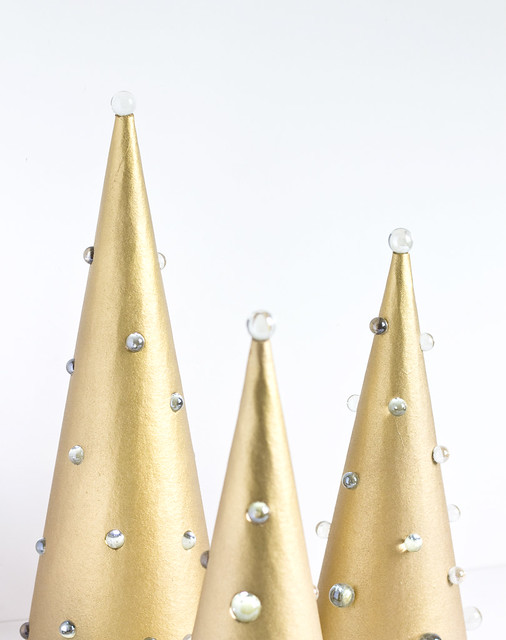
Add some E6000 to the edges of the openings and push the marbles into place. Glue a marble to the top, too.

DIY Mod Light-Up Trees. Click through for the full tutorial! | www.vitaminihandmade.com

Put a battery light underneath and enjoy your new light-up creation!

DIY Mod Light-Up Trees. Click through for the full tutorial! | www.vitaminihandmade.com

Try mixing up the marble sizes and adding variation to the depth of the openings for different looks.

DIY Mod Light-Up Trees. Click through for the full tutorial! | www.vitaminihandmade.com DIY Mod Light-Up Trees. Click through for the full tutorial! | www.vitaminihandmade.com DIY Mod Light-Up Trees. Click through for the full tutorial! | www.vitaminihandmade.com
Now that's my cue to sign off for a few days and enjoy the season! I still have to wrap all of my gifts and sew a Christmas stocking for my puppy. I also have lots of cookies I need to eat and movies I need to watch. Serious business! Have a wonderful holiday!

*P.S.: Little Farm Media interviewed me last week about how I use social media for my business. Check it out and learn about my favorite hashtags and best practices!
 

vitamini handmade © All rights reserved · Theme by Blog Milk · Blogger