




456

DIY Valentine Planters with a Free Printable!

Wednesday, January 22, 2014

DIY Valentine's Day Succulent Planter with Free Printable

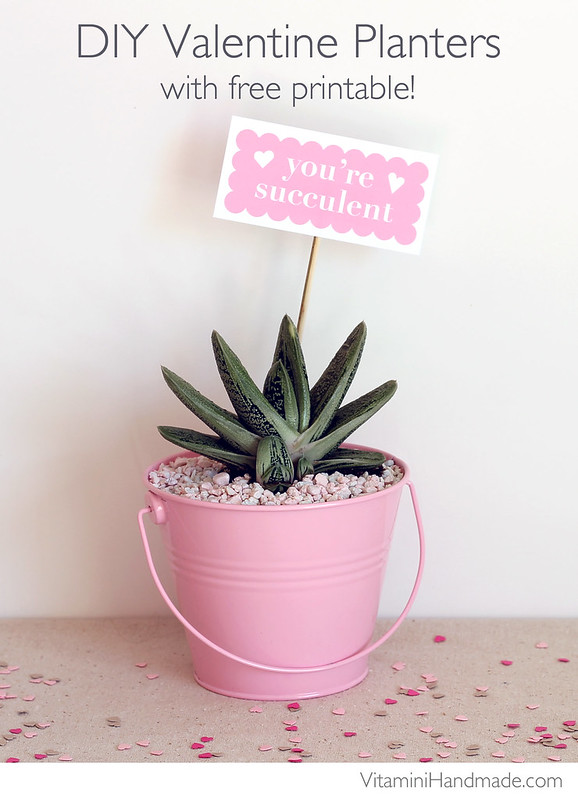
Valentine's Day is just a few short weeks away. Skip the drugstore candy aisle and whip up some of these sweet little succulent planters for your favorite people! Don't get me wrong, I love me some Valentine's Day candy, but sometimes the sugar gets to be a little too much. These sweet little planters will last much longer than a bouquet of flowers or a bag of cinnamon hearts and the punny plant stakes will make your friends smile.

Here's what you'll need:

DIY Valentine Succulent Planters with free printable!
  • Mini metal buckets in pink and white. I found mine at Michael's. Similar
  • White fish tank gravel. I still had some leftover from my dish garden
  • Pink spray paint. I used Krylon Fairytale Pink
  • Wood kitchen skewers
  • Assorted cacti and succulents
Not pictured:

Punch a few holes in the bottom of your buckets with a nail and hammer. Well-draining soil is very important to these plants. This will help keep your them happy and healthy! Do you like my tiny hammer? ;)

DIY Valentine Succulent Planters with free printable!

Plant your cacti and succulents in the buckets. I'm going to demonstrate how to re-pot a spiny cactus since those are a little harder to do without harming the plant or yourself. Add a layer of succulent soil to the bottom of your container at about the height of where your rootball will sit.

DIY Valentine Succulent Planters with free printable!

Roll up a few layers of butcher paper or newspaper. Flatten it. Fold it in half to create a loop. Position the cactus inside the loop and hold it tight on the end.

DIY Valentine Succulent Planters with free printable!

Lay the plant on its side and remove the pot. Grabbing the roots with one hand and the paper loop with the other, position the cactus in the pot. Still holding the cactus upright with the paper, fill around the roots with soil. Done! No need to look for the tweezers!

DIY Valentine Succulent Planters with free printable!

Spread out a thin layer of gravel in a cardboard box or on a paper plate and spray paint it. Mix the gravel up between coats to get more coverage. When it's fully dry, layer it over the exposed soil in the buckets. Resist the urge to water! Let them get used to their new digs for a week or two before watering.

DIY Valentine Succulent Planters with free printable!

Low Maintenance Love, You're Succulent, and Don't be Prickly, Valentine. I love me a plant pun and I hope you like these graphics!


Valentine Succulent Planter Printable

Print the download on white cardstock (the thicker, the better) and cut out with scissors or a craft knife. Add a dab of rubber cement to the top of the skewer and attach to the back of the tag. To make it more secure, glue a scrap of paper over the back.

DIY Valentine Succulent Planters with free printable!

Add them to your freshly-potted succulents and give to your valentines (if you can bear to part with them)!

DIY Valentine Succulent Planters DIY Valentine Succulent Planters with free printable! DIY Valentine Succulent Planters with free printable! DIY Valentine Succulent Planters with free printable! DIY Valentine Succulent Planters with free printable!

Project and photography by Casey Starks | Vitamini Handmade
The download is not for commercial use or distribution and is © Vitamini Handmade.

131

Top Posts of 2014

Monday, January 5, 2015

DIY Paper Magnolia Blossoms | www.vitaminihandmade.com Happy first Monday of 2015! I'm slowly getting back in the swing of things over here. It was nice to take a break from the computer for a few days over the holiday break, even though I kept myself busy with lots of other offline projects (which I can't wait to share with you). In the meantime, I thought I'd recap 2014 by sharing the most popular posts from the blog. I had so much fun creating these projects and I'm so glad you liked them! So here they are, in chronological order.

Top DIY Posts for 2014 | www.vitaminihandmade.com DIY Valentine's Day Succulent Planter with Free Printable

Top DIY Posts for 2014 | www.vitaminihandmade.com
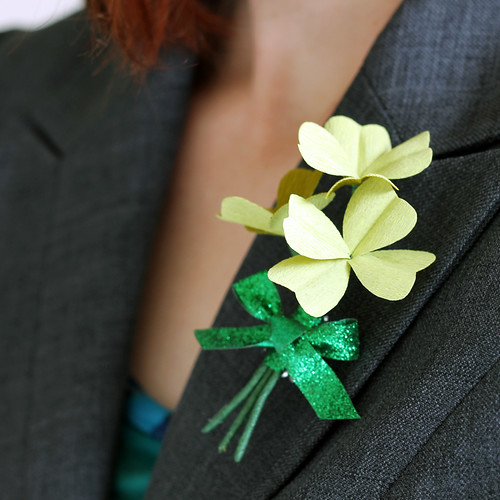
DIY St. Patrick's Day Paper Shamrock Corsage

Top DIY Posts for 2014 | www.vitaminihandmade.com
Top Tips for Thrifting

Top DIY Posts for 2014 | www.vitaminihandmade.com
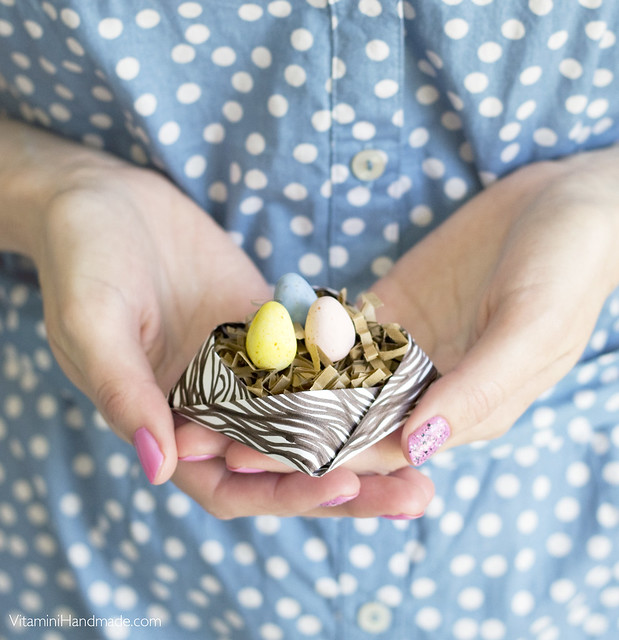
DIY Origami Birds Nest with Free Printable

Top DIY Posts for 2014 | www.vitaminihandmade.com
DIY Marbled Paper Mache Eggs

Top DIY Posts for 2014 | www.vitaminihandmade.com
DIY Paper Magnolia Blossoms (also the top post of the year!)

Top DIY Posts for 2014 | www.vitaminihandmade.com
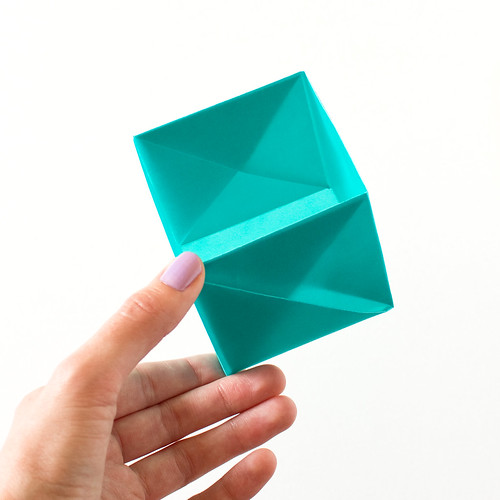
DIY Origami Gift Box

Top DIY Posts for 2014 | www.vitaminihandmade.com
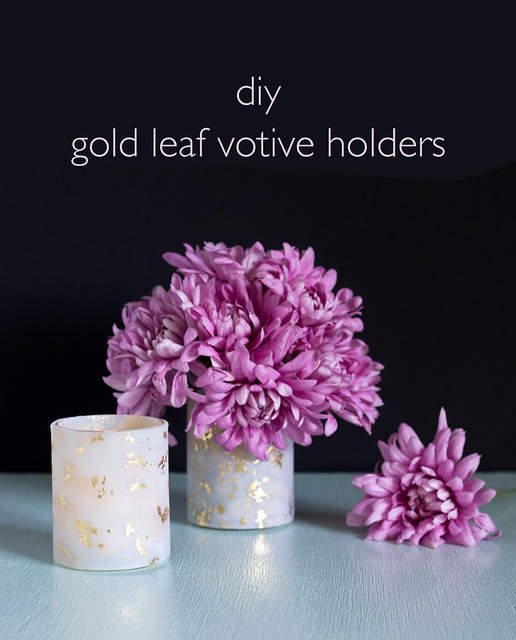
DIY Gold Leaf Votive Holders

Top DIY Posts for 2014 | www.vitaminihandmade.com
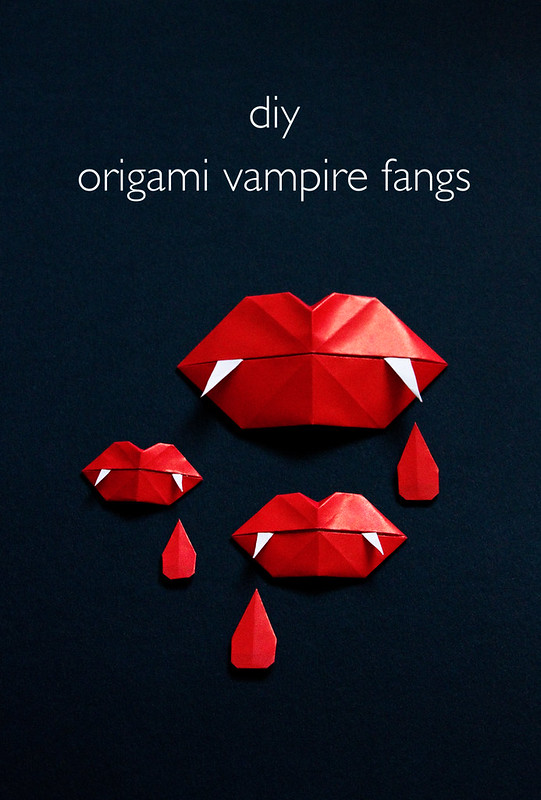
DIY Origami Vampire Fangs

Top DIY Posts for 2014 | www.vitaminihandmade.com
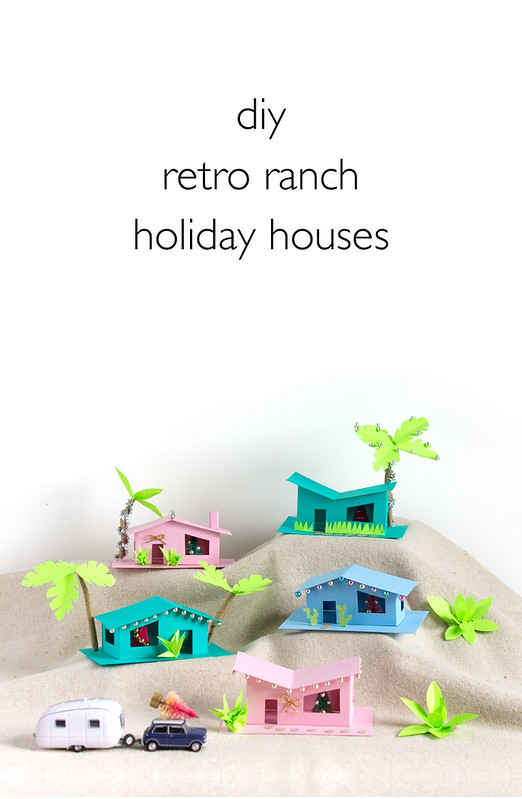
DIY Retro Ranch Paper Holiday Houses

You can see these and the rest of the projects from 2014 (and every other past year) in the DIY Gallery page.

15

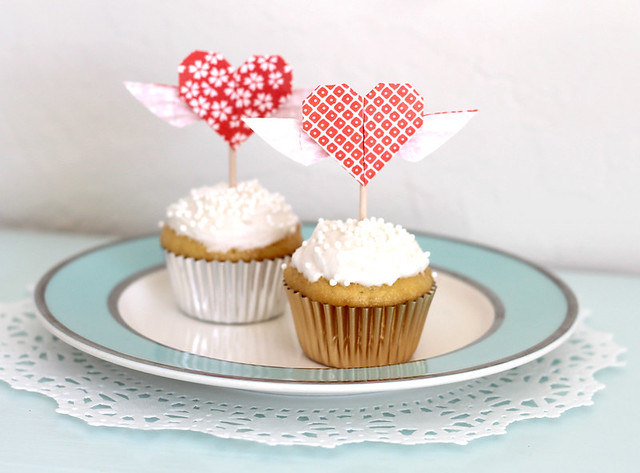
DIY: Origami winged heart cupcake toppers

Sunday, February 3, 2013

DIY Origami Heart Cupcake Topper  | www.vitaminihandmade.com
I think my favorite memories of Valentine's Day were from when I was a kid in elementary school. Not only did we get to make our own mail boxes for all the valentines we'd get (so fun), but we usually had a ton of desserts to feast on at the end of the day. What kid doesn't love a sugar rush? These origami heart cupcake toppers are not only fun to make, they remind me of those festive love-themed treats that I enjoyed at school as a kid.

Here's what you'll need:

DIY Origami Heart Cupcake Topper  | www.vitaminihandmade.com
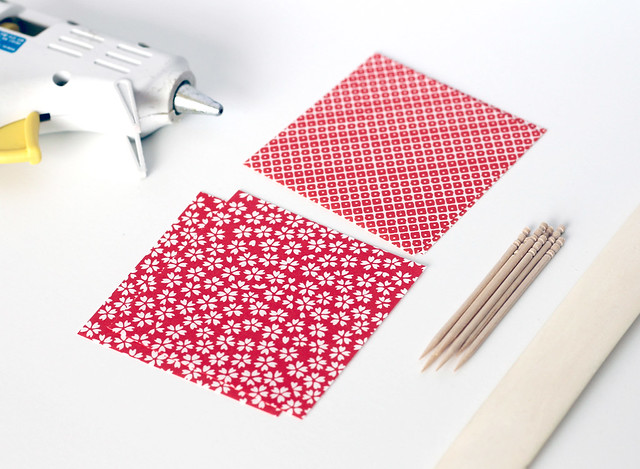
  • Origami paper. 2 3/4" squares worked well with mini cupcakes. Increase the paper size for standard cupcakes
  • Toothpicks
  • Bone folder, if you have one
  • Low-heat hot glue gun

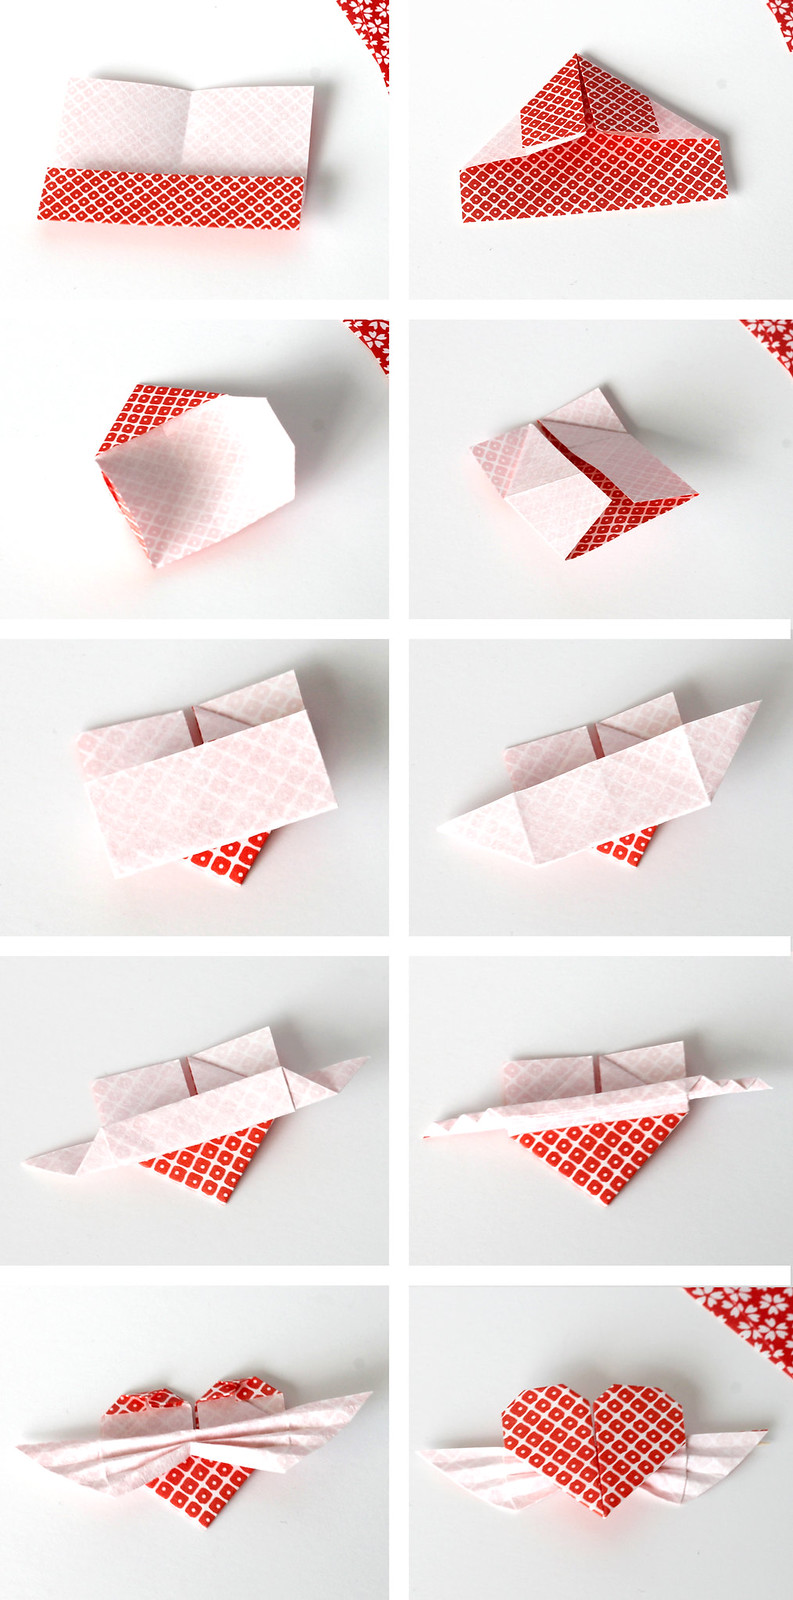
I learned the origami heart technique from this YouTube video. I took photos of each step to help you with the process, but make sure to watch the video if you're confused by any of the transitions. It may be worthwhile to try the technique with a larger piece of paper first to better understand the folds. Let's get started!

DIY Origami Heart Cupcake Topper  | www.vitaminihandmade.com With the pattern or color down, fold the paper square in half, both ways, and unfold. Fold one side of sheet to the center and crease. Flip over. Fold top corner of each side of sheet to the center line. Flip over. Fold each side of the paper to the center line, and unfold. Flip over. Flip the top layer of paper up and flatten (see the video for more detail). Fold bottom section up to meet crease line. Flip the inside flaps out to form the wings. Fold this flap up, in half, and crease.
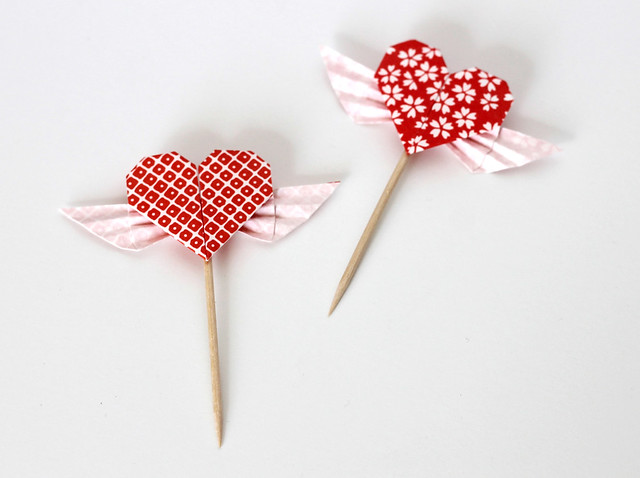
The next few steps form fan-type folds in the wings, folding each area you just created in half. It can be tricky to get narrow folds in with such a small piece of paper, so use your bone folder to reinforce the creases. Fold each corner of the top of the hearts down and to the center. Fold the heart tops down. Crimp the center of the wings with your fingernail, and flatten and spread out the wing ends.

Flip over. You're done with your winged heart!

DIY Origami Heart Cupcake Topper  | www.vitaminihandmade.com
To attach to the toothpick, flip over, add a dab of hot glue to the top of the toothpick, and scoot it under the wings. I added a weight to the top of the hearts and toothpicks while the glue dried, to ensure that they dried flat.

DIY Origami Heart Cupcake Topper  | www.vitaminihandmade.com
Make a bunch! Add your handmade toppers to a batch of mini cupcakes and they're ready to go to your next Valentine's Day party!

18

DIY Heart Manicure

Tuesday, January 27, 2015

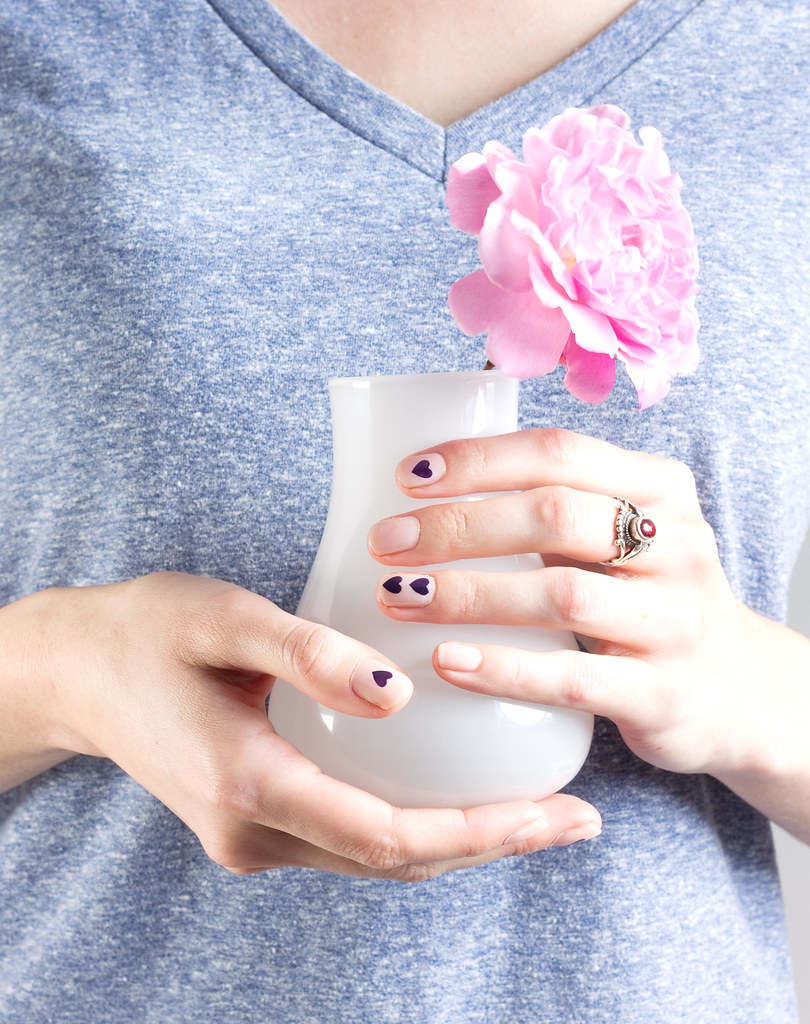
DIY Heart Manicure | www.vitaminihandmade.com

I love painting my nails myself, so I'm always looking for easy ways to make my home manicures a little more special. What's more special than hearts? Here's a super easy way to customize a plain manicure for Valentine's Day, or any other day when you want to some cute little hearts on your nails.
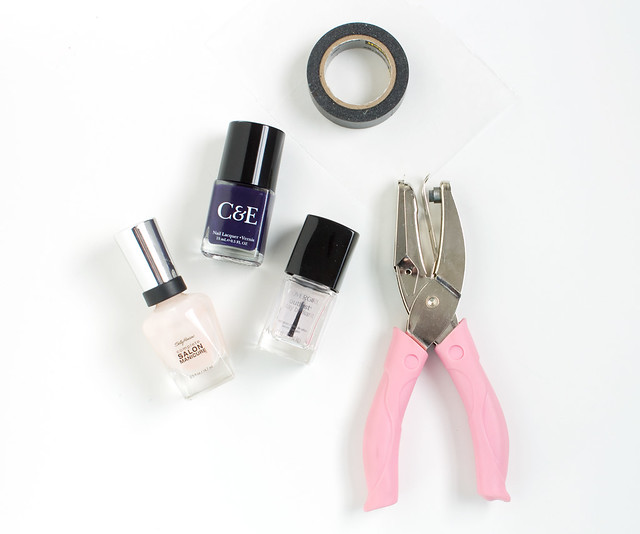
Here's what you'll need:
DIY Heart Manicure | www.vitaminihandmade.com

  • Light colored base coat of nail polish. I used Sally Hansen Shell We Dance
  • Contrasting accent color. I used this deep purple/almost black from Crabtree and Evelyn called Eggplant
  • Clear top coat
  • Washi tape
  • Wax paper
  • Heart hole punch

Start with 2 coats of the base color and let dry.

DIY Heart Manicure | www.vitaminihandmade.com

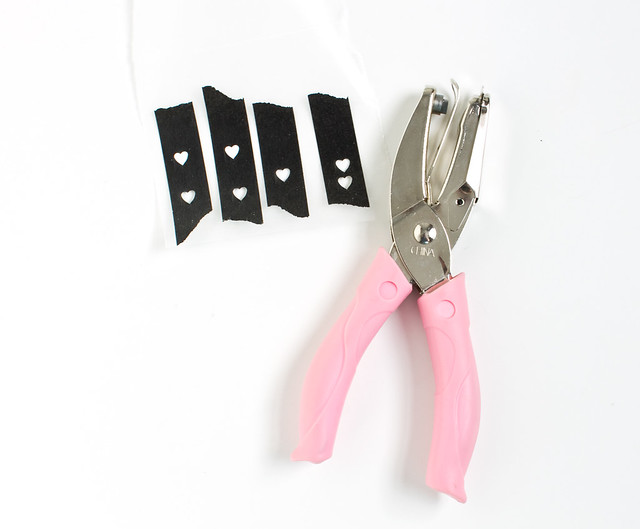
Lay some strips of washi tape onto a small piece of wax paper. Punch out one or two hearts per piece of tape. Here's a little trick if your punch is getting stuck on the paper: double a piece of scrap paper and lay it under the tape/wax paper while you punch to get cleaner edges.

DIY Heart Manicure | www.vitaminihandmade.com

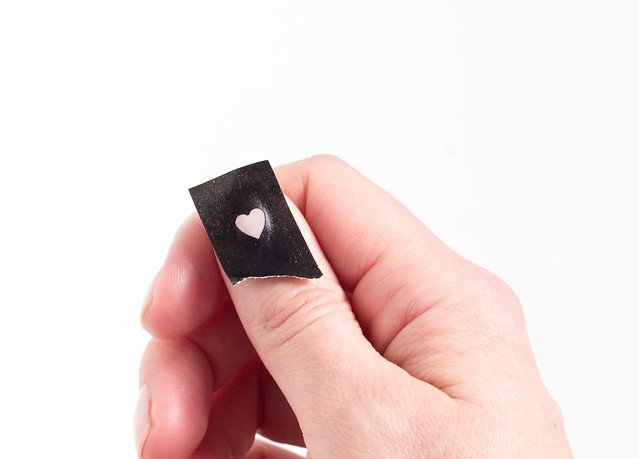
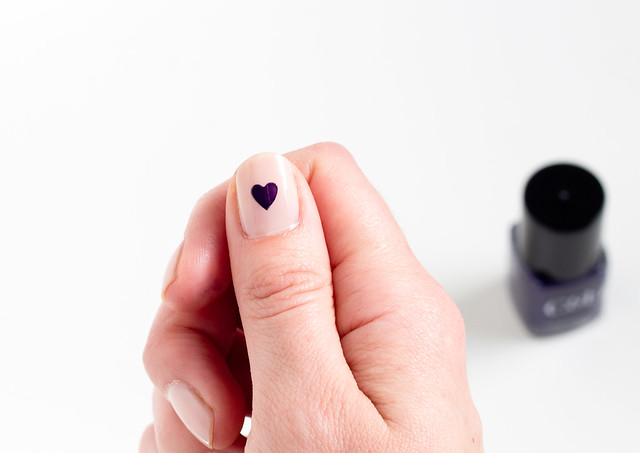
Pull the tape up from the wax paper and center the heart over the nail. Make sure the edges of the heart are stuck down. Paint over the heart area with the accent polish and then carefully pull up the tape while it's still wet.

DIY Heart Manicure | www.vitaminihandmade.com DIY Heart Manicure | www.vitaminihandmade.com

Continue on the other nails. Finish off with a coat or two of clear top coat once the hearts have dried.

DIY Heart Manicure | www.vitaminihandmade.com

Enjoy your new nails! Let's put hearts on everything, mmkay?


59

DIY Paper Carnation Valentine

Thursday, February 12, 2015

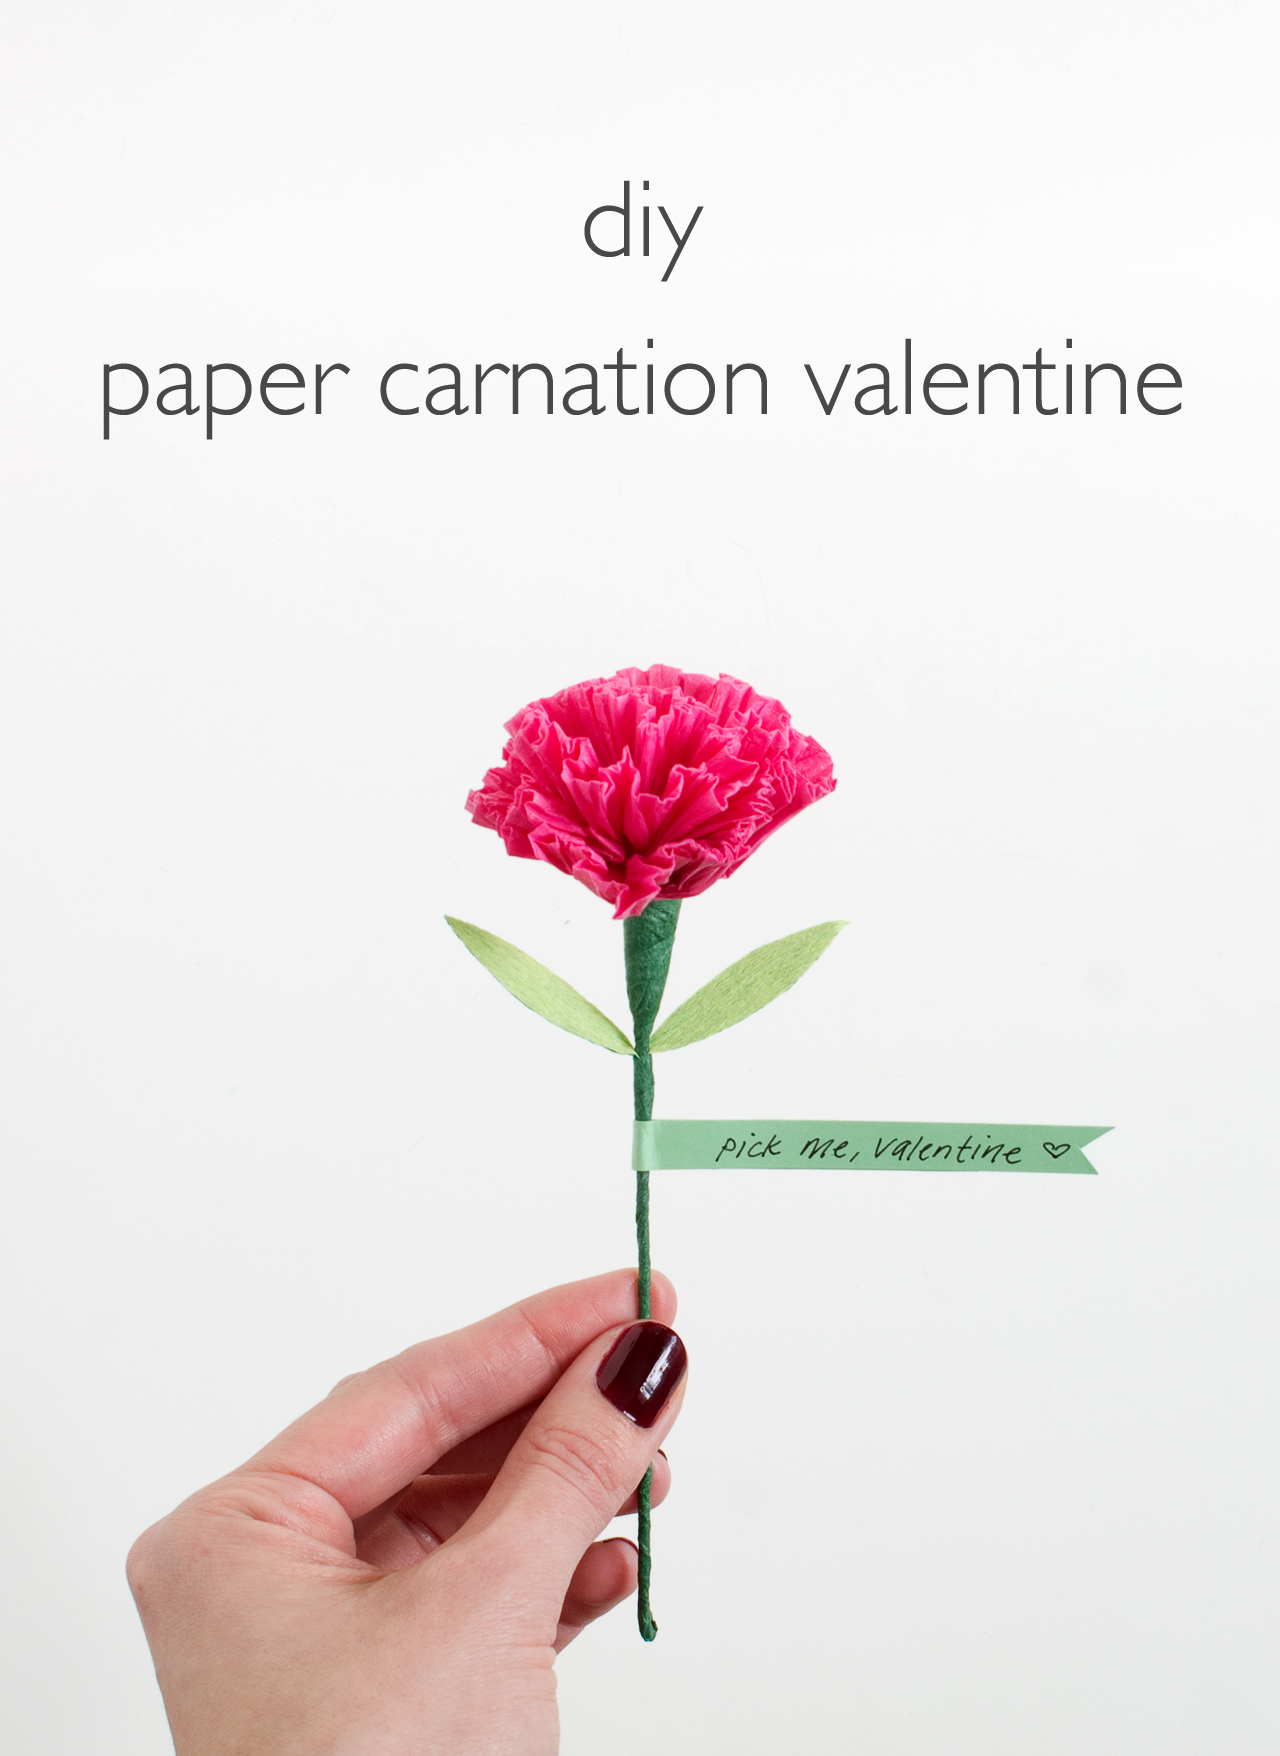
DIY Paper Carnation Valentine

I couldn't let Valentine's Day season pass by without coming up with some sort of paper flower project! Enter the sweet, reliable carnation. You can always find bunches of them in the grocery store in every shade, they're super inexpensive, and they last forever. Carrie Bradshaw did say that carnations were making a comeback! (Nevermind that she said that like 15 years ago...)

I love the look of this paper carnation since it has more dimension than single ply tissue flowers. The crinkly petals almost look real and they're easy and inexpensive to make. All pluses in my book! Add a sturdy stem and a sweet love note and you've got a unique valentine flower for your loved ones.

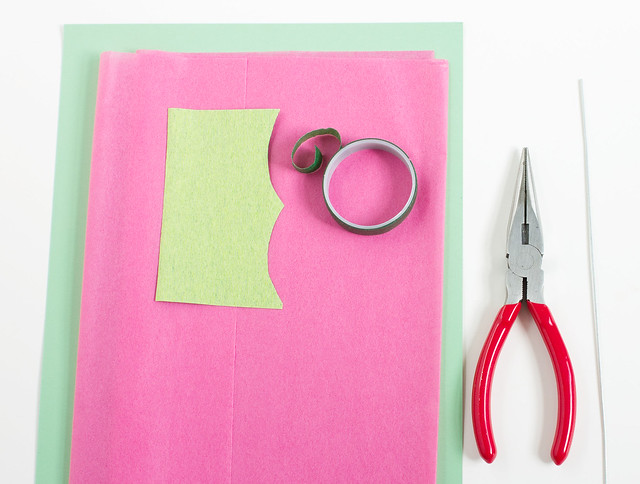
Here's what you'll need:

DIY Paper Carnation Valentine
  • Tissue paper. One 10" square per flower
  • Green cardstock
  • Green crepe or tissue paper
  • Green floral tape
  • Floral wire, about 6" lengths
  • Pliers
  • Scissors
  • Paper glue

DIY Paper Carnation Valentine

This is the folded carnation design that I've adapted for this project. I've outlined the steps here with words and photos for clarity, but feel free to refer to the original for more info.

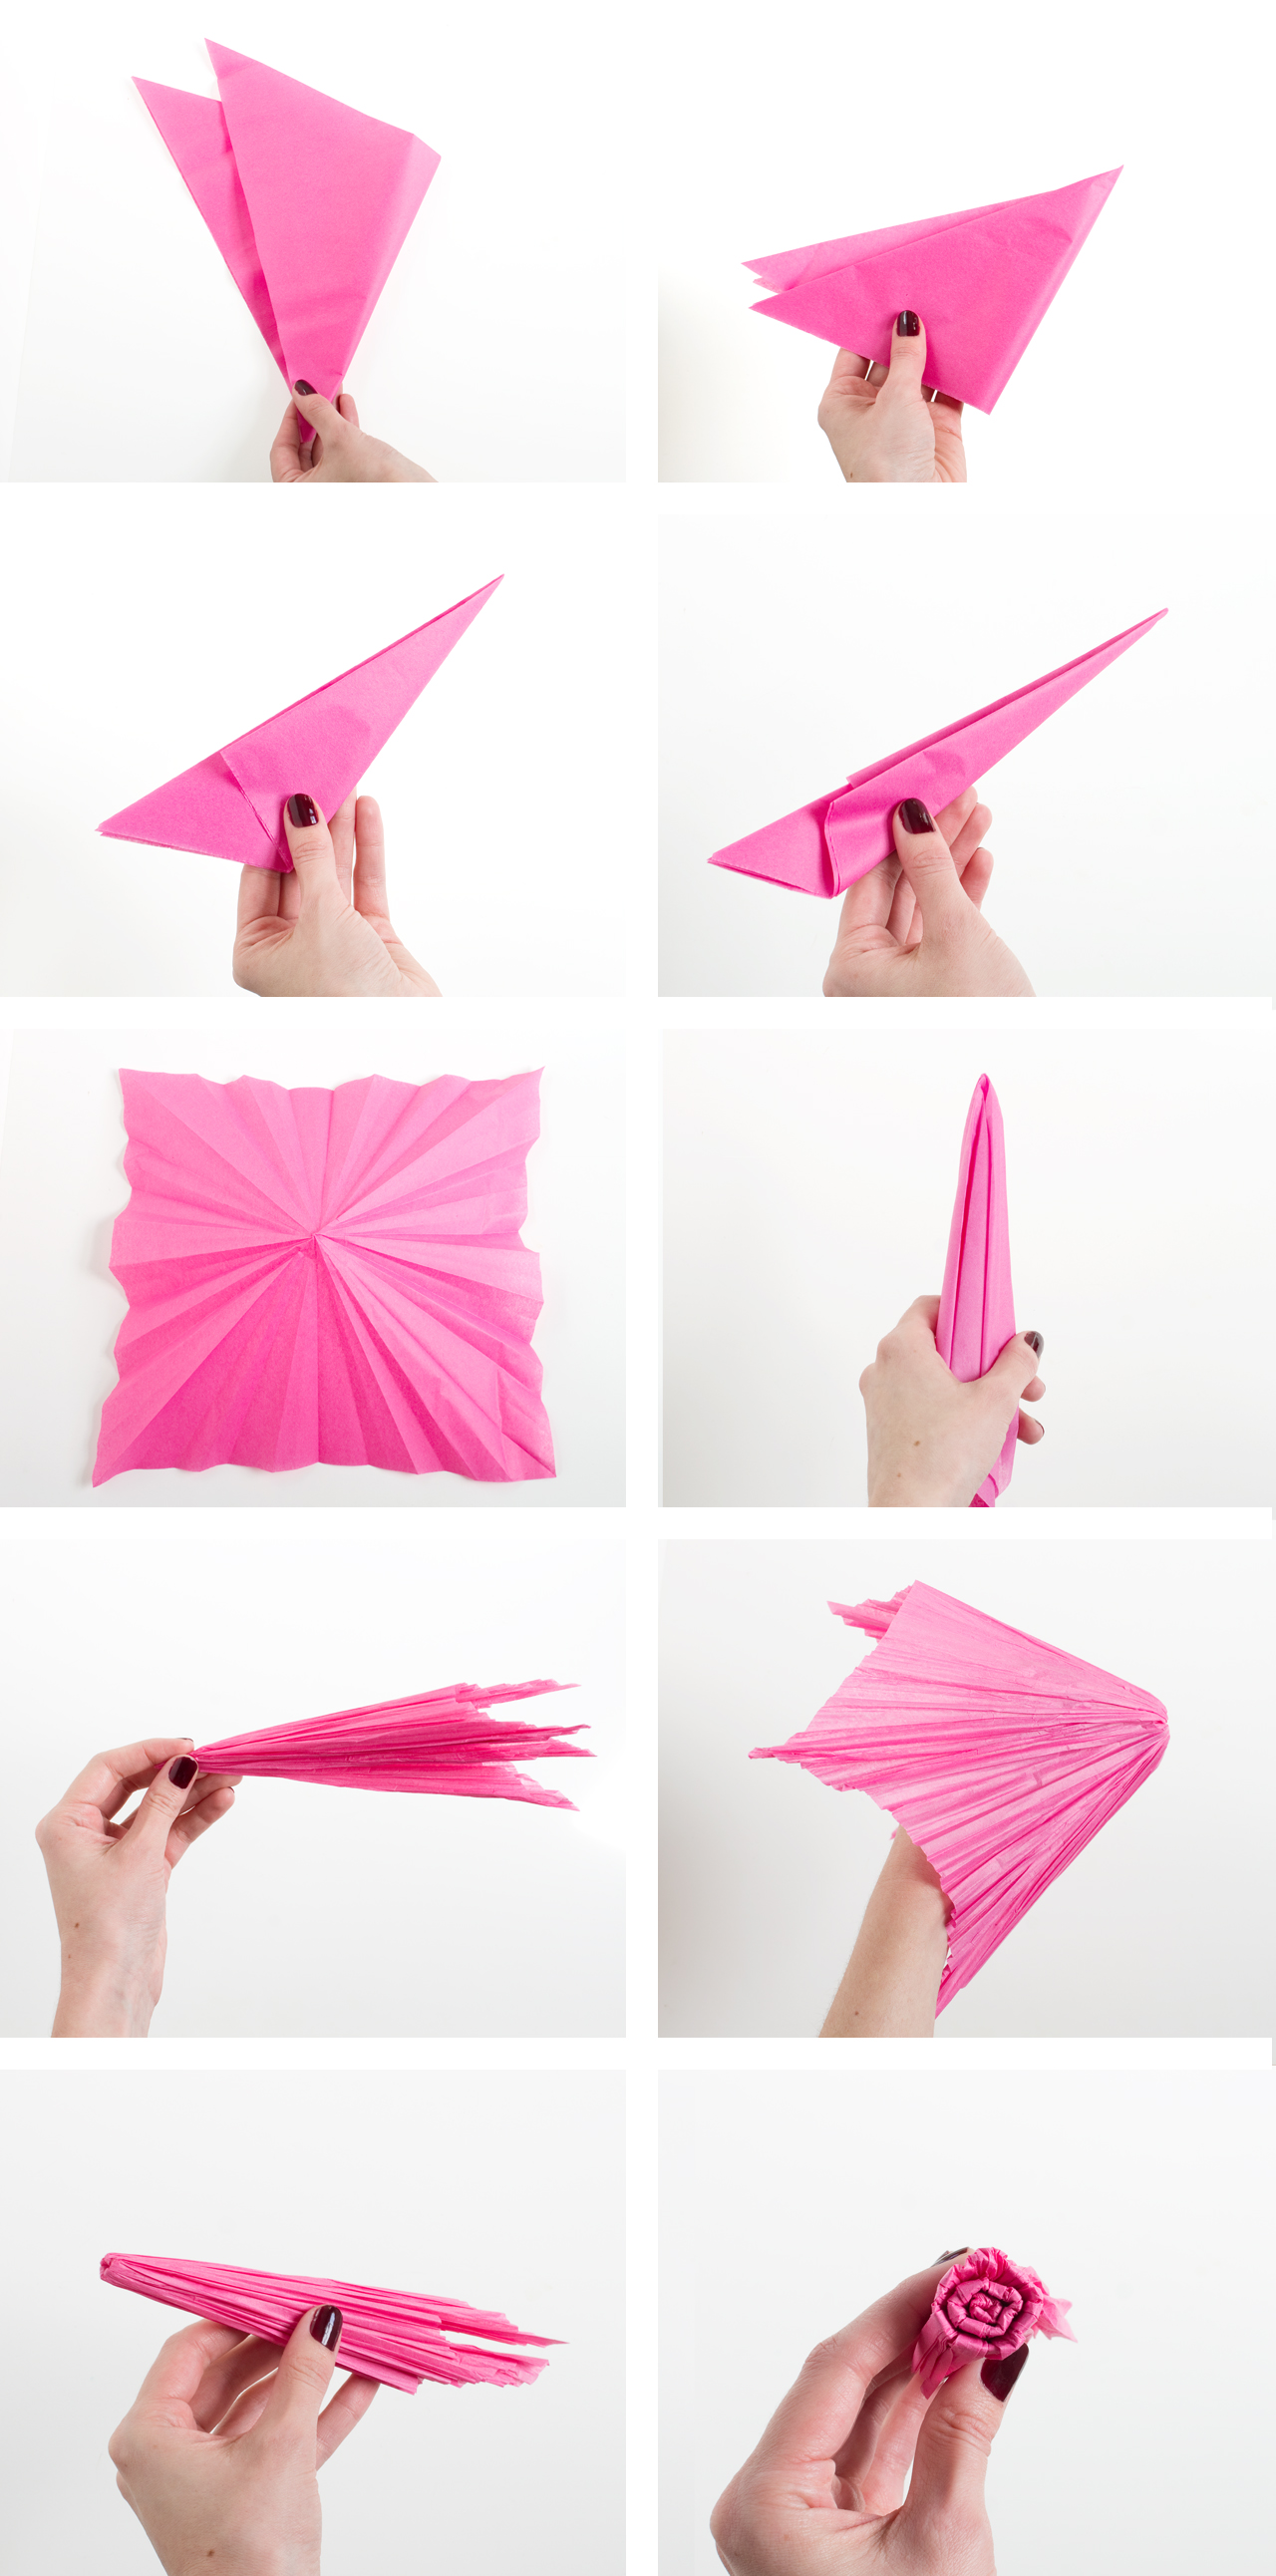
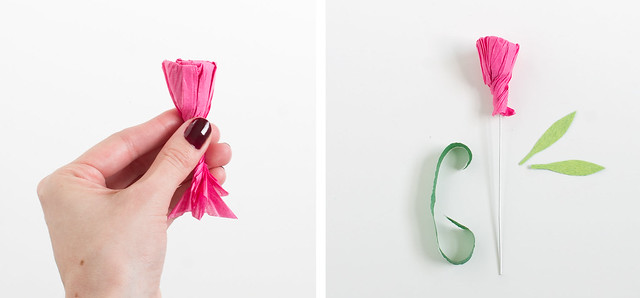
Fold the tissue square in half diagonally, and then again, and again. These steps create fan-like folds from the center of the tissue paper square. Continue folding in half until the paper is a narrow blade-like shape. Unfold. Gather the paper by the center and and crease downwards. Open the paper up and repeat multiple times. This step is creating very small vertical pleats in the paper. The more you open and re-crease the paper like this the more realistic folds the petals will have. Holding the paper horizontally with your right hand, pinch about 3/4" of the end and hold with your left hand. Flip the remaining paper back over your left hand, and crease around the fold you just made. Continue pinching about 1" of the paper and folding backwards until you have three rows of petals.

DIY Paper Carnation Valentine

Twist the base and cut off the excess paper. Wrap with floral tape around the wire and the leaves.

DIY Paper Carnation Valentine DIY Paper Carnation Valentine

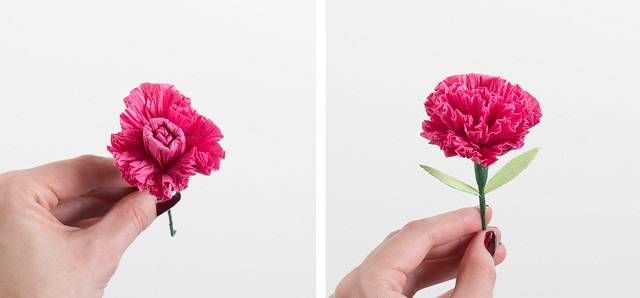
Here's the fun part! Starting with the outside petal, carefully spread out the creases in the paper. Gather the flower in your hand as you go to fold the petals towards the center of the flower. Continue with the other two rows of petals.

DIY Paper Carnation Valentine

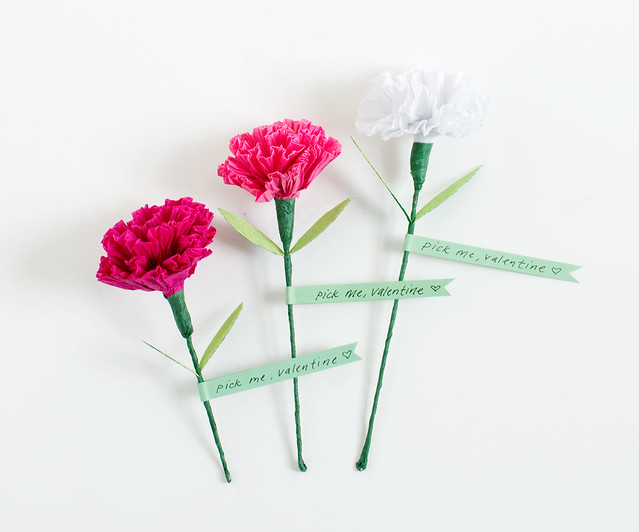
Cut a narrow strip of cardstock and write a "pick me, valentine" on the right side. Add some paper glue to the left side and fold over the stem and secure.

DIY Paper Carnation Valentine DIY Paper Carnation Valentine
So cute! I hope you give these sweet little flowery valentines a try! What do you think - are carnations still making a comeback?

181

DIY Easy Origami Candy Boxes

Wednesday, January 21, 2015

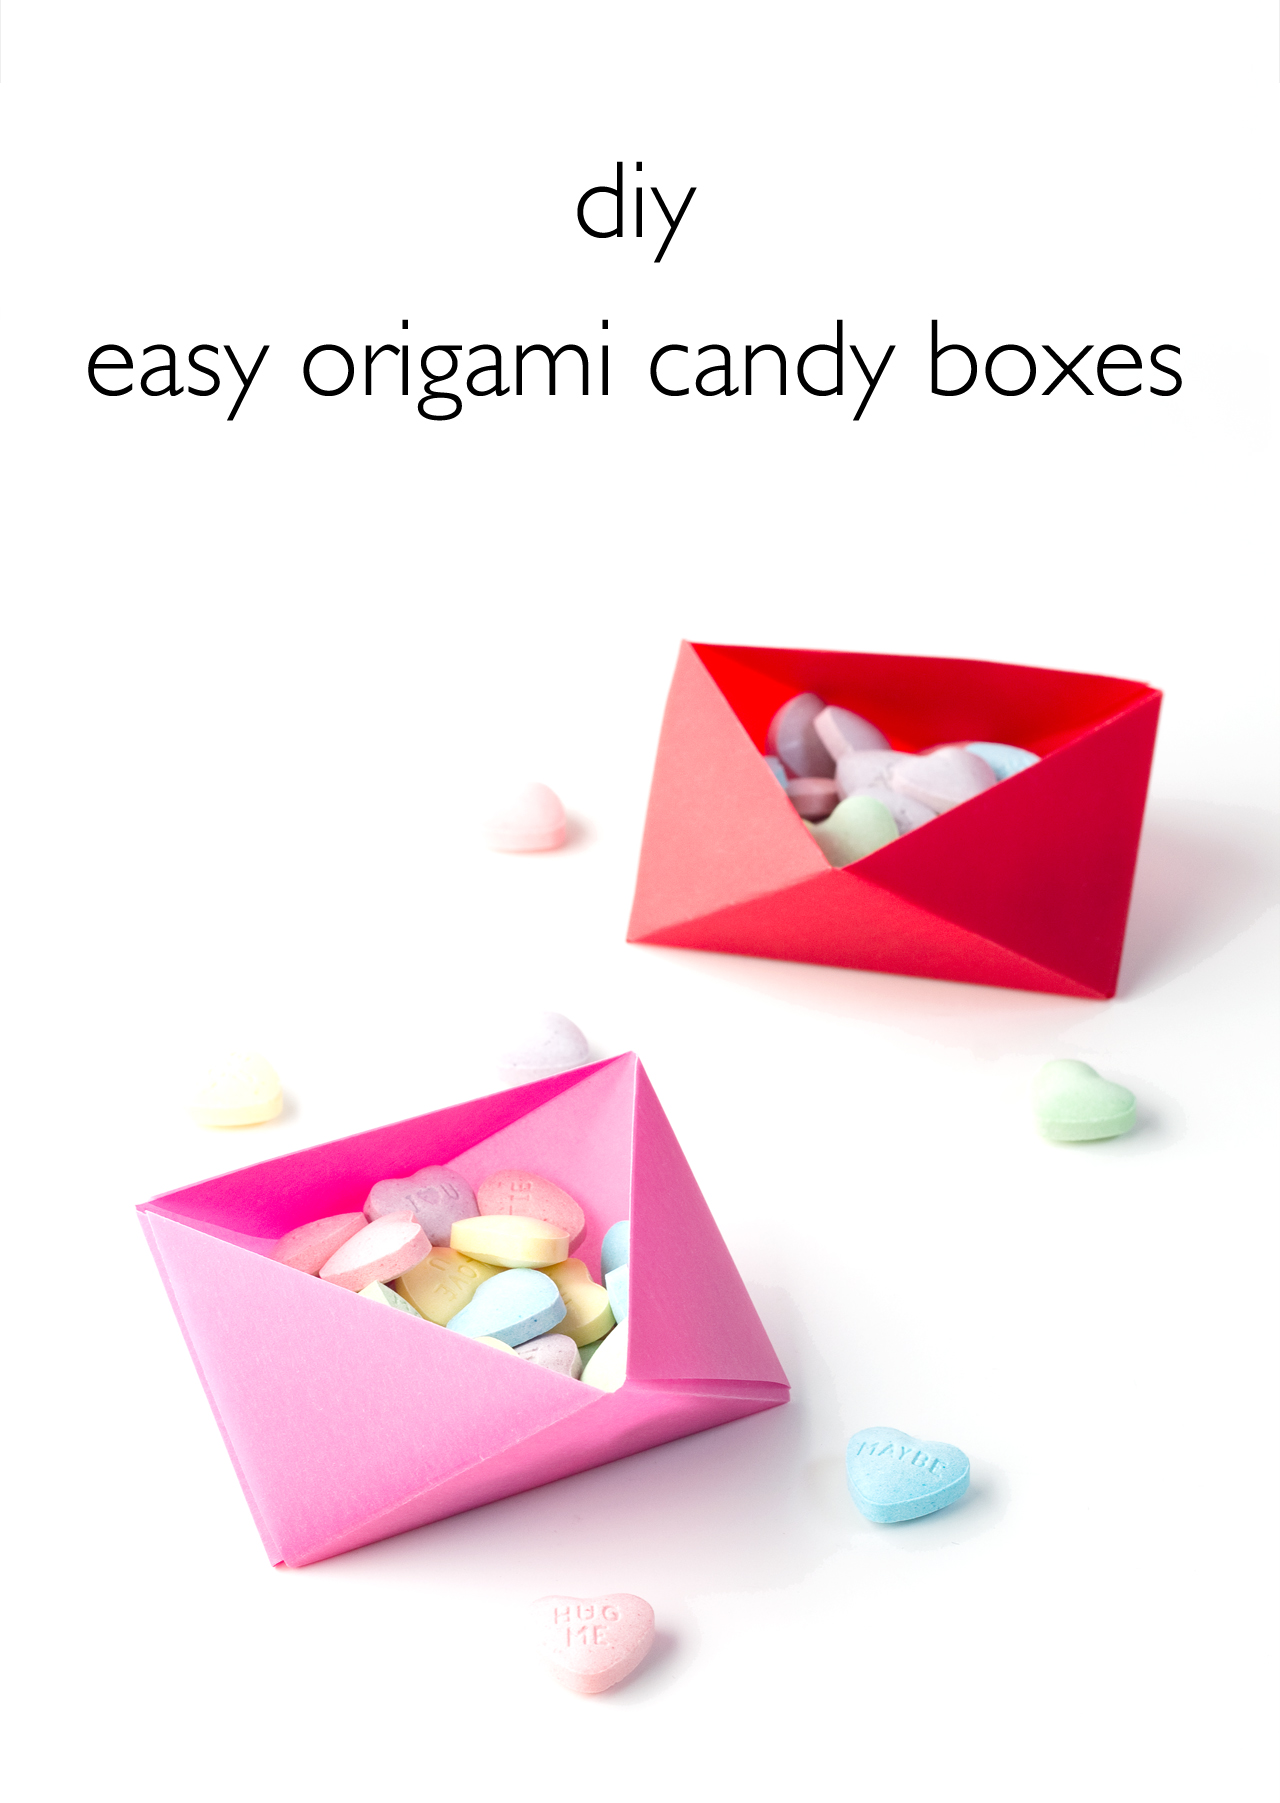
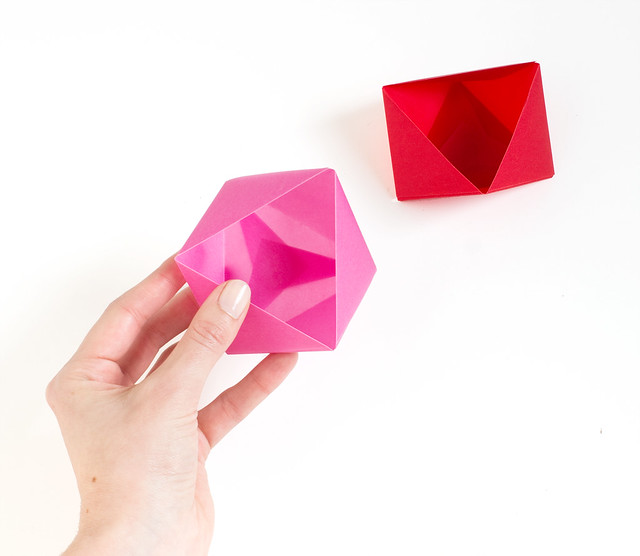
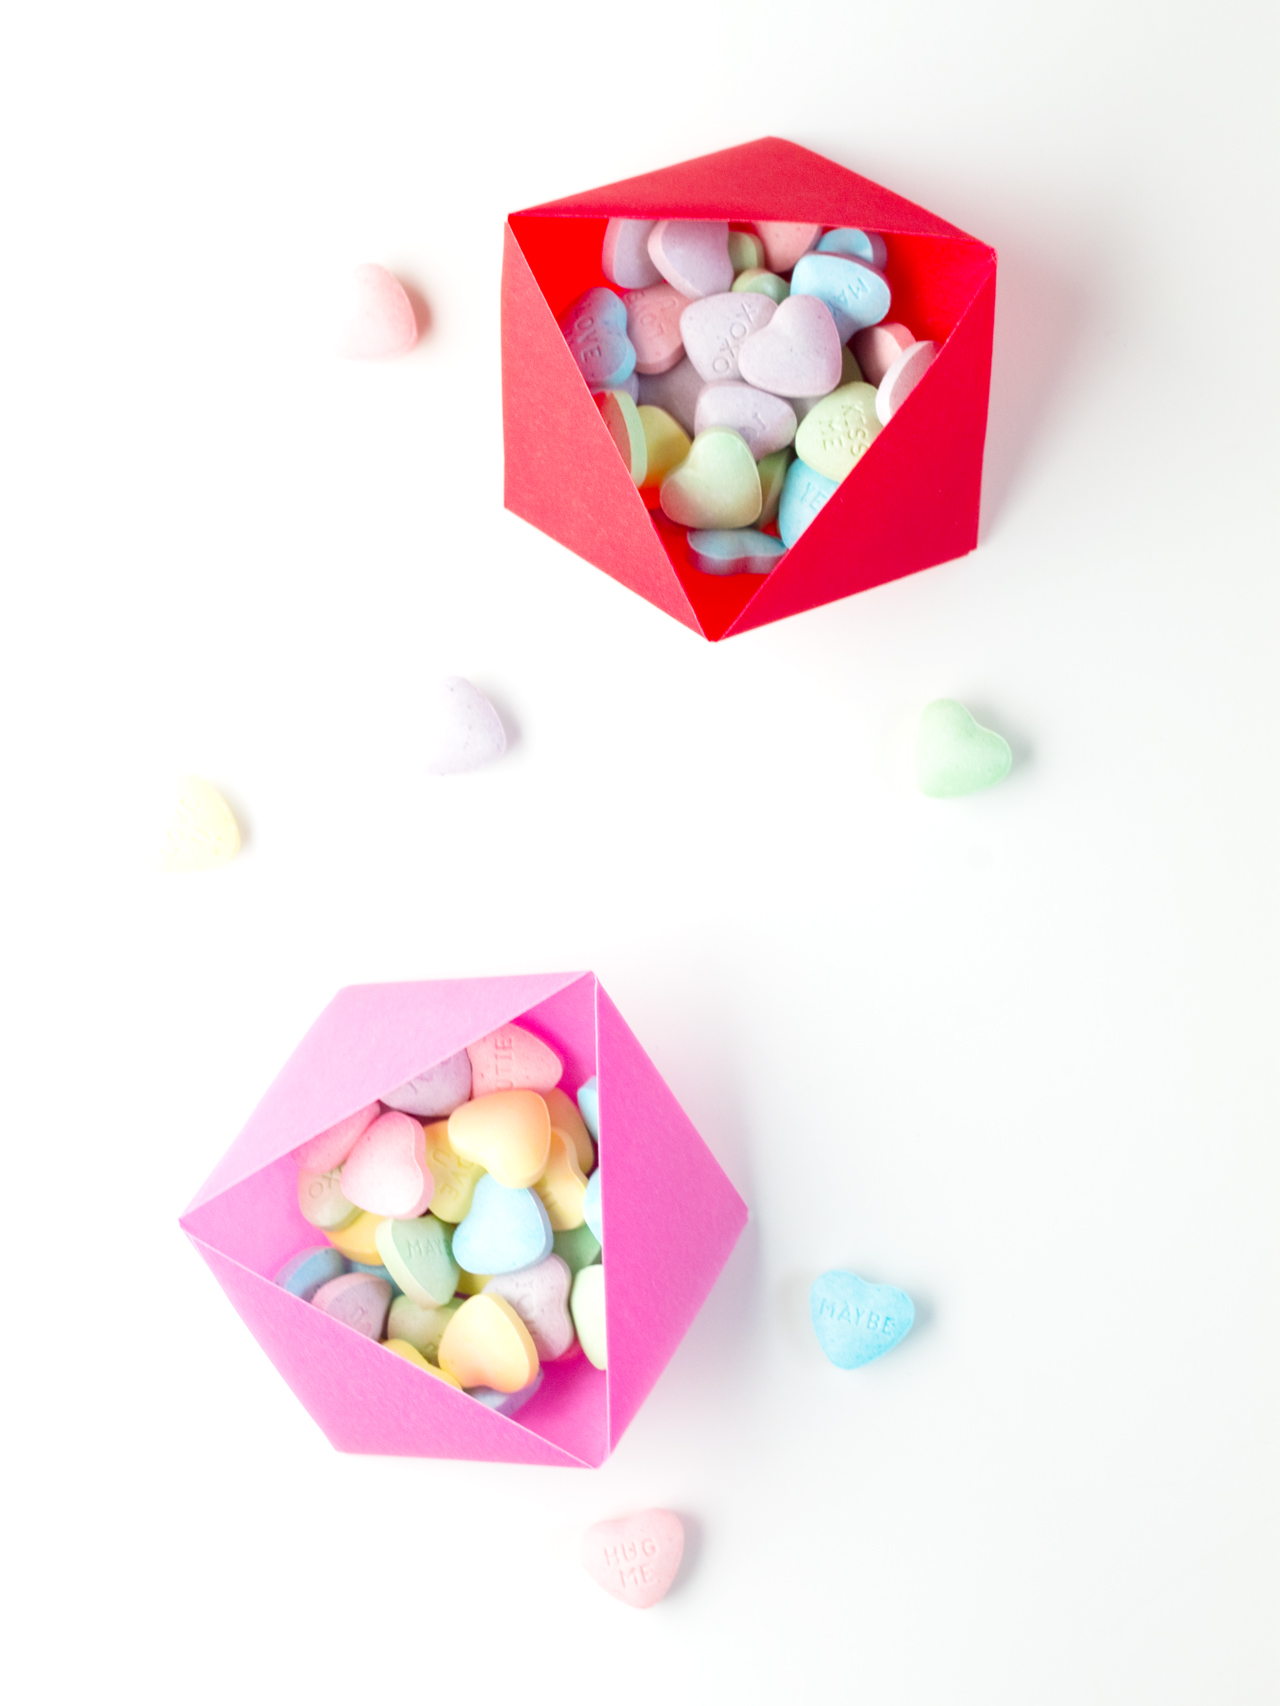
DIY Easy Origami Candy Boxes. Click through for the full tutorial! | www.vitaminihandmade.com It's heart-shaped candy season! Learn how to make these cool faceted origami boxes to hold your treats for Valentine's Day. They're so easy to make, you'll be able to whip up a bunch of them in just a few minutes. I used pink and red vellum, but they would look just as great made with patterned origami papers.
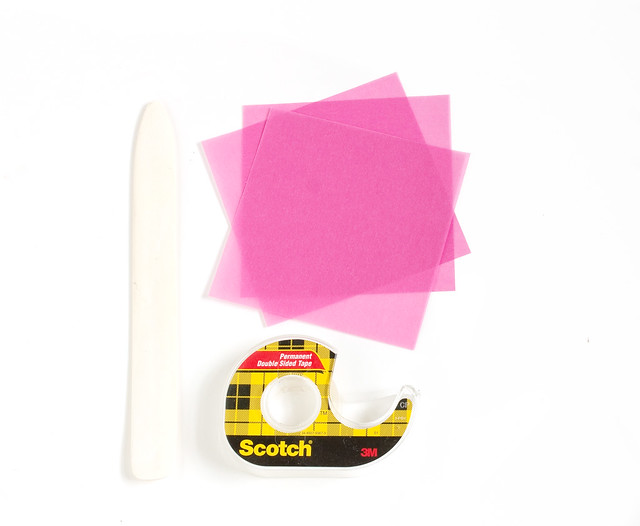
Here's what you'll need:
DIY Easy Origami Candy Boxes. Click through for the full tutorial! | www.vitaminihandmade.com
  • 3 squares of paper. Mine are 4.25" square
That's it!

Optional:
  • Bone folder for crisp folds
  • Double-sided tape

Ok, let's get to it. Seriously you guys, these are so easy you won't believe it.

DIY Easy Origami Candy Boxes. Click through for the full tutorial! | www.vitaminihandmade.com

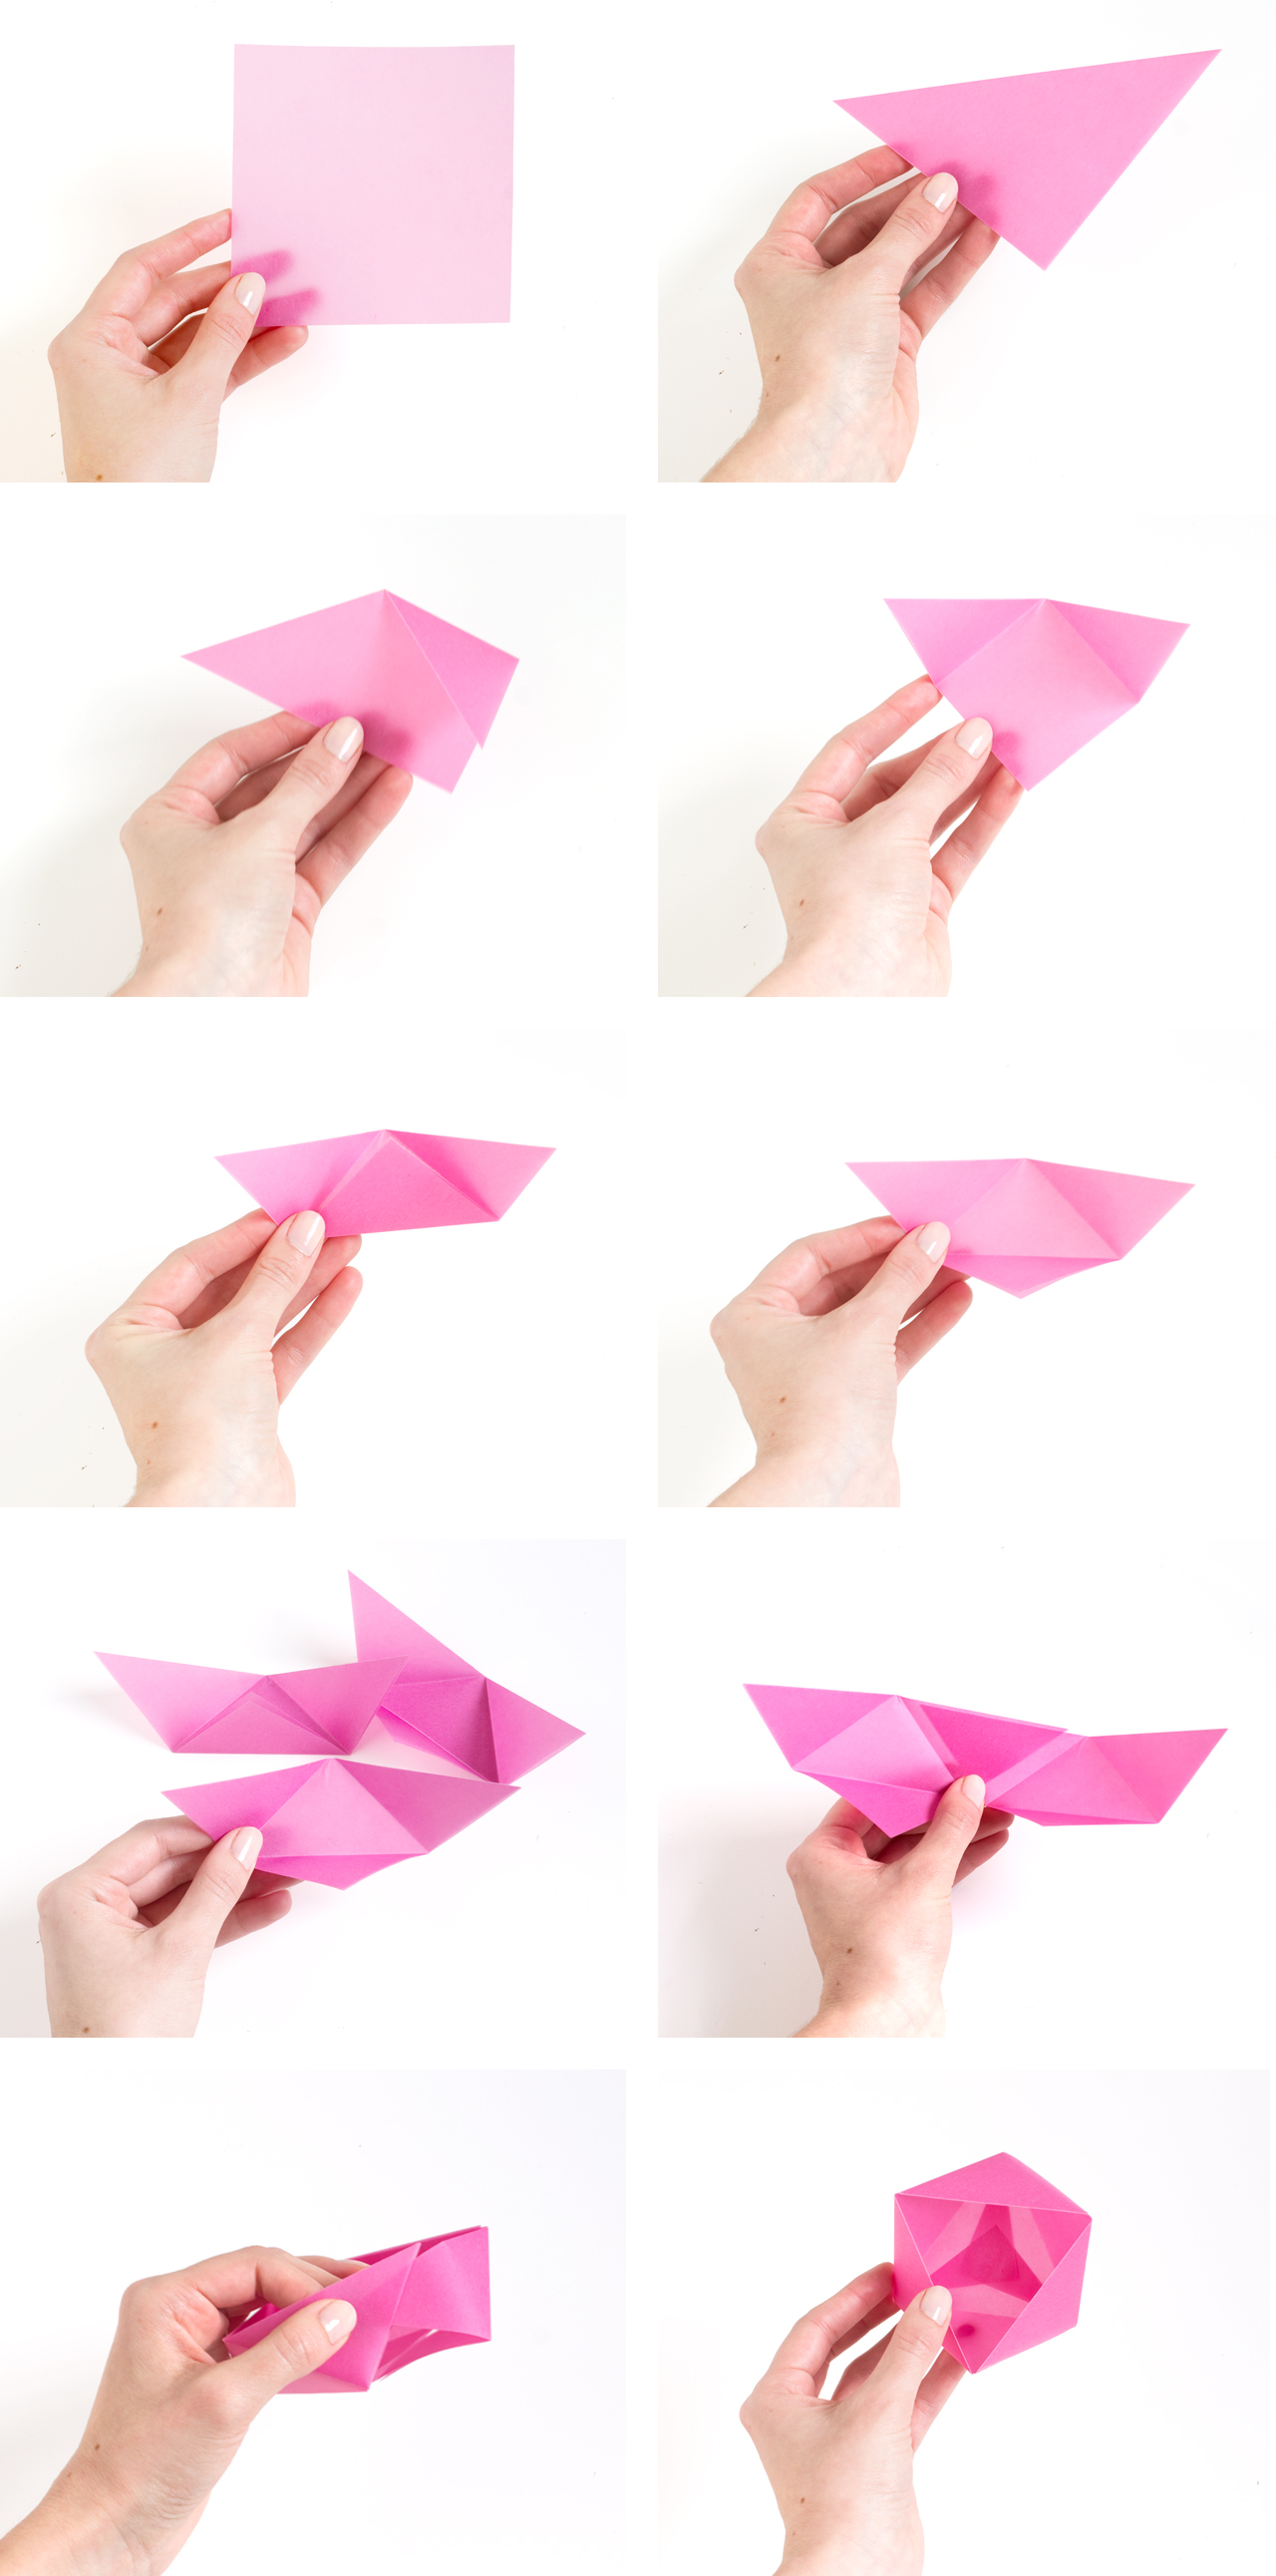
Fold one square in half diagonally. Fold each corner down to meet the bottom corner. Crease and unfold. Fold the bottom corner up to the center. Crease and unfold. Repeat for the other two paper squares. Join the three pieces by sliding one corner into another. Connect the two ends the same way, making sure the bottom flaps alternate so the bottom doesn't fall out. Add a small piece of double sided tape to the flaps in the bottom to secure if you'd like. It'll hold just fine if you don't, though.

DIY Easy Origami Candy Boxes. Click through for the full tutorial! | www.vitaminihandmade.com

Fill with candy! Wouldn't these be cute as little co-worker gifts? Heart-shaped paper clips would be a perfect alternative for those who don't like candy. I've heard those people exist, but I've never met one... ;)

DIY Easy Origami Candy Boxes. Click through for the full tutorial! | www.vitaminihandmade.com DIY Easy Origami Candy Boxes. Click through for the full tutorial! | www.vitaminihandmade.com

I hope you'll give these little origami boxes a try!
 

vitamini handmade © All rights reserved · Theme by Blog Milk · Blogger