




15

DIY Succulent Dish Garden

Friday, August 31, 2012

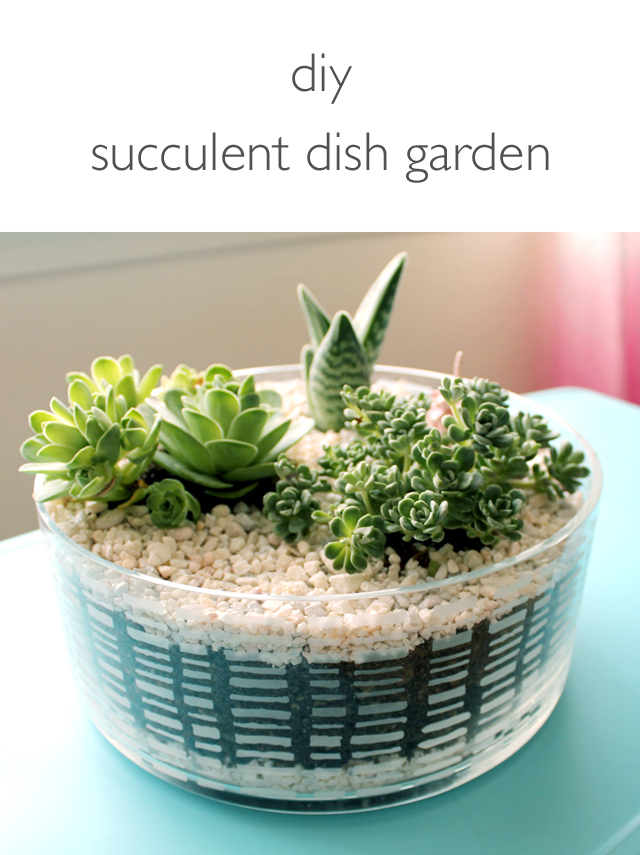
DIY Succulent Dish Garden | click through for the tutorial and tips for keeping succulents happy indoors
As a landscape architect and all-around plant lover, I enjoy arranging plants to create compositions. Combining the forms, textures, and colors of different plants is like painting a picture, but in 3 dimensions. I don't have a yard, so I have to get my fix of green with potted cacti and succulents in my little apartment and on my porch. Creating dish gardens is one of my favorite weekend projects. I'm frequently repotting and rearranging my succulent collection in new ways, to keep things interesting, incorporate newly acquired plants into my collection, and to respond to the needs of the plants.

I'm going to outline how to go about creating a dish garden in a container without drainage holes, because some of the best containers weren't originally intended for plants! I don't have a drill or a masonry drill bit, either, so adding holes isn't an option for me, but if you do, by all means, add holes!

Here's what you'll need to make your own succulent dish garden:
 
DIY Succulent Dish Garden | click through for the tutorial and tips for keeping succulents happy indoors
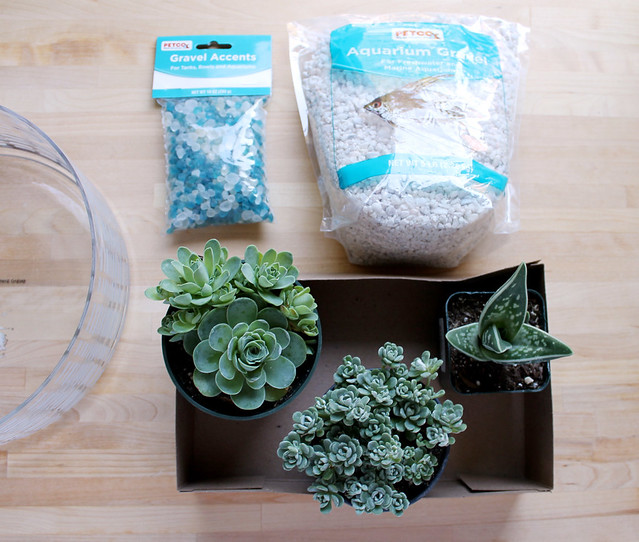
  • A dish of your choice. Succulents have compact root systems, so you don't need to use something with a lot of depth. I'm using this wide glass bowl that I got on clearance at Target many years ago.
  • Succulents. When choosing the plants to go in your garden, it's best to select plants with some contrast in their form and/or color. All of mine are in the blue/gray family, but each has a varying form (rosette, small scale, and spiky). Contrast is good!
  • Cacti and succulent soil. It is always best to use the appropriate soil for your plants. Succulent soil has high levels of sand and light-weight porous material, which encourages water to drain. These plants hate soggy roots, so well-draining soil is essential.
  • Decorative gravels. Here's a little trick of mine: skip the bags of gravel at your local nursery, and head to the pet supply store instead. The aquarium gravels that they offer are much less expensive, and you can often find many fun colors to choose from. I chose a fine white, a chunkier black (for drainage) and pretty sea glass for an accent.
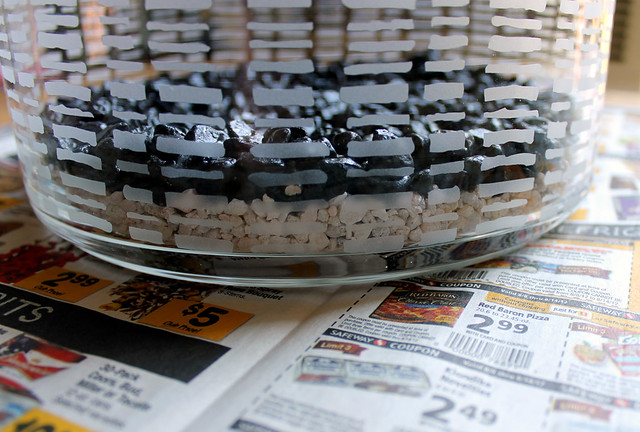
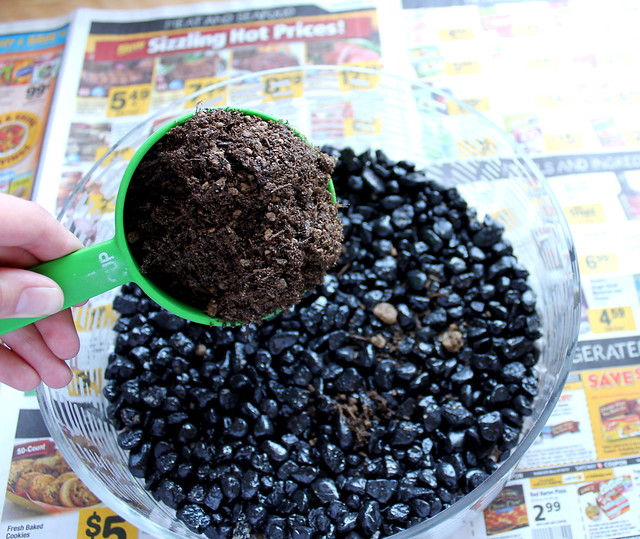
Lets get started! Since my container is transparent, I wanted the layers to pop. So instead of placing the black drain rock right at the bottom of the dish, I added a layer of the white gravel, to create a stripe. Then I added a layer of the black rock. The larger rock creates more air pockets, which means more places for excess water to hang out, keeping it away from the roots of your plants.

DIY Succulent Dish Garden | click through for the tutorial and tips for keeping succulents happy indoors
Add your soil.

DIY Succulent Dish Garden | click through for the tutorial and tips for keeping succulents happy indoors

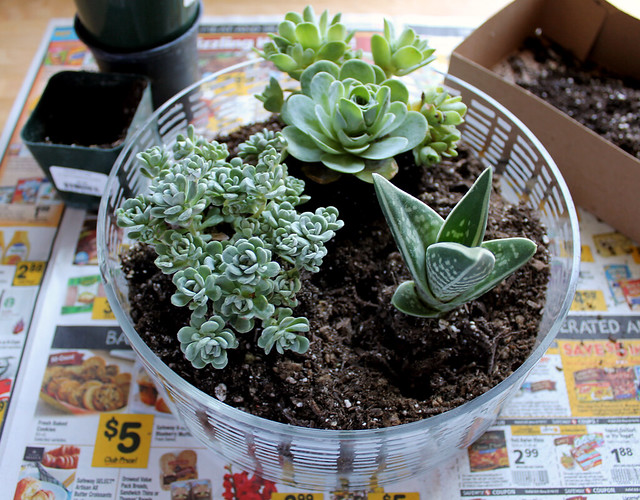
Decide on an arrangement for your plants. Odd numbers generally look better in these types of arrangements. I'm using three, so I just used a triangular spacing. Infill with soil and make sure your plants have a sturdy footing.
DIY Succulent Dish Garden | click through for the tutorial and tips for keeping succulents happy indoors

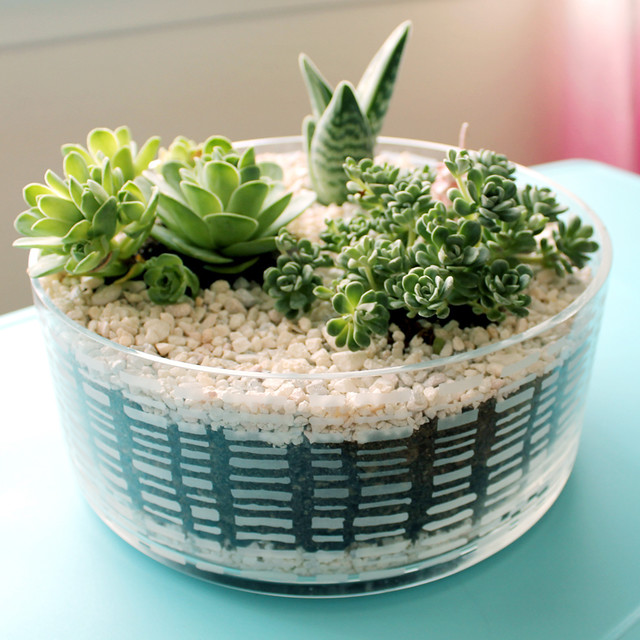
Top off with a layer of decorative gravel to cover the soil and give your dish a finished look. Make sure the top of your gravel is below the top lip of your container. Resist the urge to water your succulents right away. If the roots were damaged during planting, they are more susceptible to fungus and bacteria during this time. So, let it be for a week or two before you water it.
DIY Succulent Dish Garden | click through for the tutorial and tips for keeping succulents happy indoors

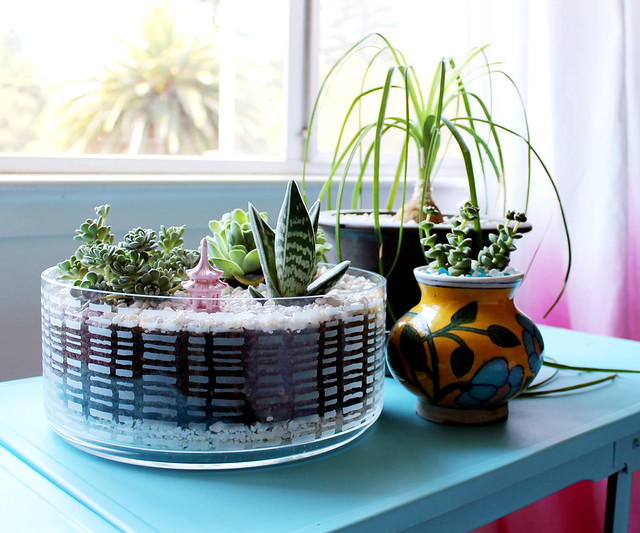
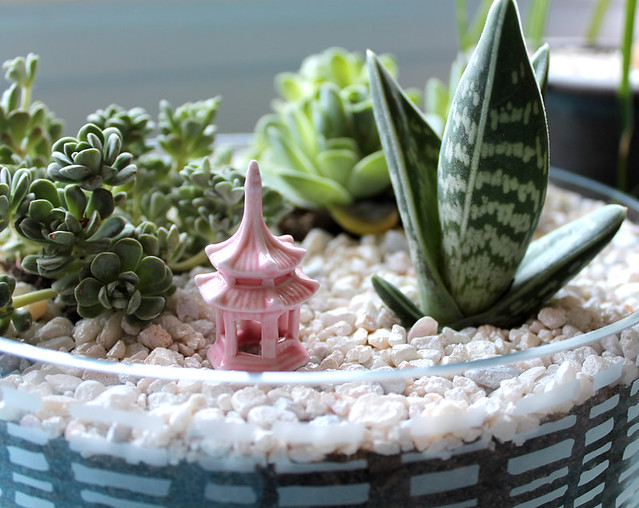
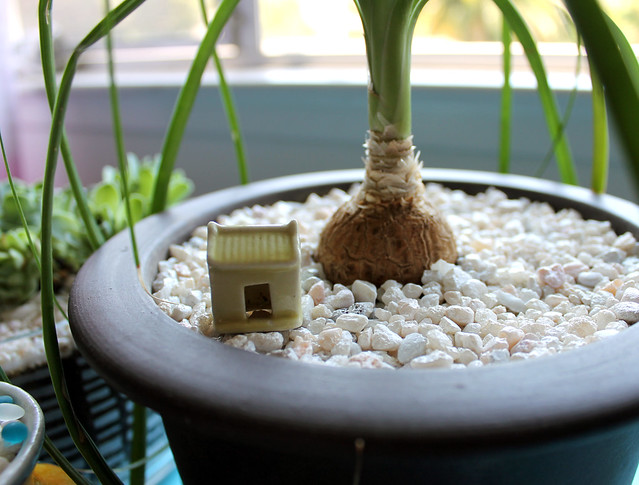
Here's one of my favorite parts: I like to place accents in my dish gardens, whether it's a single lava rock, a piece of fools gold, a painted stone, or a miniature ceramic figure. I got this great little ceramic pagoda at a bonsai shop and thought the pink really complimented the colors of the rock and the plants.
DIY Succulent Dish Garden | click through for the tutorial and tips for keeping succulents happy indoors

Find a nice spot for your new mini garden and enjoy!

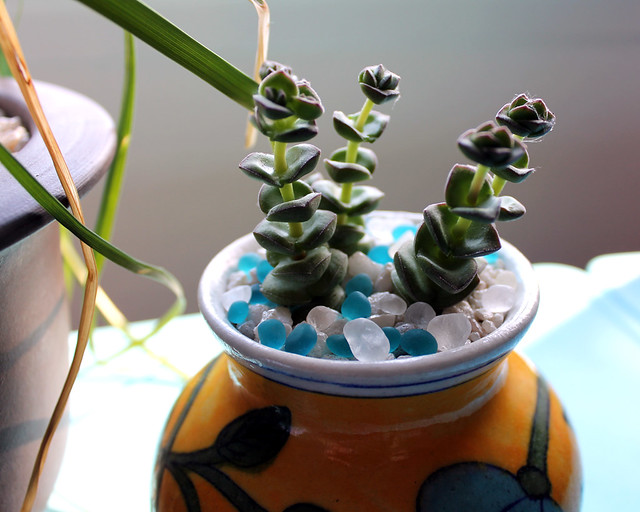
I had a bit of gravel leftover, so I topped off a few of my other house plants and added the sea glass to this succulent in a repurposed vase. Cute, right?
DIY Succulent Dish Garden | click through for the tutorial and tips for keeping succulents happy indoors

DIY Succulent Dish Garden | click through for the tutorial and tips for keeping succulents happy indoors This is just a portion of my indoor plant collection. I'm constantly moving them around so they get the appropriate amount of light, and keeping an eye on them if they seem to look stressed. Succulents can be tricky to grow indoors, but I've had many of mine for years now. Generally, succulents with red and purple in the leaves prefer more direct light than their all green friends, so keep that in mind when you're shopping. Some species just do better outdoors, though, so be open to finding the right situation where your plants will thrive. And don't overwater! :)
It's Labor Day weekend! Have a good one!

P.S. Make a dish garden for Halloween! 
15

Houseplants for Your Retro Pad

Monday, January 14, 2013

I just created a new mid-century style plant stand for my living room with a refurbished stand from my grandmother's house and a great ceramic pot. I've been thinking about what kind of plant to put in it and decided to do a round-up of houseplants that look great in mid-century and retro settings. Here are a few of my favorites:

Mid-Century Modern House Plants

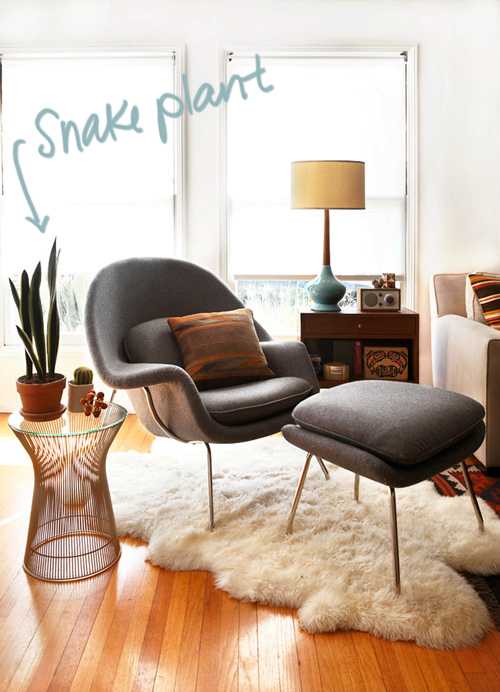
Snake Plants are very versatile indoor plants since they do well in bright and low light conditions. Their graphic leaf blades come in many different shades of green and different variegated varieties. They don't like much watering, and propagate themselves very easily. You can ignore them and they will love you for it! They are my favorite plant for the areas in my apartment that don't get any afternoon light. They were a favorite for those snazzy built-in planters in mid-century homes.

Image from Design Sponge

Mid-century Modern House Plants

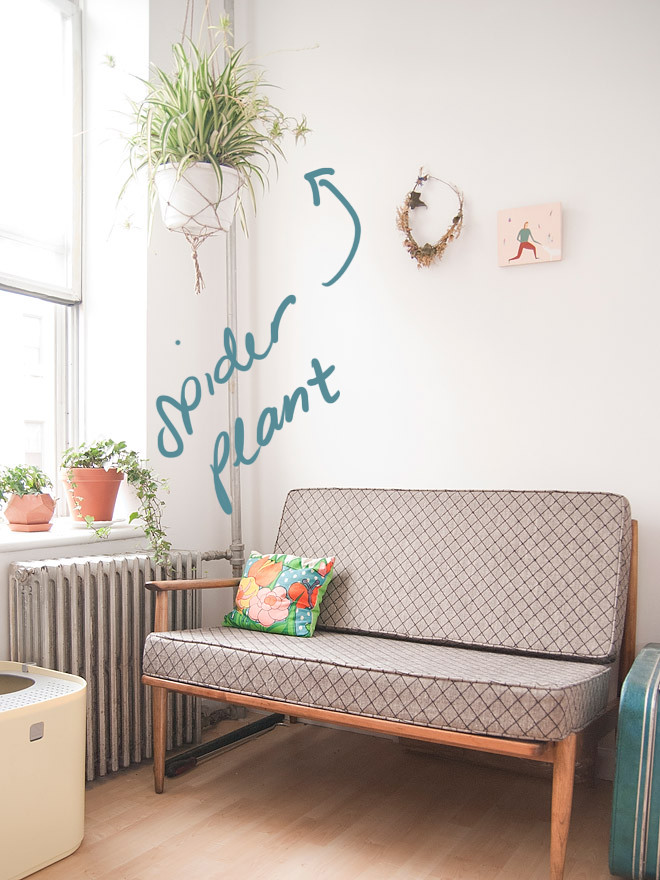
The Spider Plant is a classic indoor hanging plant. The off-shoots are easily propagated - trim them off and place them in some soil and they will start a new plant. They prefer bright light but will grow in many different conditions. They like regular water and misting. These are especially retro looking in groovy macrame hangers.

Image from Miss Moss

Mid-century Modern House Plants

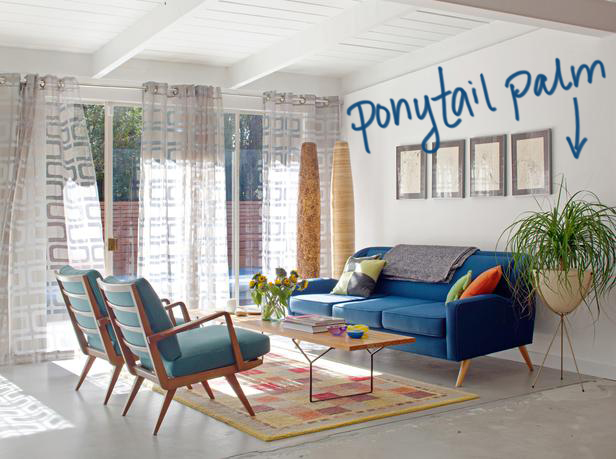
I've had a Ponytail Palm for about 7 years and it's one of my favorites in my plant collection! The exposed root ball stores water and expands after watering and contracts when it's thirsty. Pretty cool! I water mine once every 2 weeks or so. They are very slow-growing and like bright light. Their finely bladed leaves get long and curly and compliment the sleek lines of mid-century style furnishings.

Image from HGTV Remodels

Mid-Century Modern House Plants

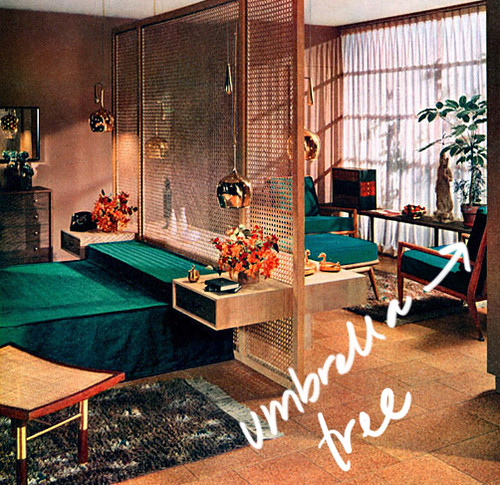
The Umbrella Tree (or Umbrella Plant) is a fairly common house plant. I'm sure you've seen these everywhere. They like evenly moist soil and bright, indirect light but can be tolerant of many different conditions.  

Image from Plan 59

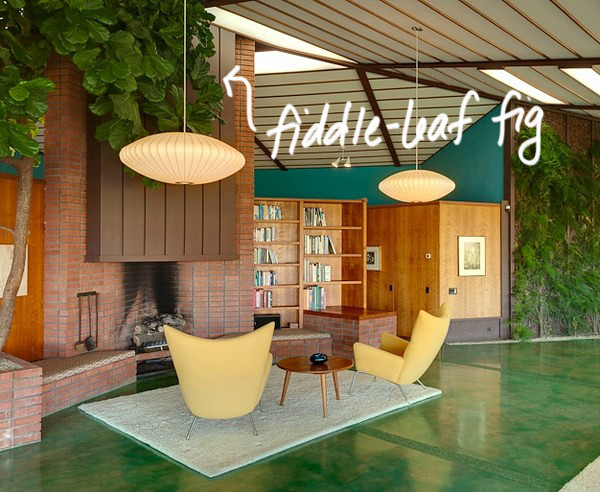
Mid-century Modern House Plants There are many species of Ficus that are appropriate as houseplants. Did you know the Rubber Tree is a species of Ficus, too? The most trendy of the Ficus (right now) is the fiddle leaf fig. They have beautiful, large lobed leaves and have a great structure. They like bright light and can be trained into a shrub or tree shape. One of these would look great in my large planter, but I fear that room doesn't get enough light. Clearly, they can get very large when placed in the right location. 
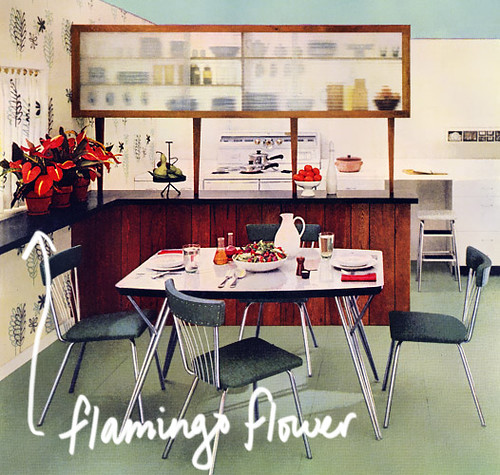
Image from Mid-Century Modern Freak

Mid-century Modern House Plants

If you're looking for some color, the Flamingo Flower is a great choice! They will bloom nearly year-round in a spot in your home with filtered light. They like mild temperatures, evenly moist soil, and humidity.

Image from Plan 59 

Mid-Century Modern House Plants

The Split-Leaf Philodendron is a broad leafed tropical plant. Their large glossy green leaves bring texture to indoor settings. Good for rooms with some extra space, these can grow up to 10' tall! They like bright, indirect light and occasional waterings. The photo above is of Charles and Ray Eames' Case Study House. They clearly loved their houseplants.

Image from Arch Daily

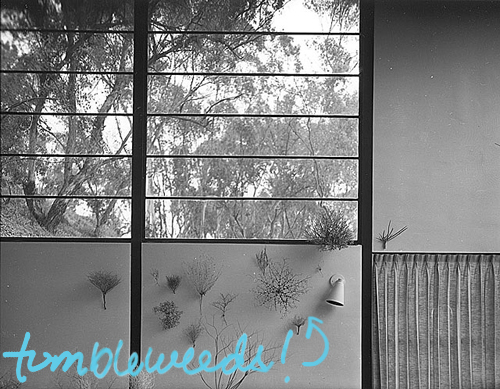
Of course, if you have a total black thumb, you can continue with the Eames theme and hang your favorite tumbleweeds on the wall!

Mid-Century Modern House Plants

Image from Design Milk

P.S. Learn how to hang and take care of a Staghorn Fern!

6

Decorate for Halloween with plants!

Thursday, October 3, 2013

DIY Halloween Dish Garden

As a plant-loving apartment dweller, I have to get creative with my collection. Thankfully, container gardening works for me, because it's my only option!

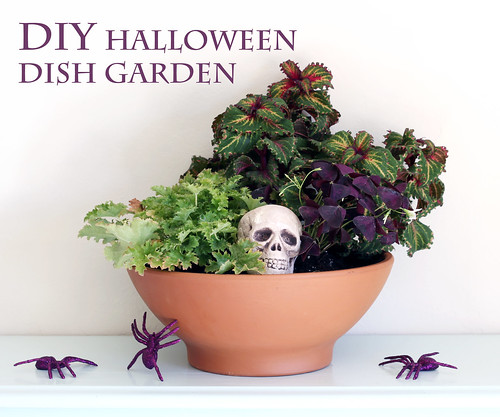
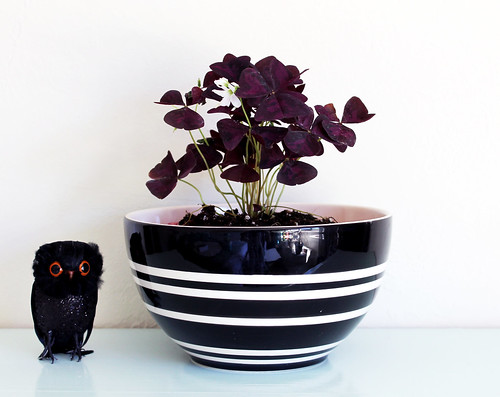
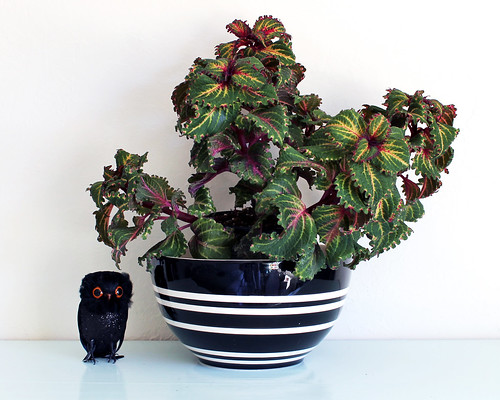
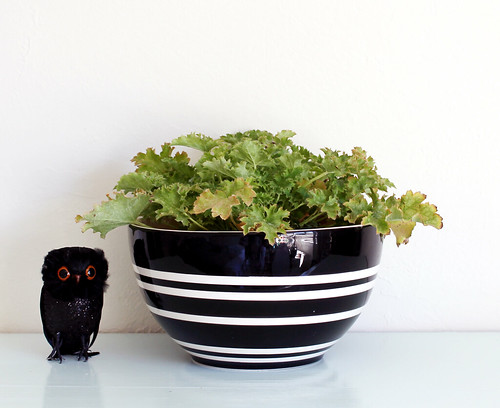
I'm a plant lover. I'd probably make a pretty crummy landscape architect if I wasn't, huh? I love plants of all kinds, but I'm especially drawn to unique and unusual varieties. I was browsing around at the local hardware store over the weekend looking for spray paint and (as always) wandered into the small garden section. I spotted this great deep purple Oxalis, and that was it for me. I decided to plant a halloween themed dish garden with this Oxalis as a feature. What's spookier than an almost black plant? Here's what I ended up getting. Thank you to my new owl for playing Vanna White for these photos.

Oxalis 'Charmed Wine'
Halloween Dish Garden

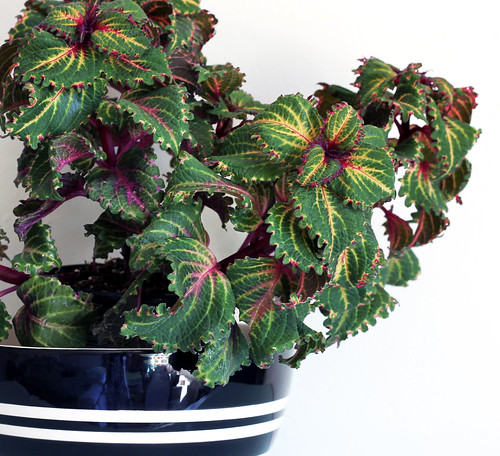
Coleus 'Peter's Wonder'
Halloween Dish Garden

Heuchera 'Apple Crisp'
Halloween Dish Garden

Three things to consider when selecting plants for a container garden:
  • Take their water and sunlight needs into account. Choose species with similar needs.
  • Consider the color, size, and form of the plants. Find plants of varying heights and varying textures. When selecting for color, I typically choose two that compliment each other, and a third that contrasts.
  • Select an odd number of plants. Odd numbers always look more natural in landscape settings.
Halloween Dish Garden

Starting with the deep purple leaves of the oxalis, I knew I needed at least one other plant with purple. The coleus was a great find, because of its interesting leaf shape, tall form, and cool variegated leaves (with purple!). Those two plants compliment each other in color and form, so next I went looking for something with contrast. I found this great lime green heuchera, that when paired up with the other two, really pops. It also satisfied my need for something low. All three of these work well in containers and part shady conditions of my porch. I picked up a simple clay pot and a bag of soil and I was ready to get started!

Halloween Dish Garden

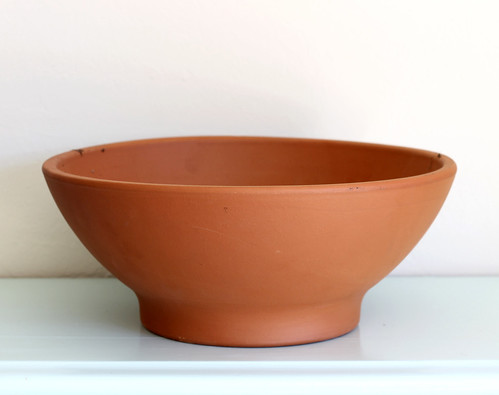
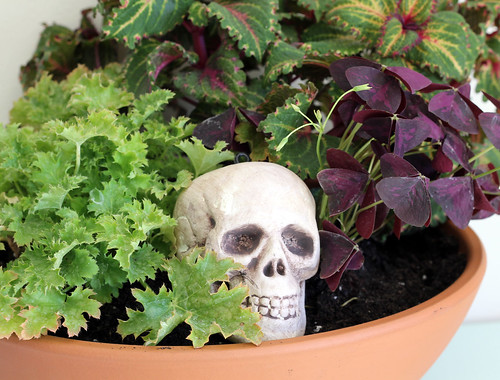
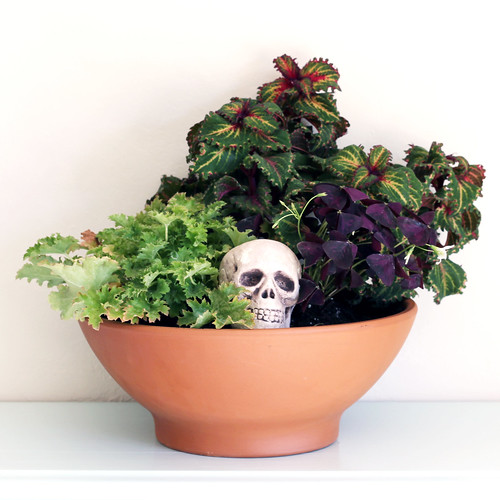
To arrange the plants in the pot always place the taller ones in the back and the shorter in the front. I like to add a little something extra in my container gardens (as seen in my succulent dish garden) so I kept a little space open in the front for this skull that I found in my box of Halloween decorations.

Halloween Dish Garden DIY Halloween Planter DIY Halloween Dish Garden
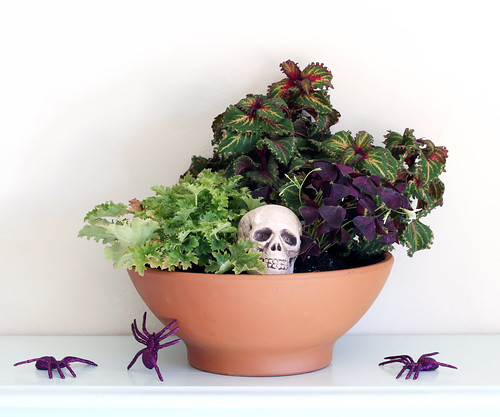
Done! And it'll make a nice centerpiece for evening get-togethers this fall. Just add some creepy spiders. In the meantime, it looks great on my front porch and reminds me of fall every time I walk by.

6

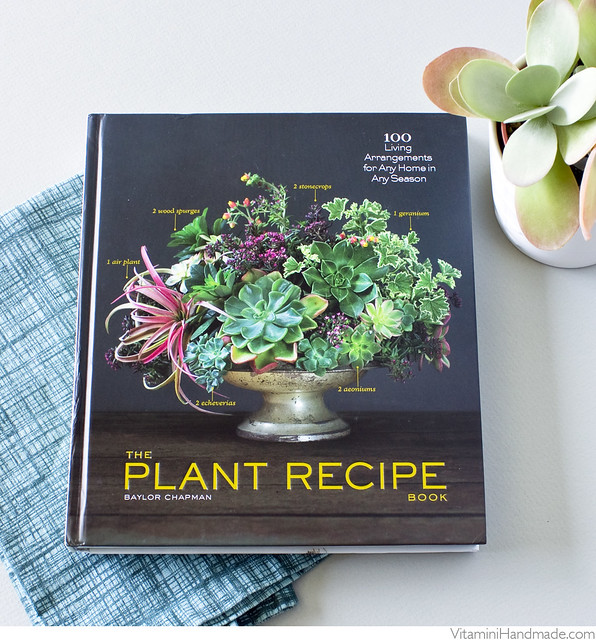
Book Review: The Plant Recipe Book

Friday, May 2, 2014

The Plant Recipe Book, by Baylor Chapman

As a landscape designer with no yard space to speak of, small container gardens are the only way I can get my plant design fix at home. They're easy to switch-out with the seasons and can add a splash of color, texture, and life to a small front porch or tabletop. Naturally, I was thrilled when Artisan sent me a copy of The Plant Recipe Book: 100 Living Arrangements for Any Home in Any Season to check out.

The Plant Recipe Book, by Baylor Chapman

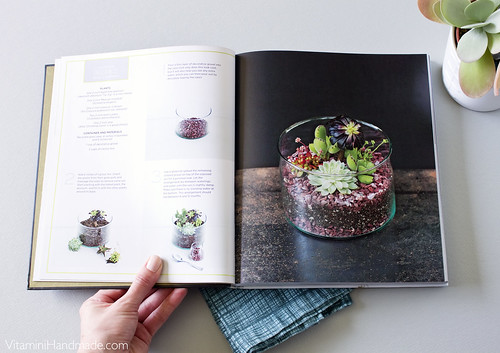
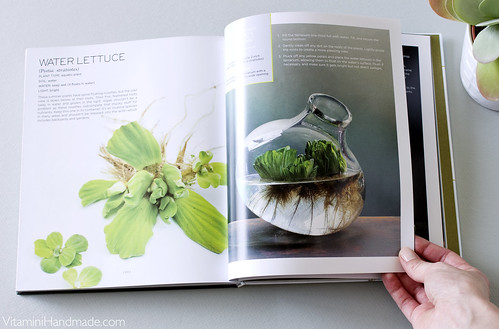
San Francisco garden designer and author Baylor Chapman provides detailed instructions for how to create these beautiful arrangements yourself.  Each "recipe" comes with descriptive text about the featured plants (size, scientific name, recommended cultivars), container and materials list, detailed steps outlining how to assemble the arrangement, and care instructions.

The Plant Recipe Book, by Baylor Chapman

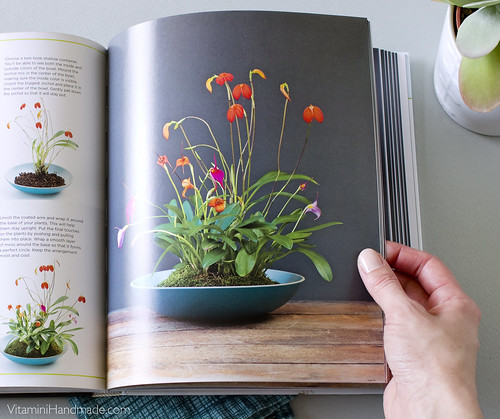
Succulents, air plants, ferns, carnivorous plants, mushrooms, and orchids; there's something for everyone. The horticulturalist in me loves that the scientific names for all of the plants are provided and there is information about soil and amendments. The designer in me loves the unique compositions and the beautiful photographs.

The Plant Recipe Book, by Baylor Chapman

I'm feeling inspired to start making some new arrangements in unconventional containers. I really need to get my hands on some water lettuce!

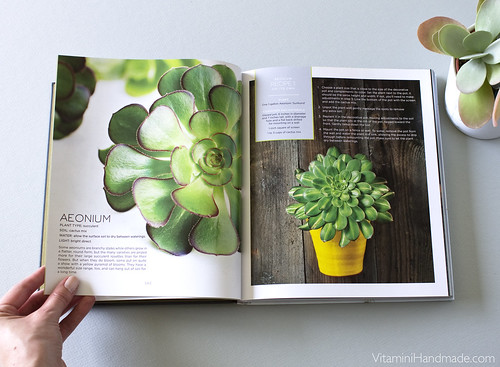
The Plant Recipe Book, by Baylor Chapman

This is just a small sampling of the projects in this book. It's a great source of plant-y inspiration and would also make a wonderful gift. Check it out on Amazon.

Disclosure: I was sent a copy of The Plant Recipe Book for review. All opinions, words, and images are my own. Thanks for supporting the brands that keep Vitamini Handmade going! 

217

DIY Modern Staghorn Fern

Monday, June 22, 2015

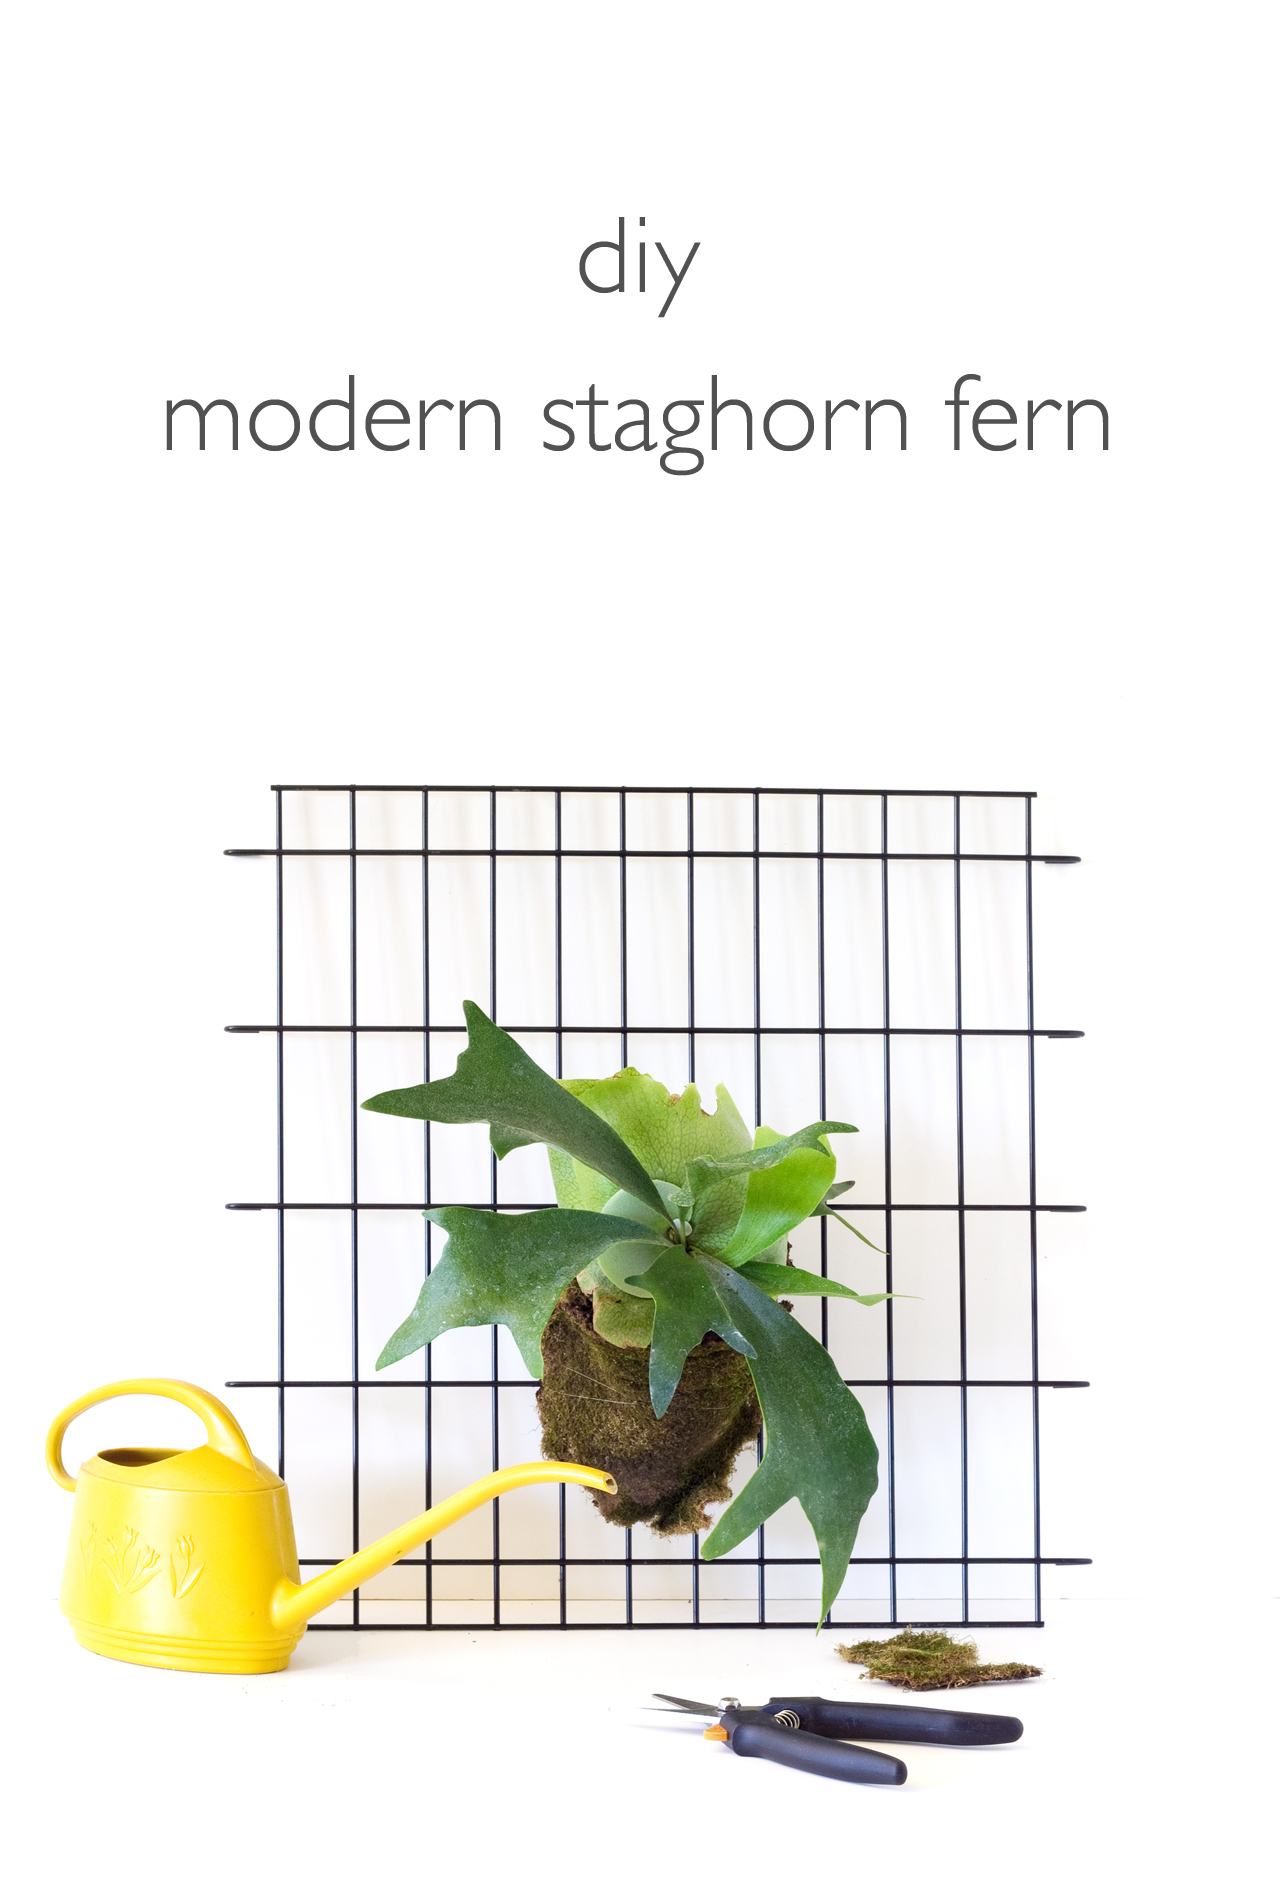
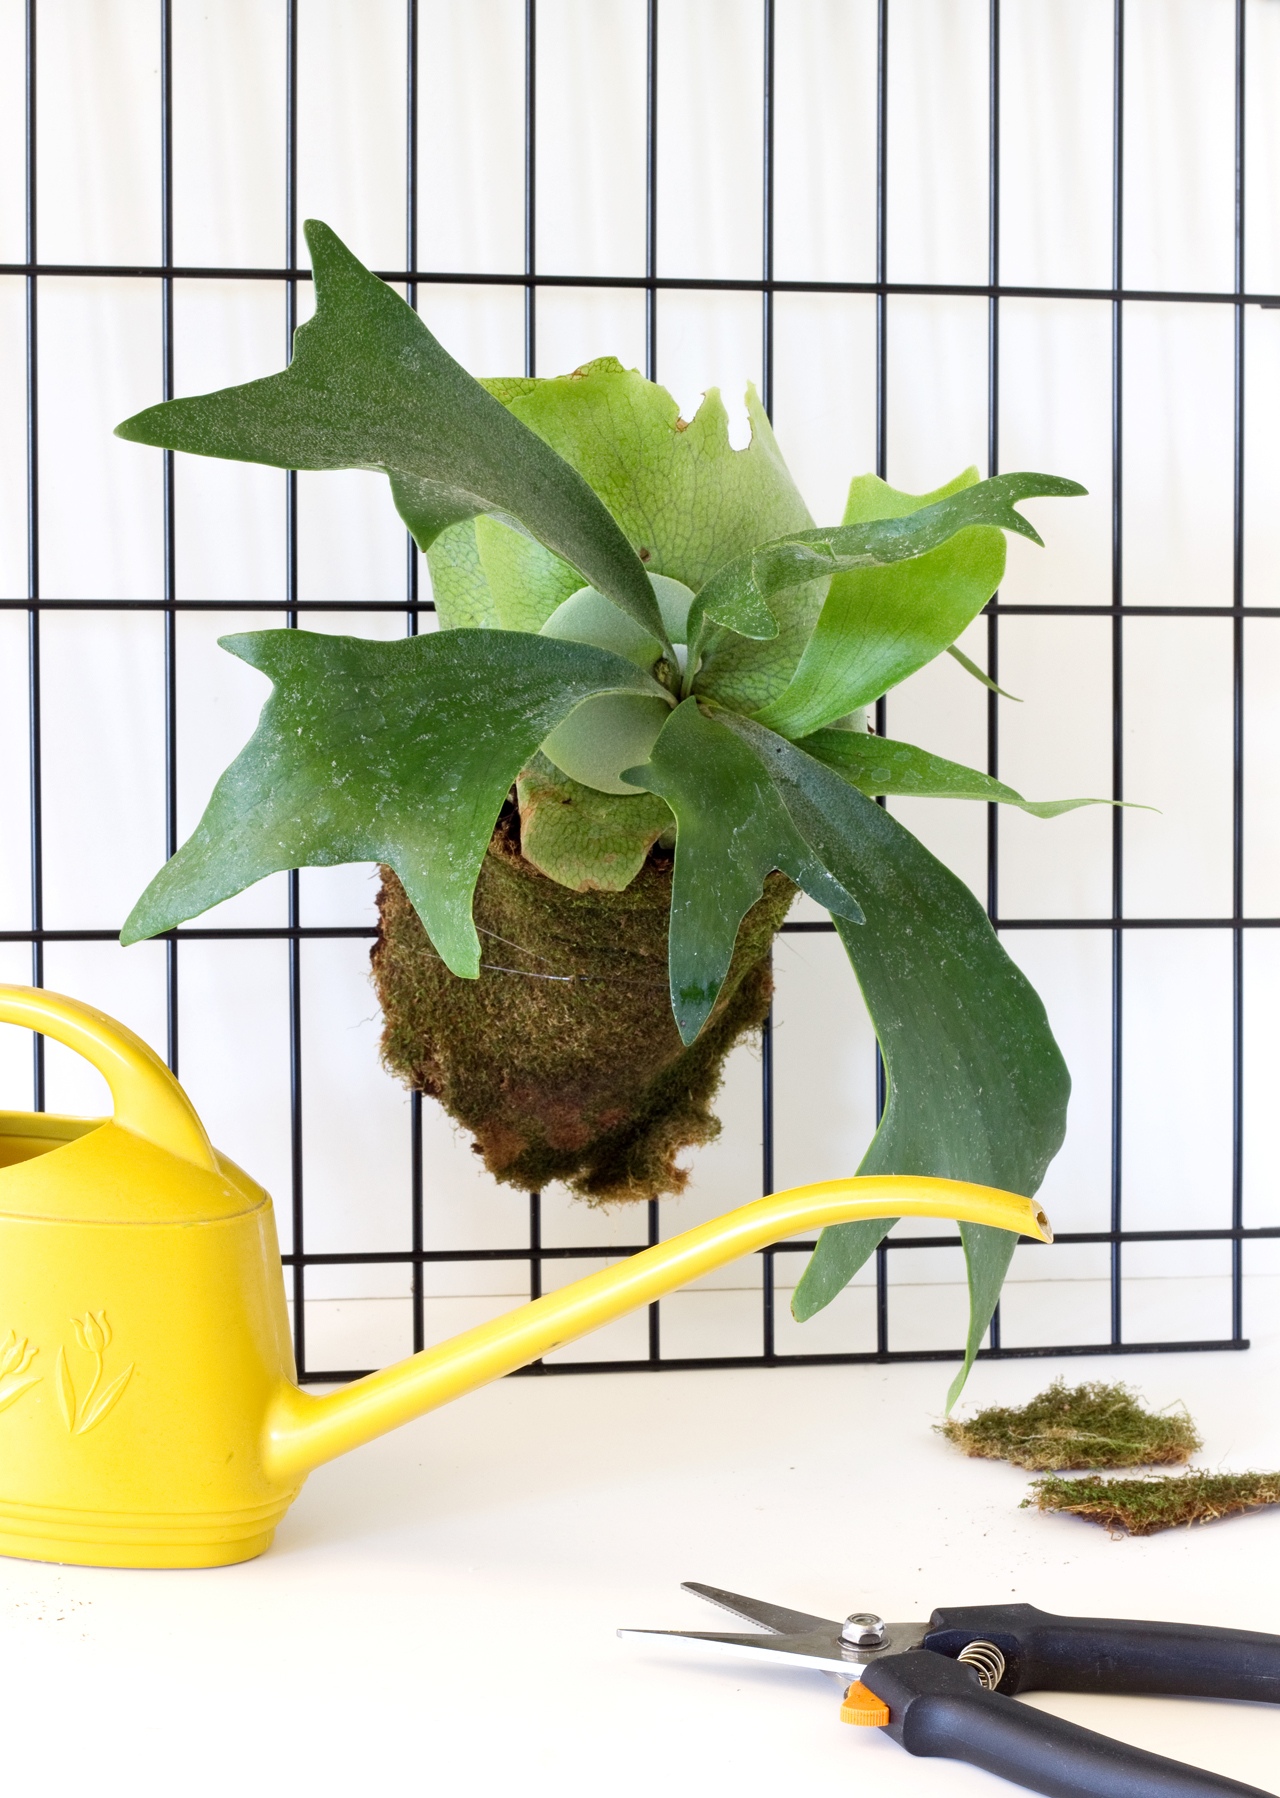
DIY Modern Staghorn Fern | click through for the tutorial and care tips! Hey, did I tell you guys I love plants? I've been on the hunt (ha!) for a staghorn fern for a few years, so I was thrilled when I came across some for sale at a orchid show I attended a couple weeks ago. Staghorn ferns are named for their resemblance to, well, the horns of a stag. They're epiphytes, which means they naturally attach themselves and grow on the trunks and branches of other trees and shrubs. They can also be attached to other vertical surfaces and hung on the wall. They're really cool plants! When I originally picked mine up I planned to mount it to a slab of weathered wood, but I changed my mind and decided instead to attach it to a piece of wire metal mesh. The clean lines of the metal combined with the leafy, organic form of the fern really gives it a modern look. It would look great hanging inside or outside!

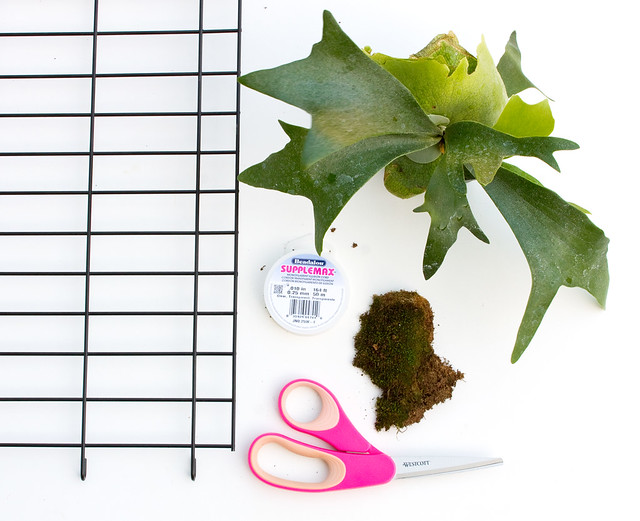
Here's what you'll need to make a modern hanging staghorn fern of your own:
DIY Modern Staghorn Fern | click through for the tutorial and care tips!
  • Staghorn Fern. I bought mine at a local orchid show, but you can find them online and in specialty nurseries.
  • Sheet Moss
  • Monofilament or fishing line (I used clear beading line from my mobile project)
  • Hooks and/or spacers for hanging on the wall. My wire panel has loops on the sides that would prevent it from hanging flush against the wall - that is good! If your panel is flat it would be best to hang it 1/2" or so away from the wall so the moisture doesn't affect it. Try using pegboard spacers for the installation.

  • Metal grid. Repurposed (I always see these at the thrift shop) or you can buy and paint a piece of wire mesh from the hardware store. Mine was a divider for my puppy's crate!  
  • Scissors

DIY Modern Staghorn Fern | click through for the tutorial and care tips!

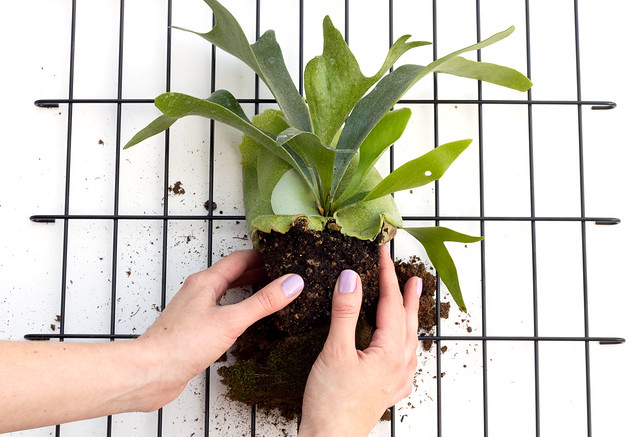
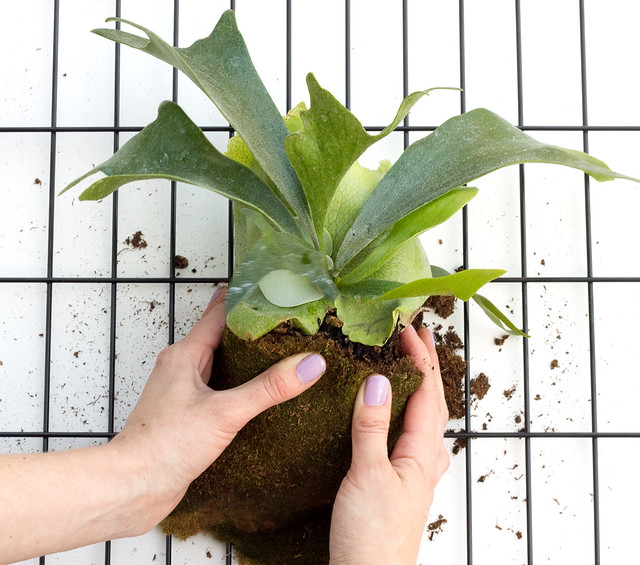
Cut a few pieces of moss and dampen in a bowl of water. Lay the metal panel on your work surface and create a little "nest" shape where you want the fern to go. Make it thicker on the side that will become the bottom when it's standing up. Remove the pot from the fern, remove any loose soil, and loosen the root ball. Don't be afraid to use a little muscle loosening the roots. Set the fern in the moss nest.

DIY Modern Staghorn Fern | click through for the tutorial and care tips!

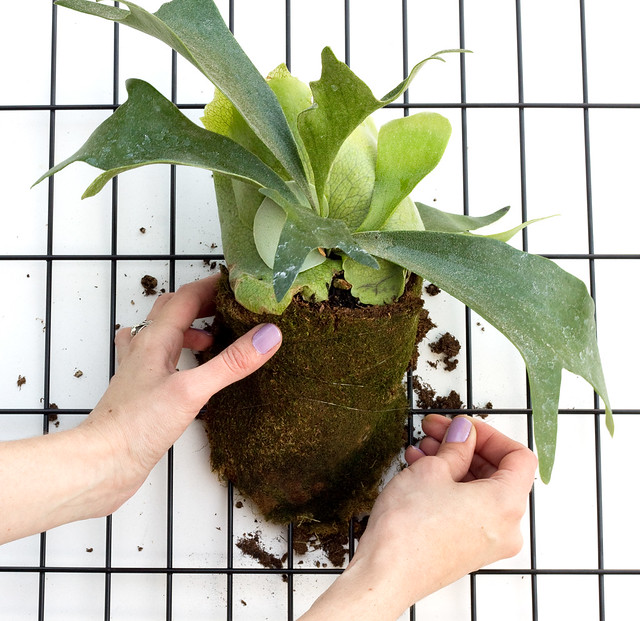
Cut another piece of moss to go over all of the exposed soil. I was able to do this with one piece, but use more if you need to fill in any open areas. Bundle the moss around the roots, covering up any exposed soil.

DIY Modern Staghorn Fern | click through for the tutorial and care tips!

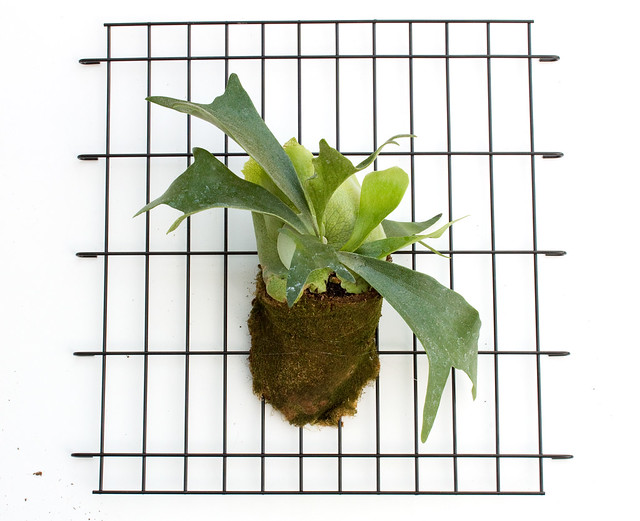
Cut a length of the monofilament, about 3' long. Tie the end to the wire mesh next to the edge of the plant. Pull the line directly across the plant, making sure to go under all of the leaves (so it only makes contact with the moss) and loop on the other side. Repeat, looping back and forth until the entire base of the fern is securely attached to the wire grid. Tie off the end. Tuck additional bits of moss around any visible monofilment if you'd like, to help conceal it.

DIY Modern Staghorn Fern | click through for the tutorial and care tips!

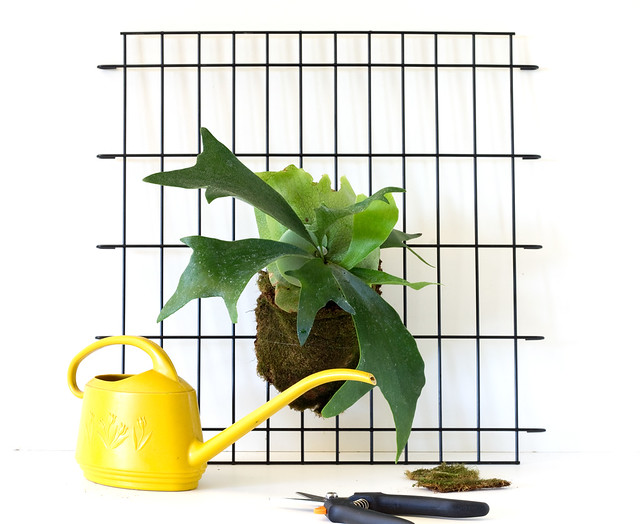
Screw in a two hooks on the wall and hang, or just lean it against a wall. If placing it outside, it will do best in a bright area with no direct sunlight. Morning sun is ok, but it will burn in direct afternoon sun. Bring inside during the colder months to avoid frost. It also likes humidity so place it near a water source like a pond, or hang it in the bathroom when you shower. Give it a soak once a week or when the soil and moss feel dry.

DIY Modern Staghorn Fern | click through for the tutorial and care tips! DIY Modern Staghorn Fern | click through for the tutorial and care tips!

I can't wait for this guy to grow! Do you have any experience with staghorn ferns? Aren't they cool?

15

Friday Finds 4.10.15

Friday, April 10, 2015

Untitled
We made it to another Friday! How was your week? Mine was jam packed - I've been working on a bunch of new card designs over the past couple of weeks and finished making the final adjustments the other day. I've already made the screens with the designs and now I'm anxious to get them all printed so I can share! I'll be spending some quality time in front of my printing table over the next few days. I'm also planning to take a little road trip to visit a friend this weekend and I'm looking forward to the break since I usually work on the weekends. Anyway, enough of me! I've noticed lots of fun and colorful stuff on the web this week that I thought you would appreciate as well:
Zipper photo from my Instagram feed. Follow me there to see what I'm up to, or to just look at Baci's puppy pics. :) Have a great weekend!

16

DIY Spooky Plant Pick

Monday, October 20, 2014

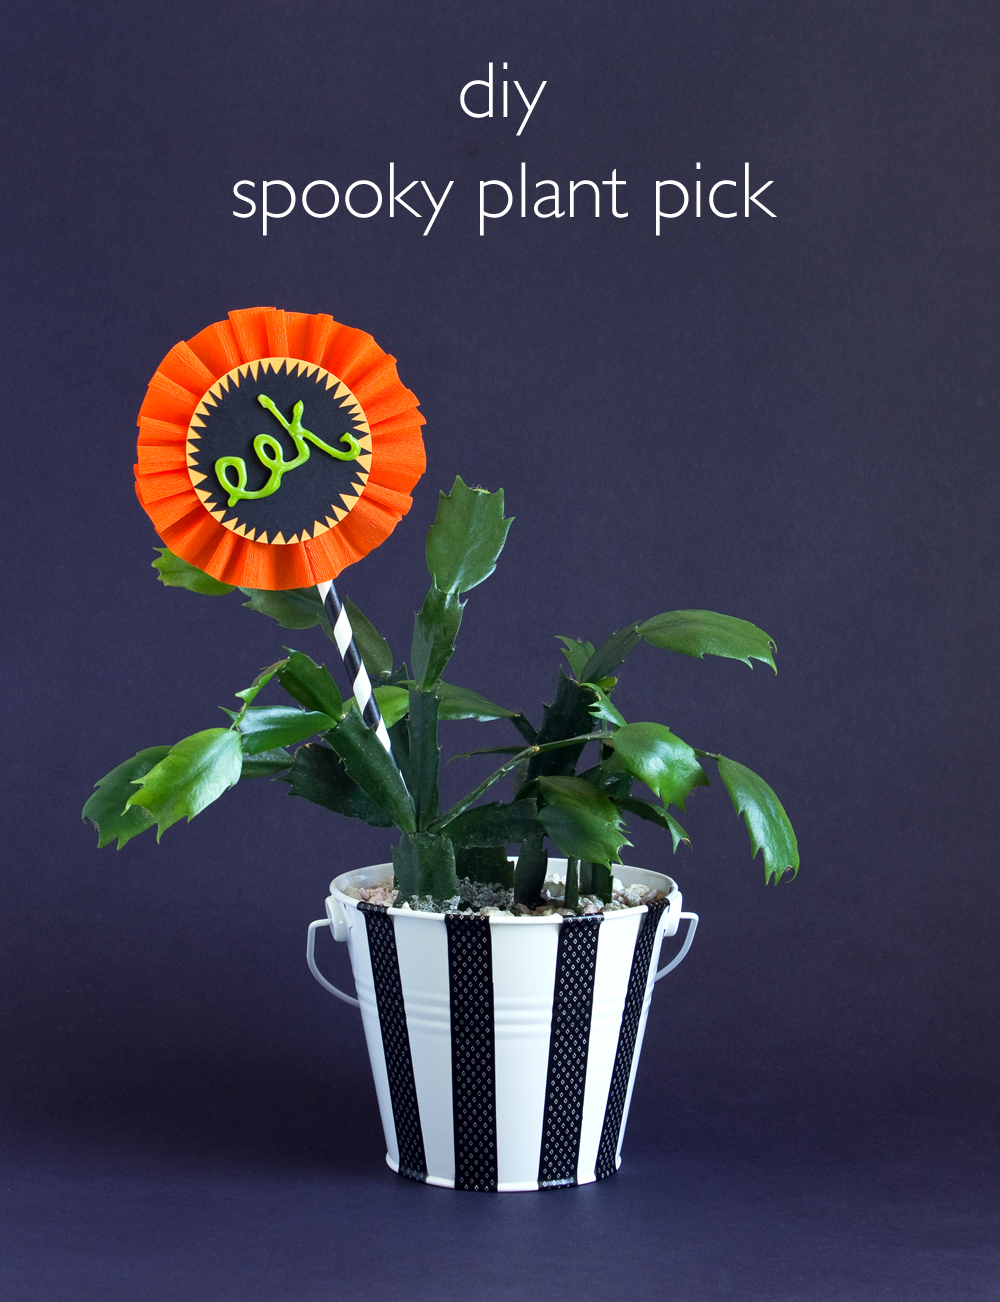
DIY Spooky Plant Pick
 
I love Halloween, so any excuse to create another craft project is good by me! I partnered up with Mod Podge to make a Halloween project with a few of their supplies. These fun plant decorations can are made with just a few materials and can help spookify your favorite houseplants. Plus they're glow-in-the-dark!

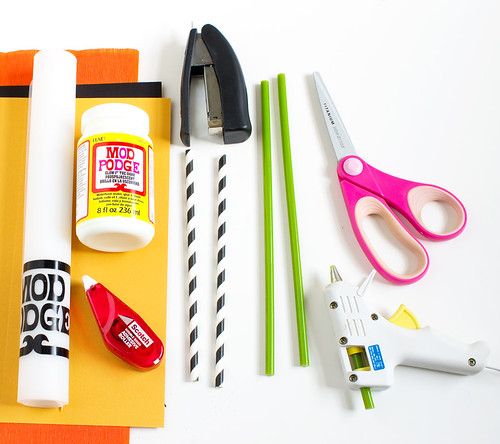
Here's what you'll need:
DIY Halloween Plant Decoration
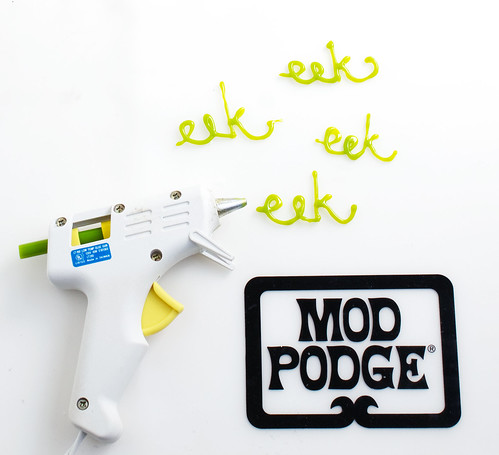
  • Mod Melts in Green
  • Mod Podge Silicone Mat
  • Mod Podge Glow in the Dark
  • Hot glue gun
  • Cardstock in yellow and black
  • Single ply crepe paper (or tissue paper) in orange
  • Stapler
  • Double sided tape or gluestick
  • Striped paper straw
  • Scissors
DIY Halloween Plant Decoration
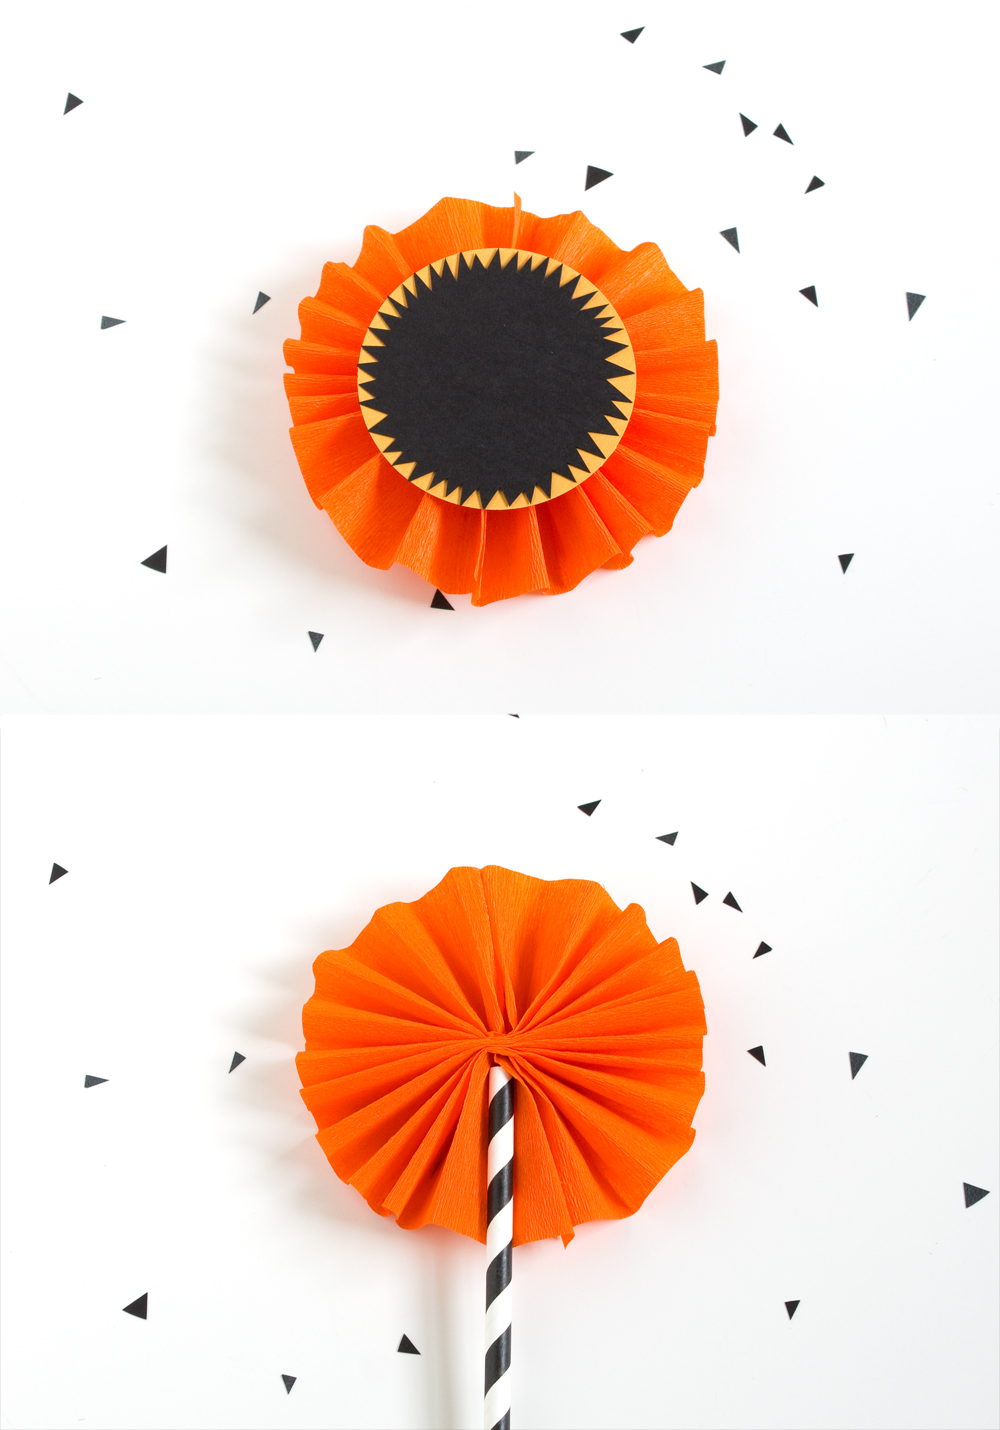
Punch (or trace and cut) 2 1/2" diameter circles from the yellow and black cardstock. Cut notches out of the black circle to make an irregular, spiky edge. Glue the two circles together.
DIY Halloween Plant Decoration

Cut a 3.5" x 18" piece of crepe. Accordion fold and staple in the center. Add double-sided tape to the edges and fan out.

DIY Halloween Plant Decoration

Glue the paper circles to the fan. Hot glue the straw to the back of the fan.

DIY Halloween Plant Decoration

Now for the fun part! Heat up the Mod Melt in the hot glue gun. Write "eek" in script directly onto the silicone mat. Nothing sticks to this mat so it'll be easy to pop off the words once they're cool! It might take a little practice (it did for me!) but it'll get easier once you get the hang of it.

Once the word is cool, carefully pull it up from the mat. To get a nice, thick coat of glow-in-the-dark goodness, brush the glow Mod Podge over the letters, or do like I did and dip the whole thing into the jar. Let dry on the mat and then glue to the center of the circles.
DIY Halloween Plant Decoration DIY Halloween Plant Decoration

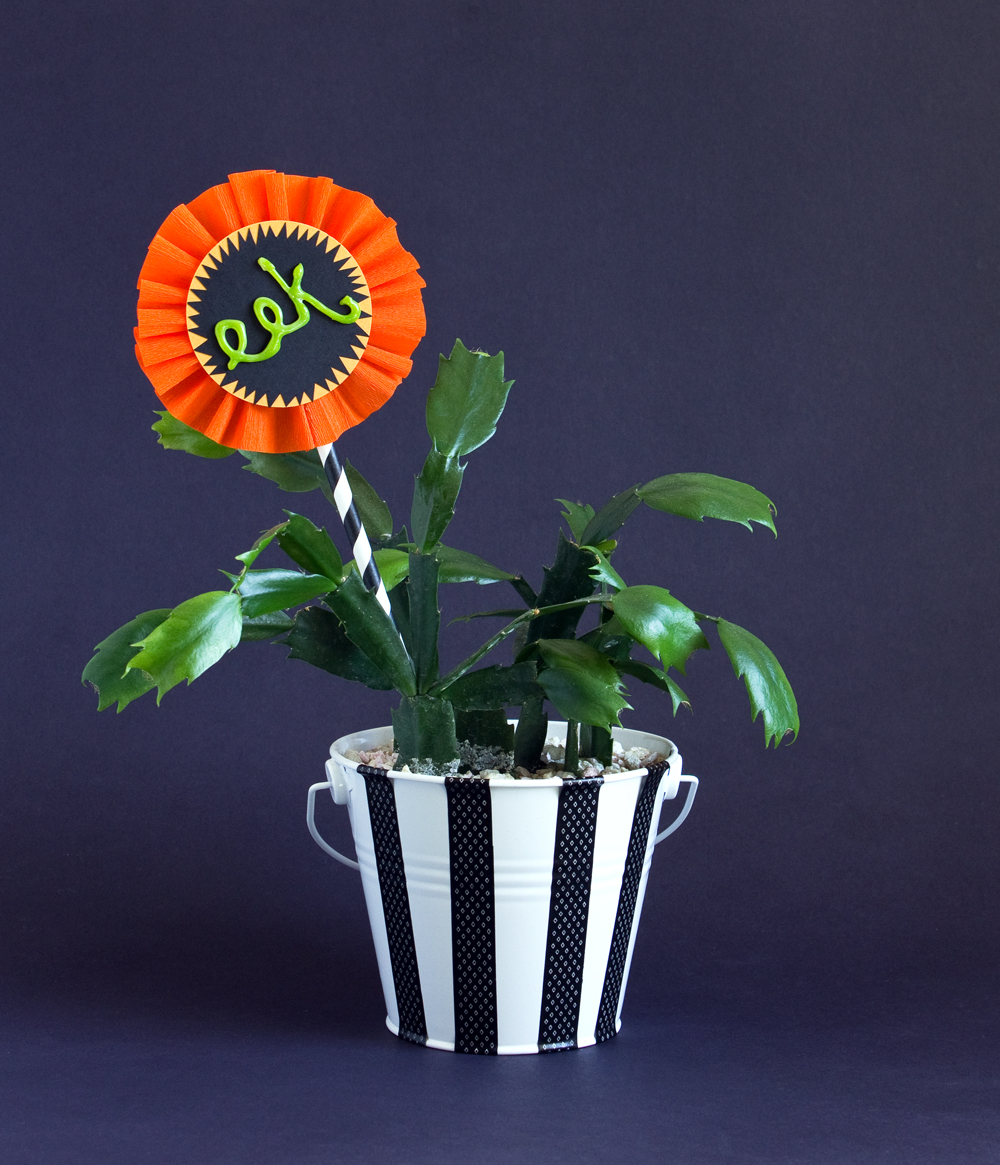
Add the pick to a spooky-looking plant for a nice Halloween gift! Wouldn't these make the cutest party favors? I used a Christmas cactus, but there are all kinds of other creepy-looking plants that would be great with this pick: venus fly traps, spiky succulents, spider plants, something cabbage-y (an ode to Little Shop of Horrors). The plant container is another opportunity to bring in the Halloween theme. I added black washi tape stripes to a plain white metal bucket, but the opportunities are endless!

DIY Halloween Plant Decoration

Disclosure: I wrote this post as part of a paid campaign with Mod Podge and Blueprint Social. I was compensated for this post, but all ideas and opinions are my own. Thanks for supporting the brands that keep Vitamini Handmade going! 

If you're looking for more craft ideas from Plaid check out these projects: DIY Faux Sugar Skulls with Collage Clay by Mod Podge, 3 DIY Cell Phone Cases with Decoden by Mod Podge, Plaid Blog - Introducing Mod Podge Modeling Clay, Plaid Decoden Pinterest Board


Follow Plaid on Social Media: Pinterest | Facebook | Twitter | Instagram | Google+ 


vitamini handmade © All rights reserved · Theme by Blog Milk · Blogger