8

DIY Succulent Dish Garden

Friday, August 31, 2012

DIY Succulent Dish Garden | click through for the tutorial and tips for keeping succulents happy indoors
As a landscape architect and all-around plant lover, I enjoy arranging plants to create compositions. Combining the forms, textures, and colors of different plants is like painting a picture, but in 3 dimensions. I don't have a yard, so I have to get my fix of green with potted cacti and succulents in my little apartment and on my porch. Creating dish gardens is one of my favorite weekend projects. I'm frequently repotting and rearranging my succulent collection in new ways, to keep things interesting, incorporate newly acquired plants into my collection, and to respond to the needs of the plants.

I'm going to outline how to go about creating a dish garden in a container without drainage holes, because some of the best containers weren't originally intended for plants! I don't have a drill or a masonry drill bit, either, so adding holes isn't an option for me, but if you do, by all means, add holes!

Here's what you'll need to make your own succulent dish garden:
 
DIY Succulent Dish Garden | click through for the tutorial and tips for keeping succulents happy indoors
  • A dish of your choice. Succulents have compact root systems, so you don't need to use something with a lot of depth. I'm using this wide glass bowl that I got on clearance at Target many years ago.
  • Succulents. When choosing the plants to go in your garden, it's best to select plants with some contrast in their form and/or color. All of mine are in the blue/gray family, but each has a varying form (rosette, small scale, and spiky). Contrast is good!
  • Cacti and succulent soil. It is always best to use the appropriate soil for your plants. Succulent soil has high levels of sand and light-weight porous material, which encourages water to drain. These plants hate soggy roots, so well-draining soil is essential.
  • Decorative gravels. Here's a little trick of mine: skip the bags of gravel at your local nursery, and head to the pet supply store instead. The aquarium gravels that they offer are much less expensive, and you can often find many fun colors to choose from. I chose a fine white, a chunkier black (for drainage) and pretty sea glass for an accent.
Lets get started! Since my container is transparent, I wanted the layers to pop. So instead of placing the black drain rock right at the bottom of the dish, I added a layer of the white gravel, to create a stripe. Then I added a layer of the black rock. The larger rock creates more air pockets, which means more places for excess water to hang out, keeping it away from the roots of your plants.

DIY Succulent Dish Garden | click through for the tutorial and tips for keeping succulents happy indoors
Add your soil.

DIY Succulent Dish Garden | click through for the tutorial and tips for keeping succulents happy indoors

Decide on an arrangement for your plants. Odd numbers generally look better in these types of arrangements. I'm using three, so I just used a triangular spacing. Infill with soil and make sure your plants have a sturdy footing.

DIY Succulent Dish Garden | click through for the tutorial and tips for keeping succulents happy indoors

Top off with a layer of decorative gravel to cover the soil and give your dish a finished look. Make sure the top of your gravel is below the top lip of your container. Resist the urge to water your succulents right away. If the roots were damaged during planting, they are more susceptible to fungus and bacteria during this time. So, let it be for a week or two before you water it.

DIY Succulent Dish Garden | click through for the tutorial and tips for keeping succulents happy indoors

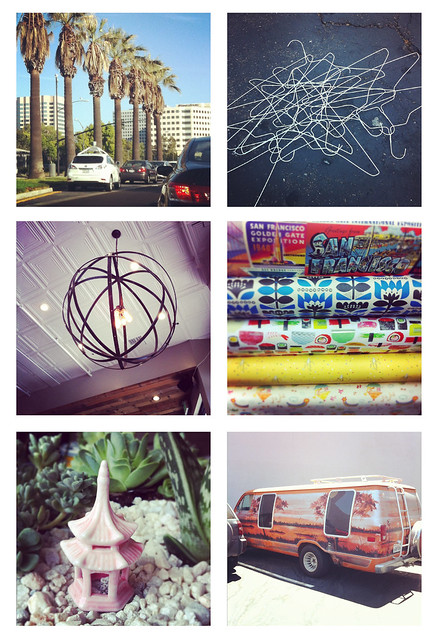
Here's one of my favorite parts: I like to place accents in my dish gardens, whether it's a single lava rock, a piece of fools gold, a painted stone, or a miniature ceramic figure. I got this great little ceramic pagoda at a bonsai shop and thought the pink really complimented the colors of the rock and the plants.

DIY Succulent Dish Garden | click through for the tutorial and tips for keeping succulents happy indoors

Find a nice spot for your new mini garden and enjoy!

I had a bit of gravel leftover, so I topped off a few of my other house plants and added the sea glass to this succulent in a repurposed vase. Cute, right?

DIY Succulent Dish Garden | click through for the tutorial and tips for keeping succulents happy indoors

DIY Succulent Dish Garden | click through for the tutorial and tips for keeping succulents happy indoors 
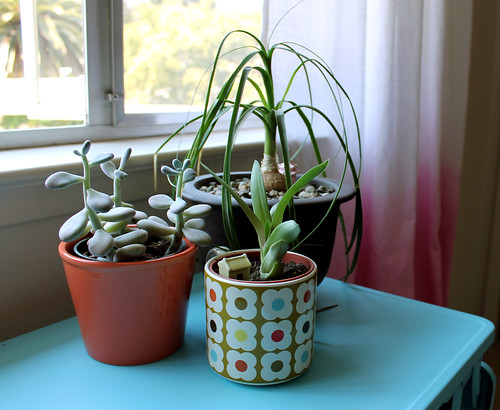
This is just a portion of my indoor plant collection. I'm constantly moving them around so they get the appropriate amount of light, and keeping an eye on them if they seem to look stressed. Succulents can be tricky to grow indoors, but I've had many of mine for years now. Generally, succulents with red and purple in the leaves prefer more direct light than their all green friends, so keep that in mind when you're shopping. Some species just do better outdoors, though, so be open to finding the right situation where your plants will thrive. And don't overwater! :)
It's Labor Day weekend! Have a good one!

P.S. Make a dish garden for Halloween

6

What I've been up to.

Tuesday, August 28, 2012

photocollage2_12.0827
A few things that have been keeping me busy lately:

1. My 3 year-old niece is a Mini Cooper fan in the making! She went to the Tiny Car Show in Pacific Grove a couple weeks ago with her mom (one of my sisters) and told me all about all of the Minis she saw. She said she even saw a yellow one just like mine. :)
2. I got a vintage aluminum Christmas tree and color wheel! And now I'm counting down the days till I can set it up in my front window.
3. New fabric prints and colors designed by me and printed by Spoonflower. I'll be listing them in the shop this week, even though I want to keep them all.
4. New old stock script address number. I love this font.
5. Pretty carnival rides at the Monterey Fair Grounds this past Saturday. I was there at a music festival to see...
6. Mumford & Sons! It was a wonderful show and I'm still humming all of the songs. I just discovered this nice video on Youtube of M&S playing on of my favorites, "Winter Winds". Six other bands played, too, so I've got some new songs on rotation on my iphone.

Have a great week!

0

Retroauto.

Friday, August 17, 2012


retro concept cars at concours d'elegance pebble beach

Concours d'Elegance 2008. 1956 Buick Centurion
1958 Buick Centurion

If you're really into cars, this weekend is a big one. The annual Concours d'Elegance is held in Pebble Beach, California this Sunday, rounding out a week full of auto shows and races held up and down the central coast of California. If you're in the Monterey area right now, you're probably tripping over Lamborghinis, Bugattis, and other crazy car brands that you've maybe never heard of before. I know this, firstly, because I grew up in Monterey County, and second, because I had the pleasure of working at the Concours event in 2008 and 2009 (and sitting in the resulting traffic on Highway 1 surrounded by car movers that were bigger than my apartment).

Concours d'Elegance 2008, Pebble Beach, CA
1958 Oldsmobile F-88 Roadster. Also the poster car for the event that year.

So, back in 2008, I was working as a Concours barista at the Pebble Beach Resort. If you're not familiar with the event, it's an antique auto show, in the style of the classic French auto shows. The world's best examples of classic, rare autos are showcased and people come from literally all over to show off their rides and rub elbows with other auto enthusiasts (or just sip champagne and show off their outfits). I was working one of the set-up days before the actual show, finished up my shift, and had a chance to take a walk around and see the exhibits. I made a bee-line to this area and saw some of the coolest cars ever.

Concours_2
Rotating platform with a rocket car

I'm sure many of us have seen photos of these concept "cars of the future" from the 50's and 60's. The atomic age was a time when Americans were really looking ahead, in an excited and positive way. There were space missions and technology innovations that really stimulated the imagination of designers. It was a creative age for all industries, from home appliances to automobiles. Everyone wanted to get a piece of this futuristic sensation. These particular models never went into production, but were used as promotional pieces for the touring auto groups.

Concours d'Elegance 2008. 1958 Firebird III
1958 Firebird III
Concours_5
Headlight, or ray gun?

Let's drool over some insane interiors, shall we?

Concours_11
Great knobs and gears.
Concours d'Elegance, 2008. Buick Interior
Interior of the Buick Centurion, above. Secret mission instructions pop up on that little screen.
Concours14
Glass bubble roof and crazy steering wheel! No 10 and 2 for this driver!

And speaking of touring auto shows, this beast, the GM Futurliner was used in the "Parade of Progress" - a touring group showcasing cars and innovation. Wikipedia says the Futurliners featured modern amenities, like jet engines, televisions, and microwave ovens. Only 12 were ever built, and there were only a reported 9 of them left in existence as of 2007.

GM parade of progress futurliner at pebble beach concours d'elegance 2008
The side panel opens down and the little door in the front opens to a staircase to the drivers seat.

Needless to say, it was very exciting to be able to see some of these cool one of a kind cars in real life. There weren't even any crowds! Just me and the guy in the sweater.

If you'd like to see a few more of my photos, check out my Flickr album. You'll see some cool modern cars, too. 

*all photos copyright Casey Starks and Vitamini Handmade

5

My week on instagram.

Wednesday, August 15, 2012

Can you believe it’s already the middle of August and summer is almost over? For me, that means the bells are going off because the Holidays are coming up quick! So I’ve been keeping myself busy getting a few new designs worked out for the Etsy shops, working on bulking up my inventory, and creating some new holiday card designs. It’s pretty strange to be working on holiday themed designs when it’s 95 degrees outside!

I’ve also been keeping busy with a few fun craft projects that I’m excited to share. In the meantime, here are a few of my instagram photos from the past week.
WeeklyPics_12.0814
  • Driving to work one morning next to a new Lexus Google Self-Driving Car. Living in Silicon Valley means seeing things like this all the time.
  • Cute folding chairs that I passed up at the thrift store. I kinda wish I snagged these, but my apartment is so tiny, and I already have too many chairs.
  • Artistic pile of wire hangers in an asphalt parking lot. I love the graphic contrast.
  • Cool light fixture/ceiling at Verve Coffee Roasters, Santa Cruz. If you're in the area, try it. Their coffee is amazing! They also have a location in Capitola.
  • Pretty papers at Bookshop Santa Cruz.
  • Sneak peek at a little project that I'll be sharing on the blog soon!
  • Awesomely hilarious painted van in San Jose.
Follow me on Instagram! I’m @vitaminimodern 

67

Gold confetti dish tutorial.

Wednesday, August 8, 2012

handmade gold leaf polka dot ceramic bowl
goldleaf5

I've had this gold leaf pen kit for a while, just waiting for the perfect application. And I think these sweet little bowls and dishes are just right! I have bowls and trays scattered all over my apartment to catch my earrings and necklaces that I seem to shed as soon as I walk through the front door. Place a necklace or pair of earrings in one, tie it up with cellophane, and you have a pretty handmade gift! Here's what you'll need:

  • Gold Leaf Pen Kit with gold leaf sheets. My kit was about $8 at Michaels.
  • Small ceramic dip bowls. I got these at Pier 1 for less than $2 each
  • Soft brush 

gold leaf diy tutorial supplies

Wash your ceramic pieces well, and remove any stickers or labels. Try not to handle the upper rim of the bowl much. The oils on your fingers may prevent the adhesive from sticking fully.

Follow the instructions on the package to get the gold leaf adhesive pen flowing. The package says the adhesive goes on clear and dries blue. The adhesive actually goes on clear and dries clear, so try to keep track of where you draw!

Starting on one side of outside of the bowl, simply dab the pen across the top rim, concentrating the dots at the top of the rim and staggering them out towards the bottom. Try to keep your pen strokes on the larger side. Tiny details will get lost. Continue all the way around the bowl. Let it dry for 10 minutes.

Lay some paper down on your workspace for easy clean-up. Cut your gold leaf sheets into strips that approximately match the width of your drawn design. Smaller pieces of leaf are easier to work with than full sheets. Lay the leaf onto your design, with the paper side up. Lightly rub with your finger over the design. Remove the paper backing, and repeat.

goldleaf3

Using a soft brush (I used a large watercolor brush), sweep it over your gold design, exfoliating the excess gold leaf. The leaf will brush off of the areas with no adhesive and will leave your design in place. This part takes a little patience, so take your time cleaning up the details of your design. If the leaf doesn't stick where you wanted it to, you can reapply the adhesive and leaf again.

goldleaf6

That's it! There are sealer sprays that you could use on your design, but I didn't since my design is on the outside of the bowl and won't get handled much. These dishes are definitely not microwave, dishwasher, or food safe.


goldleaf7 goldleaf4

It's easy to try out some other designs, too. I did this scalloped design, and the ginkgo leaf.


0

Restocked!

Sunday, August 5, 2012

towel_bb_black6

I've got a new batch of Boot and Bonnet Tea Towels up in the shop! These are made from a really nice off-white cotton/linen blend fabric, and are 100% made by me. Ok, fine, I didn't weave the fabric, but I did all of the cutting, printing, sewing, and ironing. All the important stuff.

towel_bb_black5

They feature my boot and bonnet design (hood and trunk in British lingo) of a MINI Cooper S with racing stripes! Screen printed with black water-based, non-toxic ink and heat-set (safe for washing). They'd make a nice practical little gift for the MINI lover in your life.

towel_bb_black8 towel_bb_black9

These towels have been really popular in the past, and I was just waiting for enough time to tackle that big bolt of fabric, so here they are. I hope you like them!

And, as usual, check the rest of my shop for a bunch of other handmade MINI themed items.

1

Comedians in Cars Getting Coffee.

Thursday, August 2, 2012

I came across this video on Twitter, and was soon smiling and giggling out loud while I watched. It totally reminded me of those exhilarating car rides I used to go on as a kid with my uncle Jody, in his little British coupes. Growing up, he lived right next door to our house and was always working on one (or a few) of his cars. When he got one up and running, he'd often come over to take me or one of my sisters for a cruise. I remember the bumpy rides, and the wind in my hair, and getting to shift the car myself when he put the clutch in. One of those little cars was a Mini Cooper. :)

Watch this funny video where Jerry Seinfeld takes Ricky Gervais for a ride in his 1967 Austin Healey 3000, one of Mini's cousins.

Picture 6

Happy Friday, and have a great weekend!

5

Dip-dyed curtains.

Wednesday, August 1, 2012

Curtains_3

I had been looking for the perfect curtains for my bedroom since I moved into my new place almost 5 months ago. I didn't want to spend a fortune (curtains can be SO expensive) so I decided to whip something up myself.

At one point in the project I was up to my elbows in wet fabric and rubber gloves, so I didn't take photos of the steps. I'll just list out what I did and what I learned, in case you decide to try it out for yourself.

IMG_2662

I used a pair of white curtain panels from Ikea and a box of Fuchsia Rit Dye. To start, I machine washed and dried both panels. Fabrics can be sprayed with starch and other things in the factory that may prevent dyes from adhering evenly, so it's always best to pre-wash anything you're going to dye.

I strung-up one of the panels on the curtain rod and marked where the window sill was on the panel. I planned to only dye the bottom portion of the panels, so the effect would end below the sill. I marked the point with a binder clip. Then took it down, and clipped both panels together, so the dye effect would be the same for both.

Following the instructions on the dye package (I only used one box) and wearing my handy rubber gloves, I mixed up a batch in a large plastic tote in the bathtub. I actually used more water than they recommended - about 8" deep. I kept another tote nearby with plain water for pre-soaking in plain water and rinsing. Now here's the part that took the muscle: Holding the clipped-together panels steady, I dipped the lower 6" into the dye, agitating a little, and holding for about 30 seconds. Then I lowered the panels another 6" or so, and held for another 30 seconds. At this point I started to improvise, because 7-8 yards of dripping wet fabric is very heavy and I'm no body builder. I just continued to dip the panels a little lower every time and when I got close to my window sill mark, I did a split-second dip up to the line.

I dumped out the dye and then rinsed out the panels, from the top down, making sure not to let the upper white portion get into the rinse water. I was worried that I'd transfer some of the pink dye with my gloved hands, but it was fine. I rinsed until the the water ran clear, then set the panels aside to dry. After that they just needed to be ironed.

Curtains_2

Curtains_1

I'm happy with they way they came out and they only cost about $30. I'm still debating whether to hem them or not - I kind of like the puddled look. The dyed ombre effect isn't perfect but I think it just adds to the hand-dyed quality.

Curtains_4

Here's a little teaser for another project I have coming up. I hope you're having a great week!
 

vitamini handmade © All rights reserved · Theme by Blog Milk · Blogger