


Where we left-off in part one of this series, I now have clean fiberglass sheets and the lampshade rings. My rings were rusty and dirty, so I rubbed them down with steel wool. This removed the rust and loose bits to prep them for spray painting.
I painted mine with a silver hammered metal spray paint that I already had. The color and finish of the paint doesn't really matter too much, since the rings are so thin and they'll be on the inside of the shade, but I thought a simple metal color would be good, instead of a dark brown or black. Gold would have been a nice choice, too. I let the rings dry for a few days and I was ready to re-lace!
Here's what I used:
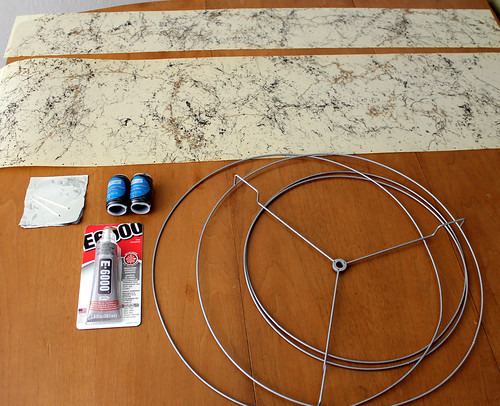
- Plastic lacing. I bought this inexpensive lacing at the craft store for less than $2 each. I bought two rolls but only needed one.
- E6000 glue. I did a bit of research to determine which adhesive would be best for fiberglass and really couldn't find anything. E6000 has a strong, long lasting, flexible bond so I decided to use it. I read reports that it may yellow with time, but my fiberglass already has a yellowish tinge to it, so that's fine with me.
- Toothpick - for applying the glue to the fiberglass. Much more precise than squeezing that big metal tube.
- Foil - for spreading out the glue before-hand and catching drips.
- Thin rubber gloves (not shown). These will prevent lots of little tiny fiberglass slivers in your fingers.
- Lampshade parts
I started with the large shade. Cut a piece of lacing about 1.5 times longer than the length of your fiberglass sheet. With the fiberglass sheet facing down on your surface, thread the lacing through the punched hole at the end and knot it around one of the large rings. Keeping the sheet flat on your surface, do a whip stitch with the lacing through the first 3 or 4 holes. keeping your stitches loose.
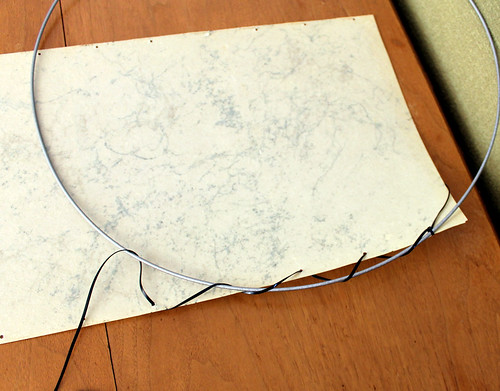
This was the trickiest part: at some point the sheeting will need to be stood up on it's side. Have someone hold it up for you while you get the stitches going, or (do like I did) and prop it up on a box. Once about half of the sheet is connected to the ring, it will stand up easier in its drum shape and the stitches will go faster.
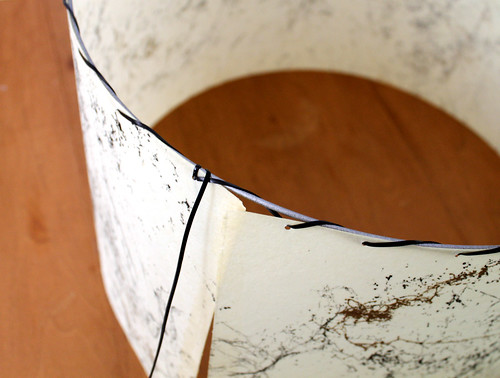
Once you get to the end, lightly tie the lacing around the ring, after going through the first hole again. Then, starting from the beginning, go back and pull the lacing tight through each stitch, making sure the lacing isn't twisted. When the lacing is tight, tie it off with a double knot.
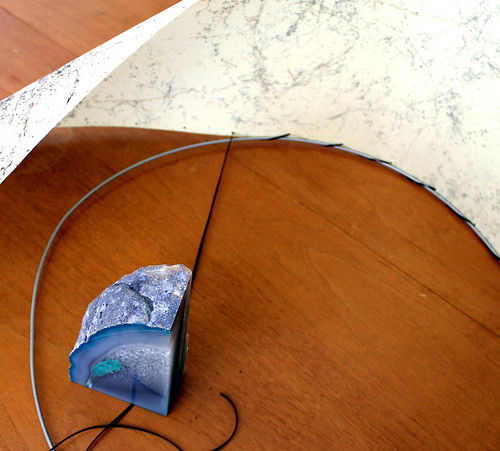
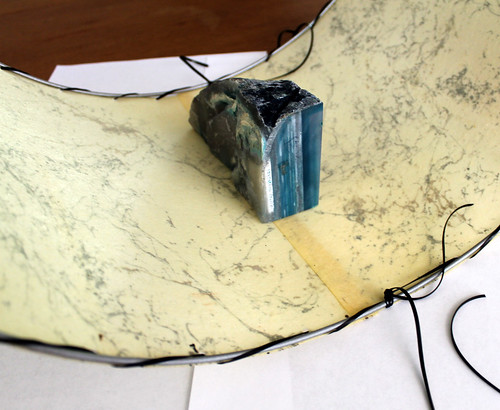
Repeat with the other ring. To glue the seam, use the toothpick to spread a thin layer of E600 in between the two overlapping ends. Just use a little bit. Rest the shade on it's side and place a weight on top of it to keep the seams together. This stone bookend worked perfectly. Let the glue dry.
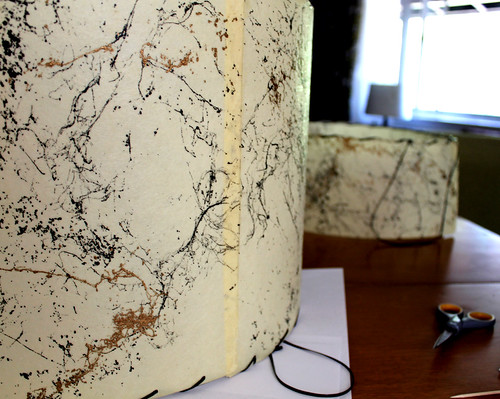
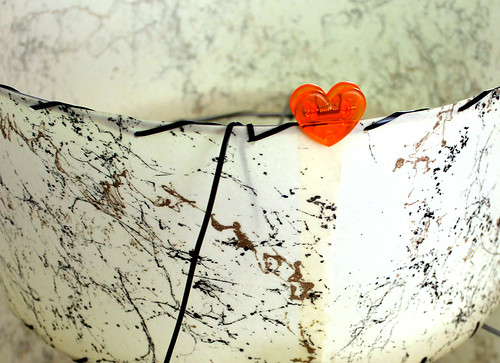
If you have a double-decker shade, repeat the lacing process with the remaining rings. Use clips on the shade as the glue dries since you can't rest it on its side.
Go get yourself a margarita.
When the glue has dried, remove the clips, make sure the knots are tight, and trim the lacing. That's it!
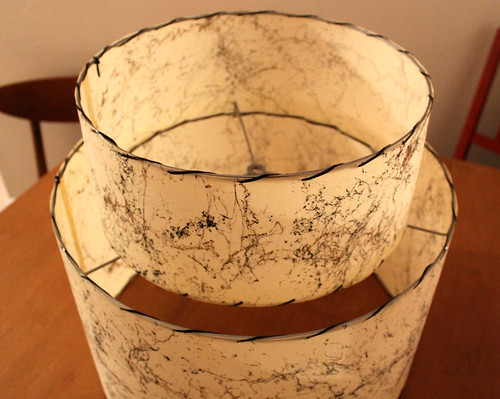
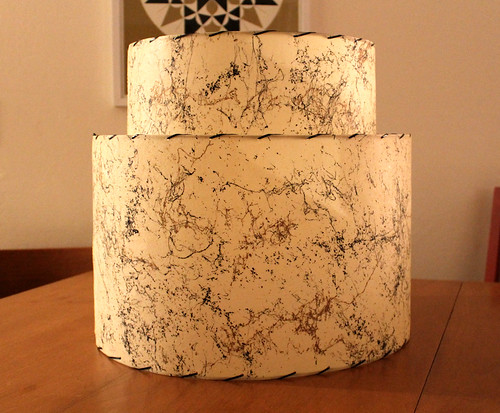 |
| No dents. Those are just shadows. |
Stay tuned for Part 3 of this series where I'll replace a glass pendant shade with this one.
sharing!
ReplyDeleteHi - whatever happened to this project? I've bookmarked your other 2 blog entries since we might find ourselves doing the same - my husband LOVES the 2-tiered fiberglass shades :)
ReplyDeleteHi there! The shade is complete and waiting for me to muster the courage to flip the circuit breaker and figure out how to disassemble my existing hanging fixture. I've been putting it off (I think it's going to be a little tricky) but I promise to share when I get to it!
DeleteHi there, this was awesome to see. I've passed up buying some of these shades because of brown "staining" similar to what was on yours. Now I know better! Have you ever had to replace the actual fiberglass sheets? Is that even possible?
ReplyDeleteHi, Jennifer. Thanks for the comment! I'm sure there are places to buy new fiberglass sheets. I did a quick google search and found deadlynightshades(dot)com. They sell kits and white fiberglass sheeting by the yard. It could probably be painted or stenciled to get custom patterns. Hmm, maybe I should try it myself!
DeleteWaiting for Part 3!!! Awesome information, thanks!
ReplyDeleteCasey- Good tips on restoring old fiberglass lampshades, but I have several simple suggestions to save time and make the process much easier and cleaner:
ReplyDelete1. Use clothespins to attach the fiberglass to the ring before you lace; this stands the material up, and it's much easier to lace than when it's it flat, like in your photo.
2. Use masking tape to mark off your seam line, preventing excess glue from spilling onto (and damaging) the old material.
3. Use cotton swabs to smear your glue around (it's faster than using toothpicks).
4. Putting the weight on something like a ruler will spread the pressure out, making the seam more even.
I've made thousands of these shades from scratch, and restored hundreds of them, and I'd be glad to answer any questions you have about restoring them.
Thanks for adding your tips! This was my first time reworking a lampshade so tips from a seasoned pro are very helpful!
DeleteI would LOVE to know where to find fiberglass sheets so I can make one from scratch!! My e-mail is info@ellyplump.se
DeleteThanks!!
Great work! Thanks for sharing those useful tips Casey.
ReplyDeleteHi there, this was awesome to see. I've passed up buying some of these shades because of brown "staining" similar to what was on yours. Now I know better! Have you ever had to replace the actual fiberglass sheets? Is that even possible?
ReplyDeleteMy parents were very hip and had a houseful of these shades so my father having a pronounced neat freak bent had washed many of them back in the day. I learned about it from him when I found him washing one of mine while helping me stage my house and have washed all of mine in the tub with dish detergent suitable for oil drenched animals and a very soft brush like a baby hair brush. Turned out perfectly to a one.
DeleteIt's very good idea Casey. You are so dextrous to do that lovely lampshade. It looks simple and cute. It will be my next project. Thanks for sharing your idea with us.
ReplyDeleteThis comment has been removed by a blog administrator.
ReplyDeleteI've read part 1. Very interesting, that I continued to track the part 2 and part 3
ReplyDeleteI have a question. Maybe I missed something, but how do you attach the two shades together? Thanks!
ReplyDeleteI have a question. Maybe I missed something, but how do you attach the two shades together? Thanks!
ReplyDeleteI love your post, include part 1 and part 2. Very interesting and useful. Want to see part 3.
ReplyDeleteBefore I read this, I thought I saw all restoring projects around the house - I was wrong! I'll look around for the finished product for this. Might give ours the makeover, too!
ReplyDeleteWhere can I get fiberglass parchment to make my own shades? And how can I dye it?
ReplyDeleteHi Casey, I appreciate every bit of your efforts to let us know about Restoring A Fiberglass Lampshade. In fact, we’re going to study and research it as part of a half-yearly initiative supported by our website and group of partners.
ReplyDeleteHi Casey, It is really such a wonderfull efforts which you've Done, Thank you soo much for the great knowledge.
ReplyDeleteHi Casey, This is awesome to see. I also bought these products personally for my self :D It was really very intresting article :D
ReplyDeleteWhere do you buy the fiberglass?
ReplyDeleteWhat a great idea to restor a fiberglass lampshade. I'll definitely make it. Thank you for sharing it.
ReplyDeleteGreat What a creative idea! I want to thank you!Cotton Jacket Rip Wheeler Yellowstone
ReplyDeleteI prefer this blog because it has much more informative stuff about restoring lampshade idea.Womens Styling Guide
ReplyDeleteThis blog is complete all you want to know about lamp idea
ReplyDeleteWomens Biker Jackets
Thanks for posting such an excellent article. It helped me a lot and I love the subject matter. VPN for traveling is the best option to protect online privacy.because they allow you to connect to the internet from anywhere in the world without worrying about data caps or restrictions.
ReplyDeleteI’ve read multiple articles from you and genuinely admire your style—keep creating such great work! Lightning Mcqueen Bomber Jacket
ReplyDeleteThe tommy vercetti shirt brings back the cool, carefree vibe of vintage Miami fashion. With its striking design and relaxed silhouette, it channels the effortless confidence of the iconic character himself. This shirt isn’t just about nostalgia—it’s about making bold style feel easy again. Pair it with jeans or summer chinos, and you’ve got a timeless look that never misses.
ReplyDeleteEvery good website should provide easy access to quality outfits, and that’s something you’ll instantly notice. Vanson Jackets carries excellent celebrity-inspired designs like the Kevin Hart: Acting My Age 2025 Black Leather Jacket which is perfect for anyone wanting a bold yet timeless leather style.
ReplyDelete