2

So long, February.

Friday, February 28, 2014

Just like that, the first two months of 2014 are in the bag! I don't know about you, but time has been flying by as I've been busying myself with a bunch of projects. First off, I'm setting myself up to do freelance contract work in landscape architecture, so contracts, tax requirements, and technology needs have been on the brain lately. I'm also getting ready for Craftcation in April! I'm designing new business cards for the site and I'll be implementing a little blog re-design here once I get those things finalized. Additionally, I'm almost done with my new shop website. Wow, talk about spinning plates!

A print in progress

In between all of this business behind-the-scenes work I just had to do some drawing. Here's a little sneak peak at a new print I've been working on. As usual, it started with inked sketches in my sketchbook, then onto tracing paper, then scanned into Illustrator so I could assemble the repeat, and then printed tests at different sizes to determine the scale. I can't wait to show you the finished product in a couple weeks!

Have a creative weekend! 

7

DIY Graphic Pushpins

Friday, February 21, 2014

DIY graphic pushpins

I have a corkboard next to my screen printing table to hold all those random little scraps of paper that I'm always collecting. I love pinning up new, pretty things, but those plastic pushpins weren't doing anything for me. I whipped up this project with materials I already had on-hand and love how they unify my board! Here's what you'll need to make your own:

DIY graphic pushpins
  • Pushpins. Use up those mis-matched ones you already have. Where did that single yellow one come from, anyway?
  • White Fimo or Sculpey. I used FIMO Soft
  • Assorted acrylic paints. I used Martha Stewart Paints in Pea Shoot, Scallion, Beach Glass, and Beetle Black
  • Paint brush
  • Scrap of cardboard

Start by making spaced-out holes in the cardboard with a pushpin. Make one hole for each pin. Pull off a small piece of Fimo from the block. Soften it in your hands and roll out a little ball and a long flattened piece (technical terms, people).

DIY graphic pushpins

Roll the flattened piece around the pushpin, removing any excess that overlaps too much. Roll it between your fingers to smooth it out around the pin. Flatten the ball a little, and add it to the top. Work it between your fingers until it's smooth and the seams disappear.
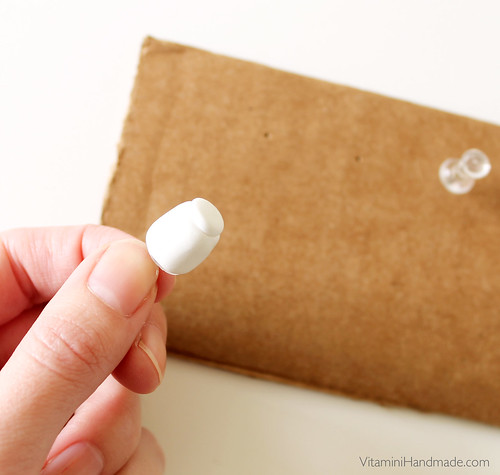
DIY graphic pushpins

Carefully put it into your cardboard rack in one of the holes you made earlier. Repeat until your rack is full (or your cup runneth over, whichever comes first).

DIY graphic pushpins

Bake on the cardboard rack according to the instructions on the clay label. (Cardboard will not catch fire at the low temperature the clay requires, but do not leave it unattended. The Sculpey site has more information about safe baking techniques.)

When your pieces are cool, paint them with the light color. Just leave them on the rack and paint around them.
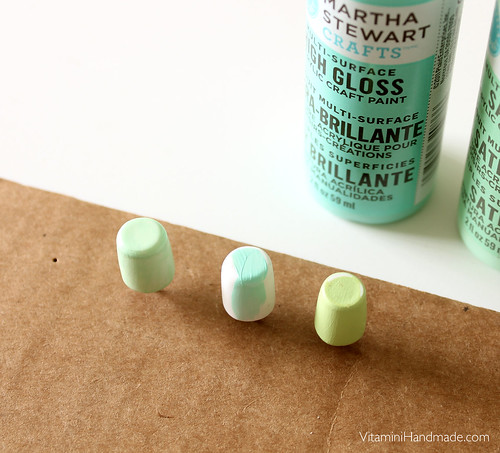
DIY graphic pushpins

Add the black accents. Paint just the middle, or just the top, or try an angled, dipped look. Make a bunch!

DIY graphic pushpins DIY graphic pushpins

Let them dry, and done! A set of these would be a nice gift for a coworker. Make them in her favorite colors!

DIY graphic pushpins

I think these bad boys will really class-up my cork board. I'm off to go make some more! Have a wonderful weekend!

1

New Retro Items in the Shop

Thursday, February 20, 2014

Cheers! Cocktail Cutting Board I've been adding lots of new products and designs to my Vitamodern shop over the past few weeks. I treated myself to a laser cutting class for the new year and have been having a blast making new items for the shops. First up, these bamboo cutting boards are perfect for your swanky bar!

Cheers! Cutting Board

I also made a coordinating card with a teal boomerang and some stars, just for fun.

Cheers! Card. Screen Printed by hand

Laser cutting paper is a lot of fun. I have two new gift tag designs listed in the shop: Boomerangs and Retro Gifts.

Retro Gifts gift tags Boomerang gift tags

Remember the trailer stamp I carved last year? I finally digitized the design and printed it on canvas tote bags, notebooks, and greeting cards. Matchy, matchy!

Retro Trailer tote bag Retro Trailer Card. Screen Printed by hand Retro Trailer Pocket Notebook

2

Happy Love Day!

Friday, February 14, 2014

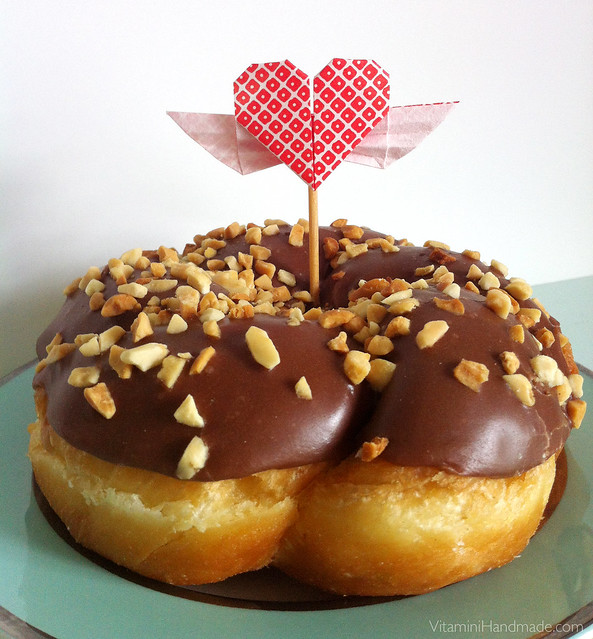
Donut valentine

Happy Valentine's Day, friends! Don't forget to do something sweet for yourself today, while you're sharing the love!

Origami heart topper from this post last year. Click through for instructions if you're still feeling crafty!

2

How to plan and hang a gallery wall.

Gallery wall layout
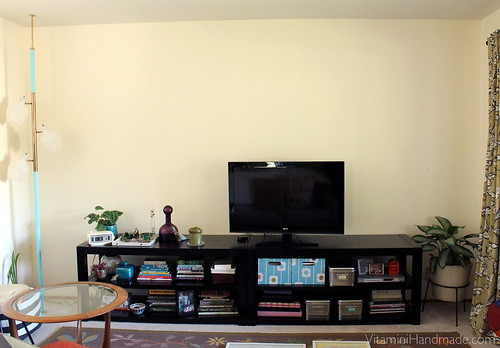
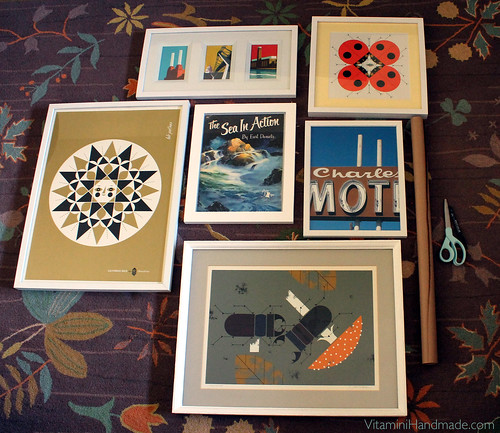
I love arranging art in clusters or galleries. When I'm planning an arrangement I typically spread everything out on the floor, take photos, select a layout, and then transfer the layout to the wall (much like I did with my kitchen plate wall).

Gallery wall layout
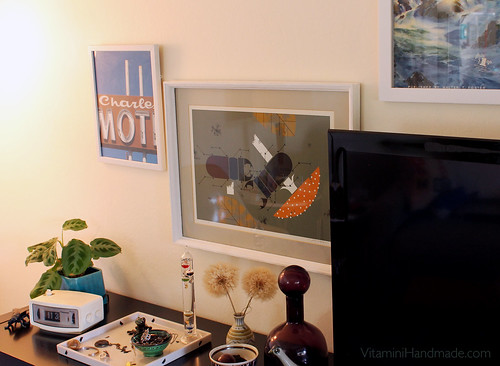
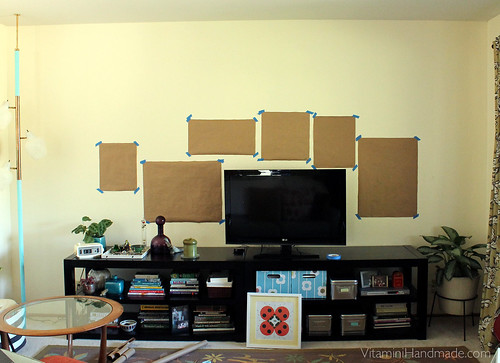
I've had a stack of framed art to go above my media shelves and around my tv for a few months and decided to get to it. Since I was going to be arranging the frames around the tv, playing with arrangements on the floor wasn't going to work. In this case I'd usually measure each piece and then draft different alternatives in AutoCAD. Not everyone has (or wants) access to this program so I went with an analog approach this time. You'll need a pen, scissors, painter's tape, and a roll of kraft or butcher paper.

Gallery wall layout Gallery wall layout
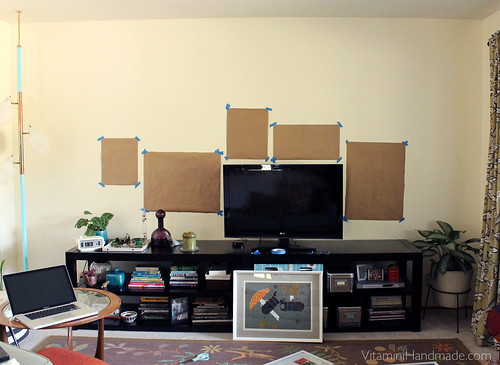
Trace each of your frames onto the paper. Cut each out and label which is which and which side of the paper is up. Take your time arranging and taping each piece of paper on the wall until you find the right layout. I started with 6 frames but ended up only using 5.

Gallery wall layout Gallery wall layout Gallery wall layout
Once you have a layout that you like, all you have to do is determine where the nails or picture hangers need to go for each frame. Mark these points directly on the paper, tap in the nail, then pull the paper away. No unnecessary nail holes!

Gallery wall layout
I like how asymmetrical this is, and that I could easily add more pieces if I want. It really completes the look of this wall and actually makes the room look bigger!

This was so easy I'm thinking I might go the paper and tape route next time. What do you think - how do you plan a gallery wall?


vitamini handmade © All rights reserved · Theme by Blog Milk · Blogger