13

Vintage-style glittered ornaments

Thursday, November 29, 2012

ornaments_complete1

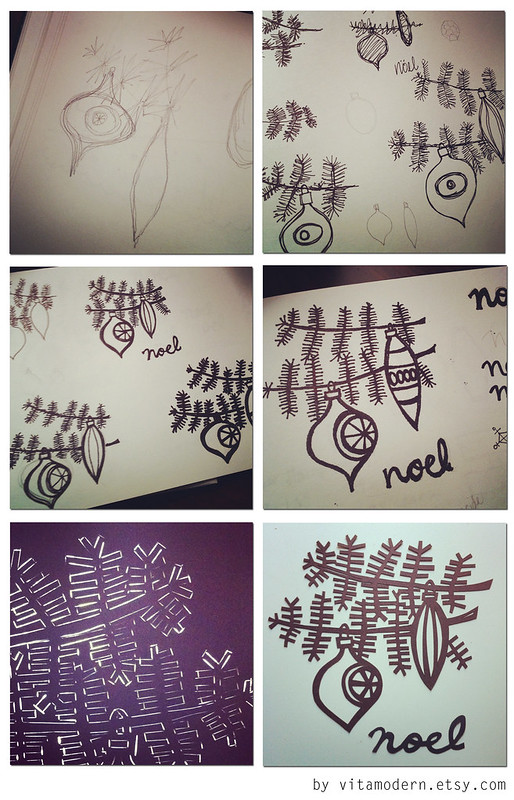
I'm extra excited to set up my holiday decorations this year because I bought a vintage aluminum tree a few months ago! I've wanted one for precisely forever, and found it on Etsy a few months ago. In keeping with the theme, I'd like to decorate it with vintage glass ornaments. I have a small collection of real ones but I decided to fill in with a few handmade, simple mini ornaments. They were really easy to make and I think will add a little extra sparkle to the tree and will catch the light of the color wheel. (Yep, got one of those, too!)
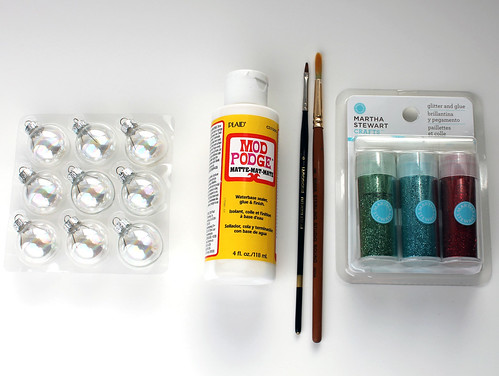
Retro Style Glass Glittered Ornaments

Materials:
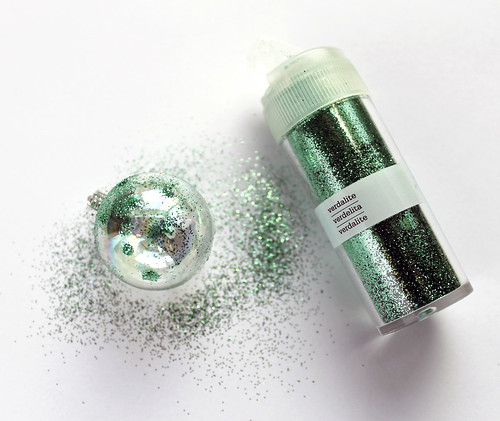
  • Plain glass mini ornaments. The ones I used are a little irridescent, but you could use clear glass or plain frosted ornaments.
  • Fine glitter in various colors. I bought this Martha Stewart variety pack that had Verdalite, Turquoise, and Garnet and also used another Martha Stewart glitter called Smoky Quartz
  • Glue. I used Mod Podge since I wanted a glue that was thin and easy to brush on.
  • Small brushes

Retro Style Glass Glittered Ornaments
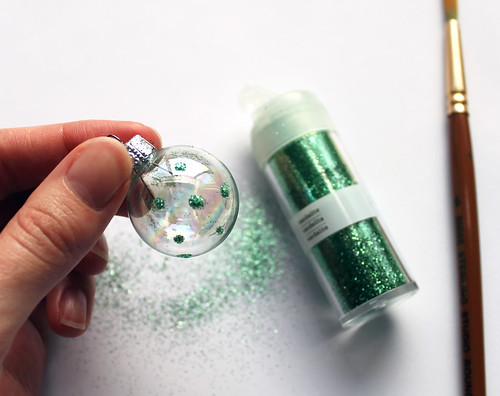
Dip the brush into the Mod Podge and paint the design directly onto the ornament. I used simple dots and stripes. For the dots, I dipped the back end of the paint brush into the Mod Podge and dotted it on that way.
Retro Style Glass Glittered Ornaments

Over a loose sheet of paper on top of your work surface, sprinkle the glitter over your painted design. Tap it to remove the excess and to ensure that the glitter adheres to the glue. When your painted design is covered, prop it up and let it dry.

Retro Style Glass Glittered Ornaments

Lift the loose sheet of paper with the leftover glitter, gently fold it in half, and funnel the glitter back into its container.

After the ornaments have dried, there will probably be glitter all over, not just on the glue design. Here's a tip I used to remove the excess glitter after the design had dried: lightly spray it with a canned air duster, the kind you use on your computer keyboard. If there is still loose glitter around, gently brush it off with a dry, clean paintbrush. Do your best to not get it everywhere, but you'll probably walk around with sparkles on your face for a while.

Retro Style Glittered Glass Ornaments Retro Style Glass Glittered Ornaments

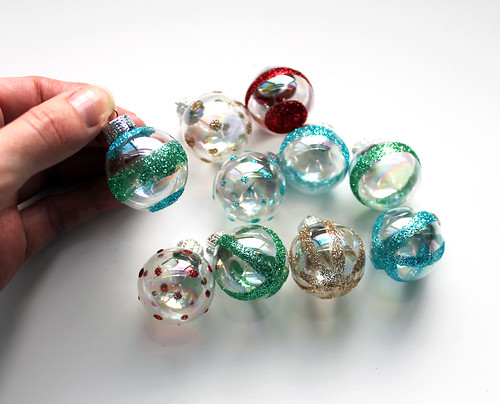
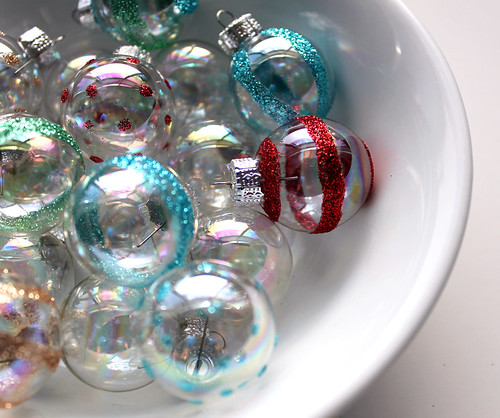
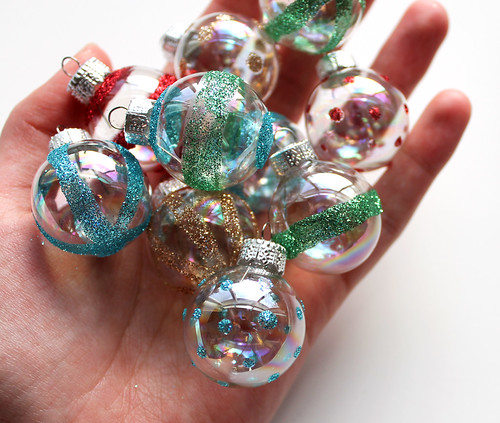
I love the way they came out! Try combining different colors and shapes, or try using a small glue applicator for fine linework. Make a set or two and give them to your friends as gifts!

5

Dashing through the snow...

Tuesday, November 27, 2012

I've been having so much fun creating MINI Cooper fabric designs to sell in my Etsy shop. Spoonflower, based in North Carolina (yay, for US made!) does all of the digital printing for me, giving me flexibility beyond what I'd be able to screen print in my little studio myself. I was excited to create a winter-themed design, so I started with my Let it Snow card design and created a large repeat. Here it is!

mini cooper winter christmas fabric

This fabric would make nice little sachets, pillows, or even MINI Christmas stockings! Available in fat quarter pieces here. And browse my other MINI Cooper fabrics here.

I hope you're getting into the holiday spirit! And if you've got the shopping bug, my holiday sale is is still going strong in both of my Etsy shops. Take 10% your entire purchase through today! See the Vitamini and Vitamodern shops (or the previous blog post) for coupon codes.

6

Holiday sale!

Friday, November 23, 2012

If your looking for unique gifts for your favorite MINI Cooper lovers, take advantage of the special holiday sale in my Etsy shop!

Holiday sale - handmade mini cooper gifts and stationery

Now through Tuesday, November 27th, enter the code MINIHOLIDAY12 in the coupon code box and get 10% off your entire purchase!

And if you're into the retro thang, my Vitamodern shop is also on sale!

handmade retro gifts and stationery holiday sale

You know the drill - type in the code and get 10% off! I've got a few different style of hand screen printed holiday cards available, as well as coasters, art prints, and other home decor items.

5

Happy Thanksgiving!

Wednesday, November 21, 2012

I hope you have a great one with great food, friends, and family! This will be me tomorrow morning:

Vintage kitchen and bathroom advertisements

And afterwards, I'll do this:

Vintage kitchen and bathroom advertisements

Hehe, ok, maybe not! Have a good one and don't forget to think about a few of the things you're thankful for.

Images from Plan59, my favorite resource for vintage advertisements.

5

Favorites: No Barcode Blog

Friday, November 16, 2012

I thought it would be fun to share some of my favorites here every now and then. If you're a regular reader of my blog, chances are we have similar taste, so maybe you'll enjoy these products/websites/projects/blogs as much as I do!

I don't recall how I stumbled upon this blog, but I'm so glad I did! No Barcode by Javier Garcia keeps a visual library of vintage packaging, showing off their colors, fonts, and graphics. It's hard not to get inspired by these great little examples of graphic design. Here are just a few:

Starting with Sterling circa 1959 Inked Ribbon Packaging circa 1960's Dining Out In the Country NYC c1954 Van Rex Bouquet Garni Packaging c1950's So click around to see some fun examples of vintage graphic design. The clean, simple photography really makes the graphics pop, don't you think? All images from No Barcode. You can also find samples of Javier's own graphic design work on Flickr. Happy Friday, friends! Enjoy this last weekend before the holiday madness really hits. I'll be working on a few screen printing projects and thinking up some winter crafts to share here on the blog. Have a good one!

4

Evolution of a design.

Thursday, November 8, 2012

Hand screen printed retro holiday cards
Things have been a little quiet around here lately as I've been busy readying my shops for the holiday season. Can you believe we're already one week into November? I've created a new holiday card design for each of my Etsy shops, and I wanted to share the design evolution with you - from pencil sketch, to papercut, to screen printed design. My first sketch of this design is dated from last November! Sometimes you just need to sit with an idea for a while before you can really work it out and get it right. :) Here are some views into my sketchbook.

Evolution of a design After I had my papercut, I scanned, resized, and exposed a silkscreen with the design. I printed it in a two-color process (deep red and forest green) onto cardstock. Here are my finished pieces.

Hand screen printed retro holiday cards Hand screen printed retro holiday cards
Printed on French Paper Speckletone in Kraft and Natural white. Both are available in my Vitamodern Etsy shop.

I really like their retro, earthy vibe. I'm also getting really into working out my designs with papercuts. At first I was intimidated by the complex needles of the pine, but I couldn't resist trying to cut it out of paper. I'm glad I decided to go for it.

0

Dia de los Muertos Mini Shrine

Friday, November 2, 2012

handmade dia de los muertos shrine skull and butterfly by vitamini

Every now and then, I like to do craft projects that are just for me, just for fun. A few weeks ago, I saw a small Dia de los Muertos shrine in a vintage wooden box online. First, I thought, "That's really cool."Second, I thought, "I could make that!" So I headed over to Michael's to get some supplies. At first, I was looking for a standard looking wood box, but I found this one with a wire mesh lid and thought it would be even better than a solid lid. And it was only $2! I also bought a few new colors of Martha Stewart craft paint, some floral wire, and a brick of FIMO Soft clay in white. For less than $10, and some tools I already had at home, I had everything I needed!

It took a couple of days to decide on a theme, but I went with the skull/butterfly combo with roses. I took snapshots with my phone of the process (no fancy photos here!) and I thought they might be fun to share. Here's what I did!

handmade dia de los muertos shrine process photos by vitamini
It's finished and I'm so happy with the result! It was quite a fun project, too, and helped me practice all sorts of techniques like painting, sculpting, and wood burning. I hope you like it!

handpainted dia de los muertos wooden box shrine skull butterfly dia de los muertos mini shrine handmade
And Feliz Dia de los Muertos! I hope you take some time today to remember those you have lost. Have a great weekend!
(And if you're looking for another Dia de los Muertos project, check out my felt skull hairpiece from last year)
 

vitamini handmade © All rights reserved · Theme by Blog Milk · Blogger